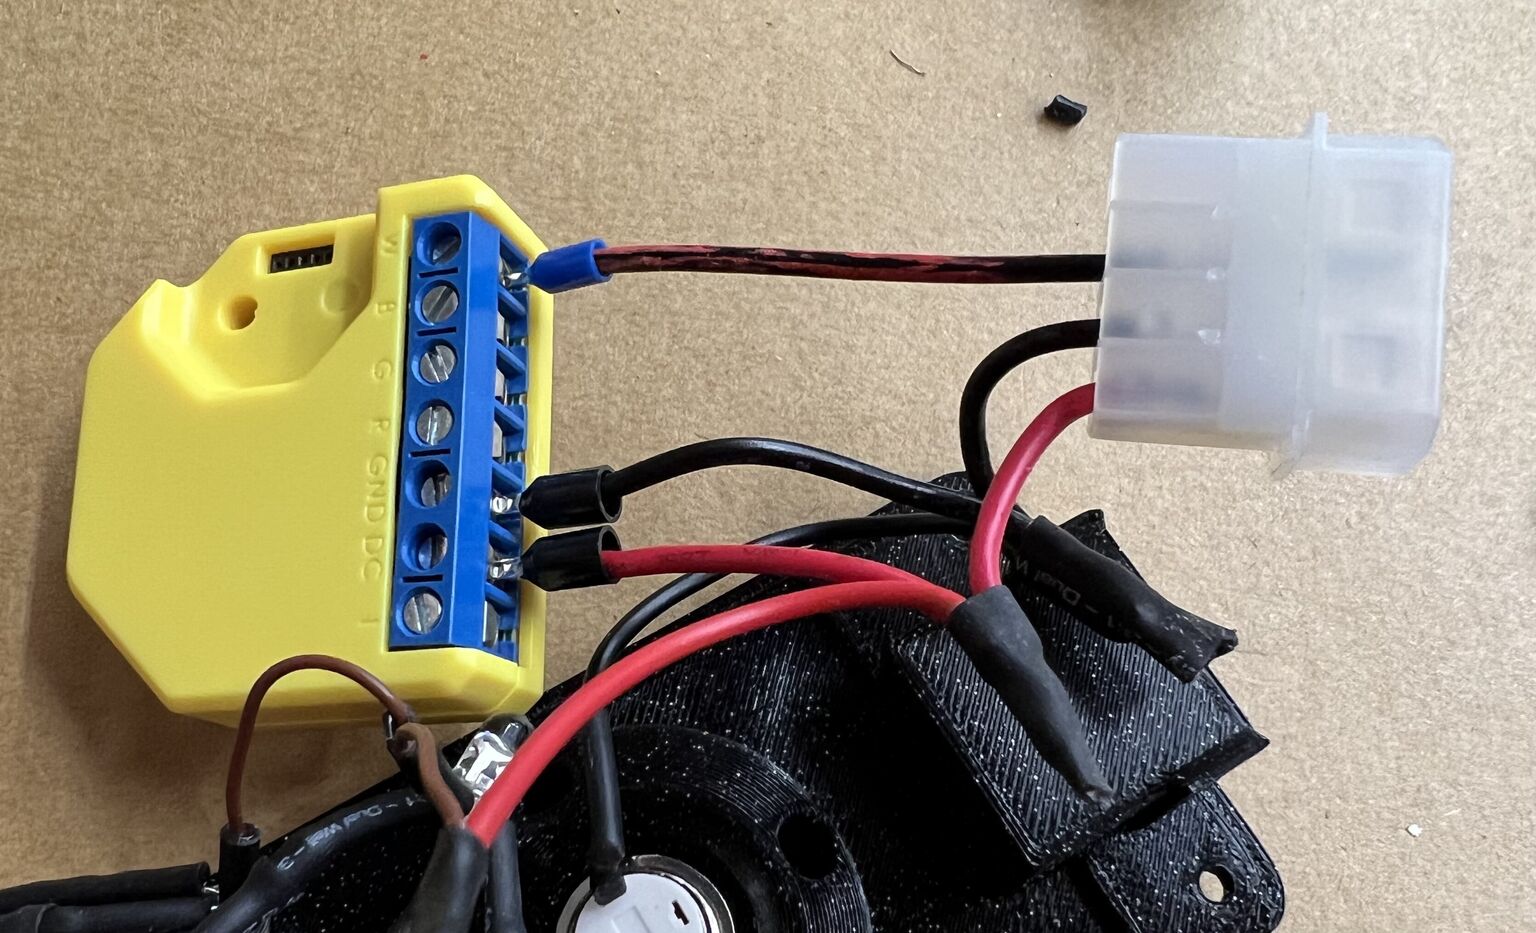
ESPHome configuration to drive an AC Infinity Cloudline S3 fan via a Shelly RGBW-2. Though the fan only puts out 10V instead of 12V, this is still enough to power the Shelly and a few LEDs. There are 3 versions of the config:
- Basic:
- This is a basic config that just requires hooking the Shelly up to the molex connector.
- Thanks to unrepentantgeek for figuring out how to do this, and coming up with the initial config.
- 3-LED with button:
- This version uses 3 separate single-color LEDs that will light in sequence to indicate the fan speed.
- RGB LEDs with button:
- This version uses 3 RGB LEDs (common anode!) and changes the color of the LEDs based on the fan speed. This allows those of us with bad eyesight to identify the fan speed from a distance.
- This is the version I made and that you see in my photos. However, it's a very tight squeeze to get everything to fit. If I were to do this again I would just use the 3-LED config and use one each of red/green/blue LEDs.
There are 3 versions of the enclosure for this project available for download at Printables. The basic version with no button can be printed in a single color, but you will probably need a multi-color printer for the rest.
If you would like to try your hand at modifying the models fit your own printing needs, you can find all 3 versions in a single document at Onshape.
- Shelly RGBW2
- Molex connectors
- https://www.amazon.com/gp/product/B00STNUB04/
- It's cheaper to cut these up than to buy the individual components.
- 12mm buttons
- 5mm RGB or single-color LEDs. I used clear ones but in retrospect frosted/diffused
would probably work better for the indicators:
- clear: https://www.amazon.com/dp/B01C19ENFK
- frosted: https://www.amazon.com/dp/B01C3ZZT8C or https://www.amazon.com/dp/B077XD5T8P (the latter comes with resistors)
- I used 470Ω resistors on green and red, and 220Ω+150Ω for blue. This is a bit high for red/green on 10V but helps balance out the dimmer blue.
- m3 screws (button head)
- Up to 12mm long should fit, but you don't need anything that long.
For the basic setup, you just need to connect the first 3 wires from the molex to DC, GND, and W (or you can edit the config and use a different PWM):
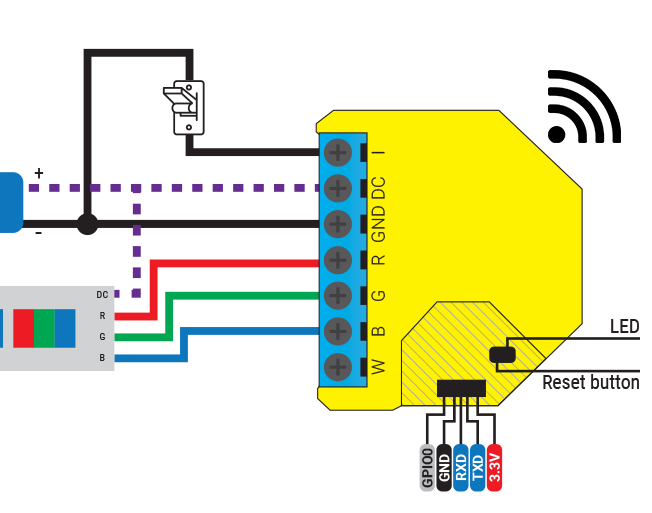
For the RGB and button setups, you will need to follow the Shelly wiring diagrams for both the button and the LED setup you are using. It's most likely the last one of their examples that looks that looks like this:
- Remember that the Shelly is designed for RGB strips with a common anode, so you will need to use the correct kind of RGB LEDs and/or hook single-color LEDs up "backwards" to how most of us are used to using them.
- When calculating resistor values, remember that the fan puts out 10V, not the more customary 12V.
There doesn't seem to be a way to use the official Shelly firmware to control the PWM outputs in the way that the fan needs, so you will need to re-flash it with ESPHome (and one of the config files in this repository).
Here is a great tutorial for how to do that.
Other users have attempted similar, however the design here using a Shelly is preferred both for its ease of setup and electrical safety.


