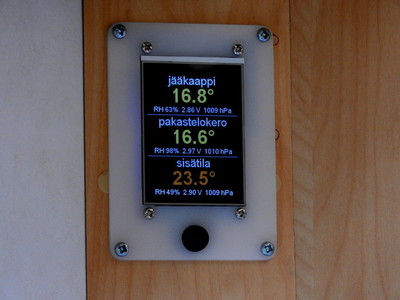
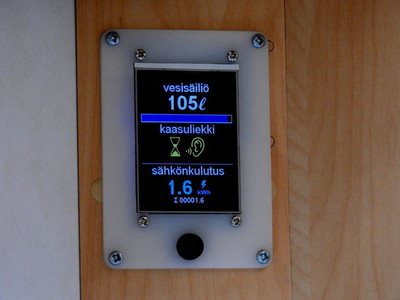
This project is for to make a "central screen" for a motorhome or caravan. The software listens to several BLE beacons and shows their data on a TFT display. The architecture is very modular. Several different BLE beacons are supported now and more are to come. If you don't have all of those beacons, you can just ignore the support. The software shows data only from known beacons that are configured from the web portal (see later).
Ruuvi tag with data format V5 (RAWv2) is supported.
Xiaomi Mijia Bluetooth Thermometer 2 with ATC_MiThermometer custom firmware is supported. (stock firmware is not supported).
NEW in May 2024
- Inkbird IBS-TH2 (version without humidity and external sensor)
- Alpicool portable fridges (most of the models, I believe. Read more)
Mopeka✓ sensors gas tank sensor is supported. See Mopeka readme for more information.
Other beacons that are supported are:
- ESP32 Water sensor
- ESP32 Energy meter
- ESP32 MAX6675 beacon for thermocouples for gas fridge
- ESP32 DS18x20 beacon
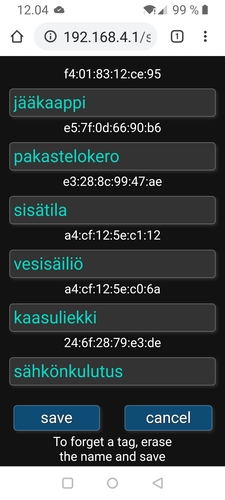
Don't worry about that the sensor names in these example photos are in Finnish. They are fully configurable via portal mode that is in English.
The file smart_rv_for_laser_cutter.svg included in this repository is for laser cutters if you want to
make a similar plexiglas frame and have a cutter available.
The display used here is ILI9341 driven 320x240 TFT. It can be bought eg. from Banggood and the price is less than 10€.
See Ready made binaries and how to upload them if you don't want to compile yourself.
NOTE: The current version has been tested with Arduino IDE version 2.3.2 and it can't be guaranteed that other versions work!
The screen graphics use Bodmer's TFT_eSPI library.
The library needs to be configured for the right driver chip etc. and with this project it's enough
to change file libraries/TFT_eSPI/User_Setup.h lines 188-193 as follows:
// #define TFT_MISO 19
#define TFT_MOSI 23
#define TFT_SCLK 18
#define TFT_CS   15  // Chip select control pin
#define TFT_DC    4  // Data Command control pin
#define TFT_RST   2  // Reset pin (could connect to RST pin)
It's very recommended to use exactly these pins for the display even though they are configurable. They have been tested and work well. The MISO pin is not connected because we are not reading anything from the display driver chip in this project.
In the main program code there are defines for push button and backlight LED. Connect a button between the pin and ground and connect the LED pin to the display's BL pin. Short press increases the lightness of the screen and long press (5s) switches the unit to the portal mode. HINT: An automatic brightness is also possible by putting an LDR between the LED pin and display's BL pin. Then the brightness setting acts as the maximum brightness.
#define BUTTON 12                // push button for lightness and long press starts portal
#define BLLED 19                 // backlight led
You will need also LittleFS_esp32 1.0.6 library. Version 1.0.7 is buggy. Install it from the IDE library manager.
You can use the filesystem uploader tool to upload the contents of data library. It contains the html pages for the configuring portal. Or you can just upload the provided image with esptool:
esptool --chip esp32 --port /dev/ttyUSB0 --baud 921600 --before default_reset --after hard_reset write_flash --flash_mode dio --flash_freq 80m --flash_size detect 3211264 esp32_smart_rv.littlefs.bin
If the button is pressed over 5 seconds, the unit switches to the portal mode.
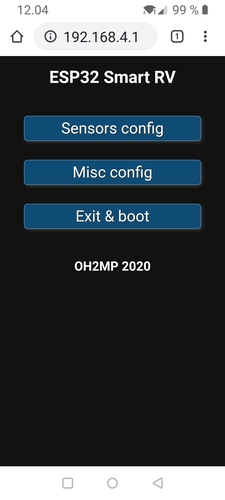
In the start of portal mode the ESP32 is listening 11 seconds for new beacons. WiFi AP is not listening yet at that period and a listening symbol is visible on the screen. After you see the AP info on the screen, connect to WiFi ESP32 Smart RV, accept that there's no internet connection and take your browser to !http://192.168.4.1/
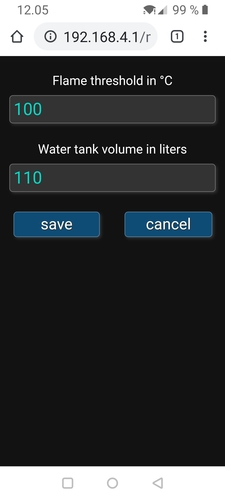
The web GUI should be self explanatory. Flame threshold is for MAX6675 beacon and it's the temperature that we believe that the gas flame is burning. 50°C is a good value to start. It looks that when the flame distinguishes, the temperature drops under 50°C quite fastly depending on the distance of the thermocouple. The water tank volume is for that the horizontal scale can be drawn onto the screen under the water tank info.
It's a good idea to find out the Bluetooth MAC addresses of the beacons beforehand. For Ruuvi tags the easiest way is to use Ruuvi software. For other beacons eg. BLE Scanner by Bluepixel Technologies is a suitable app for Android.
The portal mode has a timeout. The unit will reboot after 2 minutes of inactivity and the remaining time is visible on the screen. This timeout can be changed from line #define APTIMEOUT
There's almost no sanity checks for the data sent from the forms. This is not a public web service and if you want to mess up your board or try to make a denial of service using eg. buffer overflows, feel free to do so.
The portal saves all configurations onto the SPIFFS filesystem. They are just text files, so you can precreate them and then you don't have to use the portal at all. Just place your configuration files into the data directory along the html files and upload them with ESP filesystem uploader. Only two files are used and their formats are:
One known tag per row. First the MAC address in lowercase hex and colons between bytes, then TAB, then name of the tag and newline (ascii 0x0A).
Example known_tags.txt file:
f4:01:83:12:ce:95	foo
e3:28:8c:99:47:ae	bar
Only three rows: First row contains the flame threshold, second row the tank volume (liters) and third row the brightness. Lines ended by newline.
Example misc.txt file:
50
110
6
There are several fonts used with the display. They are as const arrays in tftfonts.h. If you want to
customize them, then look at the fonts subdirectory of this repository. Otherwise you can just
ignore or even delete the contents of that directory. They are needed only if you want to change the
fonts.
