![]()
The SDK further extends your Aperture Data Studio capabilities by enabling you to build custom plug-ins.
While Aperture Data Studio already provides a wide range of workflow steps and file parser, your needs for more specific actions (e.g. loading a specific mainframe file or integrating with a 3rd party API) can be better served by creating a custom plug-in.
The SDK allows you to create the following plugins:
- Custom workflow steps – custom steps that can be used in the Workflow canvas
- Custom file parsers – custom file parser that you can select when uploading a file.
- Customer file exporter – custom file generator that can be selected in export step.
This repo contains the SDK JAR and a pre-configured Java project that uses Gradle, allowing you to easily build your own custom step. Alternatively, you can add the SDK as a dependency to your own project by downloading the SDK JAR from the sdkapi folder.
Javadoc reference for full reference documentation.
- Compatibility matrix between SDK and Data Studio version
- Generating a custom step from a new or existing project
- Comparison of SDK v1.0 and v2.0 and Unified SDK
- Which SDK version should I use?
- Creating a custom step
- Class-isolation
- The Logging library
- The HTTP Client library
- Best practices and limitation
- Generating a custom parser from a new or existing project
- Creating a custom parser
- Creating a custom file generator
- Debugging
- Limitation in supporting minor upgrade
- Unified SDK API
| SDK version | Compatible Data Studio version | New features released |
|---|---|---|
| 2.8.2 | 2.14.7 (or newer) |
|
| 2.8.1 | 2.12.6 (or newer) |
|
| 2.8.0 | 2.12.4 (or newer) |
|
| 2.7.1 | 2.9.7 (or newer) |
|
| 2.7.0 | 2.9.7 (or newer) |
|
| 2.6.0 | 2.5.7 (or newer) |
|
| 2.5.0 | 2.4.2 (or newer) |
|
| 2.4.0 | 2.4.0 (or newer) |
|
| 2.3.0 | 2.1.0 (or newer) |
|
| 2.2.0 | 2.0.11 (or newer) |
|
| 2.1.1 | 2.0.9 (or newer) | New custom icons added:
|
| 2.1.0 | 2.0.6 (or newer) |
|
| 2.0.0 | 2.0.0 (or newer) | |
| 1.6.2 | 1.6.2 | |
| 1.6.1 | 1.6.1 (up to 1.6.2) | |
| 1.6.0 | 1.6.0 (up to 1.6.2) | |
| 1.5.1 | 1.5.1 (up to 1.6.2) | |
| 1.5.0 | 1.5.0 (up to 1.6.2) |
-
Both the Data Studio and SDK version follows semantic version notation where for version a.b.c; a, b, c indicate the major, minor and patch version respectively. Each SDK version released will be exclusively tied to a compatible Data Studio version.
-
Any custom steps built on an SDK version, will work on the Data Studio version that it is tied to, as well as any newer version onwards.
- Example 1: Custom steps built on SDK v2.0.0 will work on Data Studio v2.0.0, v2.0.6 and onwards.
- Example 2: Custom steps built on SDK v2.1.0 will work on Data Studio v2.0.6 and onwards.
-
Any features provided by a newer version of the SDK will not be supported on an older version of Data Studio.
- Example 1: Custom steps using new features from SDK v2.1.0 will not work on a Data Studio version that is earlier than v2.0.6.
- You can either use Gradle or Maven:
If using Gradle, point to the SDK repository in the build.gradle:
apply plugin: 'java'

repositories {
    mavenCentral()
    maven {
        url 'https://raw.githubusercontent.com/experiandataquality/aperture-data-studio-sdk/github-maven-repository/maven'
    }
}

dependencies {
    compileOnly("com.experian.datastudio:sdkapi:2.3.0")
    compileOnly("com.experian.datastudio:sdklib:2.3.0")
}
If you don't want to use Gradle, you'll have to configure your own Java project to generate a compatible JAR artifact:
- Create a new Java project or open an existing one.
- Download and install the sdkapi.jar file.
If using Maven, modify pom.xml to add the SDK GitHub repository:
<project xmlns="http://maven.apache.org/POM/4.0.0"
         xmlns:xsi="http://www.w3.org/2001/XMLSchema-instance"
         xsi:schemaLocation="http://maven.apache.org/POM/4.0.0
                             http://maven.apache.org/maven-v4_0_0.xsd">
    <modelVersion>4.0.0</modelVersion>
    <groupId>com.experian.aperture.datastudio.sdk.step.addons</groupId>
    <!-- replace this accordingly with your custom step name -->
    <artifactId>MyCustomStep</artifactId>
    <!-- replace this accordingly with your custom step version -->
    <version>1.0</version>
    <packaging>jar</packaging>
    <!-- replace this accordingly with your custom step name -->
    <name>MyCustomStep</name>

    <properties>
         <maven.compiler.source>1.8</maven.compiler.source>
         <maven.compiler.target>1.8</maven.compiler.target>
    </properties>

    <repositories>
        <repository>
            <id>aperture-data-studio-github-repo</id>
            <url>https://raw.githubusercontent.com/experiandataquality/aperture-data-studio-sdk/github-maven-repository/maven/</url>
        </repository>
    </repositories>

    <dependencies>
        <dependency>
            <groupId>com.experian.datastudio</groupId>
            <artifactId>sdkapi</artifactId>
            <version>2.3.0</version>
            <scope>provided</scope>
        </dependency>
        <dependency>
             <groupId>com.experian.datastudio</groupId>
             <artifactId>sdklib</artifactId>
             <version>2.3.0</version>
        </dependency>
    </dependencies>
</project>- (Skip this step if using Maven or Gradle). If you've downloaded the JAR manually, create a libs folder and add in the sdkapi.jar as a library.
- Create a new package and class.
- Configure your project to output a .jar file as an artifact. Note that this will be done differently depending on your IDE.
Here are the main differences between the v1.0 and v2.0 of the SDK:
| Features | SDK v1.0 | SDK v2.0 | Unified SDK |
|---|---|---|---|
| Design | Extending Abstract class | Implementing interface CustomStepDefinition |
Implementing interface OneToOneDataUnifiedCustomStepDefinition |
| Register step details | Using setStepDefinition methods in StepConfiguration class |
Using CustomTypeMetadataBuilder Sample code |
same as SDK v2.0 Sample code |
| Configure step property | Using setStepProperties() in StepConfiguration class |
Using StepConfigurationBuilder Sample code |
Using UnifiedStepConfigurationBuilder, this is similar to SDK v2.0 Comparison |
| Configure isComplete handling | Override isComplete() in StepConfiguration class |
Using StepConfigurationBuilder Sample code |
Using UnifiedStepConfigurationBuilder, this is similar to SDK v2.0 Comparison |
| Configure column step | Override initialise() in StepOutput class |
Using StepConfigurationBuilder Sample code |
Using UnifiedStepConfigurationBuilder, this is similar to SDK v2.0 Comparison |
| Execute and retrieve value from step | Override execute() and getValueAt() in StepOutput class |
Using StepProcessorBuilder Sample code |
Using ProcessingContext and InputRecord in process method Sample code |
| Logging in step | Using logError() from base class |
Using SdkLogManager library Sample Code |
Using SdkLogManager library Sample Code,same as SDK v2.0 |
| Global constant | Predefined server property | Using CustomStepSettingBuilder Sample Code |
Using CustomStepSettingBuilder Sample Code,same as SDK v2.0 |
- Use the Unified SDK if you are developing custom steps to be used on the latest versions of Aperture Data Studio and especially if the step is used in real-time workflows.
- Use SDK v2.0 if you need to develop custom steps with multiple input and/or output nodes and the step is not used in real-time workflows.
- SDK v1.0 is not longer supported.
Once your project is set up, you can create a new class and implement the CustomStepDefinition interface. The newly created class will be picked up by the Data Studio UI.
Note that it is recommended that you bundle one custom step per JAR.
To use the interfaces, classes and methods, you have to import the SDK into your class. Add an import statement below the package name to import all the SDK classes and methods:
import com.experian.datastudio.sdk.api.*;
import com.experian.datastudio.sdk.api.step.*;
import com.experian.datastudio.sdk.api.step.configuration.*;
import com.experian.datastudio.sdk.api.step.processor.*;
Your new class should look something like this:
package com.experian.datastudio.customstep;

import com.experian.datastudio.sdk.api.*;
import com.experian.datastudio.sdk.api.step.*;
import com.experian.datastudio.sdk.api.step.configuration.*;
import com.experian.datastudio.sdk.api.step.processor.*;

public class DemoStep implements CustomStepDefinition{
}
All the SDK interfaces, classes and methods will now be available.
Use CustomTypeMetadataBuilder in the createMetadata method to create metadata such as the custom step name, description, version and licenses.
@Override
public CustomTypeMetadata createMetadata(final CustomTypeMetadataBuilder metadataBuilder) {
        return metadataBuilder
                .withName("Example: StepsTemplate")
                .withDescription("Step Template Example")
                .withMajorVersion(0)
                .withMinorVersion(0)
                .withPatchVersion(0)
                .withDeveloper("Experian")
                .withLicense("Apache License Version 2.0")
                .build();
}Use StepConfigurationBuilder in createConfiguration method to configure your custom step (e.g. nodes, step properties, column layouts) and ensure it displays correctly in the Data Studio UI.
Nodes represent the input and output nodes in the step. You can define how many nodes the step will have. For example, to create a step with one input and one output node:
.withNodes(stepNodeBuilder -> stepNodeBuilder
        .addInputNode(INPUT_ID)
        .addOutputNode(OUTPUT_ID)
.build())By default, the input and output nodes are DATA nodes, which receive data or produce data. You can create a custom step that doesn't change the data in the workflow: For example, a custom step that sends an email or calls a REST API when the execution reaches that step. Please take note that PROCESS output nodes cannot connect to DATA input nodes.
.withNodes(stepNodeBuilder -> stepNodeBuilder
        .addInputNode(inputNodeBuilder -> inputNodeBuilder
                .withId(INPUT_ID)
                .withLabel("Name (required)")
                .withType(NodeType.PROCESS)
                .build())
        .addOutputNode(outputNodeBuilder -> outputNodeBuilder
                .withId(OUTPUT_ID)
                .withType(NodeType.PROCESS)
                .build())
.build())A disconnected input node displays the label defined in "withLabel". When connected, the input node displays the name of the preceding step in the current step by default. To hide the input node label, set "withLabelDisplayed" to false.
Disconnected input node without label
.withNodes(stepNodeBuilder -> stepNodeBuilder
        .addInputNode(inputNodeBuilder -> inputNodeBuilder
            .withId(INPUT_ID)
            .build())
        .addOutputNode(OUTPUT_ID)
        .build())
Disconnected input node with label
.withNodes(stepNodeBuilder -> stepNodeBuilder
        .addInputNode(inputNodeBuilder -> inputNodeBuilder
            .withId(INPUT_ID)
            .withLabel("Sales input required")
            .build())
        .addOutputNode(OUTPUT_ID)
        .build())
Connected input node without label
.withNodes(stepNodeBuilder -> stepNodeBuilder
        .addInputNode(inputNodeBuilder -> inputNodeBuilder
            .withId(INPUT_ID)
            .withLabelDisplayed(false)
            .build())
        .addOutputNode(OUTPUT_ID)
        .build())
Connected input node with label
.withNodes(stepNodeBuilder -> stepNodeBuilder
        .addInputNode(inputNodeBuilder -> inputNodeBuilder
            .withId(INPUT_ID)
            // withLabelDisplayed is set to true by default
            .withLabelDisplayed(true)
            .build())
        .addOutputNode(OUTPUT_ID)
        .build())
Step properties represent the UI elements of the step. These properties include displaying information about the step, allowing the user to input something or selecting a column to manipulate. For example, to add a column chooser to the step:
.withStepProperties(stepPropertiesBuilder -> stepPropertiesBuilder
        .addStepProperty(stepPropertyBuilder -> stepPropertyBuilder
                .asColumnChooser(ARG_ID_COLUMN_CHOOSER)
                .forInputNode(INPUT_ID)
                .build())
.build())| StepPropertyType | Description |
|---|---|
| asBoolean | A true or false field |
| asString | A text field |
| asNumber | A number without fraction |
| asColumnChooser | An input column drop-down list |
| asCustomChooser | A custom drop-down list |
| Method | Description |
|---|---|
| asBoolean | Set a Boolean field |
| withDefaultValue | Set a default value in the field |
| build | Build the step property |
| Method | Description |
|---|---|
| asString | Set a string field |
| withIsRequired | Set whether the field is mandatory |
| withDefaultValue | Set a default value in the field |
| build | Build the step property |
| Method | Description |
|---|---|
| asNumber | Set a number field |
| withAllowDecimal | Set whether the field accepts decimal values |
| withMaxValue | Set a maximum value in the field |
| withMinValue | Set a minimum value in the field |
| withIsRequired | Set whether the field is mandatory |
| withDefaultValue | Set a default value in the field |
| build | Build the step property |
| Method | Description |
|---|---|
| asColumnChooser | Set an input column from a drop-down list |
| forInputNode | Set an input node |
| withMultipleSelect | Set whether multiple fields are allowed |
| build | Build the step property |
| Method | Description |
|---|---|
| asCustomChooser | Set an input column from a custom drop-down list |
| withAllowValuesProvider | Set the custom list for selection |
| withAllowChooserItemsProvider | Set the custom list with display name and value for selection |
| withAllowSearch | Set whether there's a field search |
| withAllowSelectAll() | Set whether you can select all fields |
| withIsRequired() | Set whether the field is mandatory |
| withMultipleSelect() | Set whether multiple fields can be selected |
| build | Build the step property |
There are 2 overloaded methods for withDefaultValue. You can either set it with a direct value or based on DefaultValueContext. DefaultValueContext is an instance that used to return step property and step setting values. It does also return metadata input columns however this is only applicable for ColumnChooser step property.
| Method | Description |
|---|---|
| getStepPropertyValue | Gets the value of a step property |
| getStepSettingFieldValueAsString | Gets the value of a step setting |
| getColumnsByTag | Gets the metadata input columns by tag (for column chooser only) |
| getColumnByIndex | Gets the metadata input columns by index (for column chooser only) |
Since version 2.2.0, on-value-changed handler is added to all the step property types. The on-value-changed handler allows a step property to update another step property's value, when its own value is updated.
This is necessary for the example scenario below. The step property CUSTOM_2's allowed values depends on step property CUSTOM_1's value. First, the user selects "1" for CUSTOM_1, AND "1b" for CUSTOM_2. Then, the user edits CUSTOM_1's value to "2". Step property CUSTOM_2's value will become invalid as "1b" is not found in the new allowed values ("2a", "2b"). By configuring the on-value-changed in CUSTOM_1, the invalid value of CUSTOM_2 can be cleared.
.addStepProperty(stepPropertyBuilder -> stepPropertyBuilder
        .asCustomChooser(CUSTOM_1)
        .withAllowValuesProvider(context -> Arrays.asList("1", "2"))
        .withOnValueChanged(context -> {
            context.clearStepPropertyValue(CUSTOM_2);
        })
        .build())
.addStepProperty(stepPropertyBuilder -> stepPropertyBuilder
        .asCustomChooser(CUSTOM_2)
        .withAllowValuesProvider(context -> {
            List<String> list = (List<String>) context.getStepPropertyValue(CUSTOM_1).orElse(Collections.emptyList());
            if (!list.isEmpty()) {
                switch (list.get(0)) {
                    case "1":
                        return Arrays.asList("1a", "1b");
                    case "2":
                        return Arrays.asList("2a", "2b");
                }
            }
            return Collections.emptyList();
        })
Below are the actions that can be performed in on-value-changed handler.
| Method | Description |
|---|---|
| clearStepPropertyValue | Removes the value of a step property. |
| getChangedByStepPropertyId | Gets the step property ID that changes this value. For chaining on-value-changed events. |
| getStepPropertyValue | Gets the value of a step property. |
| setStepPropertyValue | Sets the value of a step property. Please note that the column chooser is not supported. |
Chaining on-value-changed event is supported. For example, when STRING_3 is edited, it will update NUMBER_4's value via on-value-changed handler. Then, NUMBER_4 will fire it's on-value-changed event to update BOOLEAN_5. However, the same on-value-changed handler will not be triggered twice.
.addStepProperty(stepPropertyBuilder -> stepPropertyBuilder
        .asString(STRING_3)
        .withOnValueChanged(context -> {
            final String value = (String) context.getStepPropertyValue(STRING_3).orElse("");
            context.setStepPropertyValue(NUMBER_4, value.length());
        })
        .build())
.addStepProperty(stepPropertyBuilder -> stepPropertyBuilder
        .asNumber(NUMBER_4)
        .withOnValueChanged(context -> {
            final Number value = (Number) context.getStepPropertyValue(NUMBER_4).orElse(0);
            context.setStepPropertyValue(BOOLEAN_5, value.intValue() % 2 == 0);
        })
        .build())
.addStepProperty(stepPropertyBuilder -> stepPropertyBuilder
        .asBoolean(BOOLEAN_5)
        .withOnValueChanged(context -> {
            final Boolean value = (Boolean) context.getStepPropertyValue(BOOLEAN_5).orElse(false);
            if (Boolean.FALSE.equals(value)) {
                context.clearStepPropertyValue(COLUMN_6);
            }
        })
        .build())
.addStepProperty(stepPropertyBuilder -> stepPropertyBuilder
        .asColumnChooser(COLUMN_6)
        .forInputNode(INPUT_ID)
        .build())
Sometimes, chaining on-value-changed events can be confusing, especially if a step property's value can be updated by multiple step properties. It might be hard to trace how a step property's value has been set. On-value-changed event chaining cannot be turned off. However, there is a workaround using the getChangedByStepPropertyId() method.
.addStepProperty(stepPropertyBuilder -> stepPropertyBuilder
        .asString(STRING_3)
        .withOnValueChanged(context -> {
            if (!context.getChangedByStepPropertyId().isPresent()) { // ChangedByStepPropertyId is empty if triggered by UI
                final String value = (String) context.getStepPropertyValue(STRING_3).orElse("");
                context.setStepPropertyValue(NUMBER_4, value.length());
            }
        })
.build())The CompleteHandler determines the completeness based on the condition of the step prior to execution or data exploration. For example, you can set the step to be in a complete state if either one of the input is connected:
.withIsCompleteHandler(context ->
        context.isInputNodeConnected(INPUT1_ID) ||
                context.isInputNodeConnected(INPUT2_ID) ||
context.isInputNodeConnected(INPUT3_ID))Column layouts represent column(s) that will be displayed in the step. For example, to configure existing columns from an input source and a new "MyColumn" for the output columns:
.withOutputLayouts(outputLayoutBuilder -> outputLayoutBuilder
        .forOutputNode(OUTPUT_ID, outputColumnBuilder -> outputColumnBuilder
                .addColumns(context -> {
                    final Optional<Boolean> hasLimitOptional = context.getStepPropertyValue(ARG_ID_HAS_LIMIT);
                    final Boolean hasLimit = hasLimitOptional.orElse(Boolean.FALSE);
                    final List<Column> columns = context.getInputContext(INPUT_ID).getColumns();
                    if (Boolean.TRUE.equals(hasLimit)) {
                        final Optional<Number> limitOptional = context.getStepPropertyValue(ARG_ID_COLUMN_LIMIT);
                        if (limitOptional.isPresent()) {
                            final Number limit = limitOptional.get();
                            return columns.stream().limit(limit.intValue()).collect(Collectors.toList());
                        }
                    }
                    return columns;
                })
                .addColumn(MY_OUTPUT_COLUMN)
                .build())
.build())ConfigurationInputContext is an instance that used to return metadata input columns.
| Method | Description |
|---|---|
| getColumns | Get all input node columns |
| getColumnById | Get input node column by id |
| getColumnsByTag | Get input node columns by tag |
@Override
public StepConfiguration createConfiguration(final StepConfigurationBuilder configurationBuilder) {
    return configurationBuilder
            /** Define input and output node */
            .withNodes(stepNodeBuilder -> stepNodeBuilder
                    .addInputNode(INPUT_ID)
                    .addOutputNode(OUTPUT_ID)
                    .build())
            /** Define step properties */
            .withStepProperties(stepPropertiesBuilder -> stepPropertiesBuilder
                    .addStepProperty(stepPropertyBuilder -> stepPropertyBuilder
                            .asBoolean(ARG_ID_HAS_LIMIT)
                            .withLabelSupplier(context -> "columns?")
                            .build())
                    .addStepProperty(stepPropertyBuilder -> stepPropertyBuilder
                            .asNumber(ARG_ID_COLUMN_LIMIT)
                            .withAllowDecimal(false)
                            .withIsDisabledSupplier(context -> {
                                final Optional<Boolean> hasLimitOptional = context.getStepPropertyValue(ARG_ID_HAS_LIMIT);
                                final Boolean hasLimit = hasLimitOptional.orElse(Boolean.FALSE);
                                return !hasLimit;
                            })
                            .withIsRequired(true)
                            .withLabelSupplier(context -> "limit?")
                            .build())
                    .build())
            /** Prevent the step from executing until the input node has been completed.
            *  This is an optional value, in below case which is always true
            */
            .withIsCompleteHandler(context -> true)
            /** Define how the output will look like, i.e. the columns and rows */
            .withOutputLayouts(outputLayoutBuilder -> outputLayoutBuilder
                    .forOutputNode(OUTPUT_ID, outputColumnBuilder -> outputColumnBuilder
                            .addColumns(context -> {
                                final Optional<Boolean> hasLimitOptional = context.getStepPropertyValue(ARG_ID_HAS_LIMIT);
                                final Boolean hasLimit = hasLimitOptional.orElse(Boolean.FALSE);
                                final List<Column> columns = context.getInputContext(INPUT_ID).getColumns();
                                if (Boolean.TRUE.equals(hasLimit)) {
                                    final Optional<Number> limitOptional = context.getStepPropertyValue(ARG_ID_COLUMN_LIMIT);
                                    if (limitOptional.isPresent()) {
                                        final Number limit = limitOptional.get();
                                        return columns.stream().limit(limit.intValue()).collect(Collectors.toList());
                                    }
                                }
                                return columns;
                            })
                            .addColumn(MY_OUTPUT_COLUMN)
                            .build())
                    .build())
            .withIcon(StepIcon.ARROW_FORWARD)
            .build();
}Use StepProcessorBuilder in the createProcessor method to implement the logic of the custom step output.
You define how to generate the cell value of an output column here. The example below shows that appending "-processed" text to the value from the first input column, and then displayed into MY_OUTPUT_COLUMN.
@Override
public StepProcessor createProcessor(final StepProcessorBuilder processorBuilder) {
    return processorBuilder
            // execute
            .forOutputNode(OUTPUT_ID, (processorContext, outputColumnManager) -> {
                final ProcessorInputContext inputManager = processorContext.getInputContext(INPUT_ID).orElseThrow(IllegalArgumentException::new);
                final Optional<InputColumn> column = inputManager.getColumns().stream().findFirst();
                column.ifPresent(inputColumn -> outputColumnManager.onValue(MY_OUTPUT_COLUMN, rowIndex -> {
                    final CellValue cellValue = inputColumn.getValueAt(rowIndex);
                    return cellValue.toString() + "-processed";
                }));
                return inputManager.getRowCount();
            })
            .build();
}On Data Studio Grid, the default cell value style is black text with white background. Data Studio SDK provides 4 predefined styles that can be chosen to differentiate from other cells.

@Override
public StepProcessor createProcessor(final StepProcessorBuilder processorBuilder) {
    return processorBuilder
            .forOutputNode(OUTPUT_ID, (processorContext, outputColumnManager) -> {
                final ProcessorInputContext inputContext = processorContext.getInputContext(INPUT_ID).orElseThrow(IllegalArgumentException::new);
                outputColumnManager.onValue(MY_OUTPUT_COLUMN, (rowIndex, outputCellBuilder) -> {
                    final String generatedValue = "Row " + (rowIndex + 1);
                    return outputCellBuilder
                            .withValue(generatedValue)
                            .withStyle(CustomValueStyle.INFO) // only 4 enums: INFO,SUCCESS,WARNING,ERROR
                            .build();
                });
                return inputContext.getRowCount();
            })
            .build();
}Interactive is a flag that set to true when the user views the output of a step on the Data Studio Grid (UI).
In interactive mode, the evaluator of OutputColumnManager.onValue(...) will only be executed when the cell is visible.
It is set to false when running the whole workflow as a Job in the background. In non-interactive mode, all the cells' value will be generated.
This flag is used for delaying the cell's value generation until it is needed. So that, the step can display data in Data Studio Grid faster. However, this is only applicable to those steps that do not depend on all the input rows to generate value.
@Override
public StepProcessor createProcessor(final StepProcessorBuilder processorBuilder) {
    return processorBuilder
            .forOutputNode(OUTPUT_ID, (processorContext, outputColumnManager) -> {
                if (processorContext.isInteractive()) {
...OutputColumnManager.onValue() accept 2 types of evaluators.
-
OutputColumnManager.onValue(MY_OUTPUT_COLUMN, rowIndex -> CELL_OUTPUT)LongFunction evaluator accepts long-valued row index and return the computed value of the specified column. -
OutputColumnManager.onValue(MY_OUTPUT_COLUMN, (rowIndex, outputCellBuilder) -> outputCellBuilder.build)BiFunction evaluator accepts long-valued row index along with the outputCellBuilder so that cell style and computed value of the specified column can be defined.
Do note that cells are evaluated in parallel. There is no guarantee the sequence of the evaluation. When displaying step result in grid, the evaluator will only be executed when the cell is visible.
Progress bar is used to indicate the progress of the custom step execution. It can be set using progressChanged() and the code snippet is as shown below:
public StepProcessor createProcessor(final StepProcessorBuilder processorBuilder) {
    return processorBuilder
            .forOutputNode(OUTPUT_ID, (processorContext, outputColumnManager) -> {
                doSlowTask();
                processorContext.progressChanged("Do slow task", 0.1);
                doHeavyTask();
                processorContext.progressChanged("Do heavy task", 0.2);
                final ProcessorInputContext inputContext = processorContext.getInputContext(INPUT_ID).orElseThrow(IllegalArgumentException::new);
                final long rowCount = inputContext.getRowCount();
                List<InputColumn> inputColumns = processorContext.getColumnFromChooserValues(COLUMN_CHOOSER_ID);
                AtomicLong result = new AtomicLong();
                if (!inputColumns.isEmpty()) {
                    for (long row = 0; row < rowCount; row++) {
                        processEachRow(result, row, inputColumns.get(0));
                        if (row % 1000 == 999) { // reduce calling progressChanged to avoid performance impact
                            final double progressBeforeProcessRows = 0.2;
                            final double progress = (row / (double) rowCount * (1 - progressBeforeProcessRows))
                                    + progressBeforeProcessRows;
                            processorContext.progressChanged(progress);
                        }
                    }
                }
                outputColumnManager.onValue(OUTPUT_COLUMN_HEADER, rowIndex -> {
                    // DO NOT call progressChanged() here
                    return result.get();
                });
                // progressChanged(1.0) will be called automatically
                return 1;
            })
            .build();
}
Please take note that progressChanged() must not be called inside outputColumnManager.onValue().
ProcessorInputContext is an instance that used to return metadata input columns.
| Method | Description |
|---|---|
| getColumns | Get all input node columns |
| getColumnById | Get input node column by id |
| getColumnsByTag | Get input node columns by tag |
| getRowCount | Get row count |
The cache object allows a custom step to cache its results, for later reuse. Each cache object is created and referenced by a particular name. It is useful for storing responses from slow services between instances of custom steps. The backing key/value datastore is thread-safe and fast enough on reads to be used for random access lookups, and it can handle reads/writes from multiple steps at once. The cache is managed by Data Studio, but it is the responsibility of the custom step to delete or refresh the cache as necessary.
It is encouraged to use the key that decides the output of the result as cache name or the cache key.
For example, country in the step property will determine the address returned, and United Kingdom is selected,
you may set the cache name as address-GB instead of address. So that when the step property is changed, the new
cache will be created instead of reusing the old cache.
There 2 types of caching scope: Workflow and Step
The cache is scoped to each custom step class within a workflow, which means that 2 instances of the same custom step in the same workflow can use the same cache if both supplied the same cache name. Same custom step in a different workflow will not able to access the same cache.
The cache is scoped to each custom step instance, which means that 2 instances of the same custom step in the same workflow will access a separate cache, even though both supplied with the same cache name.
To create or obtain cache, you will need to build the StepCacheConfiguration.
Use StepCacheConfigurationBuilder to build the StepCacheConfiguration. Here you may set the cache name,
time to live for update of the cache, cache scope and specify the type for cache key and cache value.
Cache key and cache value can be any type under Java.*.
StepCacheConfigurationBuilder is supplied by StepProcessorContext.
Caches are created or obtained by calling getOrCreateCache from the StepCacheManager. You will need to pass the
StepCacheConfiguration to create or retrieve the cache. StepCacheManager is supplied by StepProcessorContext.
Example below illustrate how to create a cache with the following configurations
| Name | Value |
|---|---|
| Cache name | cache-name-1 |
| Time-to-live | 10 minutes |
| Cache scope | STEP |
| Cache key type | String |
| Cache value type | String |
 private static final String CACHE_NAME_1 = "cache-name-1";

 ....

@Override
    public StepProcessor createProcessor(final StepProcessorBuilder processorBuilder) {
        return processorBuilder
                .forOutputNode(OUTPUT_ID, (context, columnManager) -> {
                    final StepCacheManager cacheManager = context.getCacheManager();
                    final StepCacheConfiguration<String, String> cacheConfiguration = context.getCacheConfigurationBuilder()
                            .withCacheName(CACHE_NAME_1)
                            .withTtlForUpdate(10L, TimeUnit.MINUTES)
                            .withScope(StepCacheScope.STEP)
                            .build(String.class, String.class);
final StepCache<String, String> cache1 = cacheManager.getOrCreateCache(cacheConfiguration1);cacheManager.destroyCache(cacheConfiguration);cache1.put(cacheKey, value);If the cache contains no value for that key, null is returned.
cache1.get(cacheKey);Preprocessing provide flexibility to manipulate custom Step input values through callback and made it available as an index for the main processing to use.
Advantages:
- Reduced memory usage as the callbacks that manipulate each input value are evaluted lazily. This allow the step to process even larger data than before.
- Potentially faster processing time since common operation can be written into the index and reuse by the main processing.
- Much faster read/write performance compare to SDK cache.
Disadvantages:
- Potential code duplication with the main processing (
forOutputNode). - API flexibility vs. SDK Cache. The API to populate index is not as easy to use as SDK Cache. In addition to that, index is only unique per step and changes to the structure of the Workflow or Step property values will trigger index rebuilding.
Preprocessing can be done by registering one or more indexes through the StepProcessorBuilder.
@Override
public StepProcessor createProcessor(StepProcessorBuilder processorBuilder) {
    return processorBuilder
            .registerIndex(INDEX_NAME, indexBuilder -> indexBuilder
                    .indexTypeRows() // index type
                    .provideIndexValues(ctx -> {
                        final ProcessorInputContext inputContext = ctx.getInputContext(INPUT_ID).orElseThrow(IllegalArgumentException::new);
                        final List<InputColumn> inputColumns = inputContext.getColumns();
                        final InputColumn firstInputColumn = inputColumns.get(0);
                        final InputColumn secondInputColumn = inputColumns.get(1);

                        // Append first and second input columns values with -index
                        for (long i = 0; i < inputContext.getRowCount(); i++) {
                            final int rowIndex = (int) i;
                            ctx.appendRow(() -> {
                                // this callback will be executed lazily
                                final CellValue indexColumn1 = firstInputColumn.getValueAt(rowIndex);
                                final CellValue indexColumn2 = secondInputColumn.getValueAt(rowIndex);
                                // write the index row
                                return Arrays.asList(indexColumn1, indexColumn2);
                            });
                        }
                    })
                    .build())
    // omitted for brevity...
}
For full example step, please refer to the DemoAggregateStep
As for the current moment, there's only one type of index which is indexTypeRows.
return processorBuilder
        .registerIndex(INDEX_NAME, indexBuilder -> indexBuilder
                .indexTypeRows()
                // ...
indexTypeRows store values as a map of 32 bits int (as index rows) and List of Objects (as index columns).
- This index has a good read/write performance and minimal memory usage due to the use of
intas a key. - The maximum number of row size is equivalent with
Integer.MAX_VALUEor2,147,483,647rows. If you foresee that your index is going to be bigger than this, I would suggest to split into multiple smaller indexes. - The maximum number of index columns depends on the kind of
Listbeing used.ArrayListwould have limit ofInteger.MAX_VALUE.
To append new row into the index:
// ...
.indexTypeRows()
.provideIndexValues(ctx -> {
    ctx.appendRow(() -> {
        // write the index row
        return Arrays.asList("Value for index column1", "Value for index column2");
    });
})
// ...- this will increment the index row value internally.
To explicitly put the index row:
// ...
.indexTypeRows()
.provideIndexValues(ctx -> {
    final int explicitRowIndex = 15;
    ctx.putRow(explicitRowIndex, () -> {
        return Arrays.asList("Value for index column1", "Value for index column2");
    });
})
// ...
To fetch the written index value (inside forOutputNode):
// Details omitted for brevity...
.forOutputNode(OUTPUT_ID, (context, columnManager) -> {
    final int rowIndex = 10;
    final List<CellValue> indexRowValues = context.getIndexRowValues(INDEX_NAME, rowIndex);
})
Other methods available in the provideIndexValues context(RowBasedIndex.ValueContext):
// Details omitted for brevity...
.indexTypeRows()
.provideIndexValues(ctx -> {
    ctx.getInputContext(INPUT_1);
    ctx.getStepPropertyValue(MY_STEP_PROPERTY);
    ctx.getColumnFromChooserValues(MY_INPUT_COLUMN_STEP_PROPERTY);
    ctx.getStepSettingFieldValueAsString(STEP_SETTINGS_1);
})
// ...getInputContext: Use this method to gain access to input columns values and input row count.getStepPropertyValue: Use this method to get the configured Step property value.getColumnFromChooserValues: Use this method to get the input column instance from column chooser value.getStepSettingFieldValueAsString: Use this method to get the configured Step Settings value.
You can raise custom step exception by throwing the following exception class.
throw new CustomStepException(401, "Authentication failed")You may use step setting as a constant variable or as global setting across the Aperture Data Studio. The setting page will be appeared in Step Setting module.
Use CustomStepSettingBuilder in createConfiguration method to configure your step setting, which consist the following method for each field.
| Method | Description |
|---|---|
| withId | Set the Id for the field |
| withName | Set the name for the field |
| withIsRequired | Set whether the field is mandatory |
| withFieldType | Set the field type (PASSWORD, TEXT, TEXTAREA) |
.withStepSetting(builder -> builder
	.addField(fieldBuilder -> fieldBuilder
			.withId("stepsetting-1")
			.withName("Step Setting 1")
			.withIsRequired(true)
			.withFieldType(StepSettingType.PASSWORD)
			.build())
.build())Step setting value can be accessed from both createConfiguration and createProcessor methods.
.withStepProperties(stepPropertiesBuilder -> stepPropertiesBuilder
	.addStepProperty(stepPropertyBuilder -> stepPropertyBuilder
			.asCustomChooser("property-1")
			.withAllowValuesProvider(uiCallbackContext -> {
				final Optional<String> fieldValue1 = uiCallbackContext.getStepSettingFieldValueAsString("stepsetting-1");
				return fieldValue1.map(s -> Arrays.asList(s.split(","))).orElse(Collections.emptyList());
			})
			.withIsRequired(true)
			.build())
.build()).withOutputLayouts(outputLayoutBuilder -> outputLayoutBuilder
.forOutputNode("output-1", outputColumnBuilder -> outputColumnBuilder
.addColumns(context -> {
final Optional<String> fieldValue1 = context.getStepSettingFieldValueAsString("stepsetting-1");
List<Column> columnList = context.getInputContext(INPUT_ID).getColumns();
fieldValue1.ifPresent(s -> columnList.add(context.createNewColumn(s)));
return columnList;
})
.addColumn(COLUMN_HEADER)
.build())
.build())public StepProcessor createProcessor(final StepProcessorBuilder processorBuilder) {
return processorBuilder
.forOutputNode(OUTPUT_ID, ((processorContext, outputColumnManager) -> {
final ProcessorInputContext inputContext = processorContext.getInputContext(INPUT_ID).orElseThrow(IllegalArgumentException::new);
final Optional<String> fieldValue1 = processorContext.getStepSettingFieldValueAsString("stepsetting-1");
return inputContext.getRowCount();
}))
.build();
}Workflow parameters allow you to configure the properties of your Workflow steps without specifying its value. You can create a Workflow parameter and assign it to any Workflow step property that supports the Workflow parameter's datatype.
Custom steps now automatically support workflow parameters for string (alphanumeric) and number (numeric) properties.
Any calls to the context.getStepPropertyValue() method should return the workflow parameter value if a workflow parameter is referenced.
Example:
.addStepProperty(stepPropertyBuilder -> stepPropertyBuilder
        .asString(STRING_PROPERTY)
        .withOnValueChanged(context -> {
            final String value = (String) context.getStepPropertyValue(STRING_PROPERTY).orElse("");
        })
.build())By default each and every plugin's JAR files are isolated in their own class-loader. This class-loader will prioritize
libraries that are bundled inside the jar. This allow plugin to depends on specific version of libraries without
affecting other plugin.
Some notes on jar packaging:
-
Always bundle dependencies into a single jar together with the plugin.
-
If you plan to use sdklib, your plugin jar must not contains these packages:
- org.apache.logging.log4j:log4j-api:2.12.0
- com.google.code.findbugs:jsr305:3.0.2
In addition to that, anything that falls under these Java packages:
com.experian.datastudio.sdk,sun,java, andjavaxwill always be loaded from parent class loader.Please contact us if your plugin needs a newer version of any of the libraries above.
-
It's not recommended to bundle native driver that involved JNI/JNA as it's not trivial to load native libraries from a jar in a distributed environment. Please contact us if your plugin needs a specific native drivers.
-
When using Gradle shadow plugin or Maven shade plugin, do not
minimizethe uber jar as it may remove dependencies that are loaded through reflection and service-provider-interface.Essentially, don't do any of the following:
Gradle:
shadowJar {
    minimize() // don't
}
Maven:
 <plugin>
    <groupId>org.apache.maven.plugins</groupId>
    <artifactId>maven-shade-plugin</artifactId>
    <version>3.2.1</version>
    <executions>
      <execution>
        <phase>package</phase>
        <goals>
          <goal>shade</goal>
        </goals>
        <configuration>
          <!-- don't -->
          <minimizeJar>true</minimizeJar>
        </configuration>
      </execution>
    </executions>
 </plugin>
There are 3 main methods available through the SdkLogManager for configuring the Logger:
    Method 1: SdkLogManager.getLogger(StepsTemplate.class, Level.INFO);
    Method 2: SdkLogManager.getLogger(StepsTemplate.class);
    Method 3: SdkLogManager.getLogger("CustomLoggerName");
Method 1 allows you to specify a logger for your custom step class and an explicit log level (e.g. Level.INFO).
Method 2 allows you to specify a logger for your custom step class but implicitly derives the log level from the Root logger in the log4j2.xml configuration file if no logger with the canonical class name exists. Effectively, the log level of the custom step logger will be the same as the log level of the Root logger.
Method 3 allows you to specify a logger name (which should correspond to a logger configured in the log4j2.xml configuration file). If the logger with the specified logger name does not exist, the Root logger will be returned instead.
Example (Method 1):
public class StepsTemplate implements CustomStepDefinition {
    private static final Logger LOGGER = SdkLogManager.getLogger(StepsTemplate.class, Level.INFO);

     @Override
     public StepConfiguration createConfiguration(StepConfigurationBuilder stepConfigurationBuilder) {
        LOGGER.info("Create configuration");
        ...
Example (Method 2):
private static final Logger LOGGER = SdkLogManager.getLogger(StepsTemplate.class);log4j2.xml
<Loggers>
    <Logger name="com.experian.StepsTemplate"  level="debug">
        <AppenderRef ref="AppenderRefExample1" />
    </Logger>
    <Root level="info">
        <AppenderRef ref="AppenderRefExample2"/>
    </Root>
</Loggers>
The log level of LOGGER will be Level.DEBUG since the logger with the canonical class name exists. If the first logger does not exist, the log level of LOGGER will be Level.INFO as determined by the Root logger log level instead.
The HTTP client library provides an interface for accessing external endpoints through the HTTP protocol.
The HTTP requests are made using the SDK HTTP libraries/helper classes:
WebHttpClientWebHttpRequestWebHttpResponse
First, an HTTP web client (WebHttpClient) is set up, and a request (WebHttpRequest) is sent through the client using the sendAsync() method with the request as an argument. This returns a WebHttpResponse which contains the response from the endpoint.
- Create an HTTP client
- Create an HTTP request (GET/POST/PUT/DELETE/PATCH)
- Send the HTTP request through WebHttpClient
- Retrieving the HTTP Response through WebHttpResponse
A GET example and a POST example is provided at the end of this section.
WebHttpClient.builder()
        .withHttpVersion(..) // Http protocol version
        .withProxy(..) // specifying any required proxy
        .withConnectionTimeout(..) // maximum time to establish connection
        .withSocketTimeout(..) // maximum time to retrieve data
.build() The request supports the following http methods:
WebHttpRequest.builder()
        .get(..) // passing in the url
        .withQueryString(..) // specifying query string in key value pair, alternatively can use .addQueryString(..)
        .withHeader(..) // specifying headers value, alternatively can use .addHeader(..)
.build()WebHttpRequest.builder()
.post(..) // passing in the url
.withBody(..) // specifying the body
.withQueryString(..) // specifying query string in key value pair, alternatively can use .addQueryString(..)
.withHeader(..) // specifying headers value, alternatively can use .addHeader(..)
.build()WebHttpRequest.builder()
.put(..) // passing in the url
.withBody(..) // specifying the body
.withQueryString(..) // specifying query string in key value pair, alternatively can use .addQueryString(..)
.withHeader(..) // specifying headers value, alternatively can use .addHeader(..)
.build()WebHttpRequest.builder()
.delete(..) // passing in the url
.withBody(..) // specifying the body
.withQueryString(..) // specifying query string in key value pair, alternatively can use .addQueryString(..)
.withHeader(..) // specifying headers value, alternatively can use .addHeader(..)
.build()WebHttpRequest.builder()
.patch(..) // passing in the url
.withBody(..) // specifying the body
.withQueryString(..) // specifying query string in key value pair, alternatively can use .addQueryString(..)
.withHeader(..) // specifying headers value, alternatively can use .addHeader(..)
.build()client.sendAsync(request);Calling the sendAsync() method returns a CompletableFuture<WebHttpResponse> object.
The methods provided to retrieve information from WebHttpResponse are:
getStatus()getMessage()getBody()getHeaders()
An example:
CompletableFuture<WebHttpResponse> webHttpResponse = client.sendAsync(request);

webHttpResponse
        .thenAccept(response -> {
            String responseBody = response.getBody();
        })
        .exceptionally(e -> {
            // error handling
});This example step relies on ip-api, an API endpoint that identifies the country of origin (and other location specific data) based on a provided IP address. In this example, the response is returned in JSON format.
WebHttpClient client = WebHttpClient.builder()
        .withHttpVersion(HttpVersion.HTTP1_1)
        .withProxy(Proxy.NO_PROXY)
        .withConnectionTimeout(10L, TimeUnit.SECONDS)
        .withSocketTimeout(10L, TimeUnit.SECONDS)
        .build();

WebHttpRequest request = WebHttpRequest.builder()
        .get("http://ip-api.com/json/205.174.40.1")
        .withQueryString("fields", "status,message,country")
        .build()

CompletableFuture<WebHttpResponse> webHttpResponse = client.sendAsync(request);

webHttpResponse
        .thenAccept(response -> {
            String webHttpResponseBody = response.getBody();
            JSONObject jsonObject = new JSONObject(webHttpResponseBody);
            String countryName = (String) jsonObject.opt("country");
        })
        .exceptionally(e -> {
            // error handling
});JSONObject json = new JSONObject();
json.put("test", "value");
WebHttpClient client = WebHttpClient.builder()
.withHttpVersion(HttpVersion.HTTP1_1)
.withProxy(Proxy.NO_PROXY)
.withConnectionTimeout(10L, TimeUnit.SECONDS)
.withSocketTimeout(10L, TimeUnit.SECONDS)
.build();
WebHttpRequest request = WebHttpRequest.builder()
.post(<URL>)
.withBody(json.toString())
.build()
CompletableFuture<WebHttpResponse> webHttpResponse = client.sendAsync(request);- You can either use Gradle or Maven:
If using Gradle, point to the SDK repository in the build.gradle:
apply plugin: 'java'

repositories {
    mavenCentral()
    maven {
         url 'https://raw.githubusercontent.com/experiandataquality/aperture-data-studio-sdk/github-maven-repository/maven'
    }
}

dependencies {
    compileOnly("com.experian.datastudio:sdkapi:2.2.0")
}
If you don't want to use Gradle, you'll have to configure your own Java project to generate a compatible JAR artifact:
- Create a new Java project or open an existing one.
- Download and install the sdkapi.jar file.
If using Maven, modify pom.xml to add the SDK GitHub repository:
<project xmlns="http://maven.apache.org/POM/4.0.0"
         xmlns:xsi="http://www.w3.org/2001/XMLSchema-instance"
         xsi:schemaLocation="http://maven.apache.org/POM/4.0.0
                             http://maven.apache.org/maven-v4_0_0.xsd">
    <modelVersion>4.0.0</modelVersion>
    <groupId>com.experian.aperture.datastudio.sdk.custom.addons</groupId>
    <!-- replace this accordingly with your custom parser name -->
    <artifactId>MyCustomParser</artifactId>
    <!-- replace this accordingly with your custom step version -->
    <version>1.0</version>
    <packaging>jar</packaging>
    <!-- replace this accordingly with your custom step name -->
    <name>MyCustomParser</name>

    <repositories>
        <repository>
            <id>aperture-data-studio-github-repo</id>
            <url>https://raw.githubusercontent.com/experiandataquality/aperture-data-studio-sdk/github-maven-repository/maven/</url>
        </repository>
    </repositories>

    <dependencies>
        <dependency>
            <groupId>com.experian.datastudio</groupId>
            <artifactId>sdkapi</artifactId>
            <version>2.1.0</version>
            <scope>provided</scope>
        </dependency>
    </dependencies>
</project>- (Skip this step if using Maven or Gradle). If you've downloaded the JAR manually, create a libs folder and add in the sdkapi.jar as a library.
- Create a new package and class.
- Configure your project to output a .jar file as an artifact. Note that this will be done differently depending on your IDE.
Once your project is set up, you can create a new class and implement the CustomParserDefinition interface. The newly created class will be picked up by the Data Studio UI.
Note that it is recommended that you bundle one custom parser per JAR.
To use the interfaces, classes and methods, you have to import the SDK into your class. Add an import statement below the package name to import all the SDK classes and methods:
import com.experian.datastudio.sdk.api.*;
import com.experian.datastudio.sdk.api.parser.*;
import com.experian.datastudio.sdk.api.parser.configuration.*;
import com.experian.datastudio.sdk.api.parser.processor.*;
Your new class should look something like this:
package com.experian.datastudio.customparser;

import com.experian.datastudio.sdk.api.*;
import com.experian.datastudio.sdk.api.parser.*;
import com.experian.datastudio.sdk.api.parser.configuration.*;
import com.experian.datastudio.sdk.api.parser.processor.*;

public class DemoParser implements CustomParserDefinition{
}
All the SDK interfaces, classes and methods will now available.
Same as creating metadata for custom step
Use ParserConfigurationBuilder in createConfiguration method to configure your custom parser.
Define the file extension that the custom parser is able to parse.
.withSupportedFileExtensions(supportedFileExtensionsBuilder ->
                        supportedFileExtensionsBuilder
                                .add(supportedFileExtensionBuilder ->
                                        supportedFileExtensionBuilder
                                                .withSupportedFileExtension(".testFile")
                                                .withFileExtensionName("Test extension")
                                                .withFileExtensionDescription("Test extension")
                                                .build())
.build())Each parser can be configured in the UI. It will determine the behaviour of the custom parser.
You can have multiple parameter defined using the parameterDefinitionsBuilder in the withParserParameterDefinition.
Example: For delimited parser, user can choose either comma, tab, etc as a delimiter.
.withParserParameterDefinition(parameterDefinitionsBuilder ->
                        parameterDefinitionsBuilder
                                .add(parameterDefinitionBuilder ->
                                        parameterDefinitionBuilder
                                                .withId("delimiter")
                                                .withName("Delimiter")
                                                .withDescription("Character that separates columns in plain text")
                                                .setAsRequired(true)
                                                .setTypeAs(ParserParameterValueType.STRING)
                                                .setDisplayTypeAs(ParserParameterDisplayType.TEXTFIELD)
                                                .withDefaultValueAsString(",")
                                                .affectsTableStructure(true)
                                                .build())
.build())| Method | Description |
|---|---|
| withId | Set Id for the parameter. Id can be used to retrieve the parameter value in the parser processor |
| withName | Set parameter name |
| withDescription | Set parameter description |
| setTypeAs | Set data type of the parameter value. The available type are boolean, string, integer and character |
| setDisplayTypeAs | Set display format of the parameter |
| withDefaultValueAsString | Set a default value in the field |
| withDefaultValueAsBoolean | Set a default value in the field |
| withDefaultValueAsString | Set a default value in the field |
| affectsTableStructure | Set this flag to true if the parameter value influence the table structure of the parser output |
| ParserParameterDisplayType | Description |
|---|---|
| TEXTFIELD | Display a textfield |
| CHECKBOX | Display a checkbox |
| CHARSET | Display a dropdown where user able to select one of the character set. Example: UTF-8, UTF-16, US-ASCII |
| DELIMITER | Display a dropdown where user able to select one of the delimiter. Example: Comma (,), Tab(\t), Pipe ( |
| LOCALE | Display a dropdown where user able to select one of the locale. Example: English (United States), English (United Kingdom, French (France) |
| ENDOFLINE | Display a dropdown where user able to select one of the end of line flag. Example: eg: \r\n, \n, \r |
| QUOTE | Display a dropdown where user able to select one of the quote. Example: Double ("), Single ('), Grave (`) |
| ParserParameterCustomSelectionType | Description |
|---|---|
| DROPDOWN | Display a dropdown where user able to select based on the customized item list. |
You can set default value based on the content of the file. Use ParameterContext to in set default value method, to retrieve the file input stream.
Set your parser processor class.
.withProcessor(new SampleParserProcessor())Parser processor contains the processor to take the file source and convert it to ParserTableDefintion and ClosableIterator
To build a parser processor, create a new class that implements ParserProcessor. There are 2 methods in the interface, getTableDefinition and ClosableIterator
In Aperture Data Studio, data in the files are present in form of table with rows and columns. ParserTableDefinition is the definition of the parsed table. You can have single or multiple table in a file source. For each table, you can have single or multiple columns. Use the ParserTableDefinitionFactory and ParserColumnDefinitionFactory in the TableDefinitionContext to create ParserTableDefinition.
| Method | Description |
|---|---|
| getStreamSupplier | Contains the stream of the file source |
| getFilename | Name of the file source |
| getParameterConfiguration | Get the parameter value selected by the user |
| getParserTableDefinitionFactory | Factory that generated ParserTableDefinition |
| getParserColumnDefinitionFactory | Factory that generated ParserColumnDefinition |
Return a closable iterator over a collection of table row. Use the ClosableIteratorBuilder in the RowIteratorContext to build the ClosableIterator
| Method | Description |
|---|---|
| getTableId | Returns the id of ParserTableDefinition |
| getStreamSupplier | Contains the stream of the file source |
| getParameterConfiguration | Get the parameter value selected by the user |
| getTableDefinition | Returns the ParserTableDefinition |
| getClosableIteratorBuilder | Returns the builder for a closable iterator. |
| Method | Description |
|---|---|
| withHasNext | Returns true if iterations has more rows |
| withNext | Returns the next row in the iteration |
| withClose | Closes any streams and releases system resources associated with the iterator. |
Once your project is set up, you can create a new class and implement the CustomFileGeneratorDefinition interface. The newly created class will be picked up by the Data Studio UI.
Note that it is recommended that you bundle one custom file generator per JAR.
To use the interfaces, classes and methods, you have to import the SDK into your class. Add an import statement below the package name to import all the SDK classes and methods:
import com.experian.datastudio.sdk.api.*;
import com.experian.datastudio.sdk.api.exporter.*;
Your new class should look something like this:
package com.experian.datastudio.exporter;

import com.experian.datastudio.sdk.api.*;
import com.experian.datastudio.sdk.api.exporter.*;

public class DemoFileGenerator implements CustomFileGeneratorDefinition{
}
All the SDK interfaces, classes and methods will now available.
Same as creating metadata for custom step
Use GeneratorConfig.Builder in configure method to configure your custom file generator.
Define the default file extension that the custom exporter exports.
.withDefaultFileExtension(".json")Define the label for default input node.
.withDefaultInputNodeLabel("Mylabel")By default, export step will always have one predefined input node. You can add additional input node:
.addAdditionalInputNode(INPUT_2)
.withLabel(INPUT_2)
.isRequired(true)
.next()Step properties for custom file generator is configurable through export dialog.
.addStepProperty(TAX_CUSTOM_CHOOSER)
.asCustomChooser()
.withChooserValues(List.of("0.1", "0.2", "0.3"))
.next().addStepProperty(TAX_CUSTOM_CHOOSER)
.asBoolean()
.next()Use GeneratorContext in the generate method to implement the logic of the custom file generator output context.
| Method | Description |
|---|---|
| getFirstInputRowCount | Returns the row count of first input node |
| getInputRowCounts | Returns the row count of a specific input node |
| getFirstInputValue | Returns value from first input node |
| getInputValue | Returns value from a specific input node |
| getChooserValue | Returns the value from a specific custom chooser |
| getDefaultInputContext | Returns the context of first input node |
| getAdditionalInputContext | Returns the context of a specific input node |
| write | Writes data to file context |
The example below shows that reading value from custom chooser and write it to output context.
@Override
public void generate(GeneratorContext context) {
    var value = context.getChooserValue(TAX_CUSTOM_CHOOSER, String.class);
    context.write("""
            {
                'taxRate': %s,
                'data': [
            """.formatted(value));
    context.write("]}")
};You can set up validation rules to provide step configuration level validation for the custom file generator.
Overrides validateStepConfiguration method and use the ValidationContext in the method to implement the logic of the validation rules. This method will return valid validation result by default if not overriden.
| Method | Description |
|---|---|
| getDefaultInputContext | Returns the context of default input node |
| getAdditionalInputContext | Returns the context of specified input node using ID |
| newValidationResult | Creates a ValidationResult |
| getChooserValue | Returns the value from a specific custom chooser |
| newValidResult | Creates a ValidationResult result |
ValidationResult is a record which consists of two fields, isValid and errorMessage .It is used to represent the validation result of the step configuration.
To enable Java's standard remote debugging feature:
-
Install Data Studio. Please contact us to get the latest version.
-
Go to the installation directory of Data Studio.
-
Find and edit
Aperture Data Studio Service 64bit.ini. You might need Administrator permission to edit this file if the installation is in "Program Files" folder. -
Alter the
Virtual Machine Parametersproperty.Virtual Machine Parameters=-Xms66:1000:16000P -Xmx66:1000:16000P -agentlib:jdwp=transport=dt_socket,server=y,suspend=n,address=5005
-
Open IntelliJ IDEA project containing the source code of your custom addon code.
-
Click the toolbar Edit Configurations.... This could also be found by going to the menu Run > Edit Configurations
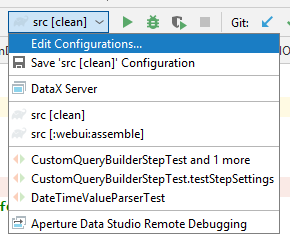
-
Click the
+button and add new Remote debugging: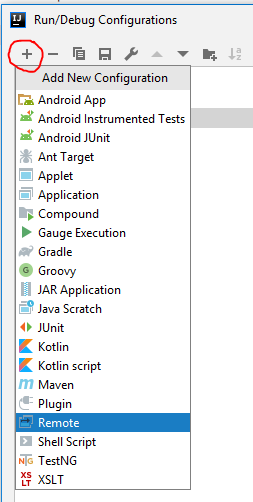
-
Fill in the Name with Aperture Data Studio Remote Debugging or any other name that you can recognize later.
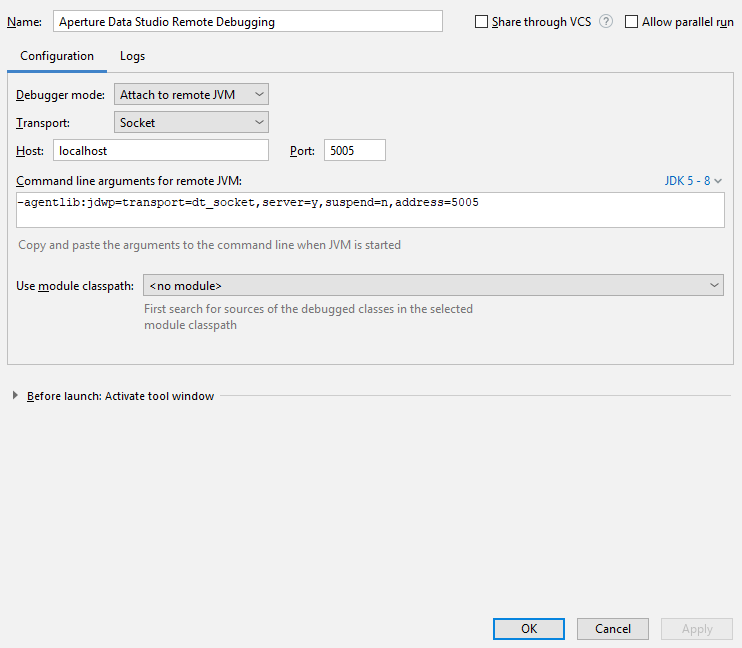
-
Click OK. This will create a new Debug configuration.
-
Place break points in your addons code where you want the debugger to stop.
-
Start debugging by clicking the Debug icon button, or menu Run > Debug... > Select Aperture Data Studio Remote Debugging configuration.

-
Restart Data Studio.
-
Now you can debug your custom addons code. Create a workflow containing your custom step and interact with UI depending on where you want to debug, e.g: If you want to debug processor, click Show step results.


NOTE: make sure -agentlib:jdwp=transport=dt_socket,server=y,suspend=n,address=5005 is removed in the production
environment.
- Data Studio SDK will pick up the latest version for any custom step which have multiple minor versions. For eg 1.1.0 and 1.2.0, hence v1.2.0 is the choosen one.
- Importing a dmx which using an older custom step version will be 'auto-upgraded' to the latest minor version of custom step in Data Studio.
- Data Studio SDK is still not able to pre-select which custom step version to use in a specified environment, space or workflow since there is no "Plugin Admin UI" to manage on this. However, Data Studio SDK will honor same custom step with different major versions as display below

Since version SDK-2.8.1, we have introduced Unified SDK API.
The custom steps created using Unified SDK API can run on three different DataStudio engines:
- Classic engine: engine used in classic on-premises Aperture Data Studio.
- Graph engine: engine used in distributed Aperture Data Studio.
- Realtime engine: engine used to run real-time workflow, a workflow that can process API request in real time.
| Name | Feature | Compatible SDK Version |
|---|---|---|
OneToOneDataUnifiedCustomStepDefinition |
Process one record at a time. | 2.8.1 |
Once your project is set up with SDK version 2.8.1 or above, you can create a new class and implement the OneToOneDataUnifiedCustomStepDefinition interface. The newly created class will be picked up by the Data Studio UI.
To use the interfaces, classes and methods in unified SDK API, you have to import the new unified SDK into your class. Add an import statement below the package name to import all the SDK classes and methods:
import com.experian.datastudio.sdk.unifiedapi.step.*;
import com.experian.datastudio.sdk.unifiedapi.step.configuration.*;
import com.experian.datastudio.sdk.unifiedapi.step.processor.*;
Your new class should look something like this:
package com.experian.unifiedsdk.demo;

import com.experian.datastudio.sdk.unifiedapi.step.*;
import com.experian.datastudio.sdk.unifiedapi.step.configuration.*;
import com.experian.datastudio.sdk.unifiedapi.step.processor.*;

public class DemoStep implements OneToOneDataUnifiedCustomStepDefinition {
}
All the Unified SDK interfaces, classes and methods will now be available.
Unified SDK API uses the same CustomTypeMetadataBuilder in createMetadata method to create metadata as in SDK v2.0. See: here.
Use UnifiedStepConfigurationBuilder in the createConfiguration method to configure your custom steps (e.g. nodes, step properties, column layouts) and ensure it displays correctly in the Data Studio UI.
Use UnifiedStepNodeBuilder in the withNodes method to add input and output nodes.
The OneToOneDataUnified SDK API only accepts one input node and one output node, and both nodes should be DATA nodes. Therefore, OneToOneData Unified SDK API cannot set node types or adding multiple nodes.
.withNodes(unifiedStepNodeBuilder -> unifiedStepNodeBuilder
        .addInputNode(inputNodeBuilder -> inputNodeBuilder
            .withId(INPUT_ID)
            .withLabel("Input Label")
            .build())
        .addOutputNode(outputNodeBuilder -> outputNodeBuilder
            .withId(OUTPUT_ID)
            .withName("Name")
            .build())
.build())OneToOneData Unified SDK API uses the same StepPropertiesBuilder in the withStepProperties method to configure the step properties as in classic SDK API. See Adding step properties.
OneToOneData Unified SDK API uses a similar way to determine the completeness of the step as in classic SDK API. See Configure isCompleteHandler.
OneToOneData Unified SDK API uses the same OutputLayoutBuilder in the withOutputLayouts method to configure the output columns layout as in classic SDK API. See Configure column layouts
Difference between OneToOneData Unified SDK API vs classic SDK API:
- OneToOneData Unified SDK
InputNodeBuilderinaddInputNode()doesn't support these methods:withType(NodeType nodeType)to set the type of input node. This can only be DATA node.withIsRequired(boolean required)to set whether the input node is mandatory. OneToOneData unified custom step can have one and only one input node.withLabelDisplayed(boolean labelDisplayed)to set whether the name of the preceding step is displayed on the current step.
- OneToOneData Unified SDK
OutputNodeBuilderinaddOutputNode()doesn't support these methods:withType(NodeType nodeType)to set the type of output node. This can only be DATA node.
- Configuration methods like
withNodes(),withStepProperties(),withOutputLayouts(),withStepSetting(),withDefaultOptions(),withIsCompleteHandler(),withIcon()in OneToOneData Unified SDK all return to the sameUnifiedStepConfigurationBuilder, allowing to declare the same configuration method multiple times, but it is discouraged to do so.
Use ProcessingContext and InputRecord in the process method to implement the logic of the custom step output.
InputRecord contains the step's input of a single row.
| Method | Description |
|---|---|
| getColumnCount | Get the total number of columns |
| getColumnSchemas | Get the ColumnSchema |
| getValue | Get value of a column |
| getValues | Get values of specified columns |
| getRowNumber | Get the current record row number starting at 1 |
ColumnSchema is the columns schema of an input.
| Method | Description |
|---|---|
| getColumns | Get all columns metadata (id, name, tags) |
| indexOfColumnName | Get column index based on the column's name |
| indexOfColumn | Get a column index based on the column's metadata |
| columnsCount | Get the total number of columns |
ProcessingContext
| Method | Description |
|---|---|
| getStepPropertyValue | Get the step property value |
| getColumnFromChooserValues | Get the columns selected by user in a column chooser |
| getStepSettingFieldValueAsString | Get the specified step setting field value as a string |
| isInteractive | Get the interactive flag of the execution. Interactive is a flag that set to true when the user views the output of a step on the Data Studio Grid (UI). It is set to false when running the whole workflow as a Job |
| getColumns | Get all the columns from the input |
| getColumnById | Get the specified column from the input using column Id |
| getColumnsByTag | Get list of column from the input with the specified tag |
| getOutputBuilder | Get the builder class for output record OutputRecordBuilder |
You define how to generate the cell value of an output column in process method and use OutputRecordBuilder, which can be acquired by calling getOutputBuilder method, with ProcessingContext to set the values of a column in the output.
The example below shows how to append "-processed" text to the value from the first input column, and then return it in MY_OUTPUT_COLUMN.
The example starts by getting the first column metadata using ProcessingContext, then appends the value of the InputRecord of this column with "-processed" (if the column exists), then sets the processed value in a new column using OutputRecordBuilder, and lastly returns an OutputRecord by calling .build() of the OutputRecordBuilder;
@Override
public OutputRecord process(ProcessingContext context, InputRecord input) {
   final Optional<Column> column = context.getColumns().stream().findFirst();
   final OutputRecordBuilder outputBuilder = context.getOutputBuilder();
           column.ifPresent(inputColumn -> outputBuilder
                       .setValue(MY_OUTPUT_COLUMN, ()->input.getValue(inputColumn.getName()).toString()+"-processed")
           );
           return outputBuilder.build();
}-
As OneToOneData Unified SDK only accepts one input node and output node, we no longer needs to worry about specifying output id in
forOutputNode(), or getting the correct input context.InputRecordcontains the step's input of a single row and has convenience method togetValue()orgetValues()in that row.OutputRecordBuildercan set the value supplier for a single cell usingsetValue().
-
Getting step property value
Actions OneToOneData Unified SDK API Classic SDK API Get step property values uses getStepPropertyValueinProcessingContext, allow to specify value type and default valueuses getStepPropertyValueinStepProcessorContextGet column chooser values uses getColumnFromChooserValuesinProcessingContextto get column metadata (Id, name tags)uses getColumnFromChooserValuesinStepProcessorContextto get column metadata and value -
There is no cache or index (preprocessing) mechanism for OneToOneData Unified SDK API.
-
Cannot update progress bar using OneToOneData Unified SDK API.