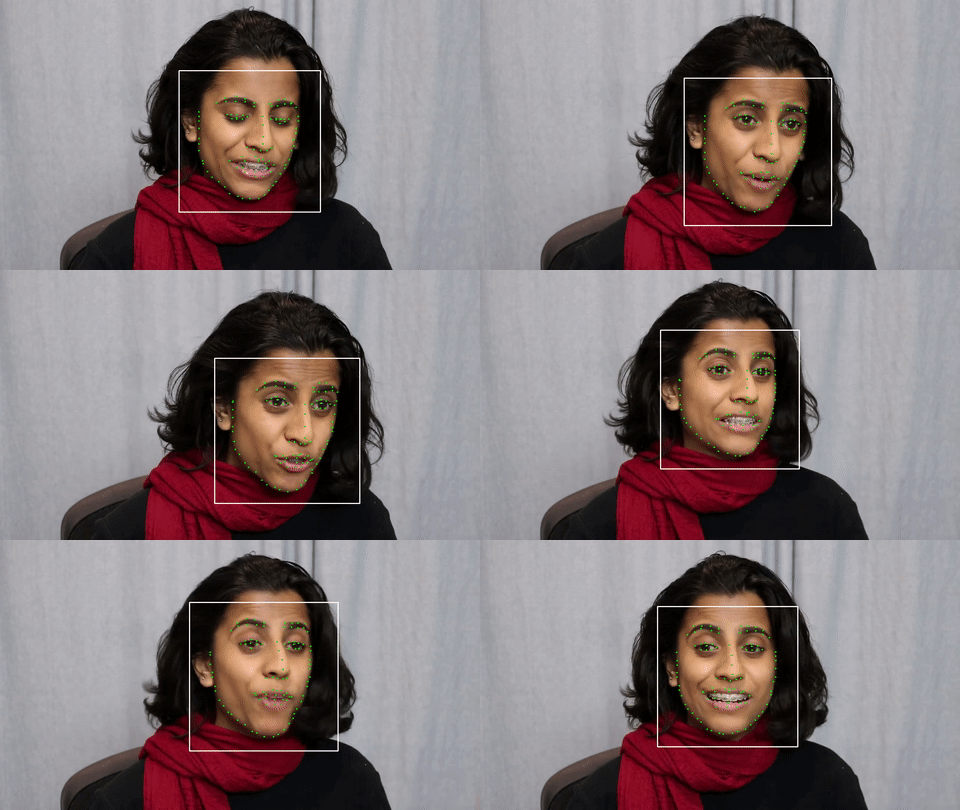
facial-landmark-detection-hrnet
A TensorFlow implementation of HRNet for facial landmark detection.
Watch this demo video: HRNet Facial Landmark Detection (bilibili).
Features
- Support multiple public dataset: WFLW, IBUG, etc.
- Advanced model architecture: HRNet v2
- Data augmentation: randomly scale/rotate/flip
- Model optimization: quantization, pruning
Getting Started
These instructions will get you a copy of the project up and running on your local machine for development and testing purposes.
Prerequisites
Installing
Get the source code for training
# From your favorite development directory
git clone --recursive https://github.com/yinguobing/facial-landmark-detection-hrnet.git
Generate the training data
There are multiple public facial mark datasets available which can be used to generate training heatmaps we need. For this training process the images will be augmented. The first step is transforming the dataset into a more uniform distribution that is easier to process. You can do this yourself or, use this repo:
# From your favorite development directory
git clone https://github.com/yinguobing/face-mesh-generator.git

# Checkout the desired branch
git checkout features/export_for_mark_regression
Use the module generate_mesh_dataset.py to generate training data. Popular public datasets like IBUG, 300-W, WFLW are supported. Checkout the full list here: facial-landmark-dataset.
Training
Deep neural network training can be complicated as you have to make sure everything is ready like datasets, checkpoints, logs, etc. But do not worry. Following these steps you should be fine.
Setup the model.
In the module train.py, setup your model's name and the number of marks.
# What is the model's name?
name = "hrnetv2"

# How many marks are there for a single face sample?
number_marks = 98
Set the training and testing datasets
These files do not change frequently so set them in the source code. Take WFLW as an example.
# Training data.
train_files_dir = "/path/to/wflw_train"

# Testing data.
test_files_dir = "/path/to/wflw_test"
Set the validation datasets
The loss value from this dataset will be used to decide which checkpoint should be preserved. Set None if no files available. Then about 512 of the training files will be used as validation samples.
# Validation data.
val_files_dir = None
Provide a sanity check image
This sample image will be logged into TensorBoard with detected marks drawing on it. In this way you can check the model's behavior visually during training.
sample_image = "docs/face.jpg"Start training
Set the hyper parameters in the command line.
python3 train.py --epochs=80 --batch_size=32Training checkpoints can be found in directory checkpoints. Before training started, this directory will be checked and the model will be restored if any checkpoint is available. Only the best model (smallest validation loss) will be saved.
Resume training
If training was interrupted, resume it by providing --initial_epoch argument.
python3 train.py --epochs=80 --initial_epoch=61Monitor the training process
Use TensorBoard. The log and profiling files are in directory logs
tensorboard --logdir /path/to/facial-landmark-detection-hrnet/logs
Training speedup
You can download this checkpoint file to speedup the training process.
URL: https://pan.baidu.com/s/1XDp6hDx_aXYTV5_OF1cc6g
Access code: b3vm
Evaluation
A quick evaluation on validation datasets will be performed automatically after training. For a full evaluation, please run the evaluate.py file. The NME value will be printed after evaluation.
python3 evaluate.py
Export
Even though the model wights are saved in the checkpoint, it is better to save the entire model so you won't need the source code to restore it. This is useful for inference and model optimization later.
For cloud/PC applications
Exported model will be saved in saved_model format in directory exported. You can restore the model with Keras directly. Loading the model in OpenCV is also supported.
python3 train.py --export_only=TrueFor Android phones, embedded and IoT devices
TensorFlow lite and TensorFlow Model Optimization Toolkit will help you to get a optimized model for these applications. Please follow the instructions of the later section Optimization.
For iPhone
Apple has developed a conversion tool named coremltools which can convert and quantize the TensorFlow model into the native model format supported and accelrated by iPhone's Neural Engine.
# Install the package
pip install --upgrade coremltools

# Do the conversion.
python3 coreml_conversion.py
Inference
Check out module predict.py for details.
A pre-trained model is provided in case you want to try it in no time, or do not have adequate equipments to train it yourself.
URL: https://pan.baidu.com/s/1EQsB0LnSkfvoNjMvkFV5dQ
Access code: qg5e
Optimization
Optimize the model so it can run on mobile, embedded, and IoT devices. TensorFlow supports post-training quantization, quantization aware training, pruning, and clustering.
Post training quantization
There are multiple means for post training quantization: dynamic range, integer only, float16. To quantize the model, run:
python3 quantization.pyQuantized tflite file will be find in the optimized directory.
Pruning
Model pruning could dramatically reduce the model size while minimize the side effects on model accuracy. There is a demo video showing the performance of a pruned model with 80% of weights pruned (set to zero): TensorFlow model pruning (bilibili)
To prune the model in this repo, run:
python3 pruning.py
Pruned model file will be find in the optimized directory.
Quantization aware training
Due to the conflict between pruning and quantization aware training, please checkout the other branch for details.
git checkout features/quantization-aware-training
python3 train.py --quantization=True
Authors
Yin Guobing (尹国冰) - yinguobing
License
Acknowledgments
The HRNet authors and the dataset authors who made their work public.


