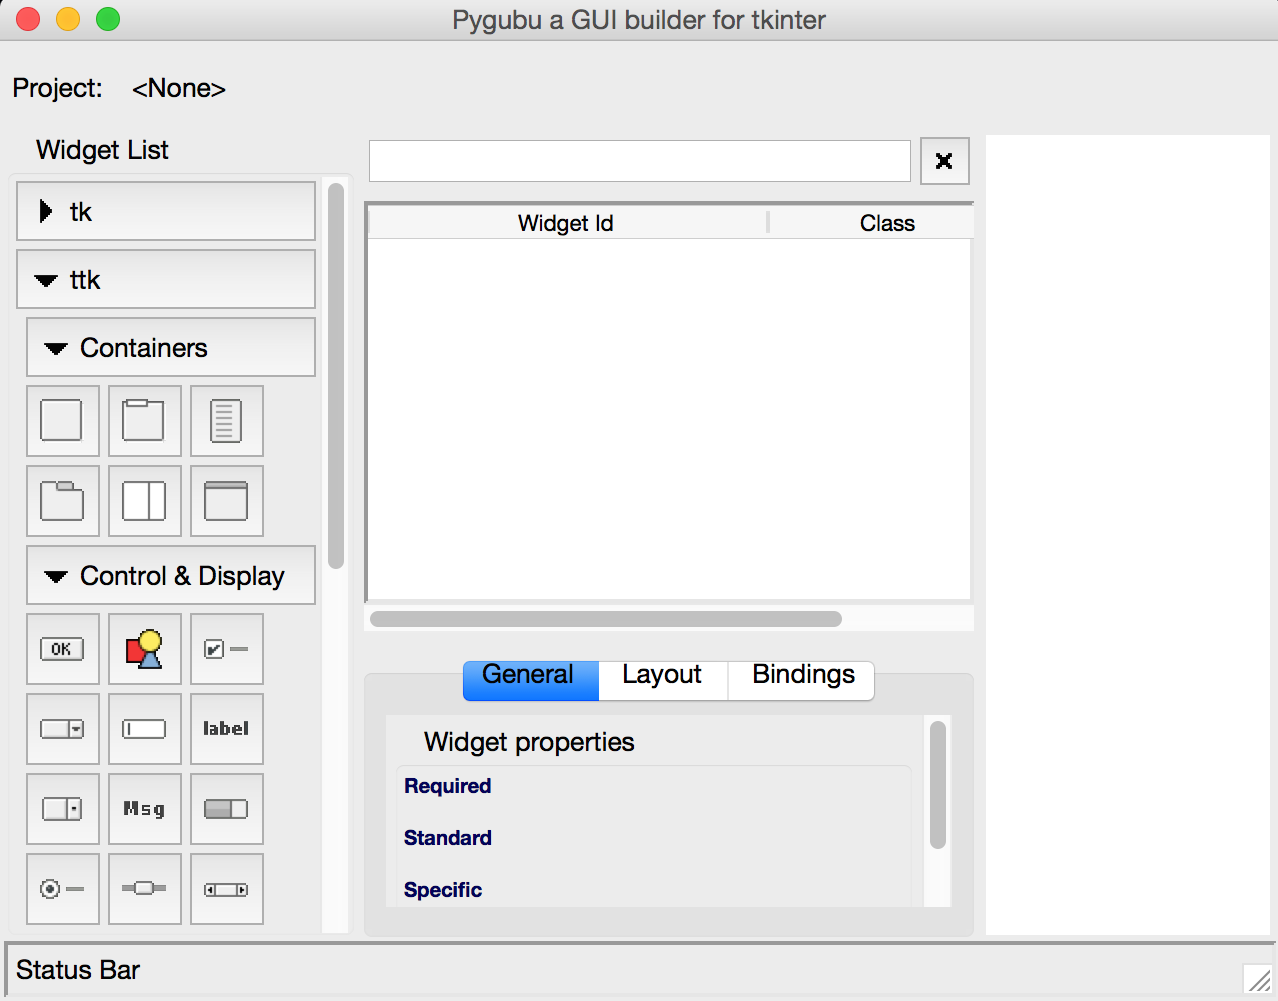
Pygubu is a RAD tool to enable quick and easy development of user interfaces for the Python's tkinter module.
The user interfaces designed are saved as XML files, and, by using the pygubu builder, these can be loaded by applications dynamically as needed.
Pygubu is inspired by Glade.
Pygubu requires Python >= 2.7 (Tested only in Python 2.7.3 and 3.2.3 with tk8.5).
You can install pygubu using:
Download and extract the tarball. Open a console in the extraction path and execute:
python setup.py install
pip install pygubu
Note that if you are using a Python 3 version, you might want to use its pip tool, for example:
pip3.5 install pygubu
In the previous case, I am using the pip tool of Python 3.5.
To check that the installation was successful, you can try to import pygubu (for example from the IDLE)
import pygubu
If you have no ImportError, then your installation was successful.
Type on the terminal one of the following commands depending on your system.
pygubu-designer
C:\Python34\Scripts\pygubu-designer.exe
Where C:\Python34 is the path to your Python installation directory.
Note: for versions prior to 0.9.8 the executable script was named pygubu-designer.bat
After that the pygubu-designer application should appear:
Now, you can start creating your tkinter application using the widgets that you find in the left panel called Widget List.
After you finished creating your UI definition, save it to a .ui file by going to the top menu File > Save.
The following is a UI definition example called helloworld.ui created using pygubu:
<?xml version='1.0' encoding='utf-8'?>
<interface>
  <object class="ttk.Frame" id="mainwindow">
    <property name="height">200</property>
    <property name="padding">20</property>
    <property name="width">200</property>
    <layout>
      <property name="column">0</property>
      <property name="propagate">True</property>
      <property name="row">0</property>
      <property name="sticky">nesw</property>
    </layout>
    <child>
      <object class="ttk.Label" id="label1">
        <property name="anchor">center</property>
        <property name="font">Helvetica 26</property>
        <property name="foreground">#0000b8</property>
        <property name="text" translatable="yes">Hello World !</property>
        <layout>
          <property name="column">0</property>
          <property name="propagate">True</property>
          <property name="row">0</property>
        </layout>
      </object>
    </child>
  </object>
  </interface>
Then, you should create your application script as shown below:
#test.py
try:
    import tkinter as tk  # for python 3
except:
    import Tkinter as tk  # for python 2
import pygubu


class Application:
    def __init__(self, master):

        #1: Create a builder
        self.builder = builder = pygubu.Builder()

        #2: Load an ui file
        builder.add_from_file('helloworld.ui')

        #3: Create the widget using a master as parent
        self.mainwindow = builder.get_object('mainwindow', master)


if __name__ == '__main__':
    root = tk.Tk()
    app = Application(root)
    root.mainloop()
Note that instead of helloworld.ui in the following line:
builder.add_from_file('helloworld.ui')You should insert the filename (or path) of your just saved UI definition.
Note also that instead of 'mainwindow' in the following line:
self.mainwindow = builder.get_object('mainwindow', master)You should have the name of your main widget (the parent of all widgets), otherwise you will get an error similar to the following:
Exception: Widget not defined.
See this issue for more information.
Visit the pygubu wiki for more documentation.
The following are some good tkinter (and tk) references:
- TkDocs
- Graphical User Interfaces with Tk
- Tkinter 8.5 reference: a GUI for Python
- An Introduction to Tkinter
- Tcl/Tk 8.5 Manual
You can also see the examples directory or watch this introductory video tutorial.
See the list of changes here.
