In this lesson you'll look at a very simple web application using a framework called Flask.
- Recall the client-server model and request-response cycle
- Identify the key functionality of a web server
- Practice running a Flask web server on your local computer
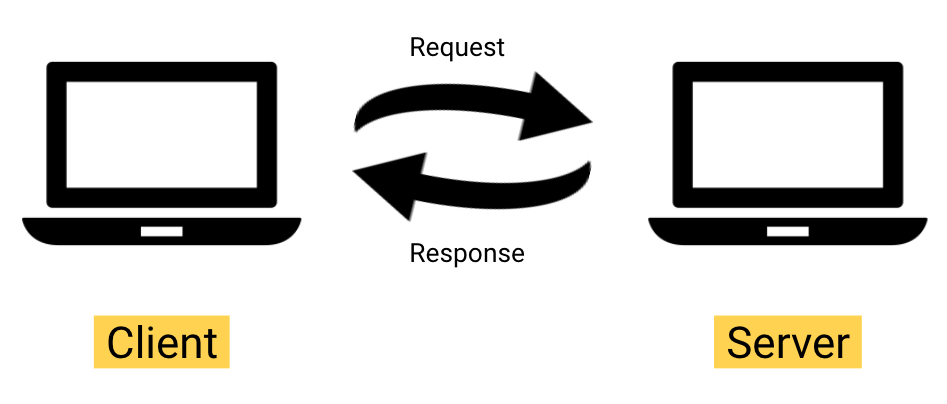
Let's review some of the fundamentals of web architecture.
(Icons made by Freepik from www.flaticon.com)
The client makes the request and waits for the response. Probably the most familiar HTTP client is a web browser. We have also previously used the requests library to make a Python code client.
The server runs constantly, waiting for requests, and then responds to requests when it receives them. Most of the time as a data scientist you will be interacting with a server that someone else is managing. However in this lesson we'll learn how to run a server of our own!
In this lesson we're specifically looking at a web server called Flask. Not all servers are web servers (e.g. database servers are a different kind of server), but web servers are a particularly valuable tool because they allow resources and services to be accessed via the Internet.
Web servers accept requests and serve responses with an HTTP protocol. This protocol means that the client and server can operate using totally different languages, and easily interact so long as they use the right HTTP methods, paths, headers, and responses.
In this example, we'll set up:
- HTTP
GETmethod- Used by clients to request to read some form of data from the server
- Corresponds to the
.get()method in therequestslibrary
/path- Essentially asking for the "home page" of the website
- No particular headers
- A string response
For the rest of this lesson we'll be creating a very basic Flask app. Clone this repository and follow along on your local computer, using your preferred local code editor (e.g. VS Code) and your terminal application.
Let's make a new conda environment for developing our Flask app.
Run this code in the terminal:
conda create --name flask-env python=3.8.12 pip
conda activate flask-env
pip install Flask==2.0.3
Test whether it worked by running this command in the terminal:
which flaskIt should print out a path that includes flask-env. If it doesn't, try repeatedly running conda deactivate until there is no current active conda environment, then conda activate flask-env again.
Now, run the following commands in the terminal, from the root of this repository:
export FLASK_ENV=development
env FLASK_APP=app.py flask run
This should produce an output that looks something like:
 * Serving Flask app 'app.py' (lazy loading)
 * Environment: development
 * Debug mode: on
 * Running on http://127.0.0.1:5000/ (Press CTRL+C to quit)
 * Restarting with stat
 * Debugger is active!
 * Debugger PIN: <PIN>
If this works, your server is now up and running!
If you do not see an output like the one above, here are some things to investigate:
- If you get
Error: Could not import 'app', make sure that you are running the above code from the root of this repository.app.pyneeds to be in the same directory where you are running theflask runcommand. Usecduntil you are in the correct directory, then try again. - If you get an
OSErrorsuch asAddress already in useorAn attempt was made to access a socket in a way forbidden by its access permissions, that means that there is another program already running on the default port (5000).- If you think there is a chance that the program using port 5000 is another Flask app, but you don't know where that terminal window is, go through the instructions at the bottom of this page under "What If I Accidentally Closed the Terminal Window?"
- If this is the first time you are running Flask and there is still something using port 5000 (e.g. macOS Monterey appears to use this port for AirPlay), you can tell Flask to use a different port instead. For example, instead of
env FLASK_APP=app.py flask runyou could runenv FLASK_APP=app.py flask run --port 5001. Just make sure you replace5000with5001in any of the following examples.
Like Jupyter Notebook, this server needs to stay running in the terminal for the application to work. If you want to do something else in the terminal, you will need to open a new window/tab, or shut down the server with control-C.
DO NOT just close the terminal window when you are done running the Flask app. It will keep running in the background and cause problems unless you locate the process ID and terminate it. Always make sure you use control-C.
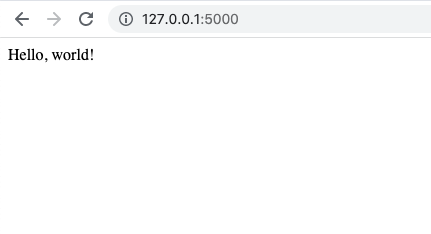
Unlike Jupyter notebook, this doesn't open in the browser automatically. You need to copy the URL http://127.0.0.1:5000/ and paste it into a web browser address bar. Once you do that, you should see this:
Now, go ahead and shut down the Flask server by typing control-C in the terminal.
(If you accidentally closed the terminal window, there are troubleshooting steps at the bottom of this page under "What If I Accidentally Closed the Terminal Window?")
This line
env FLASK_APP=app.py flask runmeans that the Flask source code is located in a file called app.py. Open up that file in your favorite text editor.
app.py looks like this:
# import flask here
from flask import Flask

# create new flask app here
app = Flask(__name__)

# define routes for your new flask app
@app.route('/', methods=['GET'])
def index():
    return 'Hello, world!'
That's it, that's the entire web server code! The Flask library does a lot of work for us.
Let's break down each line of app.py.
First, we imported the Flask class from the flask library:
from flask import FlaskThen we create a new instance of Flask, called app:
app = Flask(__name__)You can find more documentation here, including an explanation for the __name__ parameter.
@app.route('/', methods=['GET'])
def index():
    return 'Hello, world!'
@app.route is a decorator that adds the function immediately below it as a route on the Flask app. This particular route uses the HTTP GET method and the / path.
The name of the function, index(), is conventional for the home page (/ path), but it can be anything you want it to be. The important part is the content of the function.
In this case, it simply returns a string. In a more complex Flask app, this might take in additional information from the body of the request or the URL parameters, and would typically return JSON or HTML rather than simply a string like 'Hello, world!'.
Practice defining a few more routes in app.py.
-
Define a route
GET '/welcome'which shows the text'Welcome to an amazing Flask App!' -
Define a route
GET '/goodbye'which shows the text'Thanks for looking around. Come back again soon!'
Test these out by running the app again:
env FLASK_APP=app.py flask runThen go to the browser and try:
http://127.0.0.1:5000/welcome
and
http://127.0.0.1:5000/goodbye
Make sure you shut down the Flask server by typing control-C in the terminal window where it is running.
It's ok! You will still be able to shut down the Flask server, it will just take more steps. First you need to identify the process ID of your Flask server, then run a command to terminate that process.
For these examples we will assume that you did not specify a port when you started the Flask server, so it is running on port 5000. If you used a different port (e.g. 5001 due to macOS Monterey) then make sure you replace the port numbers when following these instructions.
On Mac or Linux, you should be able to use the lsof command. lsof is short for "list open files". Run this in the terminal:
lsof -P -i :5000This will produce an output like this:
COMMAND   PID     USER   FD  TYPE             DEVICE SIZE/OFF NODE NAME
Python  30786 XXXXXXXX   3u  IPv4 0xXXXXXXXXXXXXXXXX      0t0  TCP localhost:5000 (LISTEN)
Python  30786 XXXXXXXX   4u  IPv4 0xXXXXXXXXXXXXXXXX      0t0  TCP localhost:5000 (LISTEN)
The process ID is the value in the PID column of that output.
On Windows, you should be able to use the netstat command. netstat is short for "network statistics". Run this in the terminal:
netstat -ano | findstr 5000This will produce an output like this:
Proto  Local Address Foreign Address     State   PID
TCP   127.0.0.1:5000       0.0.0.0:0 LISTENING 30786
In both of the above examples, the process ID is 30786. Make sure you replace this with the actual process ID that you identified!
You can use the kill command to terminate the process in the command line on Mac or Linux.
For example,
kill -9 30786You can also use the "Activity Monitor" application on Mac if you are more comfortable with a graphical user interface. Just find the process with the relevant ID, click on the process, and click the button with the X.
You can use the taskkill command to terminate the process in the command line on Windows.
For example,
taskkill /F /PID 30786
You can also use the "Task Manager" application on Windows if you are more comfortable with a graphical user interface. If you don't immediately see the process you're looking for, try clicking "More details" to see the full list. Select the process you want to terminate and then click "End task".
Now if you re-run the command checking port 5000 (either lsof or netstat), no processes should be displayed. You should now be able to execute the flask run command without getting an OSError.
In this lesson you reviewed the client-server model and request-response cycle, and saw a specific application of it using a basic Flask app.

