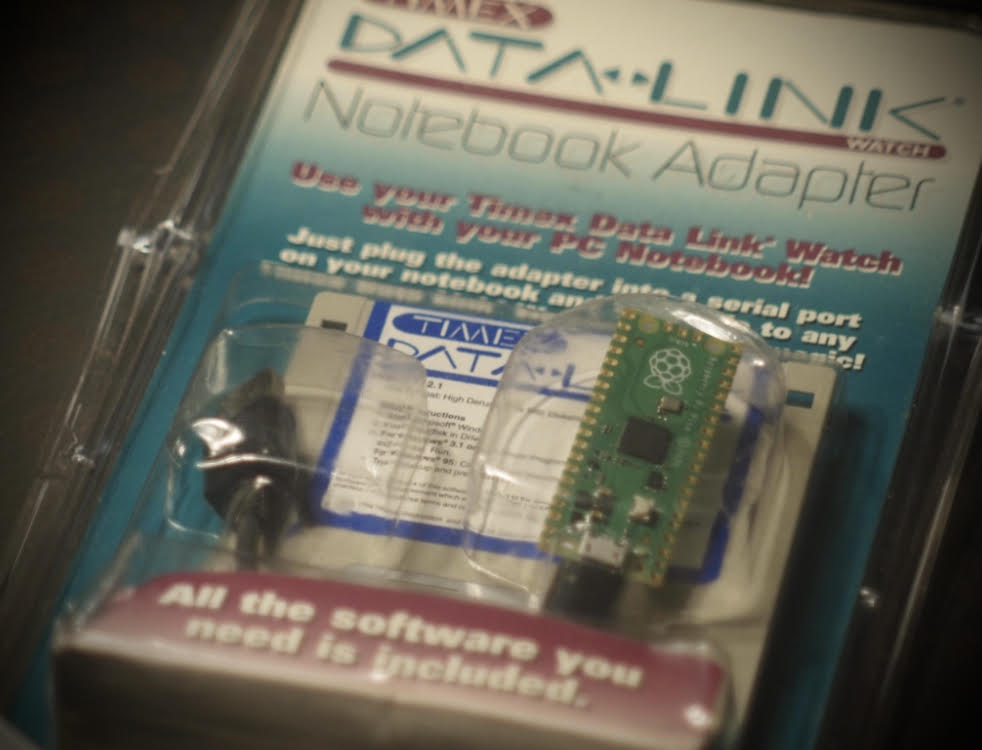
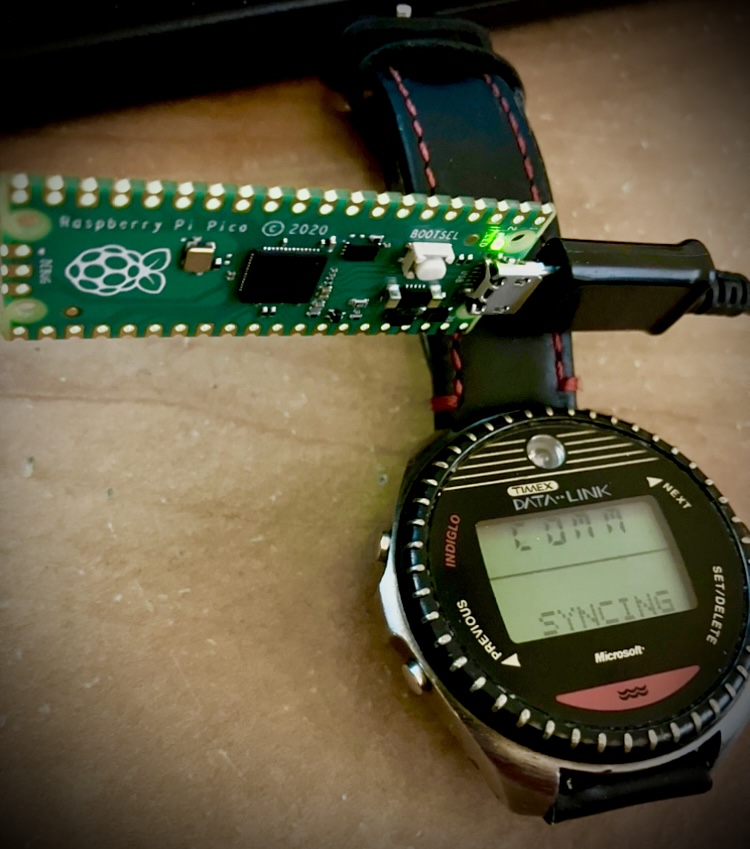
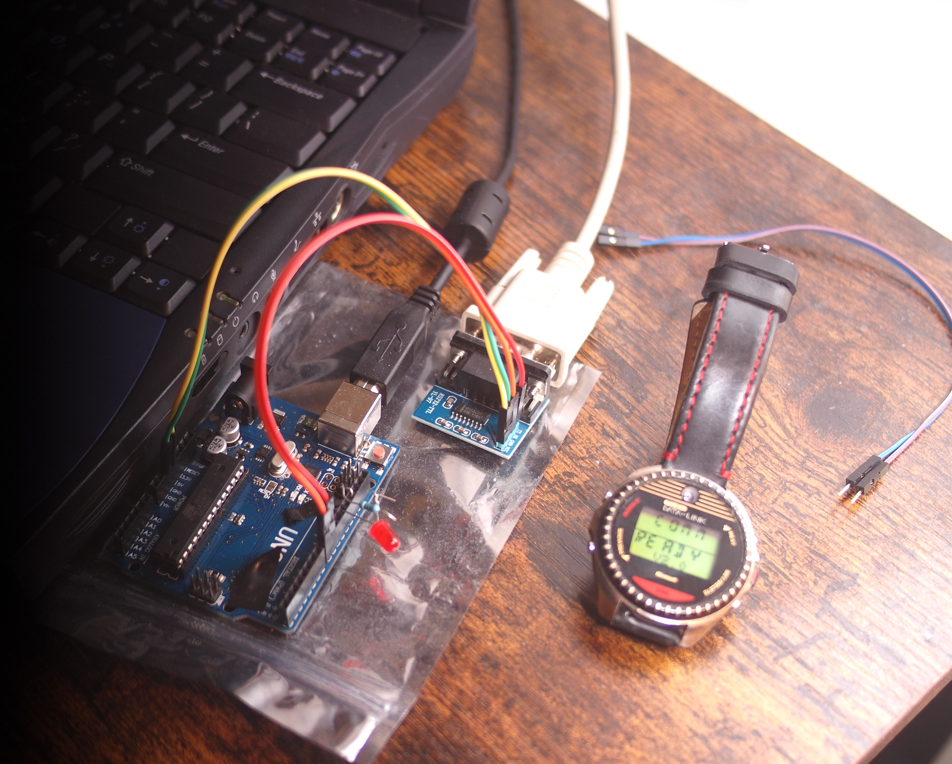
Timex Datalink Notebook Adapter Emulator for the Raspberry Pi Pico and Arudino Uno
- This is a modern microcontroller based replacement for the Notebook Adapter kit used by the Timex Datalink watch.
- This, along with the original Notebook Adapter, eliminates the need for syncing the watch with an old CRT monitor.
- You can use either a new Windows 10 machine or the original hardware, depending on which microcontroller you pick.
- It's compatible with the original software (and PC hardware), or other third party software that can communicate with an original Notebook adapter.
- Use just as you would with the official Datalink Notebook Adapter, following in-app directions (choosing to sync with the Notebook adapter).
- Note: You may need to shield the watch sensor from interference, like modern LED lightbulbs or even monitors.
- Instructions have been updated for using this "directly" in modern Windows with winevdm.
- A new simpler way for modern Windows users to sync their watch with just a Raspberry Pi Pico.
- No hardware tinkering required unless you are using the Pico W, which requires an external LED.
- You can run this "directly" on a modern Windows OS (like Windows 10) with winevdm.
- If you prefer, you can use a virtual machine running a legacy Windows version.
- You can also 3D print a case for this version.
- The original project to directly replace the serial notebook adapter.
- This is primarily intended for use with legacy hardware running older versions of Windows.
- If you have a serial port or a USB to serial adapter, you could also use this version with a Virtual Machine or even modern Windows with winevdm.
- Some assembly required.
- Original model of Raspberry Pi Pico if you want to just use the onboard LED. (Pico W users must use external LED, see below).
- USB cable (with data line)
- Download of DIY_Datalink_Pico.uf2
- Either winevdm on your modern Windows OS or a Legacy Windows Virtual Machine (tested with Windows 98 SE in VMWare Workstation 16)
- Timex Datalink watch (tested with Datalink 150)
- The original Timex Datalink softare (2.1d preferred and tested)
- No other hardware requirements for the original Pico, as it uses the built-in LED.
- Note: External LED on GPIO pin 18 connected to 1k resistor on GND is required for Pico W, but is optional (and may work better) on the original Pico. The internal LED hardware changed from a GPIO pin to go through the Wi-Fi chip on the Pico W. Because of this, it does not support the low-latency blinking that is required for this project.
- Connect the Raspberry Pi Pico to the host PC while holding down the Pico's reset button. This should mount the Pico as a USB drive.
- Drag and drop DIY_Datalink_Pico.uf2 onto the Pico's root folder, it should immediatley unmount itself and restart as a USB serial device.
- Drag and drop the installer (SETUP.EXE or TDL21D.EXE) for Timex Datalink into winevdm's otvdmw.exe and complete the installation.
- Drag and drop the TIMEXDL.EXE you previously installed (example: to C:\DATALINK) into winevdm's otvdmw.exe.
- Use the Timex Datalink software as normal, but make sure you choose the Notebook Adapter during the tutorial/setup.
If you receive an error about VBRUN300.DLL missing, you may need to manually extract the file from the installer using something like 7-zip.
- Right click on TDL21D.EXE and under 7-zip > click Open archive.
- Right click on SETUP.EXE and click Open Inside.
- Drag and drop VBRUN300.DLL into C:\DATALINK
- Try again
If you only have SETUP.EXE (i.e. the floppy version), you can just right click on it, and under 7-zip click Open archive, then drag and drop VBRUN300.DLL into C:\DATALINK and try again.
- This assumes you have a working Windows 98 virtual machine setup in VMware Workstation. You should also be able to use Windows 95.
- Determine which COM port is for the Pico on the physical/host machine. Example: COM7 (Unsure? Is your host machine running Windows 10? Watch Windows 10's Device Manager before and after you've unplugged the device. Note the differences).
- If your Windows 98 virtual machine is already powered on, shut down the virtual machine.
- Add a virtual serial port via Player > Manage > Virtual Machine Settings or right click on the Windows 98 virtual machine.
- Click "Add" (in the bottom left hand corner), select and add a Serial Port.
- Set the Serial Port to use the Physical Serial Port you determined earlier. Example: COM7
- Note that at no point during the process should you need to physically unplug the Pico. If you have, you may need to start over.
- Ensure "Connected" is unchecked in VMware Workstation.
- Ensure "Connect at power on" is unchecked.
- Start the Windows 98 Virtual Machine.
- Open the Timex software inside Windows 98 (make sure you choose to output to the Notebook Adapter).
- Intentionally fail the first device check with a sync or test.
- Go to Player > Manage > Virtual Machine Settings in VMware Workstation.
- Select the virual serial port you added earlier.
- Click "Connected" to enable it.
- Retry the Timex software sync.
- Timex software should now recognize your device.
- You should also see the LED blinking on your Pico.
- Place the watch 1.5 inches away from the LED. Be sure to shield the watch from external light. Example: Try using a toilet paper tube.
- If your watch is set to sync mode, you should hear beeps from the watch!
VMware instructions originally provided by MuddledBox. Thank you!
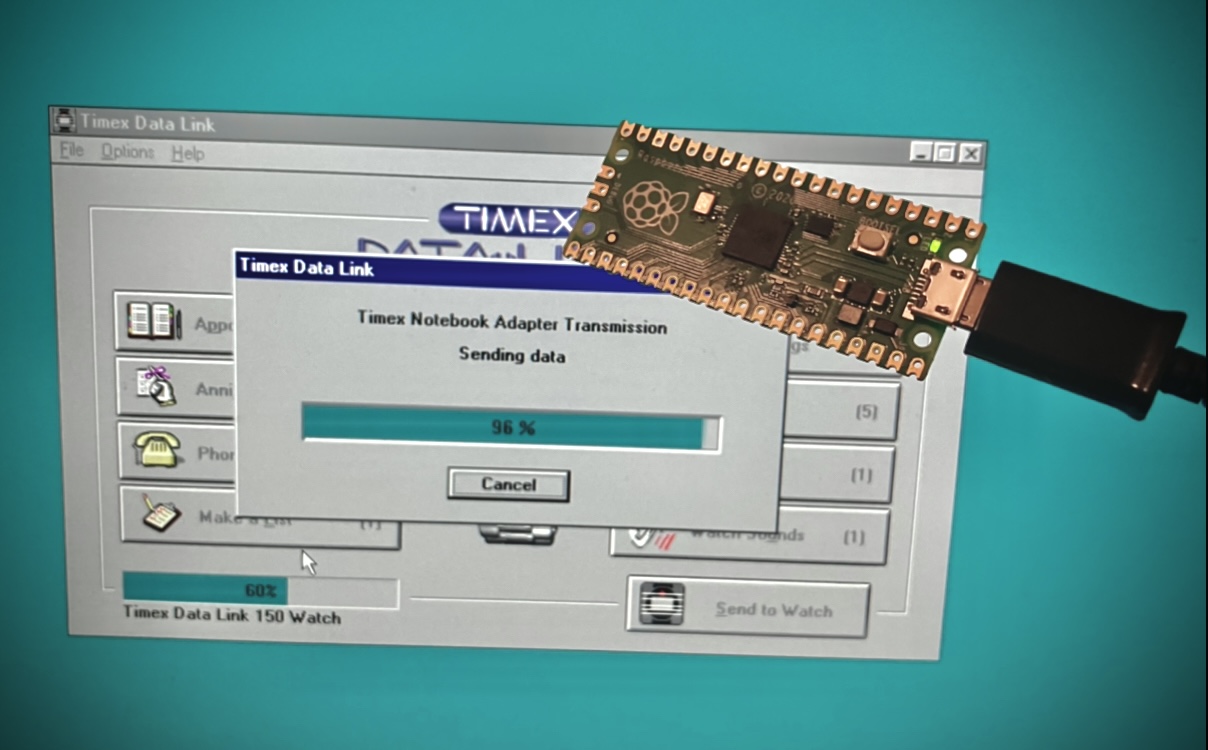
If everything is correct, you should see a blinking LED light on the Pico when syncing.
- Shilbo has designed and printed a case that not only holds the watch and Pico at the right distance, but also shields the light from interference from modern LED lighting!
- Arduino Uno (this should be compatible with other Arduino boards or similar microcontrollers, but it's only been tested on an Uno R3)
- Arduino software to upload the .ino file to an Arduino Uno
- Software libraries for Arduino (see below)
- RS232 TTL hat (I used Anmbest MAX3232 3.3V to 5V DB9 Male RS232 on Amazon)
- Red LED (with 1k resistor on GND between LED's ground wire) Note: You may need to try a clear LED if red doesn't work.
- 4-6 short wires with Dupont connectors that are male on one end, female on the other
- Null modem cable to connect TTL adapter to PC
- Windows 9x PC or virtual machine with serial port and Timex Datalink software installed (verified with 2.1d). Windows 3.x or even Wine may also work, but are untested.
- Timex Datalink watch (tested with Datalink 150)
- Optional: USB to serial adapter for use with a virtual machine. It doesn't have to involve a DB9 connector, you can use a USB to TTL adapter directly without TTL hat. But you'll need additional Dupont wires with male on both ends.
The links above are specific to the US, and may not be available internationally. Even for US shoppers, the links will likely be inaccurate over time as things go out of stock. I recommend using Adafruit and Aliexpress for alternate sources that ship worldwide. If you can, try to find the same products I've recommended, as they have been tested with the project.
This currently requires three Arduino libraries, add them with the Library Manager in the Arduino software.
- AltSoftSerial (tested with version 1.4.0)
- DigitalIO (tested with version 1.0.0)
- SafeString (for millisDelay, tested with version 4.1.15)
Connect the Arduino Uno to RS232 TTL adapter using wires with Dupont connectors. Add an LED with 1k resistor. Power the Arduino Uno via USB. Connect null modem cable from the PC to the TTL adapter.
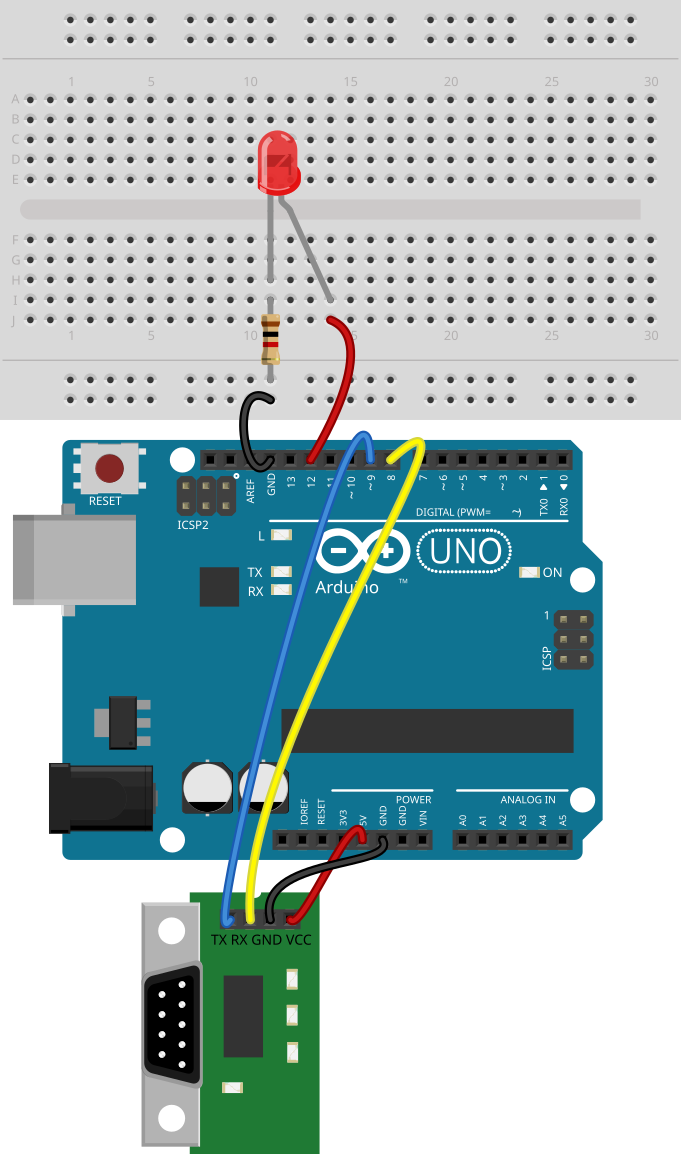
- Connect pin 9 on the Arduino Uno to TX on the TTL adapter (Note: RX and TX labels may be swapped on some TTL adapters)
- Connect pin 8 on the Arduino Uno to RX on the TTL adapter (If the software isnt seeing the adapter: try swapping RX and TX)
- Connect 5V on the Arduino Uno to VCC on the TTL adapter (Warning: some TTL adapters may accept or even require connecting 3V instead)
- Connect any GND on the Arduino Uno to GND on to serialthe TTL directlyadapter
- Connect pin 12 on the Arduino, Uno to the postive/longer leg on the red LED
- Connect any GND on the Arduino Uno to a 1k resistor and other end of resistor to the negative/short end on the red LED (you can just twist these together in a pinch)
- Connect USB type B to power source (does not currently use USB for data/communication)
- Connect null modem cable between TTL adapter and PC
- If you're using a virtual machine, pass through the COM port to your VM. It's better not to pass through the USB to serial device directly. This is verified to work in VMWare Workstation.
- If the software isn't seeing the adapter, try swapping RX and TX. You should get a blink from the LED when the software is trying to send.
- Sometimes the Dupont connectors won't make a good connection. You might need to bend the male connectors a little to make better contact. Check with a multimeter or continuity tester to be sure.
- Know that while they look the same, null modem cables are different from serial cables. You may need to adapt a serial cable with a null modem adapter, or just try a different set of cables.
- When sending the sketch to the Arduino, check for errors. You should see an "Done uploading" message if everything went smoothly.
- If you're ever having issues, try using a terminal program like PuTTy (version 0.61 works in Win9x) to check for signs of life. When typing x it should echo x, if you type ? it should return a version number.
- If your software doesn't like the adapter, make sure you're using the final version, 2.1d. The earliest versions don't support the adapter at all.
- Antti Huhtala
- excsniper on the Arduino Discord 🦆
- Selzby and leandromarceddu on the unofficial Pico Discord for their hints and encouragement
- PhiLho on a Processing.org forum post for their bitwise info
- Shilbo for providing a 3D printable case for the Pico version
- MuddledBox for providing step-by-step instructions in VMware Workstation
I am not a professional programmer. This is my first Github project. Please be kind. 😬
Timex, Datalink, and DATA LINK are the registered trademarks of Timex Corporation. This project is not associated with or sponsored by Timex.
