Foivos Paraperas Papantoniou Alexandros Lattas Stylianos Moschoglou
Jiankang Deng Bernhard Kainz Stefanos Zafeiriou
Imperial College London, UK
This is the official implementation of Arc2Face, an ID-conditioned face model:
✅ that generates high-quality images of any subject given only its ArcFace embedding, within a few seconds
✅ trained on the large-scale WebFace42M dataset offers superior ID similarity compared to existing models
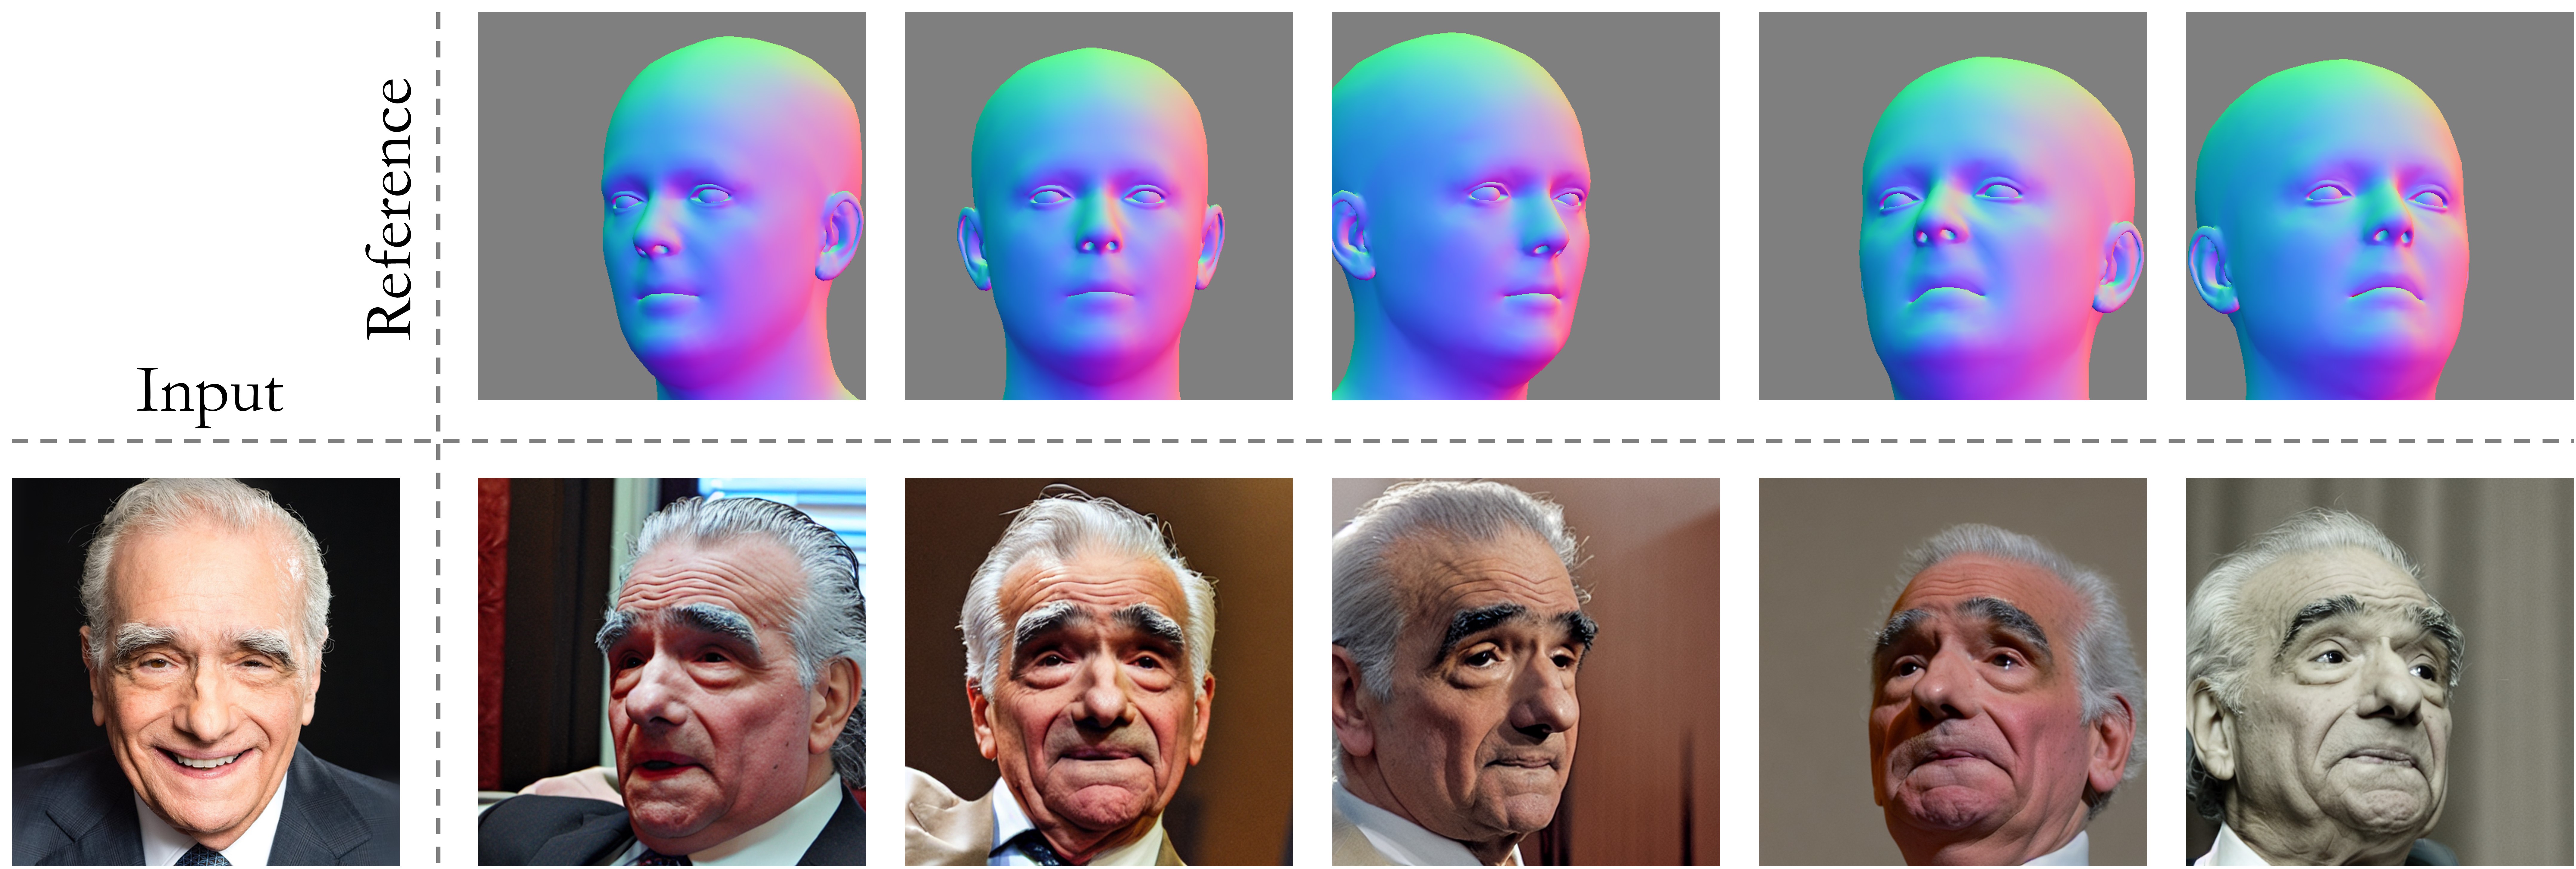
✅ built on top of Stable Diffusion, can be extended to different input modalities, e.g. with ControlNet
- [2024/03/31] 🔥 We release our demo for pose control using Arc2Face + ControlNet (see instructions below).
- [2024/03/28] 🔥 We release our Gradio demo on HuggingFace Spaces (thanks to the HF team for their free GPU support)!
- [2024/03/14] 🔥 We release Arc2Face.
conda create -n arc2face python=3.10
conda activate arc2face

# Install requirements
pip install -r requirements.txt- The models can be downloaded manually from HuggingFace or using python:
from huggingface_hub import hf_hub_download

hf_hub_download(repo_id="FoivosPar/Arc2Face", filename="arc2face/config.json", local_dir="./models")
hf_hub_download(repo_id="FoivosPar/Arc2Face", filename="arc2face/diffusion_pytorch_model.safetensors", local_dir="./models")
hf_hub_download(repo_id="FoivosPar/Arc2Face", filename="encoder/config.json", local_dir="./models")
hf_hub_download(repo_id="FoivosPar/Arc2Face", filename="encoder/pytorch_model.bin", local_dir="./models")-
For face detection and ID-embedding extraction, manually download the antelopev2 package (direct link) and place the checkpoints under
models/antelopev2. -
We use an ArcFace recognition model trained on WebFace42M. Download
arcface.onnxfrom HuggingFace and put it inmodels/antelopev2or using python:
hf_hub_download(repo_id="FoivosPar/Arc2Face", filename="arcface.onnx", local_dir="./models/antelopev2")- Then delete
glintr100.onnx(the default backbone from insightface).
The models folder structure should finally be:
  . ── models ──┌── antelopev2
                ├── arc2face
                └── encoder
Load pipeline using diffusers:
from diffusers import (
    StableDiffusionPipeline,
    UNet2DConditionModel,
    DPMSolverMultistepScheduler,
)

from arc2face import CLIPTextModelWrapper, project_face_embs

import torch
from insightface.app import FaceAnalysis
from PIL import Image
import numpy as np

base_model = 'runwayml/stable-diffusion-v1-5'

encoder = CLIPTextModelWrapper.from_pretrained(
    'models', subfolder="encoder", torch_dtype=torch.float16
)

unet = UNet2DConditionModel.from_pretrained(
    'models', subfolder="arc2face", torch_dtype=torch.float16
)

pipeline = StableDiffusionPipeline.from_pretrained(
        base_model,
        text_encoder=encoder,
        unet=unet,
        torch_dtype=torch.float16,
        safety_checker=None
    )
You can use any SD-compatible schedulers and steps, just like with Stable Diffusion. By default, we use DPMSolverMultistepScheduler with 25 steps, which produces very good results in just a few seconds.
pipeline.scheduler = DPMSolverMultistepScheduler.from_config(pipeline.scheduler.config)
pipeline = pipeline.to('cuda')
Pick an image and extract the ID-embedding:
app = FaceAnalysis(name='antelopev2', root='./', providers=['CUDAExecutionProvider', 'CPUExecutionProvider'])
app.prepare(ctx_id=0, det_size=(640, 640))

img = np.array(Image.open('assets/examples/joacquin.png'))[:,:,::-1]

faces = app.get(img)
faces = sorted(faces, key=lambda x:(x['bbox'][2]-x['bbox'][0])*(x['bbox'][3]-x['bbox'][1]))[-1]  # select largest face (if more than one detected)
id_emb = torch.tensor(faces['embedding'], dtype=torch.float16)[None].cuda()
id_emb = id_emb/torch.norm(id_emb, dim=1, keepdim=True)   # normalize embedding
id_emb = project_face_embs(pipeline, id_emb)    # pass through the encoder
Generate images:
num_images = 4
images = pipeline(prompt_embeds=id_emb, num_inference_steps=25, guidance_scale=3.0, num_images_per_prompt=num_images).imagesYou can start a local demo for inference by running:
python gradio_demo/app.pyWe provide a ControlNet model trained on top of Arc2Face for pose control. We use EMOCA for 3D pose extraction. To run our demo, follow the steps below:
Download the ControlNet checkpoint manually from HuggingFace or using python:
from huggingface_hub import hf_hub_download

hf_hub_download(repo_id="FoivosPar/Arc2Face", filename="controlnet/config.json", local_dir="./models")
hf_hub_download(repo_id="FoivosPar/Arc2Face", filename="controlnet/diffusion_pytorch_model.safetensors", local_dir="./models")git submodule update --init external/emocaThis is the most tricky part. You will need PyTorch3D to run EMOCA. As its installation may cause conflicts, we suggest to follow the process below:
- Create a new environment and start by installing PyTorch3D with GPU support first (follow the official instructions).
- Add Arc2Face + EMOCA requirements with:
pip install -r requirements_controlnet.txt- Install EMOCA code:
pip install -e external/emoca- Finally, you need to download the EMOCA/FLAME assets. Run the following and follow the instructions in the terminal:
cd external/emoca/gdl_apps/EMOCA/demos
bash download_assets.sh
cd ../../../../..You can start a local ControlNet demo by running:
python gradio_demo/app_controlnet.py- Demo link by @camenduru.
- Pinokio implementation by @cocktailpeanut (runs locally on all OS - Windows, Mac, Linux).
- Release training dataset.
If you find Arc2Face useful for your research, please consider citing us:
@misc{paraperas2024arc2face,
      title={Arc2Face: A Foundation Model of Human Faces},
      author={Foivos Paraperas Papantoniou and Alexandros Lattas and Stylianos Moschoglou and Jiankang Deng and Bernhard Kainz and Stefanos Zafeiriou},
      year={2024},
      eprint={2403.11641},
      archivePrefix={arXiv},
      primaryClass={cs.CV}
}


