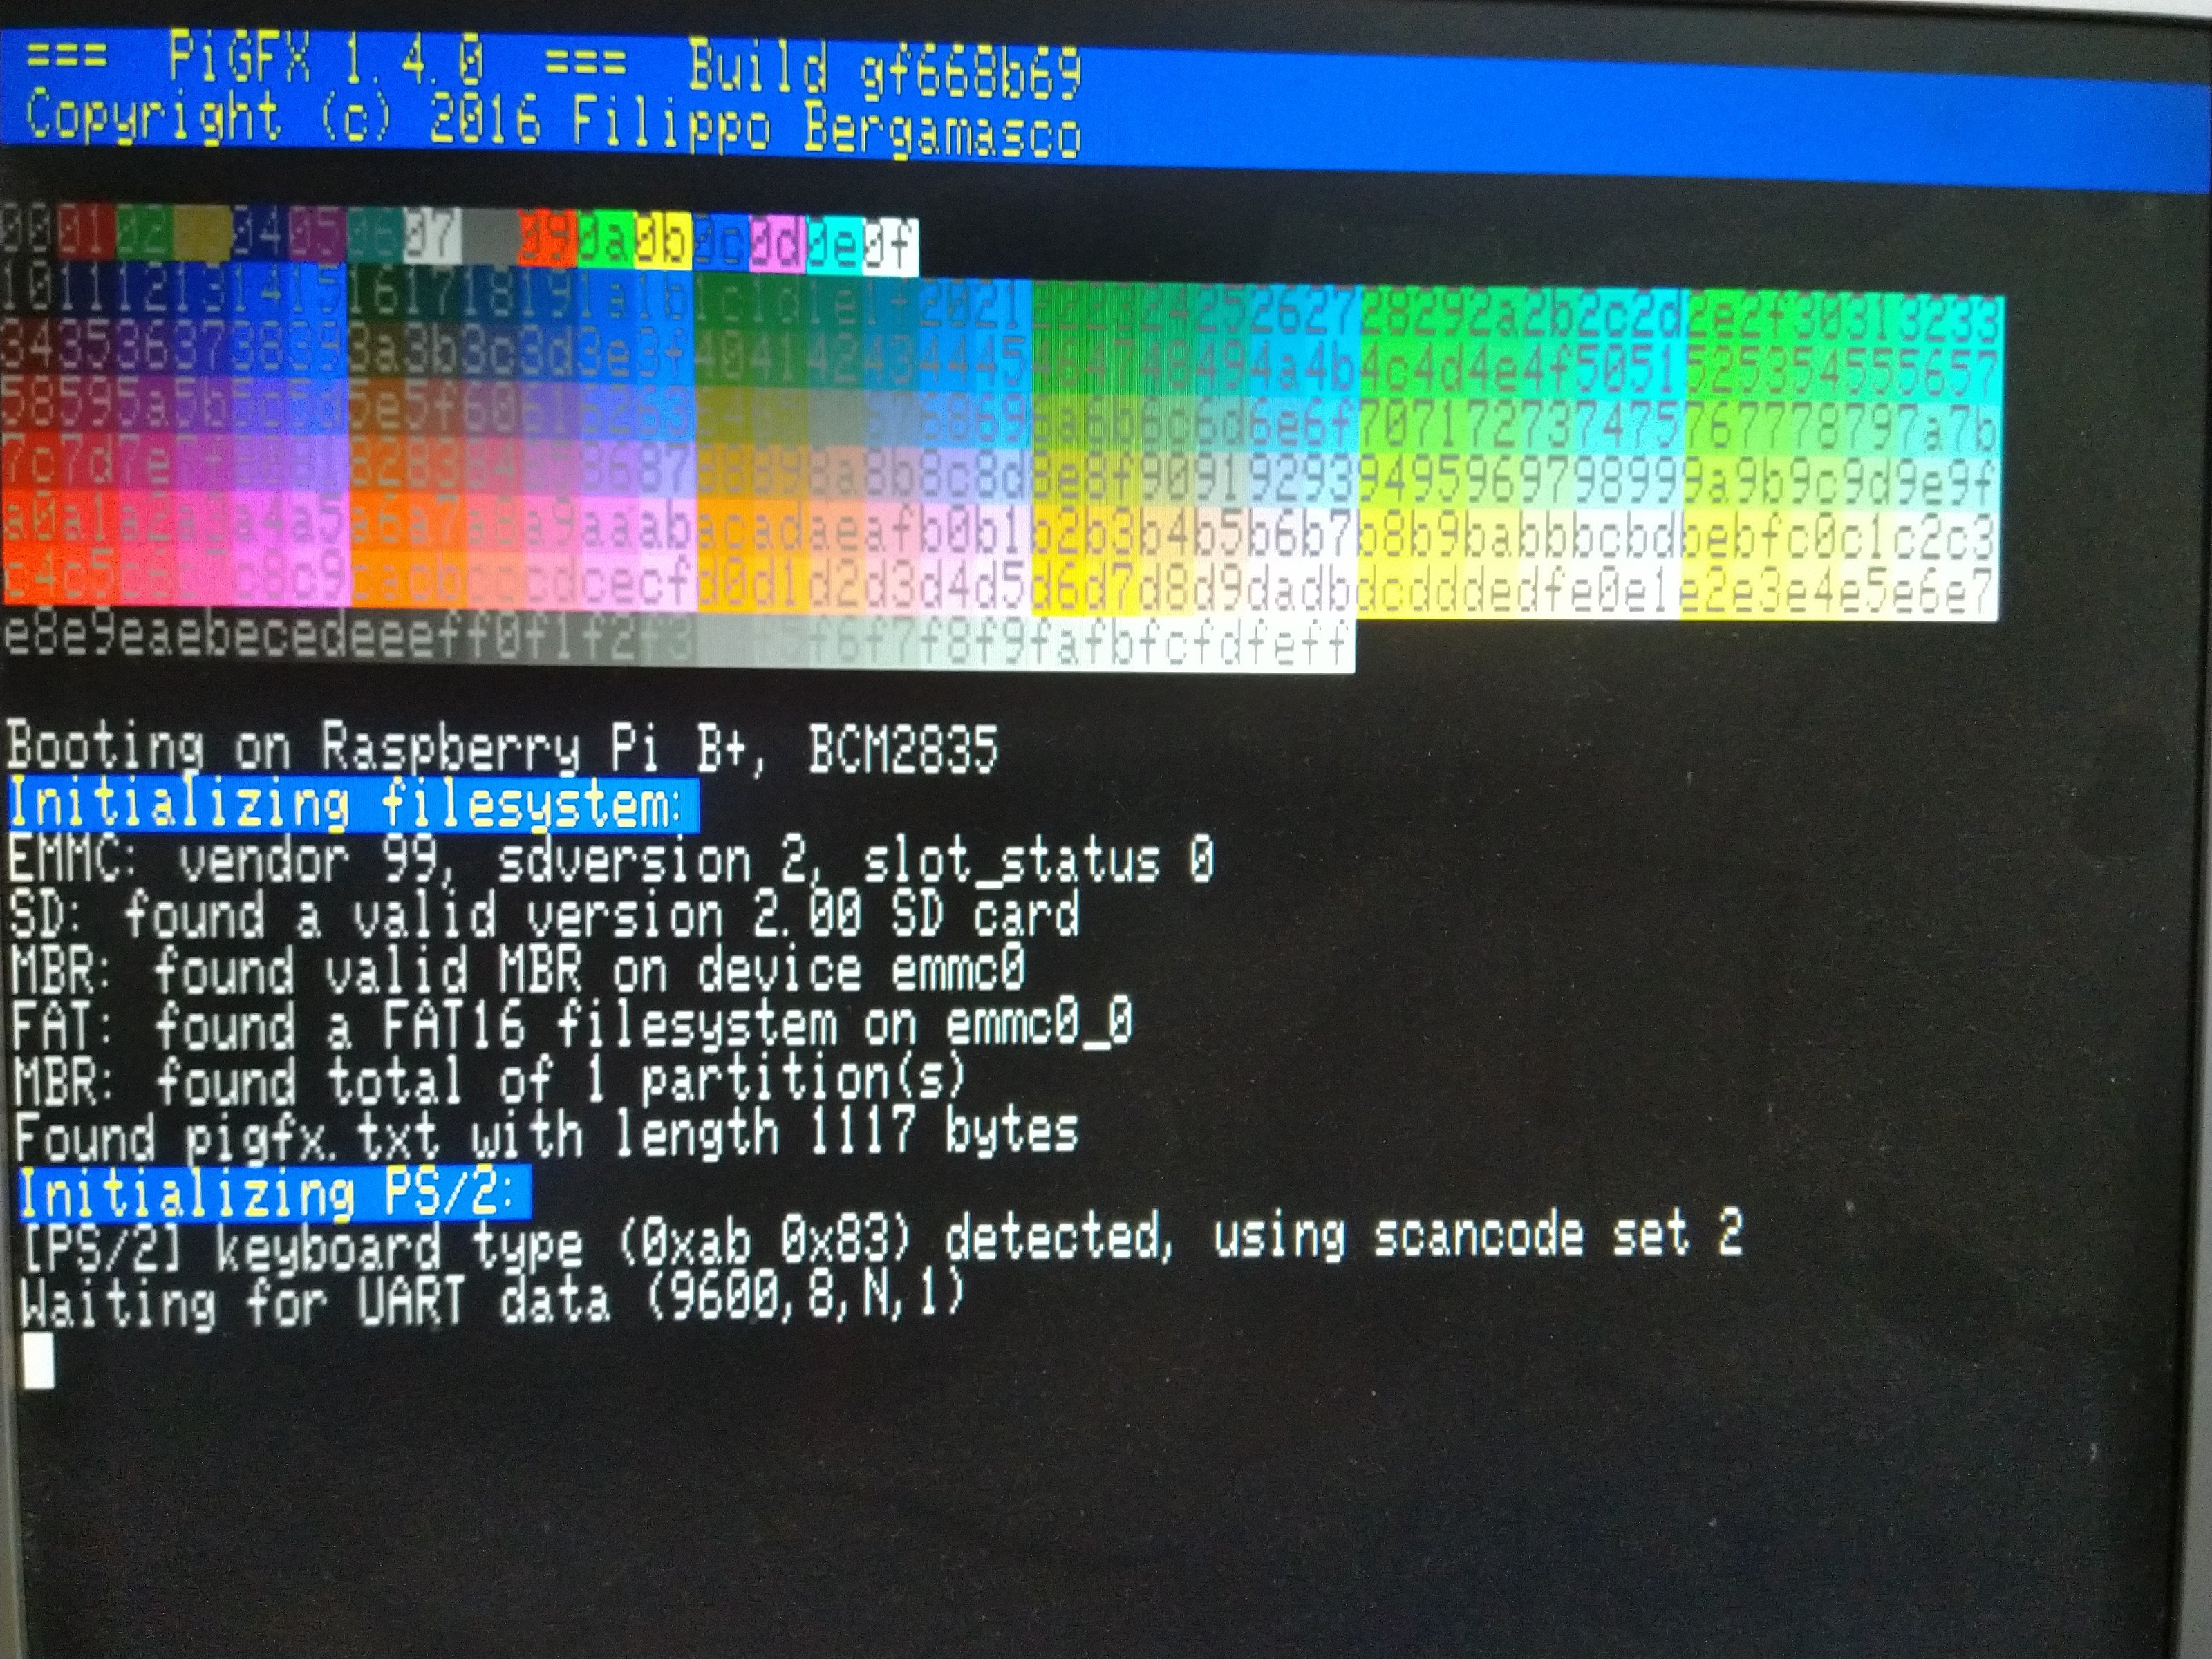
PiGFX is a bare metal kernel for the Raspberry Pi that implements a basic ANSI terminal emulator with the additional support of some primitive graphics functions. It can be driven by pushing characters to the raspi UART. Additional functions like changing text color, moving the cursor or clear the screen can be invoked via ANSI escape codes. The result is that you can easily add an HDMI display output to your embedded project without the hassle of directly generate the video signal.
This work is inspired by Spencer's project that aims to create a cheap graphics card and keyboard interface to its homebrew Z80 computer. PiGFX has the advantage of removing the fuss of having a full-featured Linux system running on your raspi. This dramatically decreases the boot time, lets the system be more customizable and, of course, adds a lot of fun :)
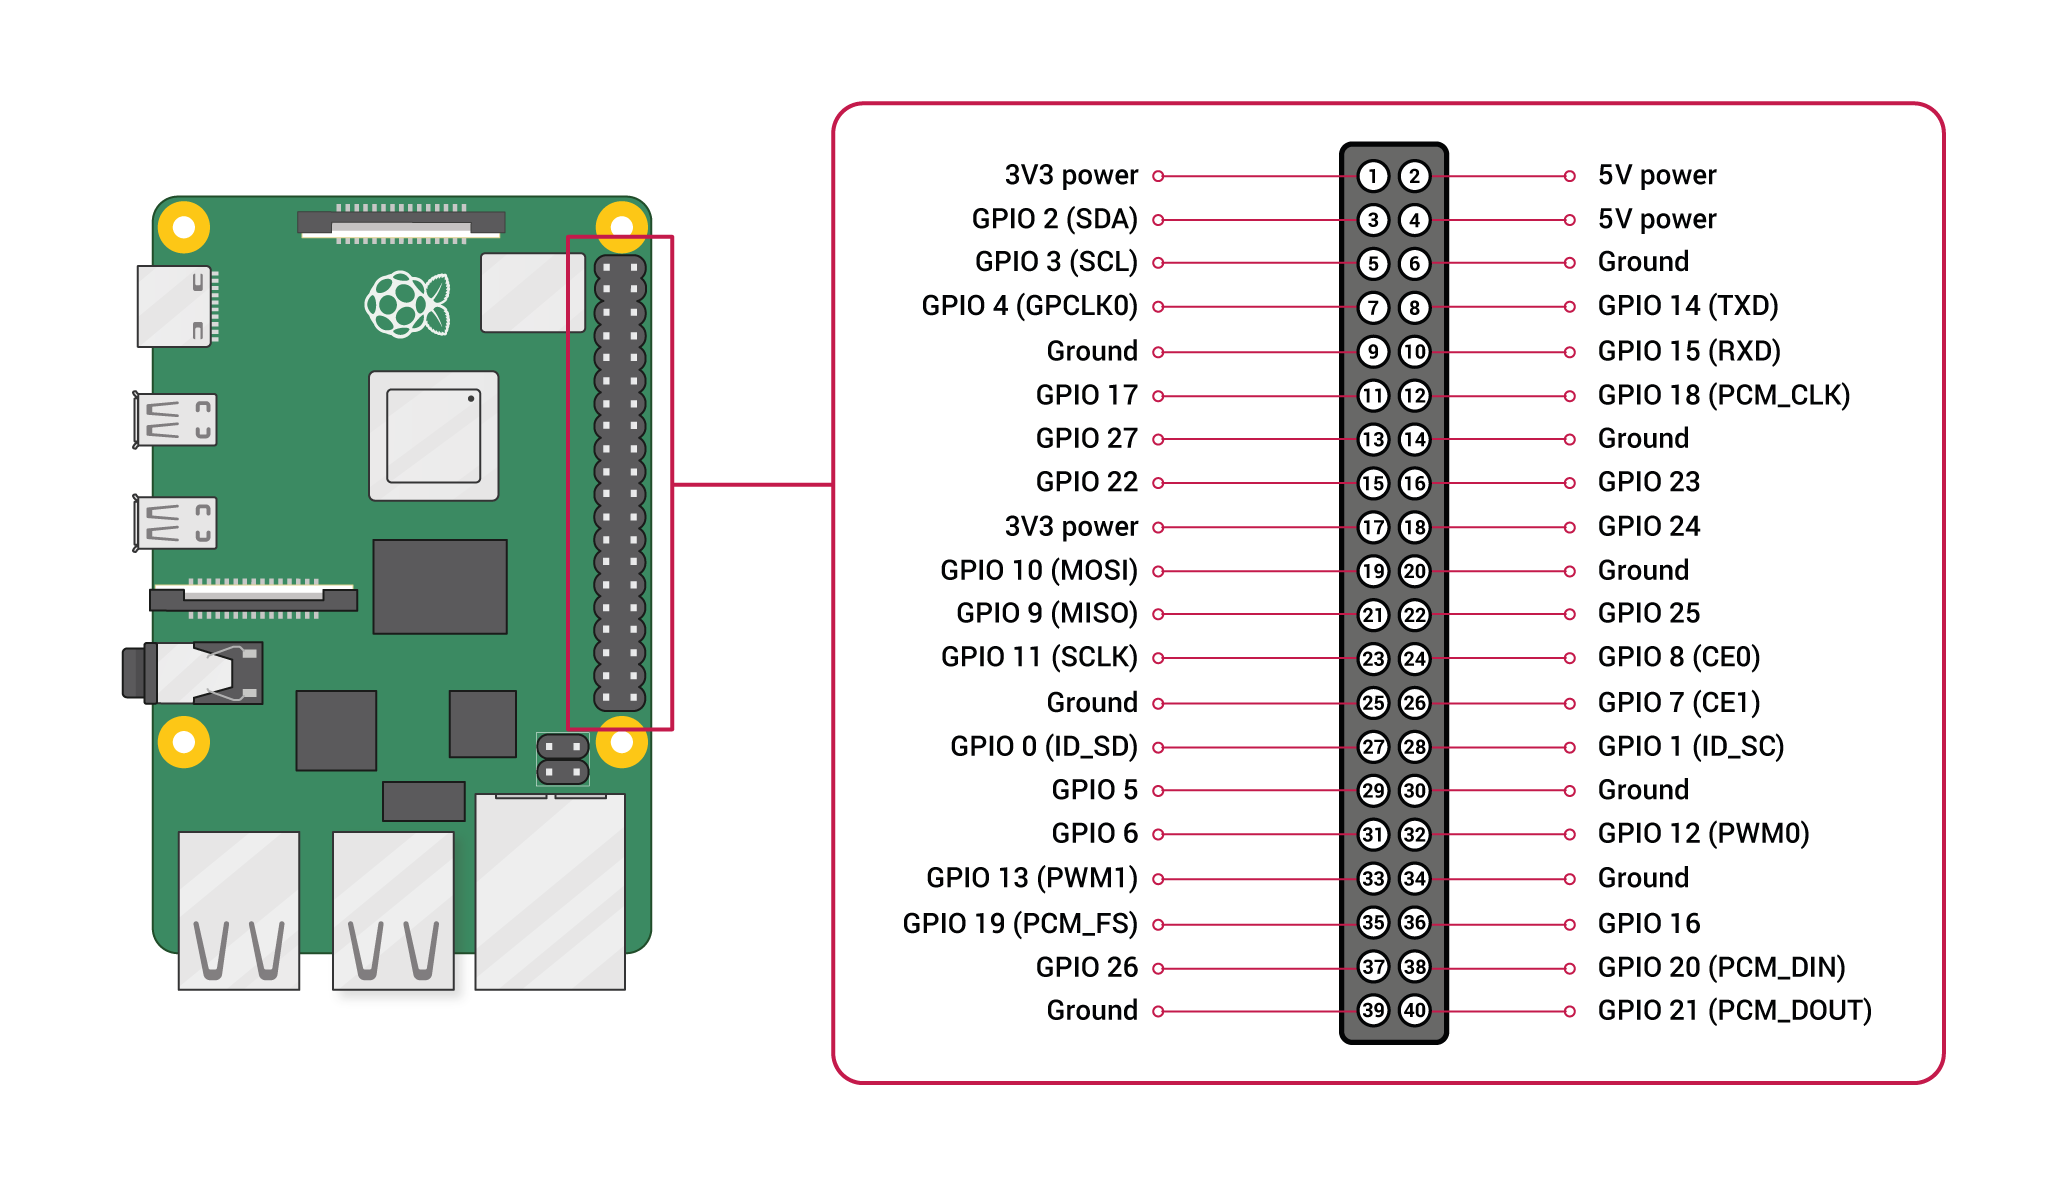
UPDATE: Thanks to the uspi bare-metal USB driver PiGFX now support an external USB keyboard as input device. Anything typed will be automatically sent to raspi UART Tx0 (pin 8, GPIO 14).
UPDATE: (2018 Nov. by F. Pierot) Added display modes, fonts, tabulation set... See 2018 Nov. modifications.
UPDATE: (2020 by Ch. Lehner) Added new graphic features and configurable baudrate. Fixed some bugs. Ported to Raspberry Pi 2, 3 and 4. Also included the ability to read a config file on the SD card. Also added support for PS/2 keyboards.
By now this is a work in progress with a minimum set of features implemented so expect that more functionalities will be added from time to time.
PiGFX should be working on all Pi models from generation 1 to generation 4. However there is no USB support on the model 4. It's tested on the following models:
- Pi Zero
- Pi Zero W
- Pi B
- Pi B+
- Pi 2B
- Pi 3B
- Pi 4B
Here is a preliminary TODO list of what I plan to add in the future:
- ✔ Add support for USB or Ps2 keyboard
- ✔ Add some graphics primitives like lines
- ✔ Add some more graphics primitives (circles, rectangles etc.)
- ✔ Let the resolution being configurable without recompiling
- ✔ Port to Raspberry Pi Generation 2/3/4
- ✔ Load configuration from SD card
- ✔ Support for PS/2 keyboard
- ✔ Implement some kind of sprite handling with collision detection
- Implement double buffering
- Load bitmap fonts directly from the SD card
- Implement a 8bit interface
- Support for USB / PS/2 Mouse
-
Format an SD-card: you need one 1 GB partition using the FAT or FAT32 system. Other formats won't boot, and a bigger size is useless. Avoid 64GB+ cards as they tend to cause problems to PI. A 32GB or 16GB card is ok as long as you format only 1 or 2 GB with FAT or FAT32.
-
Copy all
bin/*.imgto the root of the SD card along with the filesstart.elf,start4.elfandbootcode.binthat are commonly distributed with the Raspberry Pi. -
Copy
bin/pigfx.txtto the root of the SD card. Edit the file for your needs. If you have a config.txt on the SD card, delete it. -
Insert the card and reboot the Pi.
As soon as your raspi is turned on, the boot screen and other informations should be displayed as a 640x480 @ 60hz video stream from the HDMI interface. After that, PiGFX awaits anything coming from the serial line. Any data received from the UART is immediately displayed in a terminal-like fashion (ie. it automatically scrolls once you reach the bottom of the screen, etc.).
You may need to reset your computer before PiGFX displays anything coming from it.
PiGFX can be emulated with QEMU. Just download/compile/install the rpi Torlus branch and launch
$ make run
in the PiGFX root folder.
| Pin | Function |
|---|---|
| 8 | UART Tx0 (GPIO 14). Keyboard output |
| 10 | UART Rx0 (GPIO 15). Connect this pin to your device transmit pin. |
Note: Please be aware that all Raspberry Pi models accept levels between 0 and 3v3. Be sure to provide an appropriate level shifter to match your output
UART communication expects the baudrate configured in pigfx.txt, 8 bit data, 1 bit stop and no parity.
Be aware that USB support is disabled, if a PS/2 keyboard is detected during boot. This increases boot time a lot.
This is the male connector at the keyboard cable.


Most keyboards seem to work if powered with 3.3V. However if your keyboard does not and needs 5V, make sure you use a bidirectional level shifter between the Raspberry Pi and your keyboard on data and clock. If you bring 5V to the GPIO you will destroy the Pi.
| PS/2 Pin | Pi Pin | Function |
|---|---|---|
| 1 | 3 | PS/2 Data (GPIO 2) |
| 3 | 9 | Ground |
| 4 | 1 | Power to keyboard |
| 5 | 5 | PS/2 Clock (GPIO 3) |
The following escape sequences can be used to further control the terminal behaviour
| Code | Command |
|---|---|
| \ESC[?25l | Cursor invisible |
| \ESC[?25h | Cursor visible |
| \ESC[H | Move to 0-0 |
| \ESC[s | Save the cursor position |
| \ESC[u | Move cursor to previously saved position |
| \ESC[-Row-;-Col-H | Move to -Row-,-Col- |
| \ESC[0K | Clear from cursor to the end of the line |
| \ESC[1K | Clear from the beginning of the current line to the cursor |
| \ESC[2K | Clear the whole line |
| \ESC[2J | Clear the screen and move the cursor to 0-0 |
| \ESC[-n-A | Move the cursor up -n- lines |
| \ESC[-n-B | Move the cursor down -n- lines |
| \ESC[-n-C | Move the cursor forward -n- characters |
| \ESC[-n-D | Move the cursor backward -n- characters |
| \ESC[0m | Reset color attributes (white on black) |
| \ESC[38;5;-n-m | Set foreground color to -n- (0-255) |
| \ESC[48;5;-n-m | Set background color to -n- (0-255) |
Where \ESC is the binary character 0x1B and -n-,
-Row-, -Col- is any sequence of numeric characters like 123.
Additionally, PiGFX implements the following custom codes:
| Code | Command |
|---|---|
| \ESC[#-x0-;-y0-;-x1-;-y1-l | Draw a line from -x0-;-y0- to -x1-;-y1- |
| \ESC[#-x0-;-y0-;-x1-;-y1-r | Fill a rectangle with top-left corner at -x0-;-y0- and bottom-right at -x1-;-y1- |
See terminal_codes for a complete list of supported commands.
See Here for a reference of the provided xterm color palette. This is the default palette used by PiGFX.
A RGB pixel can be converted to this palette by the following formula:
Pixel = 16 + (round(R / 255 * 5) * 36) + (round(G / 255 * 5) * 6) + round(B / 255 * 5)
Using a different color palette is possible. It can be switched with a control code, see terminal_codes.
Possible palettes are Xterm, VGA and C64. PiGFX always uses 256 colors, so the unused colors in a palette remain black.
It's also possible to load a custom color palette with a specific control code.
A maximum of 128 bitmaps can be loaded to the PiGFX, either as list of binary pixels, list of ASCII decimal encoded pixels or list of ASCII hex encoded pixels. All of these can be RLE compressed. Loaded bitmaps can then be put onto the background. A transparent color can be specified before drawing a bitmap, these pixels won't be drawn in transparent mode. RLE compression expects a list of 2 values: first one is the pixel color, second one is the number of pixels to draw with this color.
See terminal_codes for the specific commands.
There are a few examples in this directory.
Once a bitmap is loaded, it can be used to draw a maximum of 256 sprites. A sprite is an object which is movable over the background. If a sprite is moved or removed, the previous background gets restored. If the sprite is manipulated by a bitmap or a different sprite, this state remains until it gets moved or removed. The sprite is then redrawn and the previous background restored. Moving a sprites, which is overlaped by another leads to artefacts.
Sprites can be drawn solid or with a transparent color. A drawn sprite keeps its settings (solid/transparent) and even the tranparent color until it gets removed.
Once a sprite is active, you should not manipulate or reload its bitmap source, otherwise the sprite changes to this new bitmap source if it gets moved.
Animations could be realized by redefining the sprite with a different bitmap source.
There's a example for a moving dinosaur (after first loading them in hex or binary).
Since we have cache enabled now on the Pi, the speed is more or less the same on every model. In most cases it's probably faster to not enable DMA.
Graphics which are drawn on a multiple of 4 pixels x-position draw faster than on a multiple of 2 or 1. You will also get more speed if your image has a width of a multiple of 4. Drawing solid is faster than drawing transparent.
This is a table that shows the time for drawing a 400x300 pixel image on different x-positions. This is an example for getting an idea.
| Pi Gen. | Aligned 4 px | Aligned 2 px | unaligned | DMA enabled |
|---|---|---|---|---|
| 1 (zero) | 4.7ms | 9.3ms | 10.5ms | 3.9ms |
| 2 | 1.9ms | 2.1ms | 2.6ms | 5.2ms |
| 3 | 2.2ms | 2.7ms | 3.8ms | 5.2ms |
| 4 | 0.9ms | 1.6ms | 3.3ms | 4.9ms |
At the time a sprite is defined, the borders of the sprite are used for detecting collisions with other sprites, so this is always a rectangle. A collision is reported if 2 sprites touch or overlap. Collisions with lower sprite indexes are detected first.
Collision detection takes place at the time a sprite is defined or moved. This sprite is checked against all other active sprites. All detected collisions are reported.
A collision is reported as a keyboard input with this syntax: \ESC[#-idx1-;-idx2-c where -idx1- is the sprite index you just defined or moved and -idx2- is the sprite it collides with.
To compile you will need to install a GNU ARM cross compiler toolchain and
ensure that arm-none-eabi-gcc, arm-none-eabi-as
arm-none-eabi-ld and arm-none-eabi-objcopy are in your PATH.
At this point, just run:
$ ./makeall
in the PiGFX root directory. The project should compile with the 2019 version of the toolchain.
To compile you will need to install a GNU ARM cross compiler toolchain and
ensure that arm-none-eabi-gcc, arm-none-eabi-as
arm-none-eabi-ld and arm-none-eabi-objcopy are in your PATH.
You'll also need the git executable git.exe in your PATH.
At this point, just run:
> makeall
The MIT License (MIT)
Copyright (c) 2016-2020 Filippo Bergamasco.
Permission is hereby granted, free of charge, to any person obtaining a copy of this software and associated documentation files (the "Software"), to deal in the Software without restriction, including without limitation the rights to use, copy, modify, merge, publish, distribute, sublicense, and/or sell copies of the Software, and to permit persons to whom the Software is furnished to do so, subject to the following conditions:
The above copyright notice and this permission notice shall be included in all copies or substantial portions of the Software.
THE SOFTWARE IS PROVIDED "AS IS", WITHOUT WARRANTY OF ANY KIND, EXPRESS OR IMPLIED, INCLUDING BUT NOT LIMITED TO THE WARRANTIES OF MERCHANTABILITY, FITNESS FOR A PARTICULAR PURPOSE AND NONINFRINGEMENT. IN NO EVENT SHALL THE AUTHORS OR COPYRIGHT HOLDERS BE LIABLE FOR ANY CLAIM, DAMAGES OR OTHER LIABILITY, WHETHER IN AN ACTION OF CONTRACT, TORT OR OTHERWISE, ARISING FROM, OUT OF OR IN CONNECTION WITH THE SOFTWARE OR THE USE OR OTHER DEALINGS IN THE SOFTWARE.
