Blender incorporates 3 operators to align the 3D view :
- alignment to the global transform orientation
- alignment to a local transform orientation
- alignment to the camera orientation
This add-on offers 2 custom alignment features for the 3D view :
- alignment to the 3D cursor orientation
- alignment to a custom transform orientation
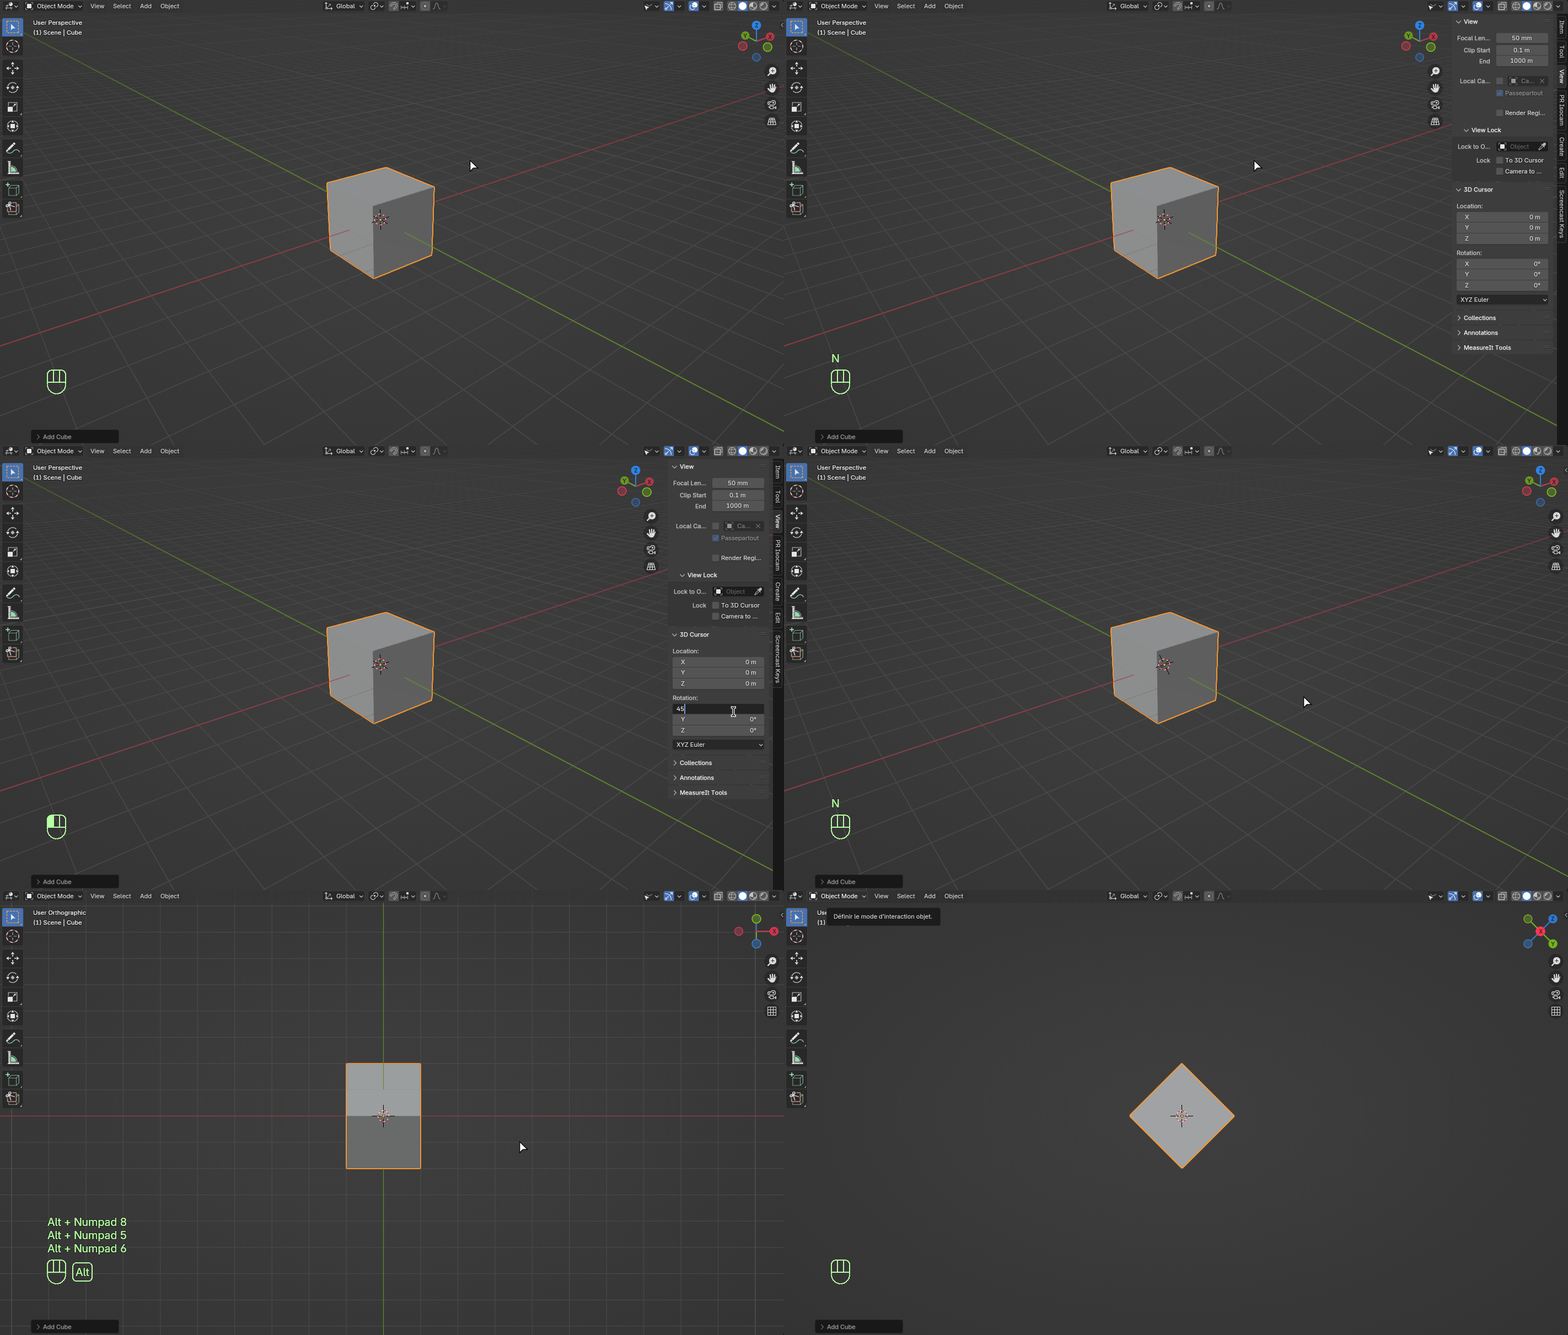
First, you need to change the 3D cursor orientation by using the method of your choice.
Next, use one of the following keyboard shortcuts to align the 3D View to the 3D cursor orientation :
- Top View : ALT + NUMPAD 8
- Bottom View : ALT + CTRL + NUMPAD 8
- Front View : ALT + NUMPAD 5
- Back View : ALT + CTRL + NUMPAD 5
- Right View : ALT + NUMPAD 6
- Left View : ALT + CTRL + NUMPAD 6
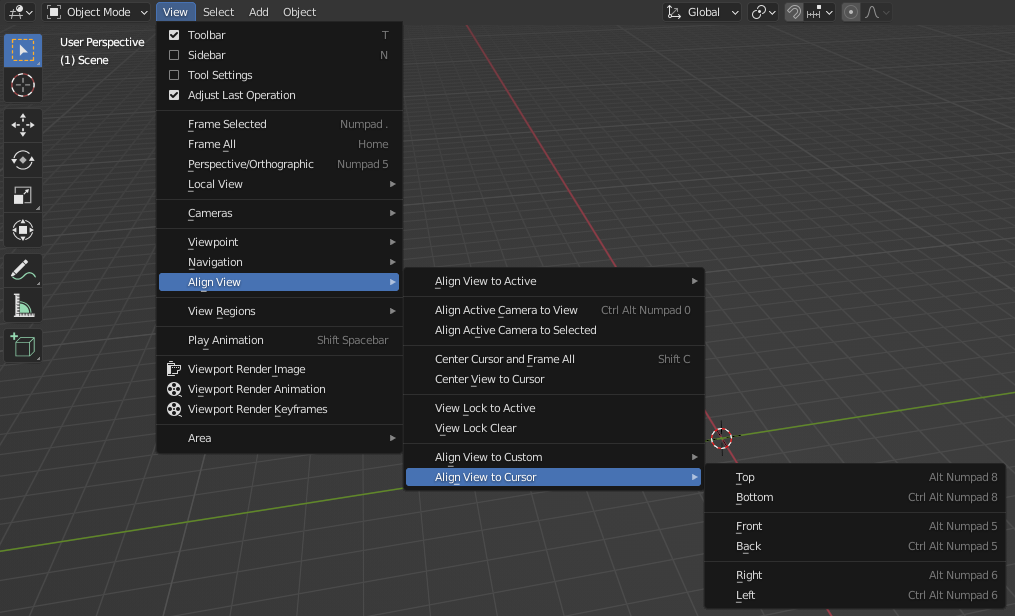
Those commands are also accessible in the View -> Align View -> Align View to Cursor top menu of the 3D View.
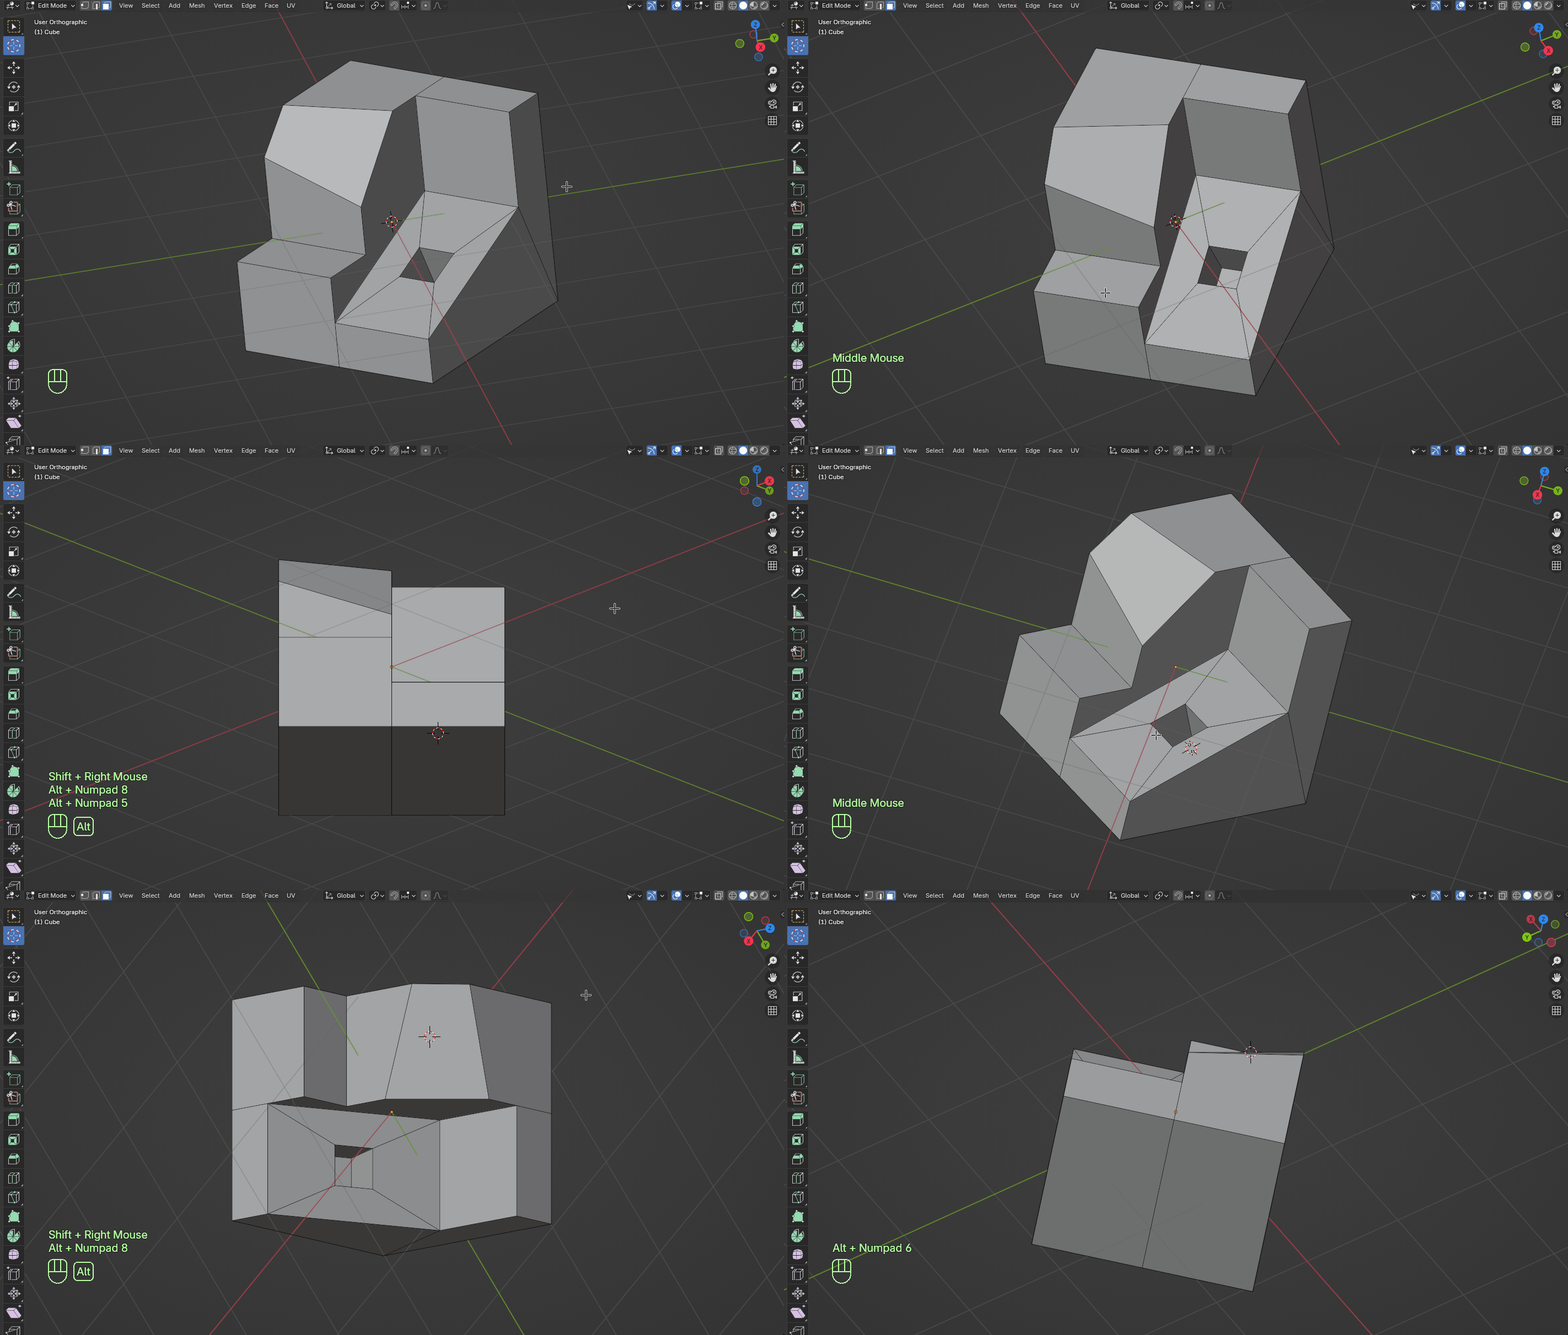
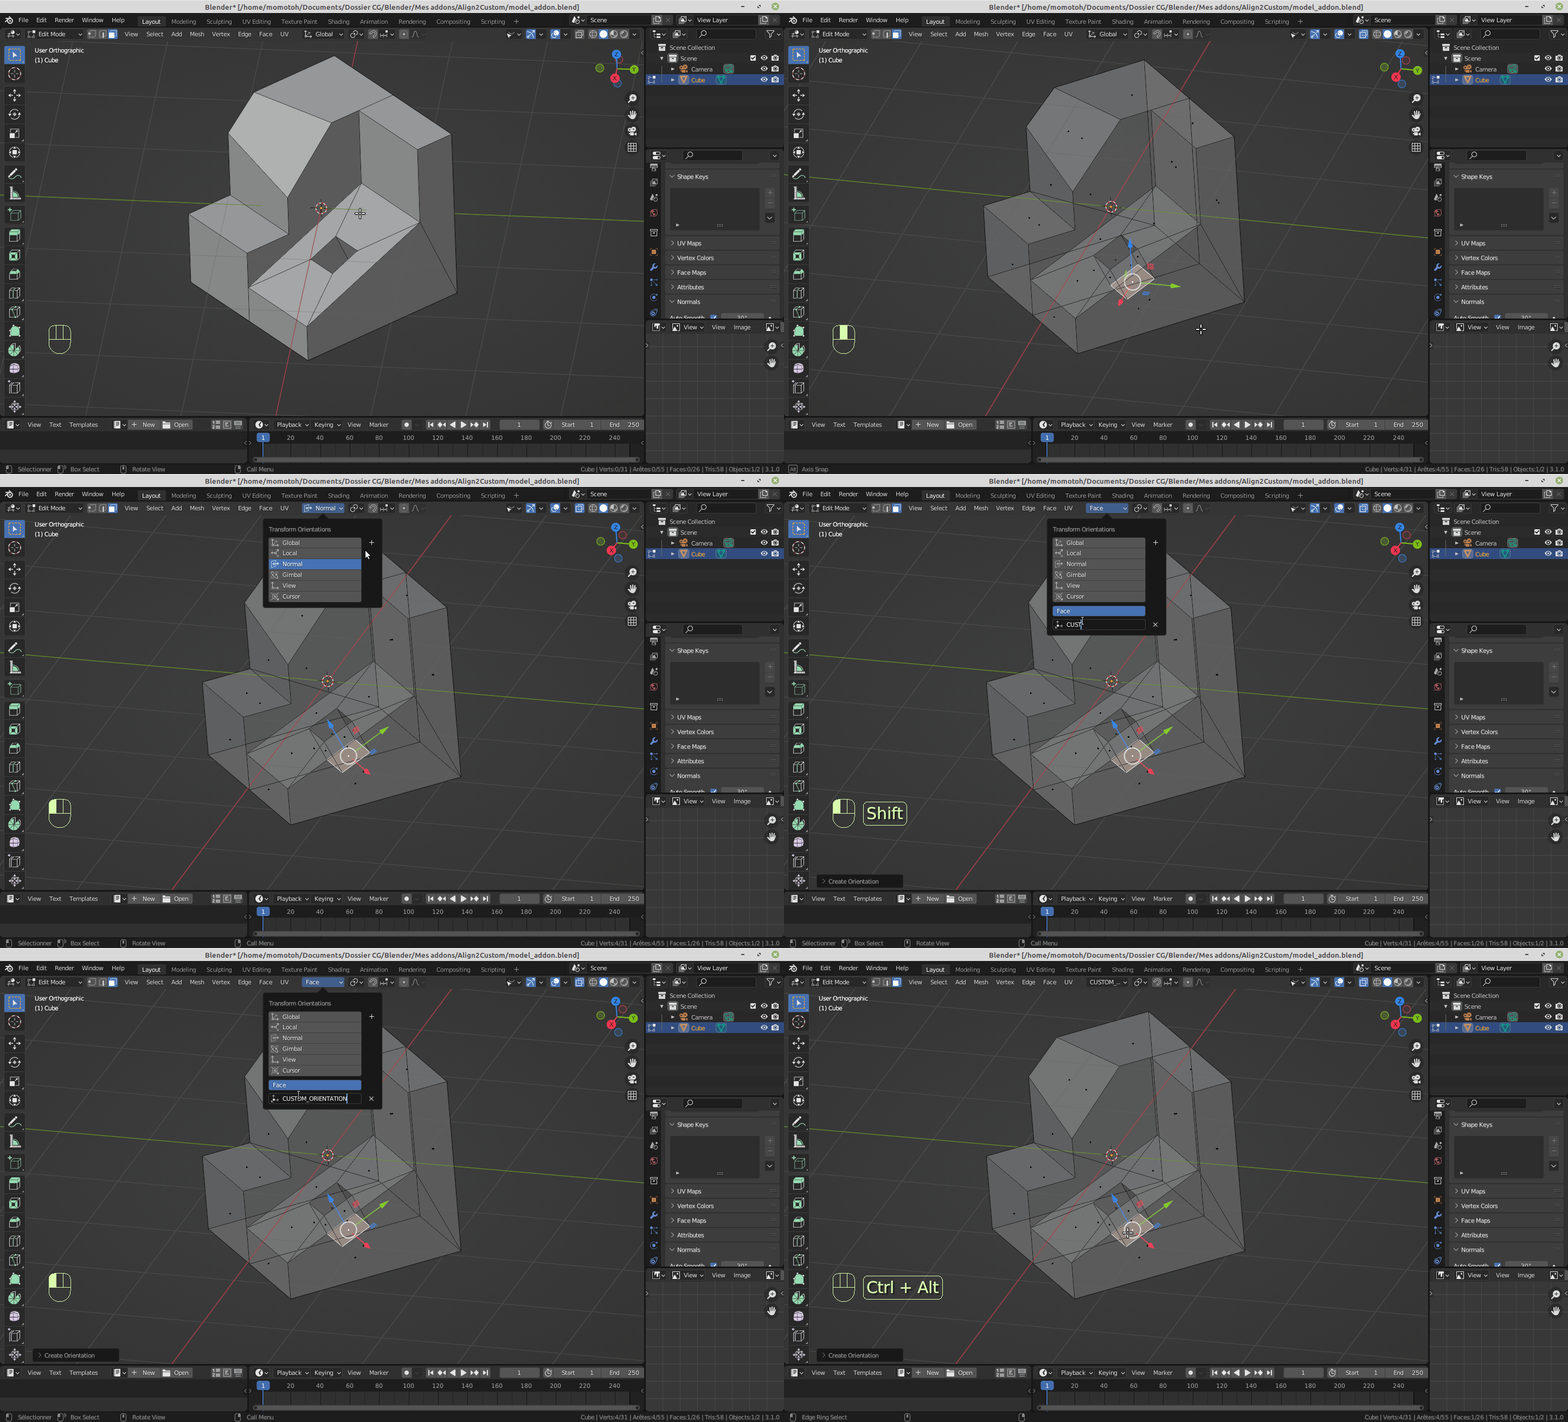
3D cursor can be used to align the 3D view to an object's face by calling the snapping tool of the cursor (SHIFT + Right Mouse Button click on the face) :
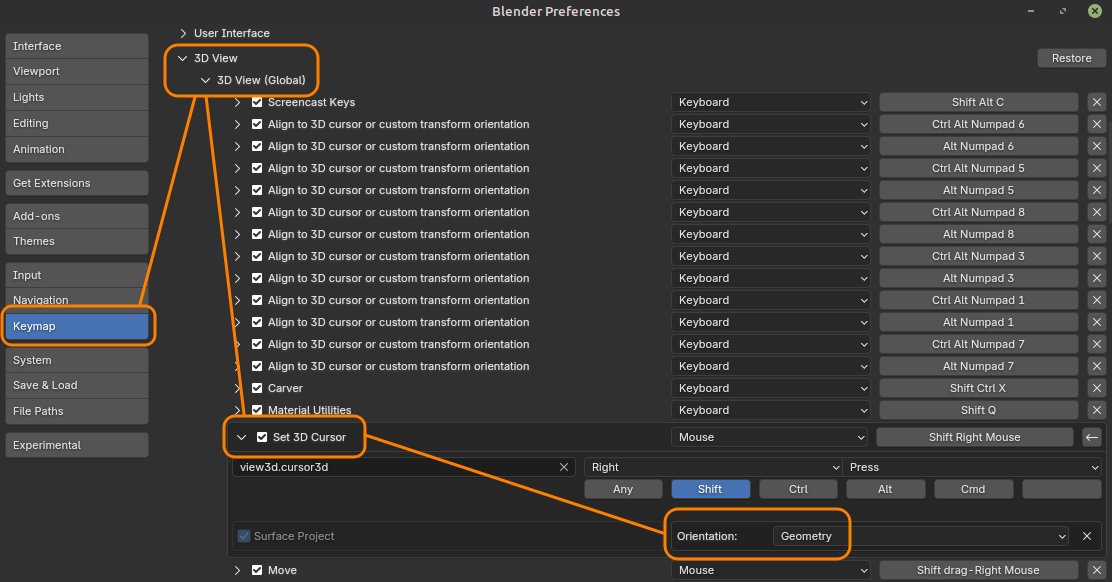
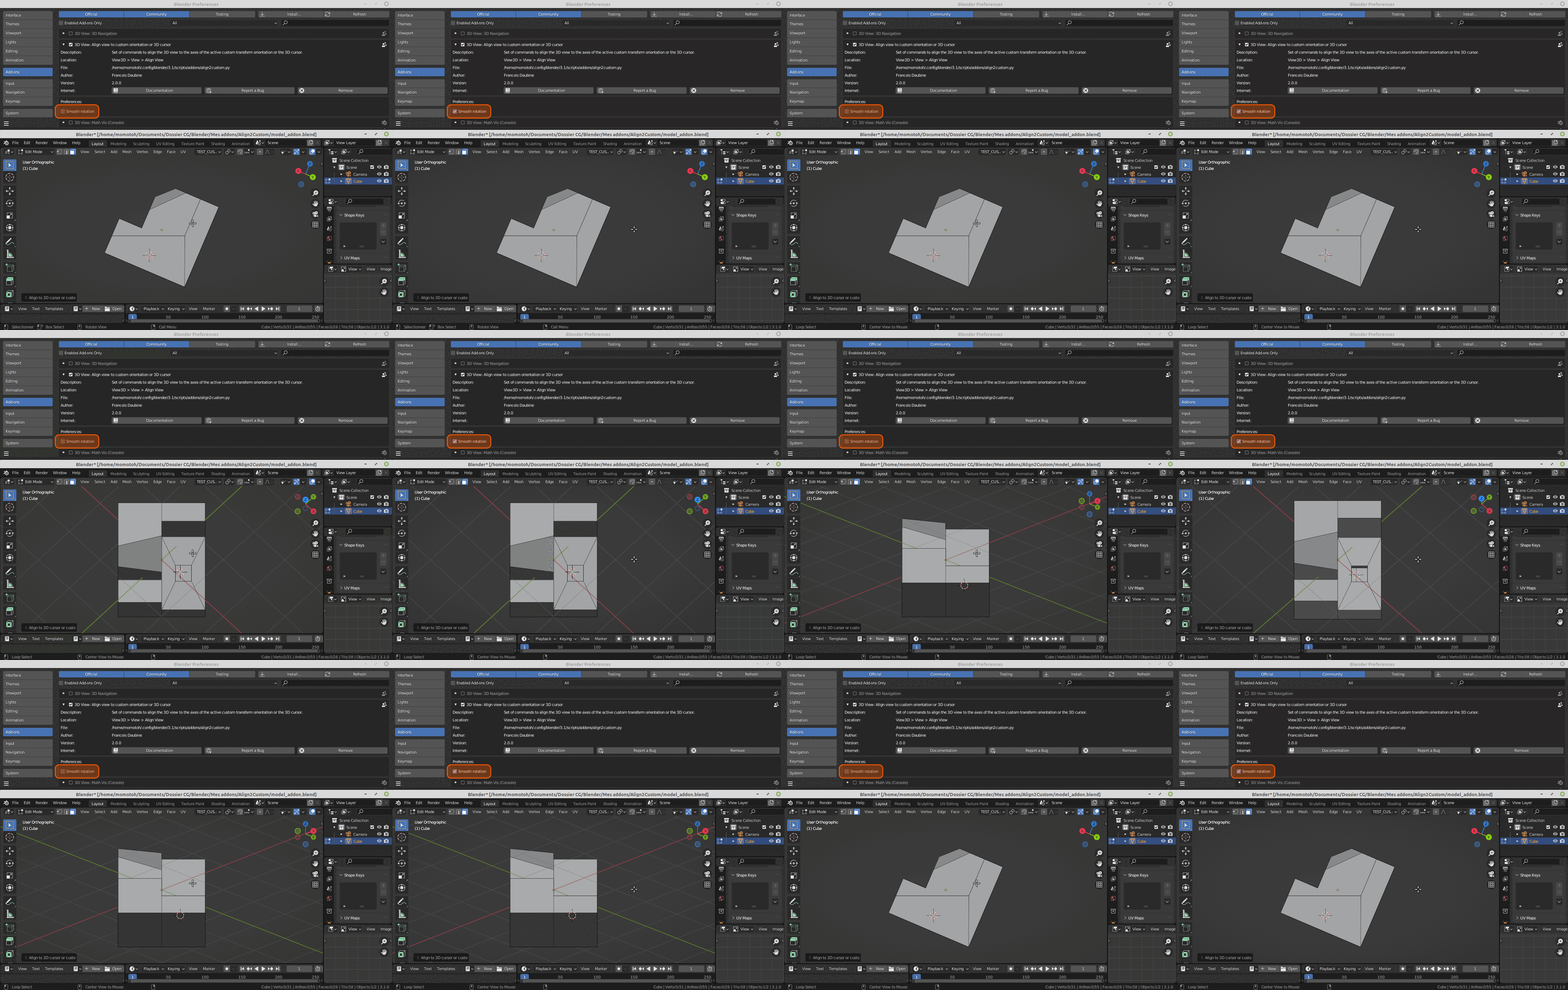
Note : the snapping tool of the 3D cursor does not align the cursor orientation to the face one by default. You need to configure the tool in the Keymap section of the Preferences panel as follows, and to save your modification to make it permanent :
This method is based on the Blender feature that allows to define custom transform orientations.
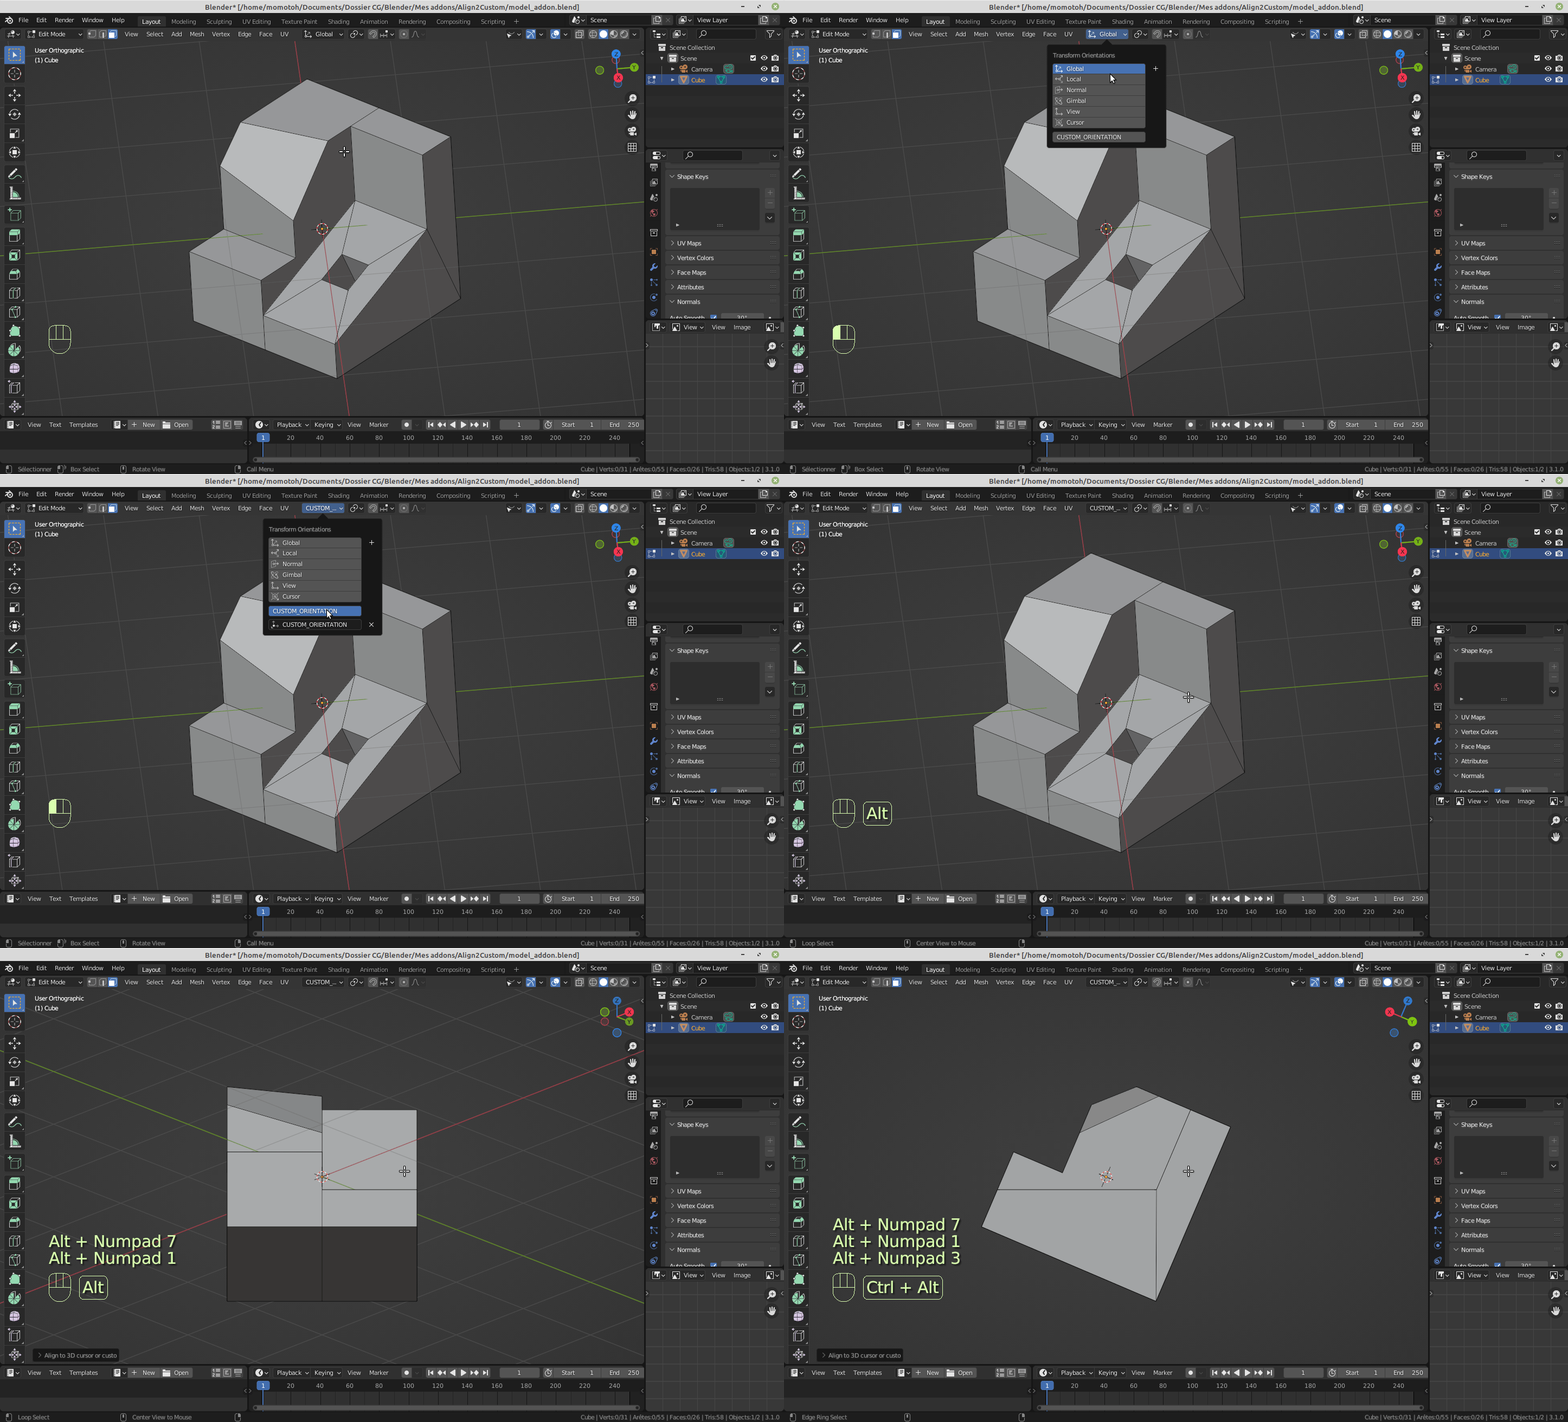
To align the 3D View to a custom transform orientation, it must have been created beforehand, like in the following example (based on the normal axes of an object's face) :
Then, you can use one of the following keyboard shortcuts to align the 3D View to its axes :
- Top View : ALT + NUMPAD 7
- Bottom View : ALT + CTRL + NUMPAD 7
- Front View : ALT + NUMPAD 1
- Back View : ALT + CTRL + NUMPAD 1
- Right View : ALT + NUMPAD 3
- Left View : ALT + CTRL + NUMPAD 3
Note : these commands have no effect if no Custom transform orientation is active.
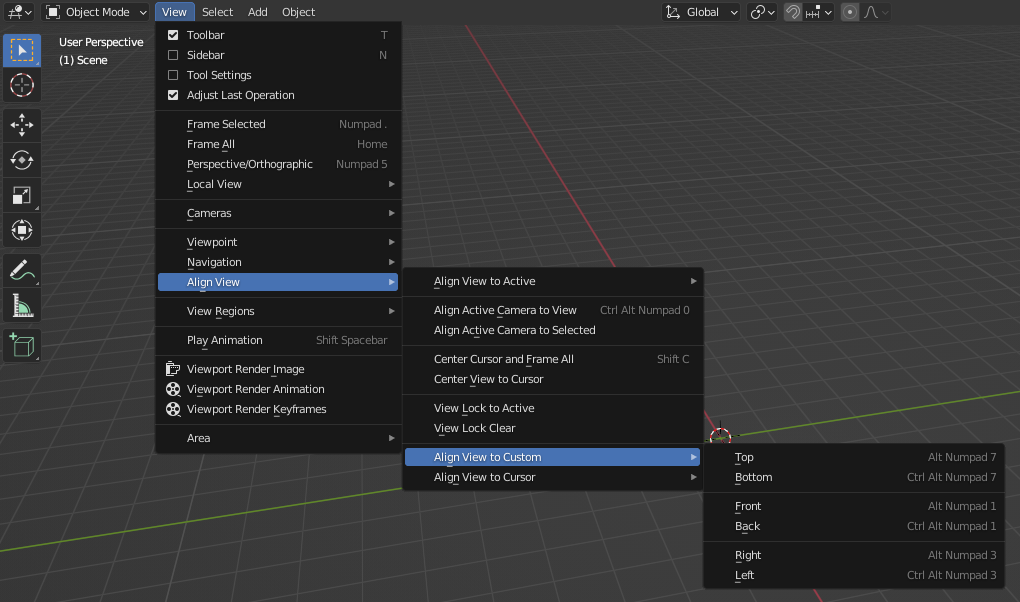
Those commands are also accessible in the View -> Align View -> Align View to Custom top menu of the 3D View.
This addon can be installed in two differents ways.
This method is recommended for Blender versions prior to 4.2 :
- Download ZIP file of Align2Custom V2.1.2 from the release section
- Open Blender, then drag and drop the ZIP file onto Blender UI to install the add-on
- Check that the
Align 2 Customoption appears in the list of add-ons (Edit->Preferences...->Add-ons)
Since 4.2 version, Blender can connect to an online platform called Blender Extensions to download and install tons of add-ons. This add-on is now available on this platform. To install it, follow these instructions :
- Look for Align2Custom add-on on Blender Extensions
- Follow the installation instructions
- In Blender, check that the
Align 2 Customoption appears in the list of add-ons (Edit->Preferences...->Add-ons)
This method is recommended for Blender 4.2 (and newer) because add-on update can be managed easily and directly from Blender UI whenever a new version of the add-on is published.
If you prefer hard transitions or if you're facing problems (odd behaviors, performance, ...), the add-on installation panel provides an option to disable the smooth transition during the 3D View alignment.
License change from GNU GPL V2 to V3 to fulfill Blender Extensions platform requirements
Removal of useless "Adjust last operation" panel
Packaging optimization for publication on Blender Extensions platform. No functional evolution nor bug fixing. No need to update to this version if you run a Blender version prior to 4.2.
Bug correction (Issue #3) for Blender 4.0 compatibility.
New feature : align the 3D view to the 3D cursor orientation. Improvement : smooth alignment transitions.
First stable release. Only feature : align the 3D view to a custom orientation.
