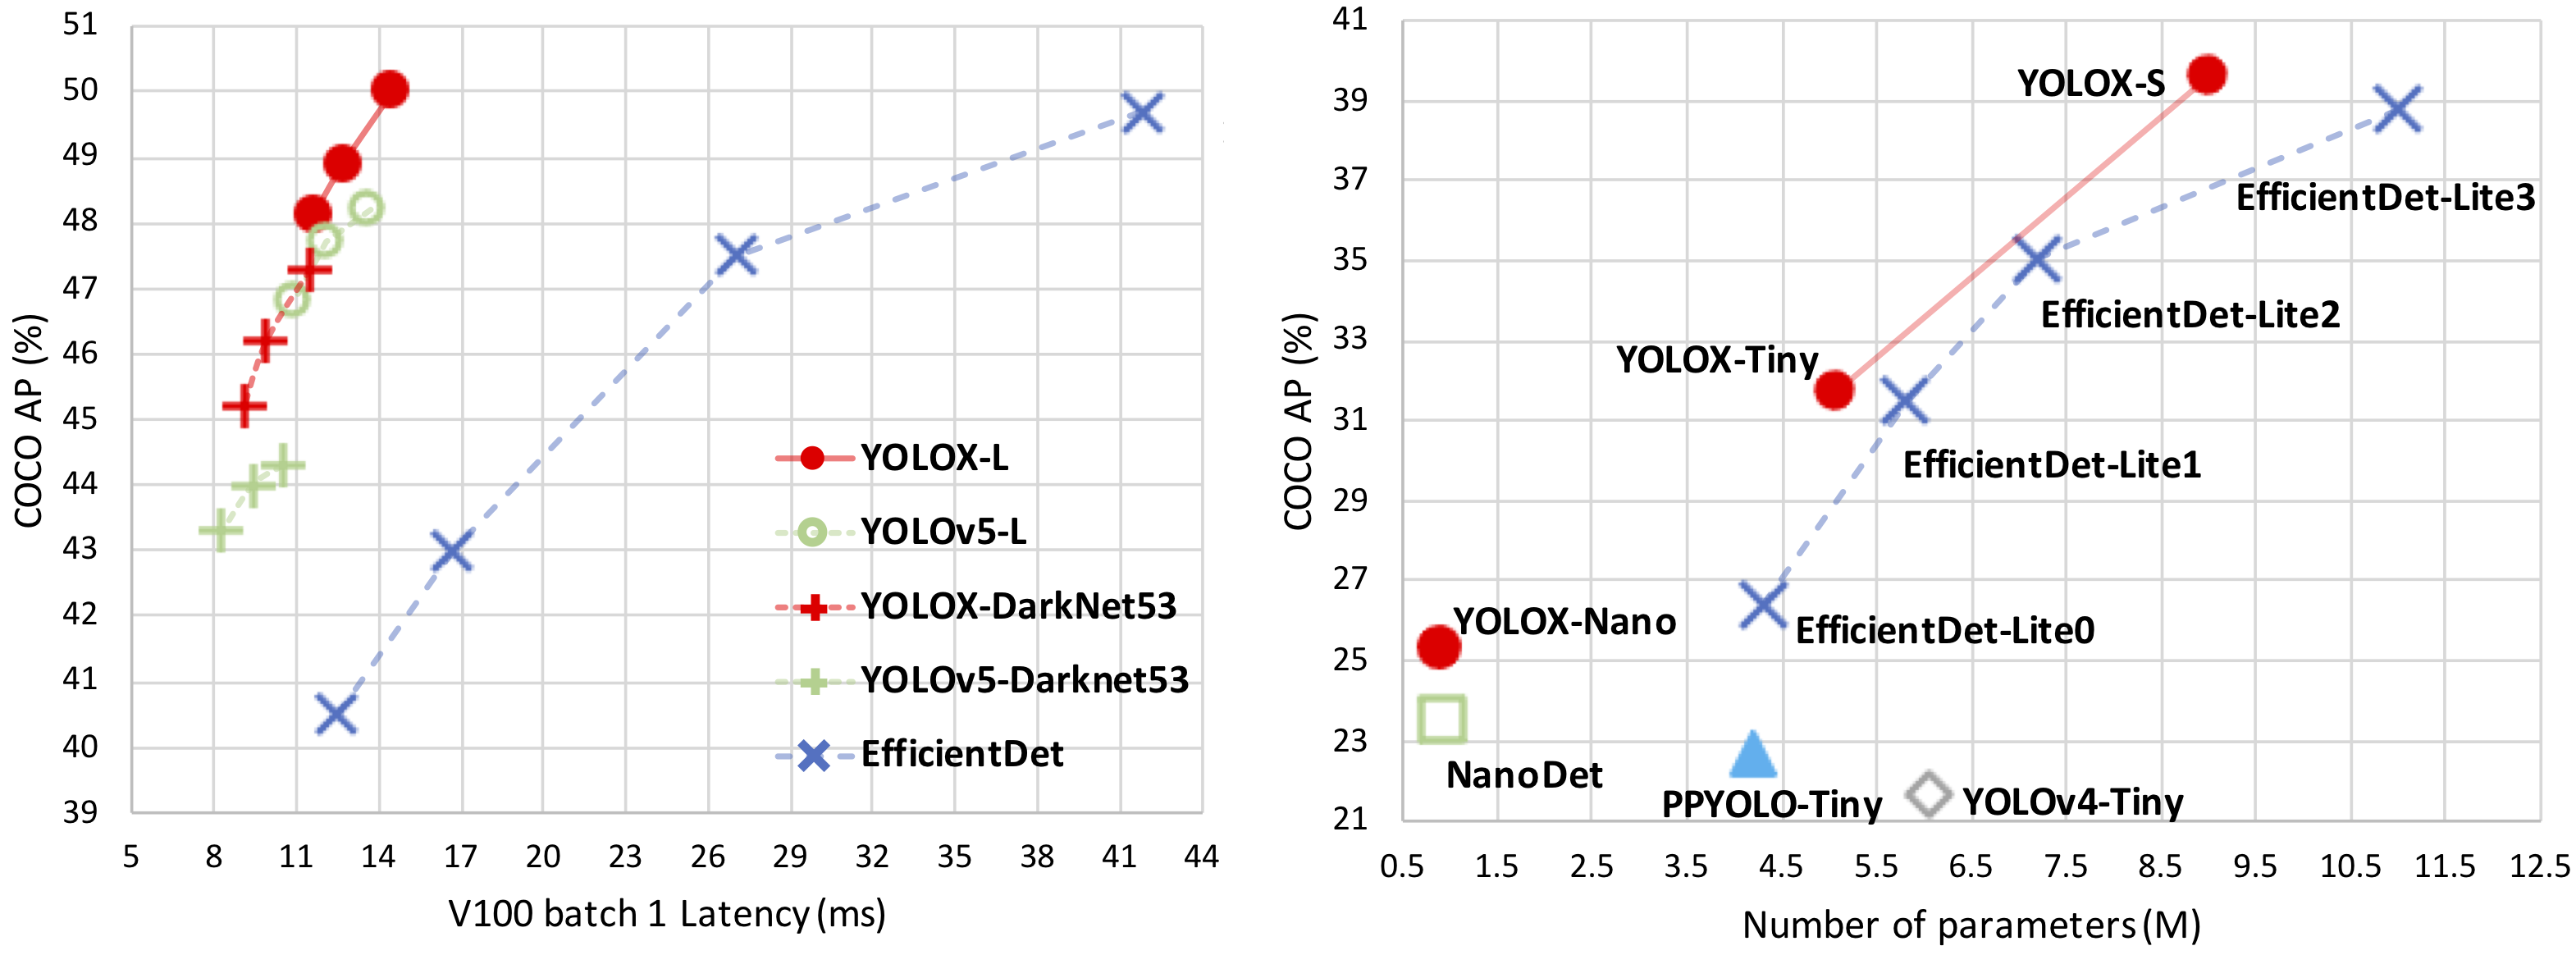
YOLOX is an anchor-free version of YOLO, with a simpler design but better performance! It aims to bridge the gap between research and industrial communities. For more details, please refer to our report on Arxiv.
This repo is an implementation of PyTorch version YOLOX, there is also a MegEngine implementation.
Installation
Step1. Install YOLOX.
git clone https://github.com/SOPHIC-AI/YOLOX-Sophic
cd YOLOX
pip3 install -r requirements.txt
Step2. Install pycocotools.
pip3 install cython; pip3 install 'git+https://github.com/cocodataset/cocoapi.git#subdirectory=PythonAPI'Training
python3 tools/train.py -f exps/example/yolox_voc/yolox_voc_nano.py -d 0 -b 64 --fp16 -o - -d: number of gpu devices
- -b: total batch size, the recommended number for -b is num-gpu * 8
- --fp16: mixed precision training
Demo
Step1. Download a pretrained model from the benchmark table.
Step2. Use either -n or -f to specify your detector's config. For example:
python tools/demo.py image -f exps/example/yolox_voc/yolox_voc_nano.py -c {path of checkpoint} --path {path of image} --conf 0.5 --nms 0.2 --tsize 640 --save_result --device [cpu/gpu]Demo for video:
python tools/demo.py video -f exps/example/yolox_voc/yolox_voc_nano.py -c {path of checkpoint} --path {path of video} --conf 0.5 --nms 0.2 --tsize 640 --save_result --device [cpu/gpu]Demo for webcam:
python tools/demo.py webcam -f exps/example/yolox_voc/yolox_voc_nano.py -c {path of checkpoint} --camid {id of webcam} --conf 0.5 --nms 0.2 --tsize 640 --save_result --device [cpu/gpu]

