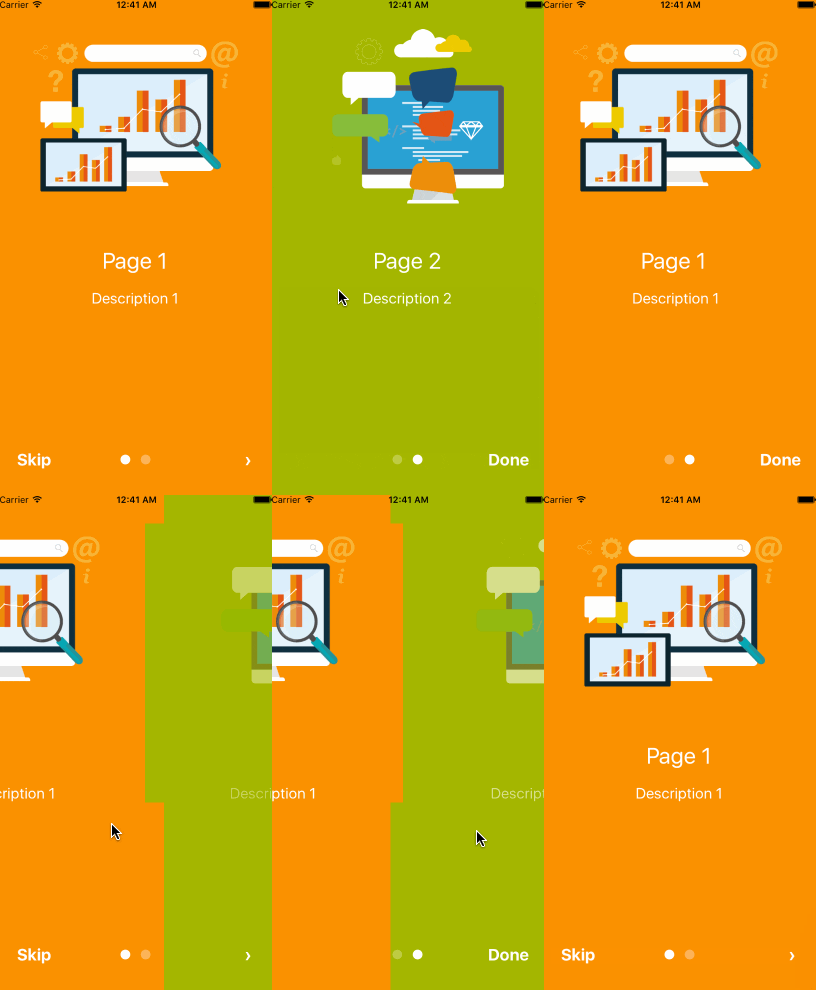
react-native-app-intro is a react native component implementing a parallax effect welcome page using base on react-native-swiper , similar to the one found in Google's app like Sheet, Drive, Docs...
$ npm i react-native-app-intro --saveYou can use pageArray quick generation your app intro with parallax effect.
import React, { Component } from 'react';
import { AppRegistry, Alert } from 'react-native';
import AppIntro from 'react-native-app-intro';

class Example extends Component {
  onSkipBtnHandle = (index) => {
    Alert.alert('Skip');
    console.log(index);
  }
  doneBtnHandle = () => {
    Alert.alert('Done');
  }
  nextBtnHandle = (index) => {
    Alert.alert('Next');
    console.log(index);
  }
  onSlideChangeHandle = (index, total) => {
    console.log(index, total);
  }
  render() {
    const pageArray = [{
      title: 'Page 1',
      description: 'Description 1',
      img: 'https://goo.gl/Bnc3XP',
      imgStyle: {
        height: 80 * 2.5,
        width: 109 * 2.5,
      },
      backgroundColor: '#fa931d',
      fontColor: '#fff',
      level: 10,
    }, {
      title: 'Page 2',
      description: 'Description 2',
      img: 'https://goo.gl/GPO6JB',
      imgStyle: {
        height: 93 * 2.5,
        width: 103 * 2.5,
      },
      backgroundColor: '#a4b602',
      fontColor: '#fff',
      level: 10,
    }];
    return (
      <AppIntro
        onNextBtnClick={this.nextBtnHandle}
        onDoneBtnClick={this.doneBtnHandle}
        onSkipBtnClick={this.onSkipBtnHandle}
        onSlideChange={this.onSlideChangeHandle}
        pageArray={pageArray}
      />
    );
  }
}

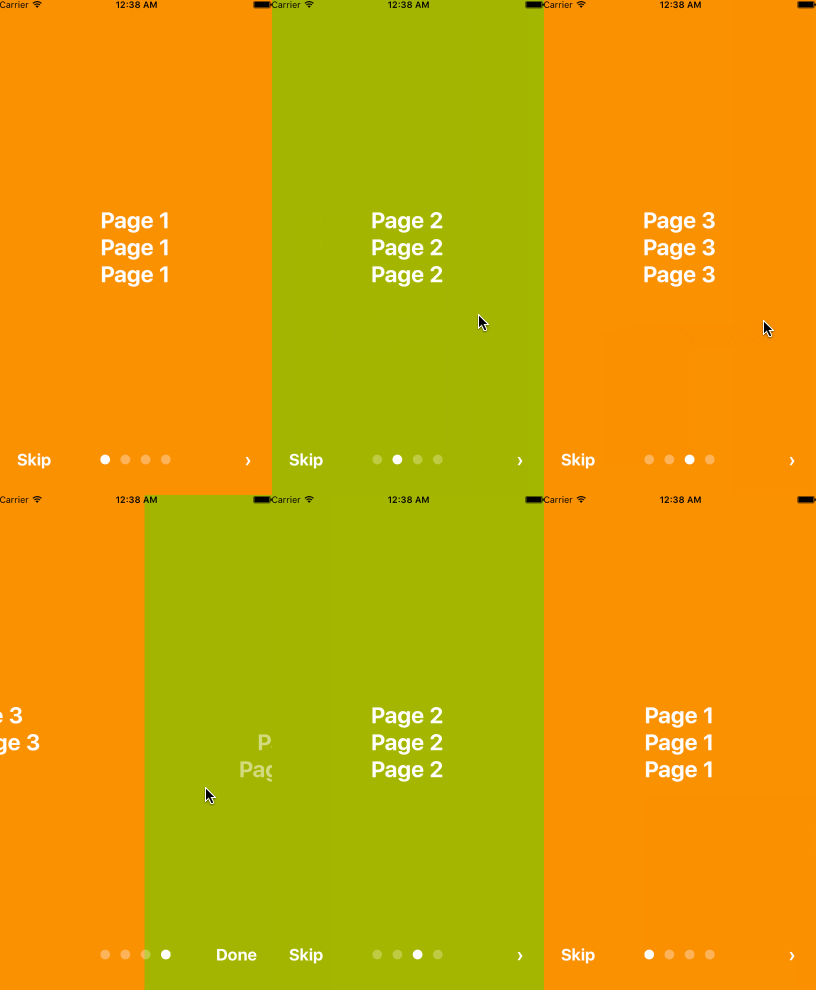
AppRegistry.registerComponent('Example', () => Example);If you need customized page like my Example, you can pass in View component into AppIntro component and set level. Remember any need use parallax effect component, Need to be <View level={10}></View> inside.
import React, { Component } from 'react';
import {
  AppRegistry,
  StyleSheet,
  Text,
  View,
} from 'react-native';
import AppIntro from 'react-native-app-intro';

const styles = StyleSheet.create({
  slide: {
    flex: 1,
    justifyContent: 'center',
    alignItems: 'center',
    backgroundColor: '#9DD6EB',
    padding: 15,
  },
  text: {
    color: '#fff',
    fontSize: 30,
    fontWeight: 'bold',
  },
});

class Example extends Component {

  render() {
    return (
      <AppIntro>
        <View style={[styles.slide,{ backgroundColor: '#fa931d' }]}>
          <View level={10}><Text style={styles.text}>Page 1</Text></View>
          <View level={15}><Text style={styles.text}>Page 1</Text></View>
          <View level={8}><Text style={styles.text}>Page 1</Text></View>
        </View>
        <View style={[styles.slide, { backgroundColor: '#a4b602' }]}>
          <View level={-10}><Text style={styles.text}>Page 2</Text></View>
          <View level={5}><Text style={styles.text}>Page 2</Text></View>
          <View level={20}><Text style={styles.text}>Page 2</Text></View>
        </View>
        <View style={[styles.slide,{ backgroundColor: '#fa931d' }]}>
          <View level={8}><Text style={styles.text}>Page 3</Text></View>
          <View level={0}><Text style={styles.text}>Page 3</Text></View>
          <View level={-10}><Text style={styles.text}>Page 3</Text></View>
        </View>
        <View style={[styles.slide, { backgroundColor: '#a4b602' }]}>
          <View level={5}><Text style={styles.text}>Page 4</Text></View>
          <View level={10}><Text style={styles.text}>Page 4</Text></View>
          <View level={15}><Text style={styles.text}>Page 4</Text></View>
        </View>
      </AppIntro>
    );
  }
}
AppRegistry.registerComponent('Example', () => Example);
And in Android, image inside view component, view need width、height.
<View style={{
  position: 'absolute',
  top: 80,
  left: 30,
  width: windows.width,
  height: windows.height,
}} level={20}
>
  <Image style={{ width: 115, height: 70 }} source={require('./img/1/c2.png')} />
</View>| Prop | PropType | Default Value | Description |
|---|---|---|---|
| dotColor | string | 'rgba(255,255,255,0.3)' | Bottom of the page dot color |
| activeDotColor | string | '#fff' | Active page index dot color |
| rightTextColor | string | '#fff' | The bottom right Text Done、> color |
| leftTextColor | string | '#fff' | The bottom left Text Skip color |
| onSlideChange | (index, total) => {} | function to call when the pages change | |
| onSkipBtnClick | (index) => {} | function to call when the Skip button click | |
| onDoneBtnClick | func | function to call when the Done button click | |
| onNextBtnClick | (index) => {} | function to call when the Next '>' button click | |
| doneBtnLabel | string、Text element | Done | The bottom right custom Text label |
| skipBtnLabel | string、Text element | Skip | The bottom left custom Text label |
| nextBtnLabel | string、Text element | › | The bottom left custom Text label |
| pageArray | array | In the basic usage, you can input object array to render basic view example: [[{title: 'Page 1', description: 'Description 1', img: 'https://goo.gl/uwzs0C', imgStyle: {height: 80 * 2.5, width: 109 * 2.5 }, backgroundColor: '#fa931d', fontColor: '#fff', level: 10 }] , level is parallax effect level ,if you use pageArray you can't use custom view |
|
| defaultIndex | number | 0 | number of the index of the initial index |
| renderSkipButton | bool | true | a boolean defining if we should render the skip button |
| renderDoneButton | bool | true | a boolean that defines if we should render the done button |
| Prop | PropType | Default Value | Description |
|---|---|---|---|
| level | number | parallax effect level |


