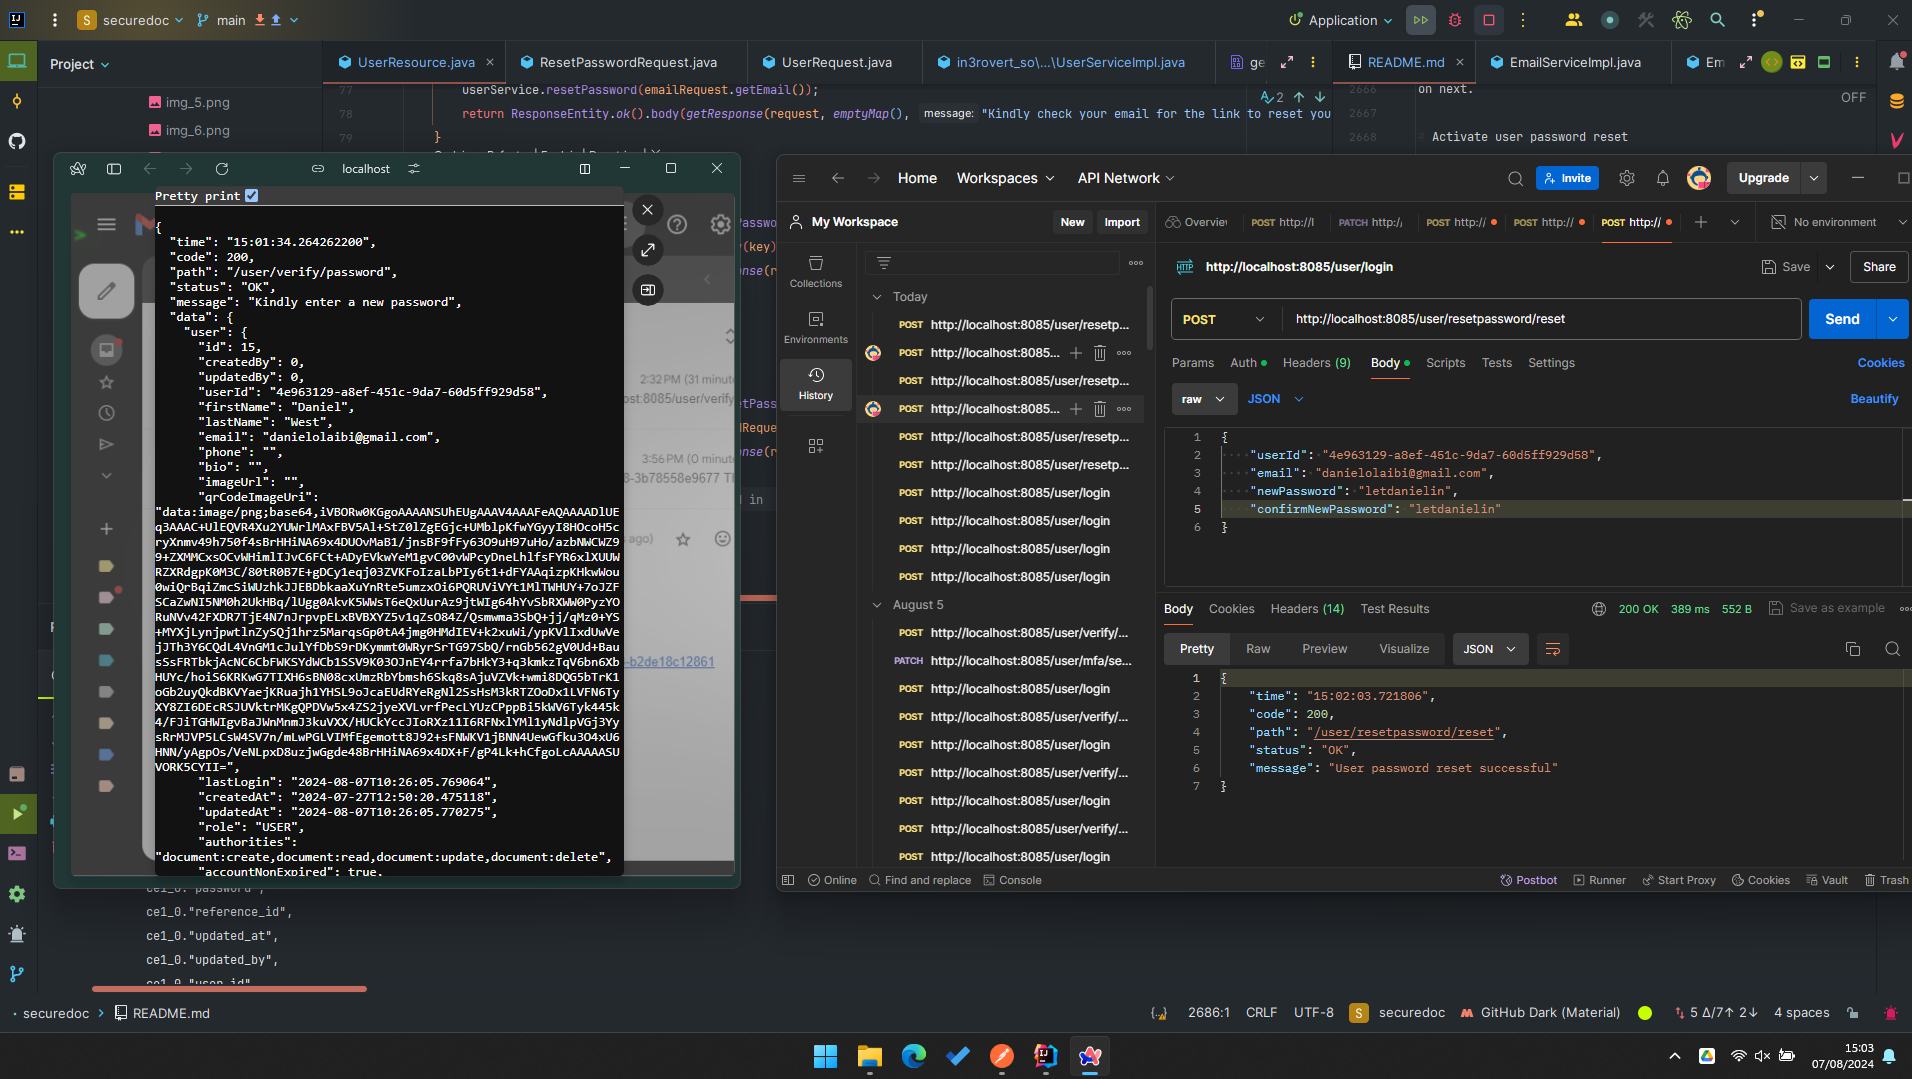
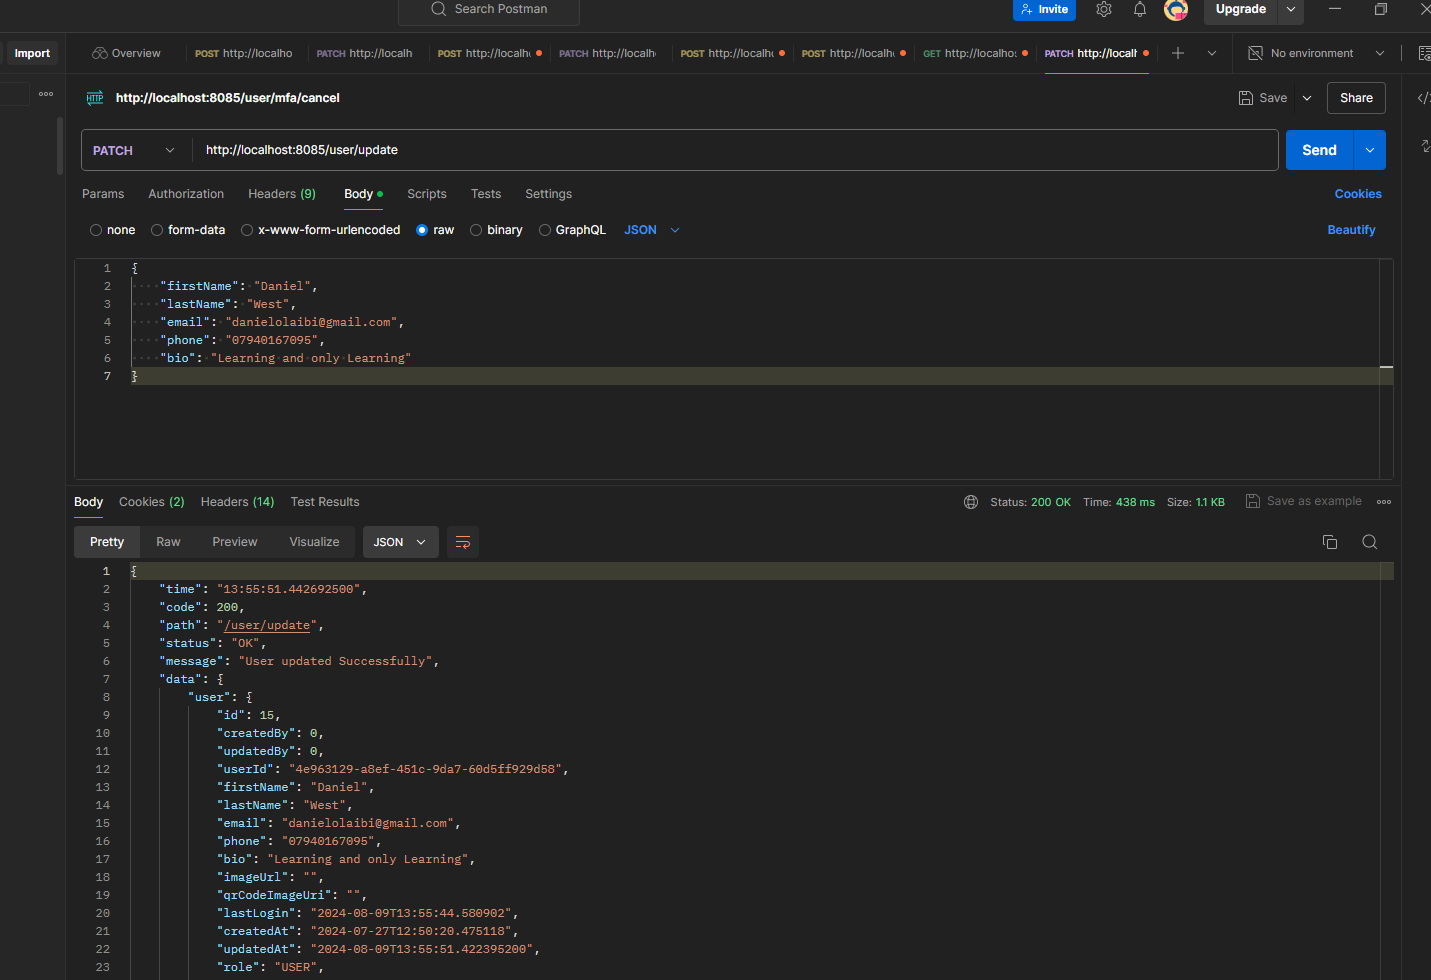
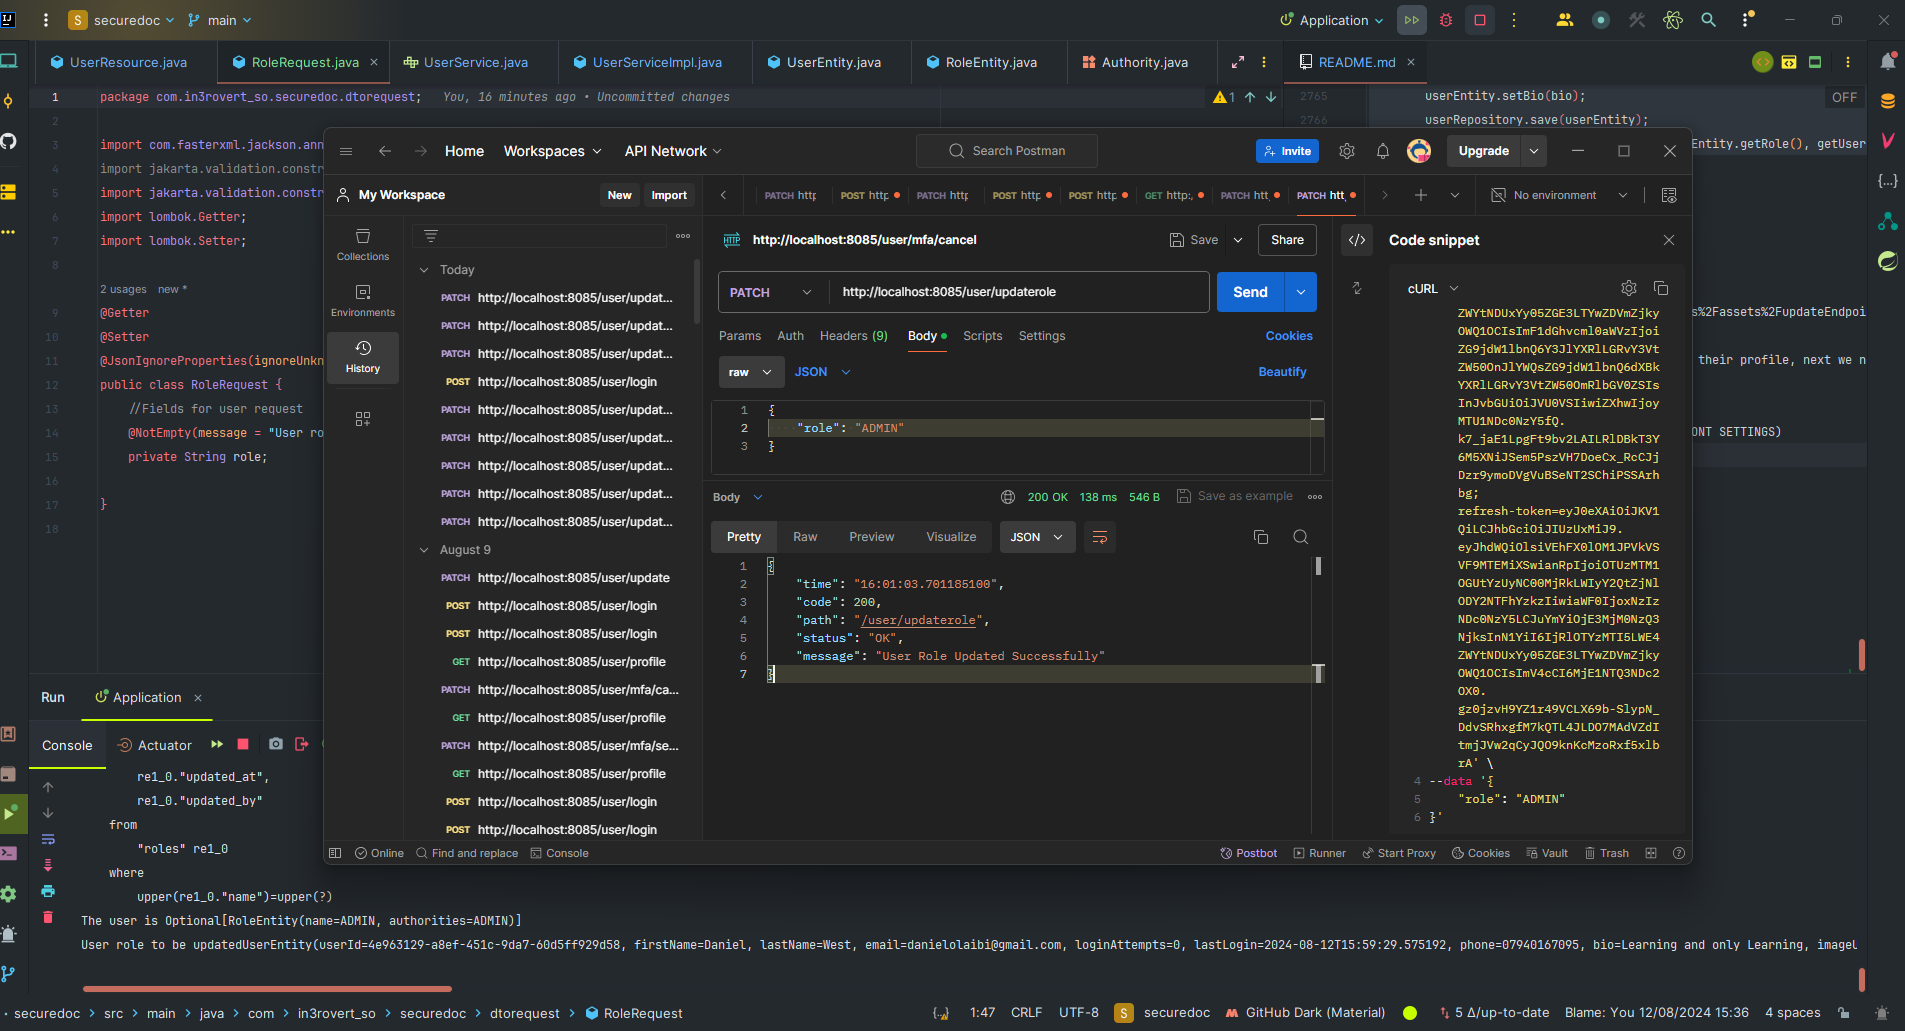
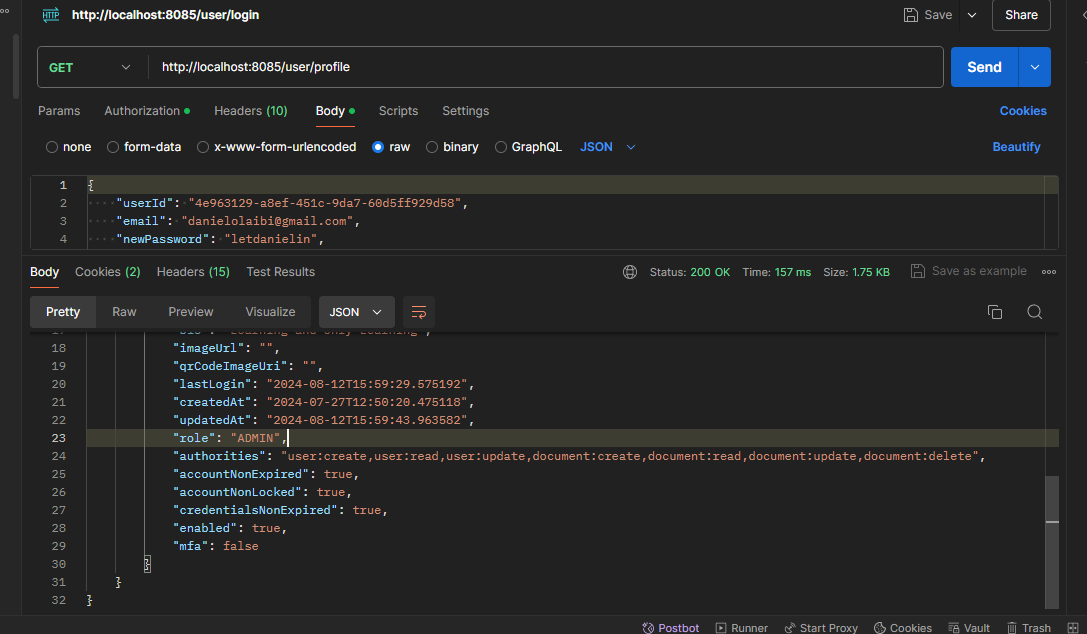
Note: THIS README is still under going documentation and is not ready yet but will be updated soon. However, it is still useful as you can always use it as a guild to understand the application and get an idea of what has been done so far.
Need to audit everything we do for the application Create an auditable (abstract) class this class can be extended to create an entity listener for any entity. Auditable --> all entities will inherit from this class. so when every we try to save an entity in the database all of the logic inside of the auditable will be executed and if we dont have who is updating the data or creating the daa then the execution will fail. (Ongoing). We can get information from this class but we cant set information from this class.
    private Long id; //This is going to serve all the subclasses so dont need to define an id from the subclasses.
    private String referenceId =  new AlternativeJdkIdGenerator().generateId().toString(); //Used to identity a specific resource in the database. Anytime we save an entity they get a refID
    private Long createdBy; // WHO CREATED IT.
    private Long updatedBy; //WHO UPDATED IT.
    private LocalDateTime createdAt; //WHO UPDATED IT at what time
    private LocalDateTime updatedAt; //WHO UPDATED IT at what time.
This are the fields needed for the super class so that all the subclasses can inherit from this is also going to be an entity that jpa will manage for us, what we have to do now is add the annotation for the required fields.
    @Id
    @SequenceGenerator(name = "primary_key_seq", sequenceName = "primary_key_seq", allocationSize = 1)
    @GeneratedValue(strategy = GenerationType.SEQUENCE, generator = "primary_key_seq")
    @Column(name = "id", updatable = false)
    private Long id; //This is going to serve all the subclasses so don't need to define an id from the subclasses.
    private String referenceId =  new AlternativeJdkIdGenerator().generateId().toString(); //Used to identity a specific resource in the database. Anytime we save an entity they get a refID

    @NotNull
    private Long createdBy; // WHO CREATED IT.

    @NotNull
    private Long updatedBy; //WHO UPDATED IT.

    @NotNull
    @Column(name = "created_at", nullable = false, updatable = false)
    @CreatedDate
    private LocalDateTime createdAt; //WHO UPDATED IT at what time

    @Column(name = "updated_at", nullable = false)
    @CreatedDate
    private LocalDateTime updatedAt; //WHO UPDATED IT at what time.
Quotes Explain each annotations and why you need them.
- What we need to do now is implement the logic for prepersit or preupdate so that before we presit for any entity we check for all of the field we are setting because we cant save anything in the database if we dont have who created it or who updated it or the date they were created or updated.
 @PrePersist
    public void beforePersist() {

    }
So this method is going to be called before any entity is saved in the database.
The beforePersist() method is used to set the createdAt, createdBy, updatedBy, and updatedAt fields of an entity before it is persisted. It also checks if a userId is provide and throws an exception if it is not.
The beforeUpdate() method is used to set the updatedAt and updatedBy fields of an entity before it is updated. It also checks if a userId is provided and throws an exception if it is not.
So before we save any entity both of the above code is going to run.
The next time I want to work on is the exception handling
- ApiException
public void beforePersist() {
        if (userId == null) { throw new ApiException("Cannot persist entity without user ID in Request  Context for this Thread ");}
So we will have to create a new class for exception handling.
public class ApiException extends RuntimeException{
    public ApiException(String message) {super (message); }
    public ApiException() {super ("An error occurred"); }
}
The objective of this ApiException class is to provide a custom exception class that can be used to handle exceptions that occur during the execution of API-related operations in a Java application. By extending the RuntimeException class, instances of ApiException do not need to be caught or declared explicitly. This makes it easier to handle API-related exceptions throughout the codebase.
"Implementing request context and userId handling in domain package"
The next thing we will be working on next is figuring out what
var userId = 1L;is going to look like, we need to have a way to always get, set and retreive the userId in the incoming request context when the request comes in. We need to set it and then get it anytime adn anywhere in the application.
- Request context The point is to access some information in every thread when the request comes in. So we are going to creat a thread local and its going to give us a way to create variables in every thread so we can access those variables when and where ever we want adn they are private fields.
Creat a domain class. Domains are like classes we have in the application while enity is still classes but are things that we are persisting in the database, we calling them entity because they are being managed by JPA and JPA calls them entities. Domains are just regular classes that are not being persisted in the database by JPA.
Stopped here today thein3rovert @github 19/05/2024
Start the next day 21/05/2024 Working on the Domain Package and also the userId in the request context.
 @PreUpdate
    public void beforeUpdate() {
        var userId = 1L;
        if (userId == null) { throw new ApiException("Cannot update entity without user ID in Request  Context for this Thread");}
    }
[Entity: Auditable -> exception: ApiException -> domain: RequestContext] Created the request context class -> domain package.
private static final ThreadLocal<Long> USER_ID = new ThreadLocal<>(); // Allows us to create userId variables in every thread
    // and also set and get the userid (its like a typeof the variables)
    private RequestContext() {
    }
    //Setting the variable to nul
     public static void start() {
        USER_ID.remove();
    } //Allows us to initialise everything.
    //SETTER AND GETTER FOR THE VARIABLES
    public static void setUserId(Long userId) {
        USER_ID.set(userId);
    }
    public static Long getUserId() {
        return USER_ID.get();
    }
Since all the values in the request context are all static we can just call the request context then set and get the values from the request context.
The next thing we're going to do it make use of it inside the Auditable class, we are going to be getting the values and later we are going to be setting them whereever the request comes in as the values are going to be done in a filter so where the request comes in we are going to have some filter to set the request, however we need to do some logic because depending on the request we might not have a userId in every request for example when we are sending a request to login or register.
@PrePersist
    public void beforePersist() {
var userId = RequestContext.getUserId();@PreUpdate
public void beforeUpdate() {
var userId = RequestContext.getUserId();;Now we have set the values of the userId which will be coming from the request context. So before a user can persist an entity it has to have a userId and also before a user can update an entity it has to have a userId and also every other classes that we created are going tp inherit from the Auditable class that way all of the auditables fields will also belong to that class and the presist and update will also be done in that class before any other class is being saved or updated.
Next, Creating the user class which will inherit from the Auditable class. [Entity: [Auditable, User] -> exception: ApiException -> domain: RequestContext] This user class is going to represent the data(User) that will be stored(persisting) in the database.
- The first we going to be doing is extend auditable so once we do that the class inherit the fields from the auditable class that was previously created above.
package com.in3rovert_so.securedoc.entity;
public class User extends Auditable{
}
We're also going to keep doing this for all entity that we are going to be creating thats is going to be managed by JPA.
- Defining the fields so far we have
 private String userId;
    private String firstName;
    private String lastName;
    private String email;
    private Integer loginAttempts;
    private LocalDateTime lastLogin;
    private String phone;
    private String bio;
    private String ImageUrl;
The fields loginAttempts and lastLogin are going to be used to keep track of the user login attempts and
the last time they logged in so it will be used to block them if they exceed a limit.
After that i added fields for Spring Security
   private boolean accountNonExpired;
    private boolean accountNonLocked;
    private  boolean enabled;
    private boolean mfa;
These fields helps to load the user from database and use some of the values to create a user details that we can pass into spring security so that spring security can do auth for us.
We are also going to need to keep track of the secret QR code so we can determine if the code the user entered (verification code) is correct or not and we also need to save this value in a database and this value is going to be created every time set their multi factor authentication because thatas what we're going to use to determine if its a correct code or not.
private String QrCodeSecret;- User Entity Part 2 (Adding Annotations)
@Getter
@Setter
@ToString
@Builder //Need to know what this is for
@NoArgsConstructor
@AllArgsConstructor
@Entity
@Table(name = "users") //Naming the table
@JsonInclude(NON_DEFAULT)
I also enforce some of the fields to be not null and also the id to be unique.
 @Column(updatable = false, unique = true, nullable = false) // We cannot have a user without an id
private String userId;@Column(unique = true, nullable = false) //We cannot have a user without an email also
private String email;Everytime we deserialize an object from the database we want to get the id from the database, and send it over as a JSON to the client(backend) When ever we get a deta from a database its called deserialization. When we send the JSON to the client its called serialization.
Serialization is converting an object to JSON and deserialization is converting JSON to an object and this is what JPA is doing.
   @JsonIgnore
    private String qrCodeSecret;
The reason why we are doing this is because when ever we want to send the Json to the client we dont want to send the QR code with the data.
 @Column(columnDefinition = "TEXT")  //Updating the column definition of the ImageURI because its a very long string.
    private String qrCodeImageUrl;
We are updating the column definition of the ImageURI because its a very long string and we want to save it in the database, having a very long string is not a good idea bacause this will take up a lot of space in the database and it will slow down the application.
-
User Roles The next things we need to do is adding roles to the user and also define a class that is going to be the class representing ther roles. Thats what we are going to be working onn next. I rename the user clasds to UserEntity because that is what we are going to be using to have a simple user class that is going to map some of the object fields into an other object. The userEntity is going to be the entity it is never going to go to the frontend but the user class is what we are going to be sending over to the frontend.
-
Now lets create the RolesEntity [Entity: [Auditable, UserEntity, Roles] -> exception: ApiException -> domain: RequestContext]
public class RoleEntity extends Auditable{
private String name;
private String authorities;
} ``` Because we are goign to define authorities for each roles and they will be ENUM.
private String authorities;And then we import that RoleEntity into the UserEntity class so that we can use it to create the roles and then I did some mapping to
@ManyToMany
    @JoinTable(name = "user_roles",
        joinColumns = @JoinColumn(name = "user_id"),
        inverseJoinColumns = @JoinColumn(name = "role_id"))
    private Set<RoleEntity> roles = new HashSet<>();
Many to one means many users can have one role and one role can have many users because the roles they carry their permissions to do certain things. So depending your the roles that give user a permission to do and not do certain things. If i want a high level control i can just use the roles and if i want a refine grainnroles i can use the permissions and authorities associated with that roles.
For examples:
ROLE(read, update, delete): USER{read, update} ADMIN{read, update, delete}
Much better way, meaning the user can read, update and reah documnets.
USER{user:read, user:update, document:read} ADMIN{user:read, user:update, user:delete} MANAGER{document:read, document:update, document:delete, user:update}
Back to the mapping
  @ManyToOne(fetch = FetchType.EAGER) //Many user can only have one role,  the Eager means when ever we load a user, we want
    //load their roles.
    @JoinTable(
            name = "user_roles",
            joinColumns = @JoinColumn (
                    name = "user_id", referencedColumnName = "id"
            )
    )
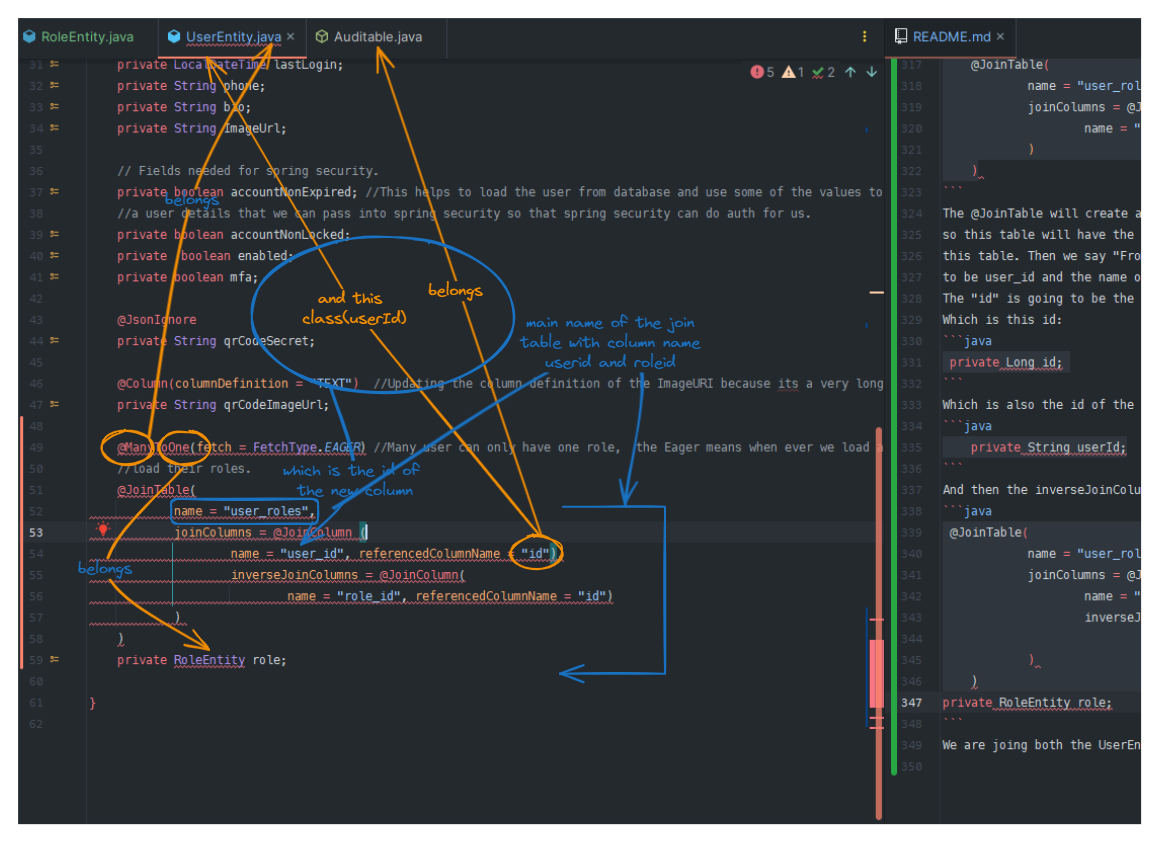
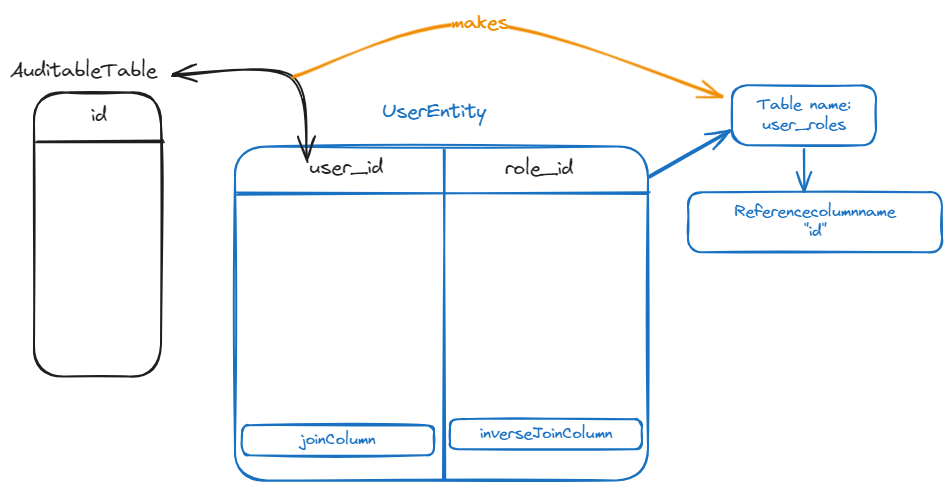
The @JoinTable will create another table in btw to map the UserEntity with the RoleEntity in the database so this table will have the name of user_roles so that we can clearly identity this table. Then we say "From this Jointable class, i want the name of the column to be user_id and the name of the referenced column to be id." The "id" is going to be the id of the UserEntity which is going to be the foreign key. Which is this id:
private Long id; Which is also the id of the RoleEntity.
private String userId;And then the inverseJoinColumns is going to be the name of the column in the RoleEntity
 @JoinTable(
            name = "user_roles",
            joinColumns = @JoinColumn (
                    name = "user_id", referencedColumnName = "id"),
                    inverseJoinColumns = @JoinColumn(
                            name = "role_id", referencedColumnName = "id")
            )
    )
private RoleEntity role;
We are joing both the UserEntity and the RoleEntity in the database. The first joinColumns is going to be
is referencing the UserEntity and the second joinColumns is going to be referencing the RoleEntity fields.
The next thing i want to do is define the enum to take care of the roles. End 21/05/2024.
Formating CTRL + ALT + L
Date: 22/05/2024 TODO: Define the enum to take care of the roles and the table. [entity: Auditable -> exception: ApiException -> domain: RequestContext -> enumeration: Authority] So we created a new package called enumaration which has a class called Authority which is an "ENUM" class.
public enum Authority {
}
Then went into the RoleEntity and change the authorities field and change the private String authorities;
to private Authority authorities;
    private Authority authorities; // Because we are going  to need to define authorires for each roles and they will be ENUM.
}
So thats going to be the authoority for the user roles. Now we are just going to define some enum in the authoriets class.
  USER(""),
    ADMIN(""),
    SUPER_ADMIN(""),
    MANAGER("");
These values are like string we need to have a way to get these strings, in other to o that we will define some fields and constructors also a getter in other the get the values.
   private final String value;
    Authority(String value) {
        this.value = value;
    }
    public String getValue() {
        return this.value;
    }
Now we will define the values what the values are going to be, in other to do that we created a constatnt class. Inside this constasnt class we are going to be defining the values of all the authorities.
public class Constants {
    public static final String ROLE_PREFIX = "ROLE_";
    public static final String AUTHORITY_DELIMITER = ",";
    public static final String USER_AUTHORITY = "document:create,document:read,document:update,document:delete";
    public static final String ADMIN_AUTHORITY = "user:create,user:read,user:update,document:create,document:read,document:update,document:delete";
    public static final String SUPER_ADMIN_AUTHORITY = "user:create,user:read,user:update,user:delete,document:create,document:read,document:update,document:delete";
    public static final String MANAGER_AUTHORITY = "document:create,document:read,document:update,document:delete";

}
First the ROLE_PREFIX is going to be the prefix of the role, More about it will be explained later.
- The AUTHORITY_DELIMITER is going to be the delimiter of the authorities, which is the litle comma "," dividing/separating the authorities..
- The USER_AUTHORITY is going to be the authority of the user.
- ADMIN_AUTHORITY is going to be the authority of the admin.
- SUPER_ADMIN_AUTHORITY is going to be the authority of the super admin.
- MANAGER_AUTHORITY is going to be the authority of the manager. After that we copied the authorities of each user and pasted in the Authority class user field.
public enum Authority {
    USER("USER_AUTHORITY"),
    ADMIN("ADMIN_AUTHORITY"),
    SUPER_ADMIN("SUPER_ADMIN_AUTHORITY"), //These values are like string we need to have a way to get these strings.
    MANAGER("MANAGER_AUTHORITY");
What we have mto figure out now is mapping this value from some data coming from my database because we need to map these values if we going to be working with data in the database, as of now we dont have a way to remove these values from here and we are going to need to do that when ever we are mmapping things and sending reposnse back to the frontend or to any http client that calls this server.
Next we going to see if we can define a converter for these values:
public enum Authority {
    USER("USER_AUTHORITY"),
    ADMIN("ADMIN_AUTHORITY"),
    SUPER_ADMIN("SUPER_ADMIN_AUTHORITY"), //These values are like string we need to have a way to get these strings.
    MANAGER("MANAGER_AUTHORITY");
Because we are going have a way to convert these values:
 public static final String USER_AUTHORITY = "document:create,document:read,document:update,document:delete";
    public static final String ADMIN_AUTHORITY = "user:create,user:read,user:update,document:create,document:read,document:update,document:delete";
    public static final String SUPER_ADMIN_AUTHORITY = "user:create,user:read,user:update,user:delete,document:create,document:read,document:update,document:delete";
    public static final String MANAGER_AUTHORITY = "document:create,document:read,document:update
from the database to the java class or the enum and visa versal.
[AI GENERATED
Here, each authority (USER, ADMIN, SUPER_ADMIN, MANAGER) is assigned a corresponding value (USER_AUTHORITY, ADMIN_AUTHORITY, SUPER_ADMIN_AUTHORITY, MANAGER_AUTHORITY) The getValue() method allows you to retrieve the value associated with each authority. Additionally, the Constants class defines constants for the authority values. These constants can be used to map the values from the database to the Authority enum and vice versa. To map the authority values from the database to the Authority enum, you can create a converter. This converter will convert the database values to the corresponding Authority enum instances and vice versa.
- What we want to do now is to create a converter for these values.
create package inside enum package, called the
converter, this package has a java class calledRoleConverter.
public class RoleConverter implements AttributeConverter<Authority, String> {
    @Override
    public String convertToDatabaseColumn(Authority authority) {
        return null;
    }
    @Override
    public Authority convertToEntityAttribute(String s) {
        return null;
    }
}
Because we implemented the AttributeConverter interface, we need to implement the
AttributeConverter interface we need to add the convertToDatabaseColumn method and
the convertToEntityAttribute method this helps us to convert these values from the database to the java class or the enum and visa versal.
-
convertToDatabaseColumn: convertToDatabaseColumn, is an implementation of the AttributeConverter interface's convertToDatabaseColumn method. It's used in the context of JPA (Java Persistence API) to convert an Authority object into a string representation that can be stored in a database column
-
convertToEntityAttribute:This will take whatever values we give it or get from the database and convert them to the enum and convert ut to entityAttribute.
  @Override
    public String convertToDatabaseColumn(Authority authority) {
        if (authority == null) {
            return null;
        }
        return authority.getValue();
}- convertToEntityAttribute, is an implementation of the AttributeConverter interface's convertToEntityAttribute method. It takes a String parameter code and returns an Authority enum value.
@Override
    public Authority convertToEntityAttribute(String code) {
        if(code == null) {
            return null;
        }
        return Stream.of(Authority.values())
                .filter(authority -> authority.getValue().equals(code))
                .findFirst()
                .orElseThrow(IllegalArgumentException::new);
    }
The method checks if the code is null. If it is, it returns null. If not, it uses Java 8's Stream API to find the first Authority enum value whose value field matches the code string. If no match is found, it throws an IllegalAccessError. In essence, it's a utility method to convert a string value into the corresponding Authority enum value.
Now we need to define some annotations for the converter.
@Converter(autoApply = true)This just means that the converter will automatically run the converter when ever we are loading the class from the database. So when ever we are going to convert the Authority to enum to the database, we are going to get the string value.
  @Override
    public String convertToDatabaseColumn(Authority authority) {
        if (authority == null) {
            return null;
        }
        return authority.getValue();
    }
Thats what we are going to save and then since we save string values in the database, we are just going to map them back to the authority where the values match.
public Authority convertToEntityAttribute(String code) {
if(code == null) {
return null;
}
return Stream.of(Authority.values())
.filter(authority -> authority.getValue().equals(code))
.findFirst()
.orElseThrow(IllegalArgumentException::new);
}Now if we go back to the UserEntity fields we are missing a field for the Password adn if we dont have
a password then we cant really save a user and if we cant save a user they wont be able to login. The reason for
this is going to be that the password is going to be its own class. Its going to be a stand alone class and
we are going to work out it's logic.
First we created a credential class for handling the credentials of the user in the class we have these fields.
public class CredentialEntity extends Auditable {
    private String password;
    private UserEntity userEntity;
Then we define a construtor for the fields.
public CredentialEntity(String password, UserEntity userEntity) {
    this.password = password;
    this.userEntity = userEntity;
}
Annotations
public class CredentialEntity extends Auditable {
    private String password;
    @OneToOne(targetEntity = UserEntity.class, fetch = EAGER) //When ever we load the userEntity it will load
    //all user associated with the credentials.
    @JoinColumn(name = "user_id", nullable = false) //We need the id specifically so we its just going tom
    //get the user_id from the userEntity.
    @OnDelete(action = OnDeleteAction.CASCADE)
    @JsonIdentityInfo(generator = ObjectIdGenerators.PropertyGenerator.class, property = "id")
    @JsonIdentityReference(alwaysAsId = true)
    @JsonProperty("user_id")
    private UserEntity userEntity;
@OneToOne: This annotation indicates that the relationship is a one-to-one relationship. @JoinColumn: This annotation specifies the name of the column in the database that will be used to join this entity with the UserEntity entity. @OnDelete: This annotation specifies the action to be taken when the referenced UserEntity is deleted. In this case, it is set to CASCADE, meaning that the referenced UserEntity will be deleted along with this entity. @JsonIdentityInfo: This annotation is used for JSON serialization and deserialization. It specifies the generator and property for the identity of this entity. @JsonIdentityReference: This annotation specifies that the user_id property should always be serialized as an ID reference. Now these credeintials is associated with the userEntity so aytime we are going to save a new credntial we need to give it a user.
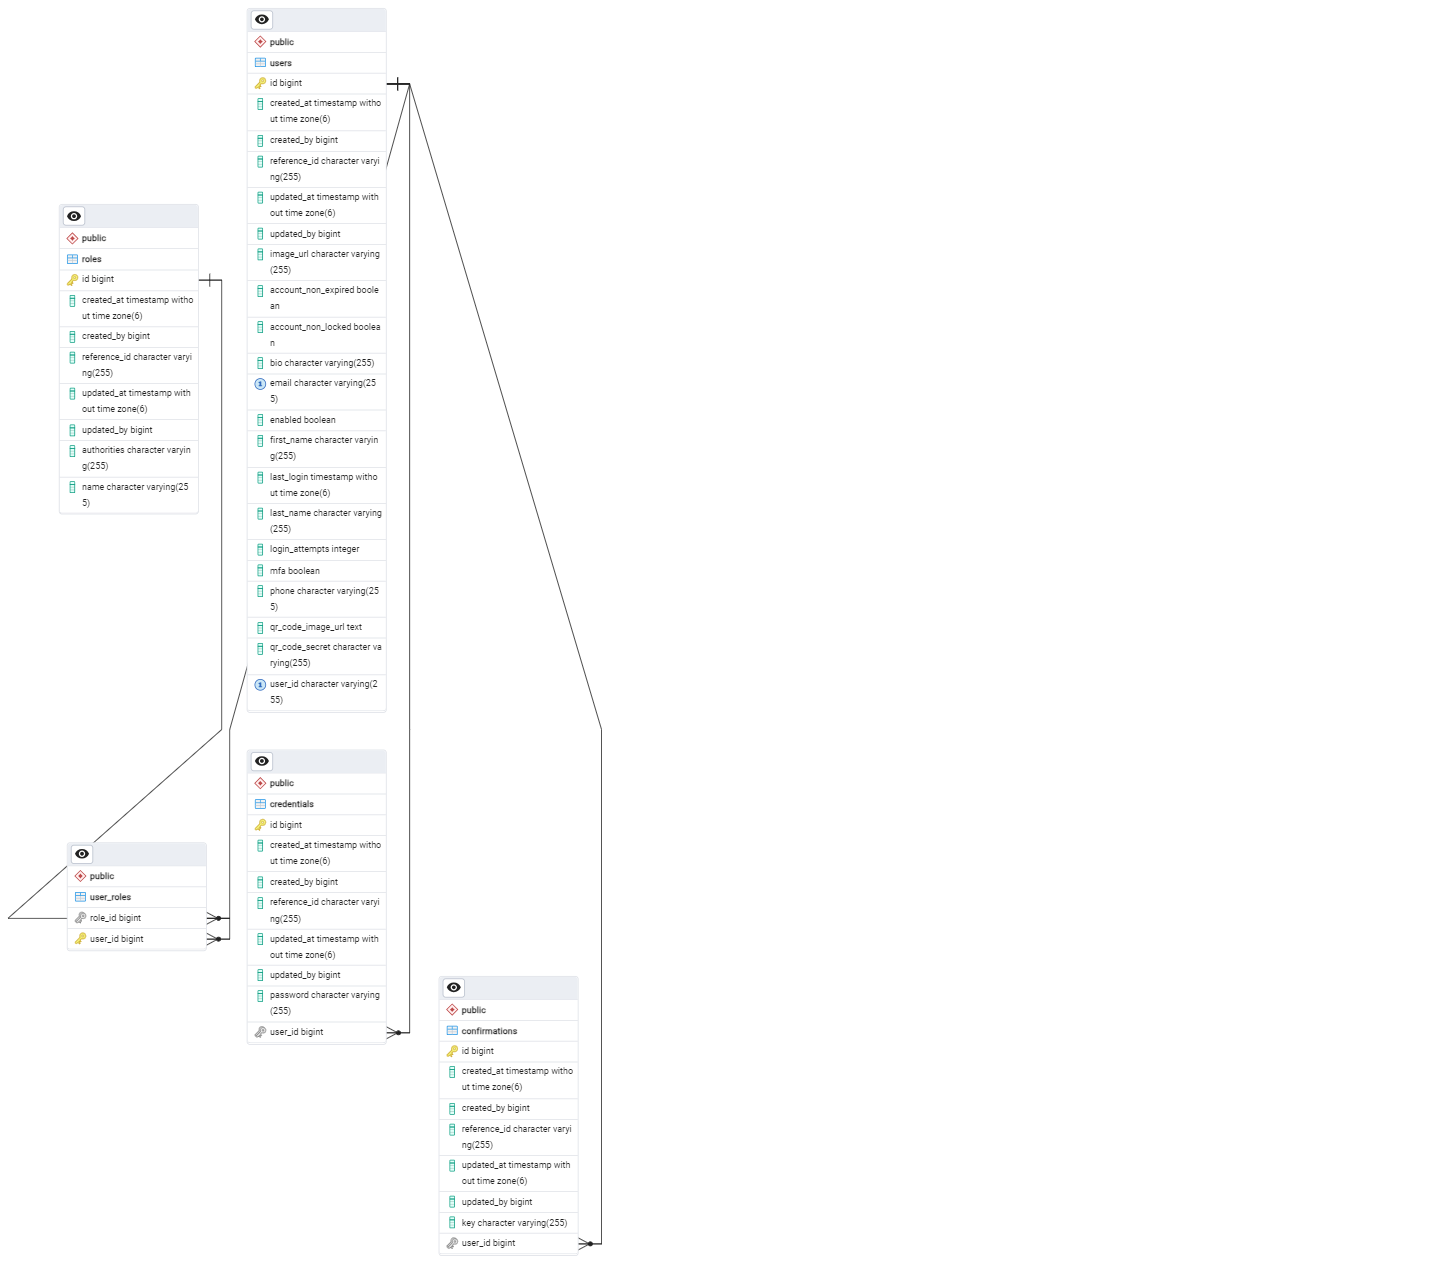
Below is a better illustation of how this works.

- The next thing we going to do is the confirmation, because whenever someone creates a new account we need to create some kindof a token or a key to confirm that the user is who they say they are. and then we are going to save it in the database and send them an email with the key and password and we need to manage them in the database. Thats what we going to be working on next.
This is pretty similar to the credentials entity, in this class
public class ConfirmationEntity extends Auditable {
    private String key; // ? This is going to be a like a UUID that we will sent to the user as a token
We have a field for the key, this key is going yto be a UUID that will be sent to the user, when they sign up
 public ConfirmationEntity(UserEntity userEntity) { // We dont need to get the key because they are going to generate it for us.
        this.userEntity = userEntity;
        this.key = UUID.randomUUID().toString(); //When ever we create a new instance of this confirmation, it going to
        //automaticallt generate the key.
    }
The UUID is what will be saved in the database as the id for the confirmation.
When ever someone creates a new user we will send them an email to confirm their account otherwise they wont be able to login. That means we need to have an email service so we can send an email to the user when ever we create a new account for them with a link so when they click on it they can activate their account.
We created a new emial services package. In this package we habe a sendNewAccountEmail method and
sendPasswordResetEmail method.
 void sendNewAccountEmail(String name, String to, String token);
    void sendPasswordResetEmail(String name, String to, String token);
And they have the same parameter, the name of the user, the email of the user, and the token. In other
to create the implemetation for these methods we will need to create a package for the implemetation..
Then we created an EmailServiceImpl class which will have a Bean because we want to inject it
to all the classes in the application.
public class EmailServiceImpl implements EmailService {
    private final JavaMailSender mailSender;
    @Override
    public void sendPasswordResetEmail(String name, String to, String token) {
    }
    @Override
    public void sendNewAccountEmail(String name, String to, String token) {
    }
}
In other to make it a bean we added
@Service
@RequiredArgsConstructor
We dont have a JavaMailSender so we need to ad the JavaMailSender dependency to the Pom.xml and this dependency
is coming from the spring-boot-starter-mail library.
Inside the Pom.xml we need to add the following dependency
<dependency>
    <groupId>org.springframework.boot</groupId>
    <artifactId>spring-boot-starter-mail</artifactId>
</dependency>
After i added two more fields
public class EmailServiceImpl implements EmailService {
    @Value("${spring.mail.verify.host}")
    private String host;
    private String fromEmail;
The host is used do identify what my enviroment is when i am generating the link for the email because
i dont want to use localhost or static ip-address, i need these to come from a properties file or something
similar. Added the @value annotation to the host field because we are going to use it in the email service
to get the host from the properties file.
  public void sendNewAccountEmail(String name, String email, String token) {
        try {
            SimpleMailMessage message = new SimpleMailMessage();
            message.setSubject("NEW_USER_ACCOUNT_VERIFICATION");
            message.setFrom(fromEmail);
            message.setTo(email);
            message.setText(getEmailMessage(name, host, token));
            sender.send(message);
        }catch (Exception exception){
            log.error(exception.getMessage());
            throw new ApiException("Unable to send email");
        }
    }
The method takes three parameters: name (a string representing the name of the user), email (a string representing the email address of the user), and token (a string representing the password reset token). Inside the method, a SimpleMailMessage object is created to represent an email message. The subject of the email is set to "NEW_USER_ACCOUNT_VERIFICATION". The sender's email address is set to the value of fromEmail, and the recipient's email address is set to the value of email. The email message text is set by calling a method called getEmailMessage with the name, host, and token parameters. Finally, the send method of the sender object is called to send the email message. If any exception occurs during the process, the exception message is logged, and an ApiException is thrown with the message "Unable to send email".
Similar thing is done for the sendResetPasswordEmail method. Inside the two method we have new method called the getEmailMessage and the getResetPasswordMessage, this method is going to be used in the two methods above to create the email message text and the reset password message text.
SO the next thing we have to do is make sure that both these methods are asynchronous because we dont want to wait for the email to be sent to the user.
@Async
public void sendNewAccountEmail(String name, String email, String token) { @Async
public void sendPasswordResetEmail(String name, String email, String token) {What these it going to do is run all these method in a separate thread when ever we call it so we dont have to wait for one to finsh the execution of the thread continue.
The next thing we have to do is make sure that we can define the getEmailMessage and the getResetPasswordMessage
method they are going to be a Util method.
Stopped here today thein3rovert @github 22/05/2024
Date: 23/05/2024 TODO: Working on Email services method (Email Utils) First we create a new package for the util methods, then we create a new class called EmailUtils.
   public static String getEmailMessage(String name, String host, String token) {
        return "Hello" + name + ",\n\nYour new account has been created. Please click on the link below to verify your account.\n\n" +
                getVerificationUrl(host, token) + "\n\nThe Support Team";
    }
Its taking the name the age and the token and its concatenating all so that it can give us a string. The method takes three parameters:name (a string representing the name of the user), host (a string representing the host of the user), and token (a string representing the password verification token). We also have the getVerification method which is responsible for geting the verification from an endpoint.
    private static String getVerificationUrl(String host, String token) {
        return host + "/verify/account?token=" + token;
    }
We are going to also be creating the endpoint in our controller but later when we have the react application
we are going to have to pass in the react application base as the host because they have to go to
the frontend for some loading animations.
We also do similar thing to the other method getResetPasswordMessage because they both have the same, parameters.
so i only changed the method name.
- The next thing we wnat to do is create a way to call this method so we can send different email to the user,
in other to do this we will need to use something called the eventlistener like an
event in springso that when someone create a new account we will just fire the event and send the email to the user. And thats what i am going to be working on for today. So inside the Enumeration package, a new class was created called the EmailServiceEventTypethis helps us to identify the different type of events and we are going to have just two events.
public enum EventType {
    REGISTRATION, RESETPASSWORD
}
for now these two event should be enabled.
public class UserEvent {
private UserEntity user;
private EventType type;
private Map<?, ?> data;//
}
When ever we fire an event we can optionally map in some data. If we dont have any data we don't have to pass in anything. But anytime we fire a new user event we have to give
the user the type and any data associated with that event. Now that we have the event we have to create
the evenlistener.
So we created a package called event inside this package we have the UserEvent class that we created earlier.
which is responsible for creating the event. Inside the same package we created a new package called the listener
which containers the UserEventListener class.
The UserEventListener class is responsible for handle UserEvent events and perform actions based on the type of
the event. In this case, it sends emails to users based on the type of the event(Registation or ResetPassword).
    public void onUserEvent(UserEvent event) {
        switch (event.getType()) {
            case REGISTRATION -> emailService.sendNewAccountEmail(event.getUser().getFirstName(), event.getUser().getEmail(), (String)event.getData().get("key"));
            case RESETPASSWORD -> emailService.sendPasswordResetEmail(event.getUser().getFirstName(), event.getUser().getEmail(), (String)event.getData().get("key"));
            default -> {}
        }
    }
The onUserEvent method is the main method of this class. It takes a UserEvent object as a parameter and performs different actions based on the type of the event. It uses a switch statement to determine the appropriate method to call on the emailService object. For a REGISTRATION event, it calls sendNewAccountEmail with the user's first name, email, and a key from the event's data. For a RESETPASSWORD event, it calls sendPasswordResetEmail with the same information.
Thats all for the EventListners also the @EventListener annotation is used to listen for events which helps us to fire an event.
What we need to do now is pass in some configurations for the Database, because when ever we run this application we need to passin some information to the database such as the entity so we are going to need to have some JPA configuration so that spring knows what it will look for in our configuaration so that it will create the data source for us otherwise all these classes are going to fail so we need to pass in the database configuration for that.
So the next thing we need to do is work on the configuaration for our datasource.
So I am going to be using postgresql as the database so all of our data are going to be saved using in this relational database system and i am going to be using pgaddmin to give me a UI interface so that i can work interact with the SQL server. Install Postgress, Pgadmin and PostMan for testing the API make sure to have these things on your computer, however in these project i am ging to be using docker so that I dont have to download things on my computer and also get experience working with docker because i want to build my skills with docker and also use docker to get an instance of PGadmin.
- The first thing i want to do is create a compose file that is going to get me both postgresql and pgadmin running so that i can run the docker container.
code compose.ymlThe First thing we have to do is define the services [List of services]
services:
 services:
  postgresdb: # Define the postgresdb service
    container_name: postgrescontainer  # Set the name of the container to postgrescontainer
    image: postgres:latest #Need to change the version
    restart: always # always what docker to run on machine start
    environment: # Passing in some env variable becuse we want to pass in some default username,pasword and DB
      POSTGRES_USER: thein3rovert ${POSTGRES_USER} # For security so that we dont pass in plain text
      POSTGRES_DB: ${POSTGRES_DB}
      POSTGRES_PASSWORD: ${POSTGRES_PASSWORD}
    expose:
      - 5432 # Expose from inside of the container
    ports:
      - 5432:5432 # Map the port to the machine port
    volumes:
      - postgresvolume:/var/lib/postgresql/data # Mount a values for when container destroyed we run a new container witht the same value
      - ./schema.sql:/docker-entrypoint-initdb.dl/schema.sql
Never use latest when you are building a project you are going to run on other computer unless you are building your own project. Becuase latest is going to be out of date and this will cause issues with project especially is your not maintaining the peoject it is a bad idea to use latest. But if you are maintaining it, you can use latest.
- The next is the Pgadmin service
gadmin:
    container_name: pgadmincontainer
    image: dpagel/pgadmin4:latest
    restart: always
    environment:
      PGADMIN_DEFAULT_EMAIL: thein3rovert ${PGADMIN_EMAIL}
      PGADMIN_DEFAULT_PASSWORD: ${PGADMIN_PASSWORD}
      PGADMIN_DEFAULT_ADDRESS: 6000
      PGADMIN_LISTEN_PORT: 6000
    expose:
      - 6000
    ports:
      - 7000:6000 #Mapping the 6000 to my local host 7000
    volumes:
      - postgresvolume:/var/lib/pgadmin
So we have an instance of Postgres and Pgadmin with appropriate configurations.
Stopped: 23/05/2024
Next thing we going to be working on is the .env file.
What we are going to be working on next is defining the enviroments variables for the our progres enviroments.
So i basically created a .env file and then define the values to the environment variables so that docker will
be able to use them, by be default docker is going to look for those file so we dont need to pass in any arguemene.
We now have our dockerfile and .env file, the next thing we want to do now is run the docker container in terminal.
To run the docker container
docker compose -f ./compose.yml up -dMake sure to cross check the config file before running to mitigate any error, after wait for docker to pull the images.
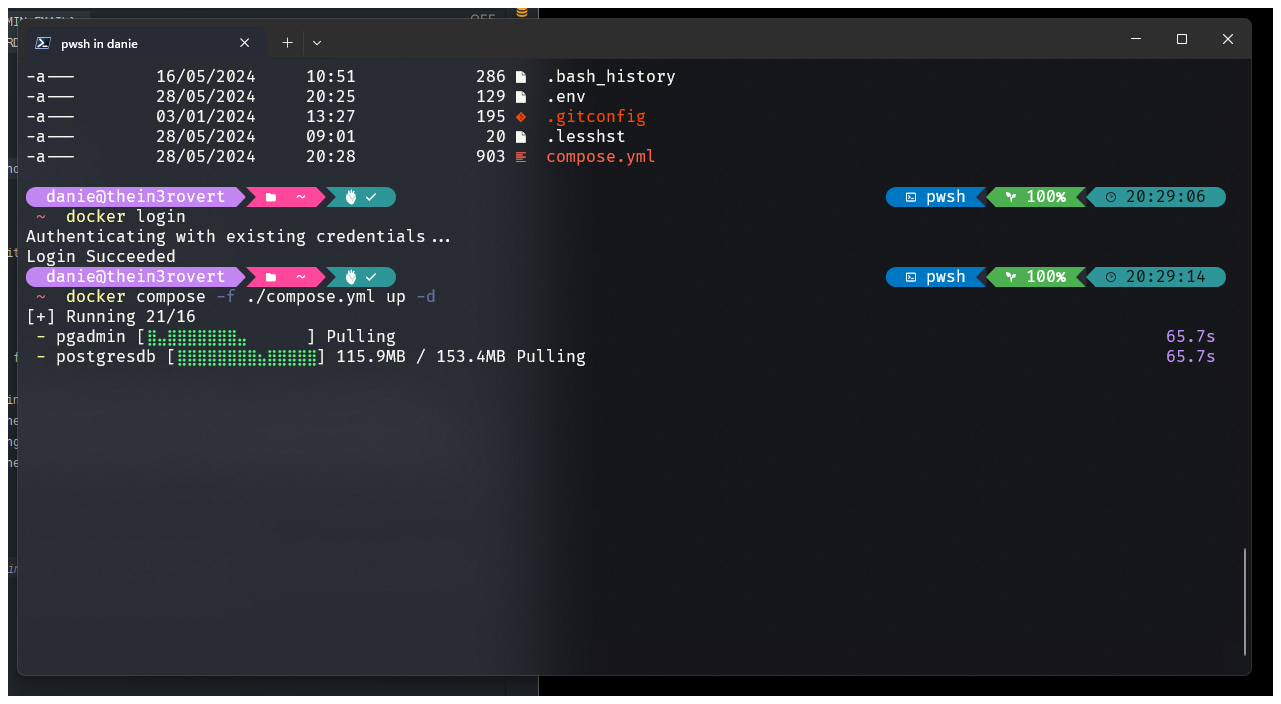 To check the port docker is running on
docker ps | grep post on windows powershell which is what i am using
docker ps | Out-String | findstr /i "post"These shows us the port of both postgres amd pgadmin, so the next thing we want to do is:
hostname -I These shows us the internal ip-address so we can access it, how ever for window powershell,
ipconfigAfter look for the IPV4 address and enter it in your browser with the config open post for pgadmin.
http://192.168.0.10:7000/login?next=/Doing that will get an instance of pgadmin running in your browser.
So what we need to donow is connect to the posgres database that we defined. So i try to connect to my postgres instance with pgadmin but it seem to be ignoring my passoword and possible my username which i added already to my config file so what do i need to do. I think i will have to delete both images and pull them again with the config file. So that why i will be working on next.
Today I have been able to make both the docker container and the pgadmin running. I am happy i was able to do it. Now we will be able able be use the credentials to login without having to install them on our local machine. After we run the application with thses credentials we will go back to the pgadmin and our tables should show up on our database. So what we are going to be working on next is putting the config file into our appllication.
Now we will be working on the database configuration to this application so that when we run it JPA will
pick up all of our entities and find the config file and use it to create the tables in our database.
So we created a new Directory called docker and then we move both our compose.yml and our .env file into the
docker directory.
If we dont want to use the enviroment variables we can add the hard coded values instead.
services:
  postgresdb:
    container_name: postgrescontainer
    image: postgres:16.3
    restart: always
    environment:
      POSTGRES_USER: ${POSTGRES_USER}
      POSTGRES_PASSWORD: ${POSTGRES_PASSWORD}
      POSTGRES_DB: ${POSTGRES_DB}
    expose:
      - 5432
    ports:
      - 5432:5432
    volumes:
      - postgresvolume:/var/lib/postgresql/data
      - ./schema.sql:/docker-entrypoint-initdb.dl/schema.sql

  pgadmin:
    container_name: pgadmincontainer
    image: dpage/pgadmin4:latest
    restart: always
    environment:
      PGADMIN_DEFAULT_EMAIL: ${PGADMIN_EMAIL}
      PGADMIN_DEFAULT_PASSWORD: ${PGADMIN_PASSWORD}
      PGADMIN_DEFAULT_ADDRESS: 6000
      PGADMIN_LISTEN_PORT: 6000
    expose:
      - 6000
    ports:
      - 8000:6000
    volumes:
      - pgadminvolume:/var/lib/pgadmin

volumes:
  postgresvolume:
pgadminvolume:- Now the first thing we are going to do it remain the proeprties file to yml file because i like working with yml alot. i like the syntax of a yml file.
Its important to define which profile is actieve when ever you have a springboot application becuase you can have dif config.
-
The we define some serilaization with Jaskson, jackson is mostly use for serialization.
-
After we are going to define some data source properties.
    datasource:
      url: jdbc:postgresql://${POSTGRESQL_HOST}:${POSTGRESQL_PORT}/${POSTGRESQL_DATABASE}
      username: ${POSTGRESQL_USERNAME}
password: ${POSTGRESQL_PASSWORD}- After we are going to pass in some JPA data.
    jpa:
      open-in-view: false
      database-platform: org.hibernate.dialect.PostgreSQLInnoDBDialect
      generate-ddl: true
      show-sql: true
      hibernate:
        ddl-auto: update
      properties:
        hibernate:
          globally_quoted_identifiers: true
          dialect: org.hibernate.dialect.PostgreSQLDialect
format_sql: true- jpa:open-in-view: false: This setting disables the "Open Session in View" pattern, which can be a performance issue in certain scenarios.
- jpa:database-platform: org.hibernate.dialect.PostgreSQLInnoDBDialect: This sets the database dialect to PostgreSQL with InnoDB storage engine.
- jpa:generate-ddl: true: This setting enables automatic generation of database schema based on the JPA entities.
- jpa:show-sql: true: This setting enables logging of SQL statements to the console.
- jpa:hibernate:ddl-auto: update: This setting tells Hibernate to update the schema automatically when the application starts.
Thats all for the configuration file, what we are going to now is create a new directory named
datainside this directory we will define the data(data.sql and schema.sql) spring is going look for a data sql and a schema sql it will run the schema first then run the data.
Inside these schema is where we create and define data such as tables and stuff and then in the data.sql thats where we do the data insertion like inserting into a table and all. By default spring is going yo use these two file and to be more organise we put them under the data directory., However spring will not be able to find them if we do not specify the where to find them. SO we are going to add another configuaration to the properties file in other to tell spring where to find them.
    sql:
      init:
        mode: never
        continue-on-error: false
        schema-locations: classpath:/data/schema.sql
        data-locations: classpath:/data/data.sql
The mode is set to never because we dont want to runt he application yet we have define the schema yet. We also specify the classpath because we are going to use the data and schema files in our application.
Also because we are going to be uploading file we need to define some servlet and tell the servelt we are going to be uploading a certain file size.
    servlet:
      multipart:
        enabled: true
        max-file-size: 1000MB
        max-request-size: 1000MB
By default the servlet max file size is 1mb, however we are going to be uploading more then 1mb file size.
Also Under Spring again we are goig to pass in some mail properties because we are going to be using
to verfiy our users.
    mail:
      host: ${EMAIL_HOST}
      port: ${EMAIL_PORT}
      username: ${EMAIL_ID}
      password: ${EMAIL_PASSWORD}
      default-encoding: UTF-8
      properties:
        mail:
          mime:
            charset: UTF
          smtp:
            writetimeout: 10000
            connectiontimeout: 10000
            timeout: 10000
            auth: true
            starttls:
              enable: true
              required: true
      verify:
        host : ${VERIFY_EMAIL_HOST}
Because we are going to be using docker when we ever we are doing deployment so we have to define the port, so we are going to add a server properties.
- spring.profiles.active: This property specifies the active profile for your application. The default profile is set to dev, but it can be overridden by setting the ACTIVE_PROFILE environment variable.
- spring.jackson: This section configures the Jackson JSON library. It sets the default property inclusion to non_null, and it configures various serialization and deserialization options.
- spring.datasource: This section configures the data source for your application. It specifies the JDBC URL, username, and password for connecting to the PostgreSQL database. The values for these properties are set using environment variables.
- spring.jpa: This section configures the JPA (Java Persistence API) properties for your application. It sets various options such as open-in-view, database-platform, generate-ddl, show-sql, and hibernate.ddl-auto.
- spring.sql: This section configures the SQL initialization for your application. It specifies the mode, continue-on-error flag, and the locations of the schema and data SQL files.
- spring.servlet.multipart: This section configures the multipart support for file uploads in your application. It sets the maximum file and request sizes.
So what we going to be working on next is definig the values for these properties.
ACTIVE_PROFILE
POSTGRESQL_HOST
POSTGRESQL_PORT
POSTGRESQL_DATABASE
POSTGRESQL_USERNAME
POSTGRESQL_PASSWORD
EMAIL_HOST
EMAIL_PORT
EMAIL_ID
EMAIL_PASSWORD
VERIFY_EMAIL_HOSTAfter defining these values above the values was defined in a application-dev.yml file and also in application-prod.yml. This was done to make it easier for us to deploy our application to both dev and prod. Having it on dev means we can run the application on dev by default and then run on prod when we deploy the application.
After then i run the application and encounter some errors:
- Initially i on commented the postgres dependencies so the error was a datasource error, meaning it could not find the data source for the database.
- This error is Caused by: org.postgresql.util.PSQLException: ERROR: relation "users" does not exist Meaning the application was not able to find the user table in the database. So what i am going to be working on now is basically finding the "Users does not exist error".
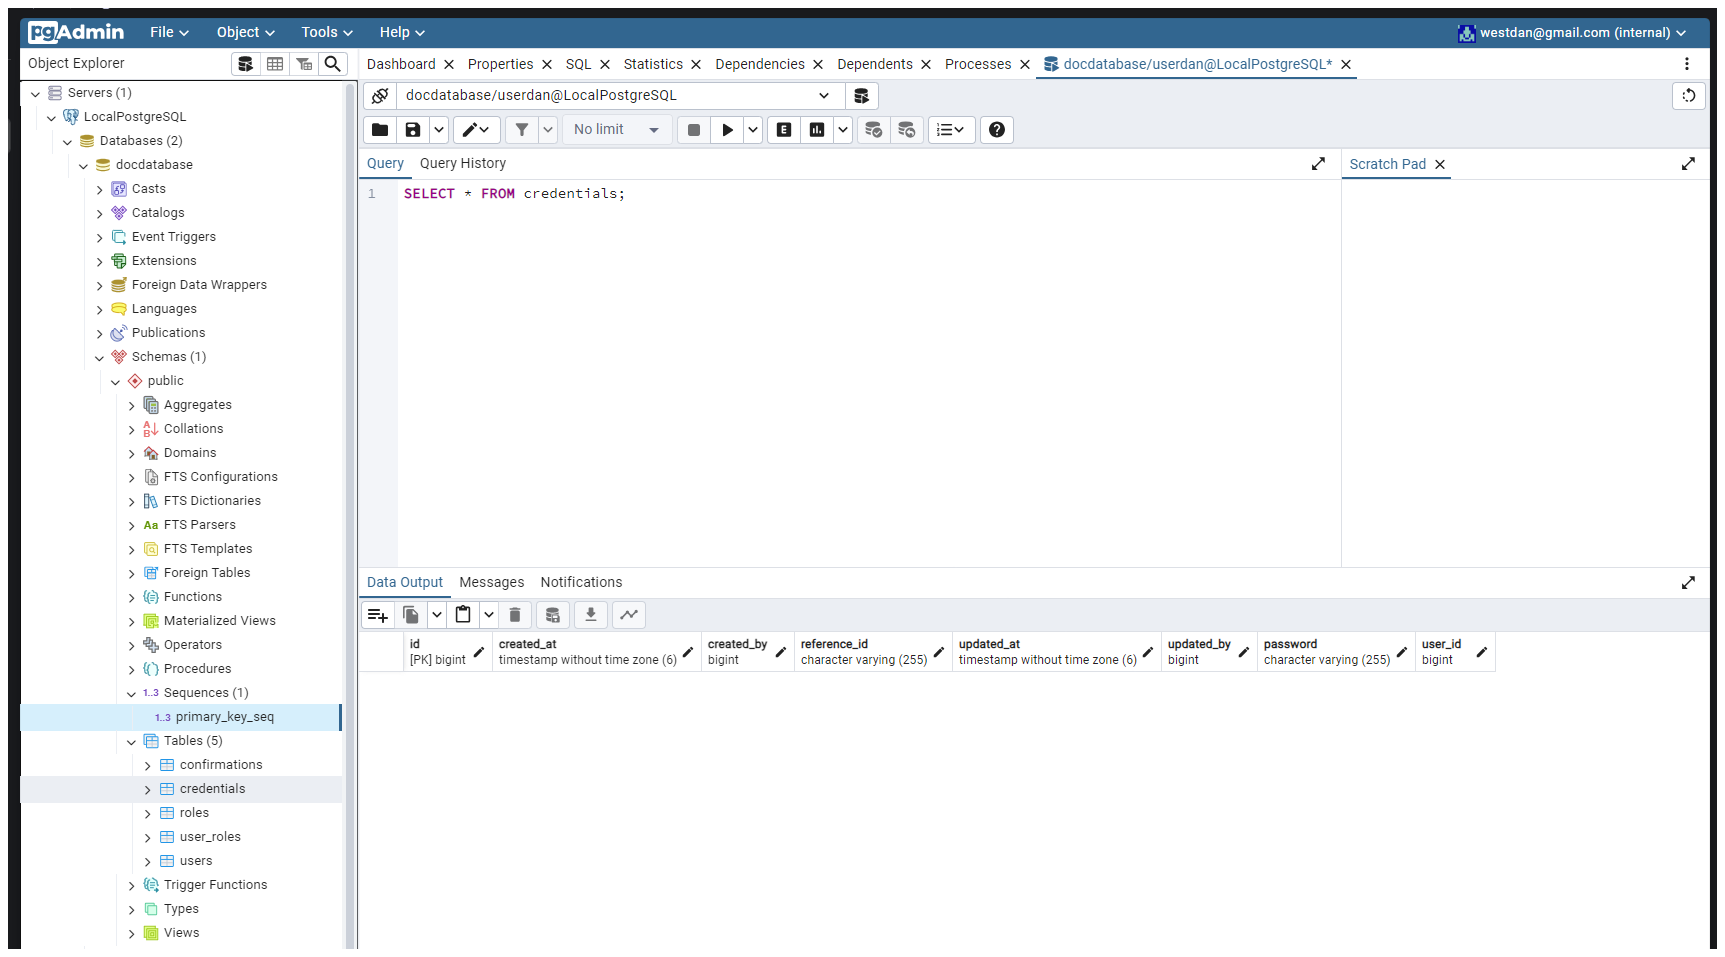
However the application did run after we uncommented the postgres dependencies and then the following tables were created in the database. [User-roles. roles, credentials and confirmations]
So the application is unhappy with this:
@Column(columnDefinition = "TEXT") //(userEntity)It wanted us to put it to lowercase
@Column(columnDefinition = "text")After that, the applicaition is now running and all the tables have been created also the
primary-key-seq that we created also exist in the database.
WHhat we will be working on next is creating a controller then accessing the services and sending the information to save the users.
In other to create any user we need to intaract with the database and in other for us to do that we will create the repo,
We will create this repo for all of our entities.
We create the RoleRepository and it has an
Optional<RoleEntity> findByName(String name);For this repository, this is the only method we are going to have in here, we need to be able to featch a role
entity by just passing in the method.
Then we created tge UserRepository which also have a method to getCredentialsEntitiesById this helps us
get the credentials entity by passing in the user id which belongs to the UserEntity.
Optional<CredentialEntity> getCredentialEntitiesById(Long userId);Then we also created a ConfirmationRepository which has a method to findByKey this helps us to find
a user by passing the Key and also we have another method findByUserEntity this helps us to find a user.
public interface ConfirmationRepository extends JpaRepository<ConfirmationEntity, Long> {
    Optional<ConfirmationEntity> findByKey(String key);

    Optional<ConfirmationEntity>findByUserEntity(UserEntity userEntity);
}
Then we also have the UserRepository which has a method to findByEmail this helps us to find a user by
and also another method fingUserByUserId this helps us to find a user by passing in the user id.
public interface UserRepository extends JpaRepository<UserEntity, Long> {
    Optional<UserEntity>findByEmailIgnoreCase(String email);

    Optional<UserEntity>findUserByUserId(String userId);
}
Now that we have created ann 4 needed repo we are good to intaract with the database. What we will do next now is create the services and then we can call this repositories to get the information we need to create the functionalties that we want so that we can save the user.
We created a UserServices interface class which has a method createUser that takes in a firstname, lastname, email adn password as a parameter. Because its an interface class, also created a UserServiceImpl class which serves as the implementation class for the UserService interface class.
public interface UserService {
    void createUser(String firstName, String lastName, String email, String password);
}
The UserServiceImpl implements the userservice and then has a method created user which is overriding the same method
created in its interface class.
    @Override
    public void createUser(String firstName, String lastName, String email, String password) {

    }
We imported the neccssary repo as fields needed for this class
    private final UserRepository userRepository;
    private final RoleRepository roleRepository;
    private final CredentialRepository credentialRepository;
    private final ConfirmationRepository confirmationRepository;
    private final BCryptPasswordEncoder encoder;
The private final BCryptPasswordEncoder fields is a from spring security, how ever initially i commented
the dependency because we dont need it currently and i am just going to comment the field also because its not
needed currently.
We are just goigng to save the raw password for now.
Lastly we inport theApplicationEventPublisher because we need to publish an event when a user is created.
CreateUser
    public void createUser(String firstName, String lastName, String email, String password) {
        userRepository.save(createNewUser(firstName, lastName, email));
    }
The method createUser takes in the parameter values, stores them in a userEntity then gets the password from the credentialEntity and saves it along side the password after that it verifies the userEntity through the ConfirmationEntity and then created a publicEvent that helps to public an event to inform the other part of the system about the new user registration.
    @Override
    public void createUser(String firstName, String lastName, String email, String password) {
        var userEntity = userRepository.save(createNewUser(firstName, lastName, email));
        var credentialEntity = new CredentialEntity(userEntity, password);
        credentialRepository.save(credentialEntity);
        var confirmationEntity = new ConfirmationEntity(userEntity);
        confirmationRepository.save(confirmationEntity);
        publisher.publishEvent(new UserEvent(userEntity, EventType.REGISTRATION, Map.of("Key", confirmationEntity.getKey())));
}- Creating a User Entity: Storing basic user information like name and email.
- Storing Credentials Securely: Saving hashed passwords for secure authentication.
- Account Verification (Optional): Implementing a system for verifying new user accounts (potentially using a confirmation entity).
- Event Notification (Optional): Publishing an event to inform other parts of the system about the new user registration.
So the new thing i am going to be created is the createnewUser helper method, this method takes
in the parameters firstname, lastname, email then gets the rolename from the Authority "User" after it then
returns a createUserEntity method that takes in the firstname, lastname, email and role.
    private UserEntity createNewUser(String firstName, String lastName, String email) {
        var role = getRoleName(Authority.USER.name());
        return createUserEntity(firstName, lastName, email, role);
    }
The getRoleName method howeever, takes in the name as param then calls the roleRepository method
findByNameIgnoreCase and pass in the name param, this helps to get the role from the database through
the roleRepository.
    @Override
    public RoleEntity getRoleName(String name) {
        var role = roleRepository.findByNameIgnoreCase(name);
        return role.orElseThrow(() -> new ApiException("Role is not found"));
    }
So when ever we wabt to create a user we are going to see if we can find the user role so by default we are going to give user the user role so that mean is that this role should already be in the database, so what we are going to do now is we need to something called "seed" "database seeding". Database seeding is the process of adding data to the database for the first time before the application is running. so we will porpulate the database with some data
If we try to run the aplication now before it database seeding it will fail this is becasue the database seeding hasnt happend and it wont be able to find a role in the database to assign to the created User by Default.
So now we nee to work on the createUserEntity method:
return createUserEntity(firstName, lastName, email, role); //Todo: Create the methodSo in other to do this we head over to the utils package and then created a Userutils class in this class we created a the default user that will will be saving in the database using the builder method and then import the method in the userServiceImpl.createNewUser method. So we can create a user now based on service perspective what we need to do now is create a controller to or a restcontroller thats going to allow us to expose these funtionalities over HTTP server.
Created a new package called resource, this is the package for the controllers.
This class is a controller class responsible for exposing the functionalities over HTTP server.
  public ResponseEntity<Response> saveUser(@RequestBody @Valid UserRequest user, HttpServletRequest request) {

    }
The reason why we using the response is becuase we want to be able to always return the same response with the same format throughout the entire application. Whether its a success response or a failure response we what they to follow the same format.
After then we created the response class which is a Java record class
The objective of the Response class is to encapsulate the response data from an API endpoint
in a standardized and structured way. It provides a way to represent the response in a format
that is easy to understand and manipulate
@JsonInclude(NON_DEFAULT)
public record Response(String time, int code , String path, HttpStatus status, String message, String exception, Map<?, ?> data) {

}The UserRequest class represents a data transfer object (DTO) that is used to encapsulate the data sent in a user request. It contains several fields representing the user's first name, last name, email, password, bio, and phone number.
The @NotEmpty annotations are used to validate that the fields are not empty or null when the UserRequest object is created.
 @NotEmpty(message = "First name cannot be empty or null")
    private String firstName;
The @Email annotation is used to validate that the email field contains a valid email address.
    @NotEmpty(message = "Email cannot be empty or null")
    @Email(message = "Invalid email address")
    private String email
After creating the two class Response and UserRequest dto we then head back back to the
UserResource and import the class in the register endpoint.
    @PostMapping("/register")
public ResponseEntity<Response> saveUser(@RequestBody @Valid UserRequest user, HttpServletRequest request) {
        userService.createUser(user.getFirstName(), user.getLastName(), user.getEmail(), user.getPassword());

        return ResponseEntity.created(getUri()).body(getResponse(request, emptyMap(), "Account created. Check your email to enable your account", CREATED));
        }
The @PostMapping("/register") annotation is used to map the HTTP POST method to the "/register" endpoint.
The saveUser method is the handler for this endpoint. It takes in a UserRequest object as a request body, which is validated using the @Valid annotation. The HttpServletRequest object is used to get information about the HTTP request.
Inside the method, the userService.createUser method is called to create a new user with the provided first name, last name, email, and password.
Finally, a ResponseEntity is returned with a Response object as the response body. The ResponseEntity.created method is used to set the status code to 201 (CREATED) and the location header to the URI returned by the getUri method. The getResponse method is used to create the Response object with the provided request, empty map, message, and status code
The next thing we are going to be working on now is the getUri method and the will be in the
utils package because its a helper method.
This is one of the most important util in the application, this class is where we going to do everyrthing to make
sure that we are always returning the same response all the time or everytime.
The RequestUtils class contains a static method getResponse which is used to create a Response object. This object contains information about the request, such as the current date and time, the request URI, the HTTP status, a message, and the data.
The next time we wnat to do now is we need to be able to create some roles in the database so that when ever we create new user the user will get a default role.
Date: 04/06/2024
So far we tested the application, we created a new user entity, however the user account is curretly locked because when we created the user we sent a verification email to the user gmail and the user account gets inserted into the database along side the user data but the user then need to verfify the emial before the account gets unlocked.
So i had a few issue with the emial services where the service was unable to send the emial to the user, this took me a while to solve but this was due to the cinfiguration of the smtp email service and i was able to fix it.
After that the email service was able to send the emial to the user, what I am going to do now is to verify the user account.
User need to be able to click on the link send to them and then comfirm the account, i am going to have to create a filter that is going to filter all the event in case the user is registering or resetting password, if the request is coming from a login user or if its a request that doesnt require a user then it will be ignored..
First we need to be able to activate our account so we are going to create another end points do that we can confirem the new coount. After that I willl then work on the filter so thbat i can set the userId automatically by using spring filter. And that is going to take me into spring security and other stuffs.
So I create a new Api endpoint called VerifyUser handles a GET request to "/verify/account"
It expects a query parameter named "token" in the request. The method calls the verifyAccountKey method of the userService object,
passing in the value of the "token" query parameter. If the verification is successful, it returns a ResponseEntity object with a 200 O
K status and a response body containing a message indicating that the account has been verified.
@GetMapping("/verify/account")
    public ResponseEntity<Response> verifyUser(@RequestParam("token") String key, HttpServletRequest request) {
        userService.verifyAccountKey(key);
        return ResponseEntity.ok().body(getResponse(request, emptyMap(), "Account Verified. ", OK));
    }
The verifyAccountKey method overrides a method named verifyAccountKey in an interface or superclass.
It takes a String parameter named key. This method is likely used to verify a user's account by setting the enabled property of the
corresponding userEntity object to true and deleting the corresponding confirmationEntity object.
It takes the key and then get the confirmationEntity for that key and then get the user from that confirmation and set the enabled property of the user to true, then the user repository save the user becuase we changed the enabled property of the user then we delete the confirmationEntity.
So when we run the application and the perfrom a GET request to "/verify/account" with a query parameter named "key"
we got a response with a 200 status and a response body containing a message indicating that the account has been verified.
Then when we run it again to get the user, we got an error confimation key not found.
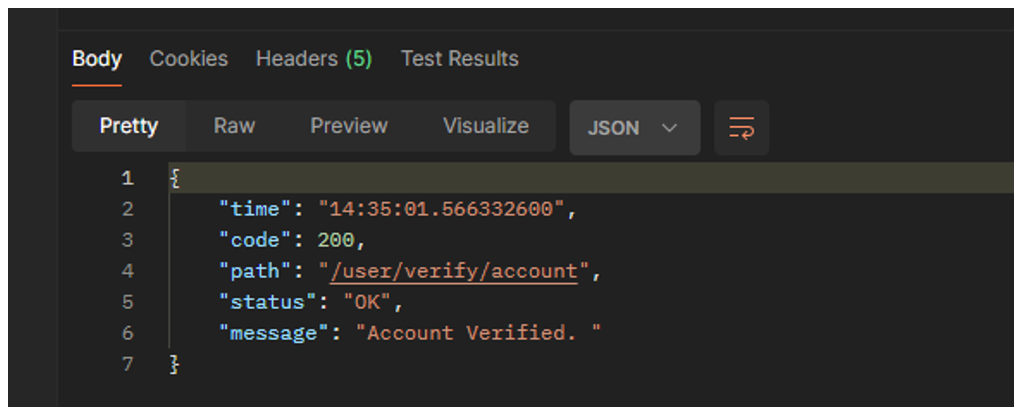 When we run again
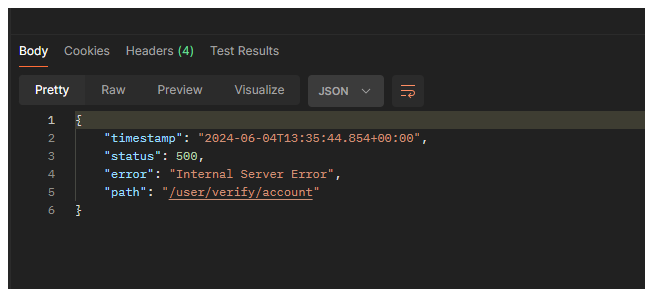
Now we have a way to create a user and also confirm the new user account. Note that the user account are disables initially when they account is created.
  public static UserEntity createUserEntity(String firstName, String lastName, String email, RoleEntity role) {
        return UserEntity.builder()
                .userId(UUID.randomUUID().toString())
                .accountNonExpired(true)
                .accountNonLocked(true)
                .mfa(false)
                .enabled(false)


} First we created a security filter chain that helps to filter the request coming from the client and then send it to the next filter. However for testing purpose i want to able to permit some path to go through the filter so it doesnt get authenticated.
  @Bean
    public SecurityFilterChain securityFilterChain(HttpSecurity http) throws Exception {
        return http
                .csrf(AbstractHttpConfigurer::disable)
                .authorizeHttpRequests(request ->
                        request.requestMatchers("/user/login").permitAll() //For every http request that matches a specific pattern permit them.
                                .anyRequest().authenticated()) //Any other user that does match "Authenticate them"
                .build();
}After creating the security filter chain we can now create the Authentiucation Manager, this will help us to manager the authentication of the user, the authentication manager will recieve the request for the filter chain and attemps to authentiate the user based on the provided credentials.
 public AuthenticationManager authenticationManager(UserDetailsService userDetailsService) {
        DaoAuthenticationProvider daoAuthenticationProvider = new DaoAuthenticationProvider();
        daoAuthenticationProvider.setUserDetailsService(userDetailsService);
        return new ProviderManager(daoAuthenticationProvider);
    }
The Authentication manager use the authentication provider tohandle the authentication process thats
why i am passing in the userdetailsservcies as a param. The authentication provider has a
doauthenticationprovider method that will attempt to authenticate the user so we have to pass in the
userdetails to the dao authentication provider which will then attempt to authenticate the user.
The DoaAuthenticationProvider has an authenticate method, this method has unauthenticated and authenticated.
    @PostMapping("/login")
    public ResponseEntity<?>test(@RequestBody UserRequest user) {
        UsernamePasswordAuthenticationToken unauthenticated = UsernamePasswordAuthenticationToken.unauthenticated(user.getEmail(), user.getPassword());
        Authentication authenticate = authenticationManager.authenticate(unauthenticated);
        return ResponseEntity.ok().body(Map.of("user", authenticate));
    }
This code snippet defines a POST endpoint for user login. It receives a JSON request body containing user credentials
(user.getEmail() and user.getPassword()). It creates an UsernamePasswordAuthenticationToken object with the provided
email and password, and then authenticates the user using the authenticationManager. Finally, it returns a ResponseEntity with an OK status and a response body containing a map with the key "user" and the value of the authenticated user.
The unauthenticated method is called when the user does not exist in the database.
    public static UsernamePasswordAuthenticationToken unauthenticated(Object principal, Object credentials) {
        return new UsernamePasswordAuthenticationToken(principal, credentials);
    }
The authenticated method is called when the user exists in the database.
   public static UsernamePasswordAuthenticationToken authenticated(Object principal, Object credentials, Collection<? extends GrantedAuthority> authorities) {
        return new UsernamePasswordAuthenticationToken(principal, credentials, authorities);
}Now we have created our won Security Filter Chain, Authentication Manager, UserDetailsService and PostMapping for login, so we have taken the responsibility from spring security, now what i need to do next is create our own authentication provider so we can then pass it the userdatails comming from the database.
So far we have been able to do this:
 Though i havent done: User should be able to login into the application that because i havent created the UI
of the application but pretty much the backend for it has been created.
So the next thing we will be working on is the login functionalities.
 In this login i am going to make use of spring security.
Note For Securing our API, I will be using the Custom Token Implementation of Spring Security becuase spring security is very powerful and its uses in alot on enterprise application.
So initially I had the dependency for spring security commented, so the first thing i will do is uncomment
the dependency then i will run the application.
After running the application a password was generated, and now i tried to get the the register user with the token
but it gave an 401 Unauthorized error this is becuase we enables spring security and by default spring
gave us a username and a password which was generated when we run the application so now the best approach to getting the
user will be.
Choosing the choosing auth and then using the basic auth option in postman, this will ask to enter the user name
and the password for authentication.
So the username will be user because it is by default and the password will be the password generated at runtime.
When we then send the request to get the user again we then, get the error user not found which I expected to get
because we already set the token to be deleted after verifying a user.
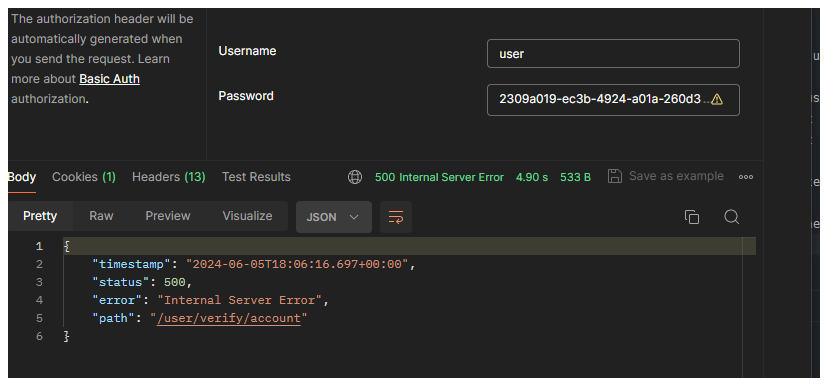
Note By default spring security gives a form authentication with the basic auth so its basic and form authentication.
So what we going to do now is, instead of using spring default users and password, we are going to create our own
users like a custom user so we going to have to to override the default user manager system.
So what we will first did was create a new package called security then inside this secueity package,
everything related to the security is inside this package, so then we created an FilterChainConfiguaration
inside this class we created two custom users daniel and james they each have their username and password.
After we create these user we then return this user in other to override the default InMemoryUserDetailsManager
users.
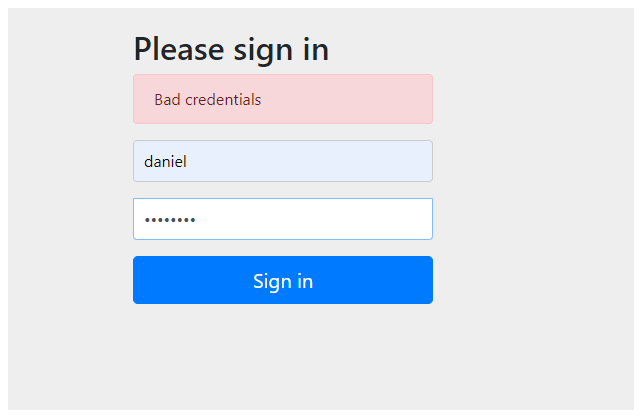
Now we will run the aplication again and try to filln the form with these customer user credentials,
and now when we run it we got the same error without the unauthorized 401 error.
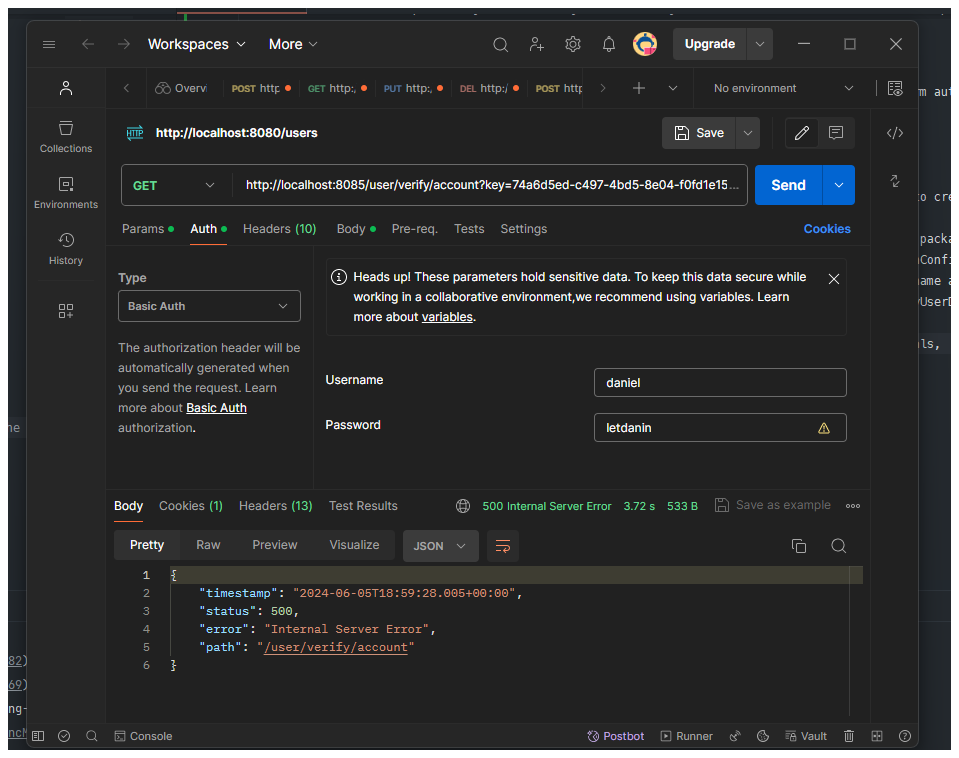 so now if i go to the browser and i then enter the credentials we will get something like this:

 @Bean
    public UserDetailsService userDetailsService() {
        //First User
        var daniel = User.withDefaultPasswordEncoder()
                .username("daniel")
                .password("letdanin")
                .roles("USER")
                .build();
        //Second User
        var james = User.withDefaultPasswordEncoder()
                .username("james")
                .password("letjamesin")
                .roles("USER")
                .build();
        return new InMemoryUserDetailsManager(List.of(daniel, james)); //Override the user in memory user details with our custom user.
    }
So far we only did the User Details service part, the other three are still on the default (Filters, Authentication Manager, Authentication Provider). The only thing weve override is the in memory user details.
In other fro use to override the `daoauthenticationProvider` we had to make use of the Authentication Manager
because they work hand in hand with each other, so then the `daoauthentication` provider override the
`userDetailsProvider` values then return the new value.
So when we run the application and pass in the same user details we got the same message as the last run, so we pass
the filter, so far we have overriden the AuthenticationManager and AuthenticationProvider with the same method
at the same time and then the UserDetailServices.
  @Bean
    public AuthenticationManager authenticationManager(UserDetailsService userDetailsService) {
        DaoAuthenticationProvider daoAuthenticationProvider = new DaoAuthenticationProvider();
        daoAuthenticationProvider.setUserDetailsService(userDetailsService);
        return new ProviderManager(daoAuthenticationProvider);
    }
By default all of the endpoint are locked by the springboot authentication, so what we hav to do now is let springboot know we dont want all path (register, login, password) to go through the filter and only just send it to the controller because we want the user to be authenticated in other to access the login or regsiter, or reset password.
All endpoints in the application are all secure by springboot, we can also tell spring security to not secure a specific endpoint and if a request comes in for a specify endpoint just let the request go through and then send the response back.
So we created a SecurityFilterChain method that basically helps in filtering request so if a specify
request matches a specify pattern for examples url endpoint "user/test" it will permit the request however
other requst will be authorized.
    @Bean
    public SecurityFilterChain securityFilterChain(HttpSecurity http) throws Exception {
        return http
                .authorizeHttpRequests(request ->
                        request.requestMatchers("/user/test").permitAll() //For every http request that matches a specific pattern permit them.
                                .anyRequest().authenticated()) //Any other user that does match "Authenticate them"
                .build();
    }
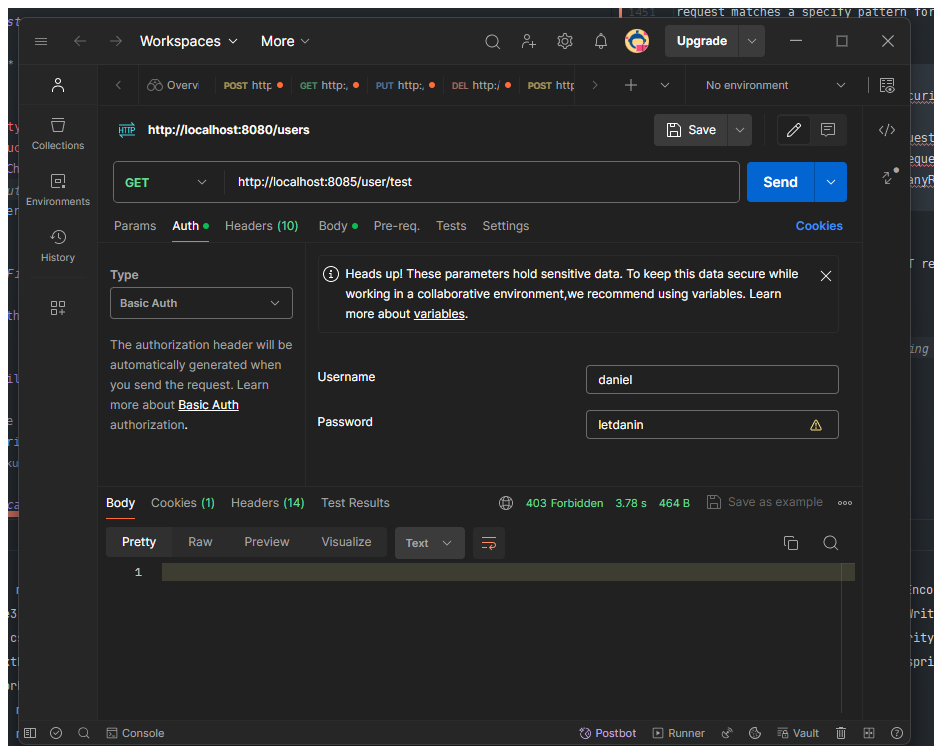
Run the application and send a GET request to:
http://localhost:8085/user/testAnd you can see we got a 403 Forbidden error which mean we dont have permission this because we have no route defined in
the application, if we have a route define we will get a 500 server error but so far is it working.
So what we will do now is create a test endpoint in the controller o(userResource), just to test the route and filter once
more. So now if we go back and re test the request we should get a 200 reponse back.
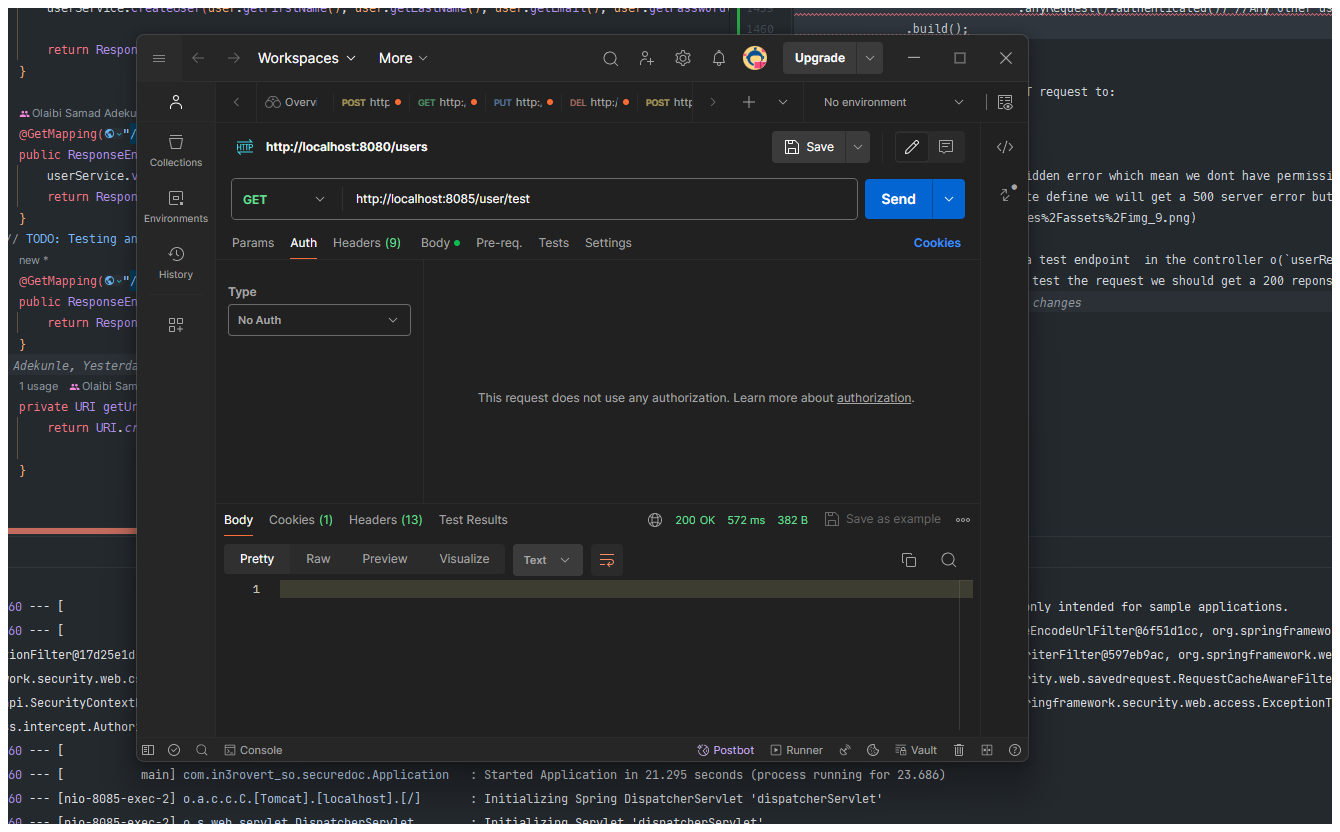 As you can see we got a 200 response back because we told spring to not secure the endpoint.
So what we want to do next is take control of the recieving the request to log a user inton the application, we have some user define, we have some configuration going on but we are still not recieving any username adn password, how can we get more control to do this, so we want to create a cmontroler son that we can send our login user to this controller.
We created a POSTMAPPING post request in other to login the user, so if we want to login we have to go
to user/login.
    @PostMapping("/login")
    public String login(@RequestBody User user, HttpServletRequest request) {
        authenticationManager.authenticate(UsernamePasswordAuthenticationToken.unauthenticated(user.getEmail(), user.getPassword()));
        return ResponseEntity.ok().build();
This method acts as a login endpoint. It expects a POST request to "/login" with a request body containing user credentials (likely in JSON format). It attempts to authenticate the user using the provided username and password through Spring Security's AuthenticationManager. If authentication is successful (specific logic might vary based on your implementation), it returns a successful HTTP response (status code 200) without an additional response body.
So now we have taken control of the recieving the request to log a user into the application, we have our own endpoint to login the user.
  @PostMapping("/login")
    public ResponseEntity<Response>test(@RequestBody UserRequest user) {
        authenticationManager.authenticate(UsernamePasswordAuthenticationToken.unauthenticated(user.getEmail(), user.getPassword()));
        return ResponseEntity.ok().build();
    }
we have the AuthenticationManager to authenticate the user.
public class UserResource {
    private final UserService userService;
    private final AuthenticationManager authenticationManager;
And we are calling the AuthenticationManager because we have define it in the SecurityFilterChain method.
@Bean
public AuthenticationManager authenticationManager(UserDetailsService userDetailsService) {
DaoAuthenticationProvider daoAuthenticationProvider = new DaoAuthenticationProvider();
daoAuthenticationProvider.setUserDetailsService(userDetailsService);
return new ProviderManager(daoAuthenticationProvider);
}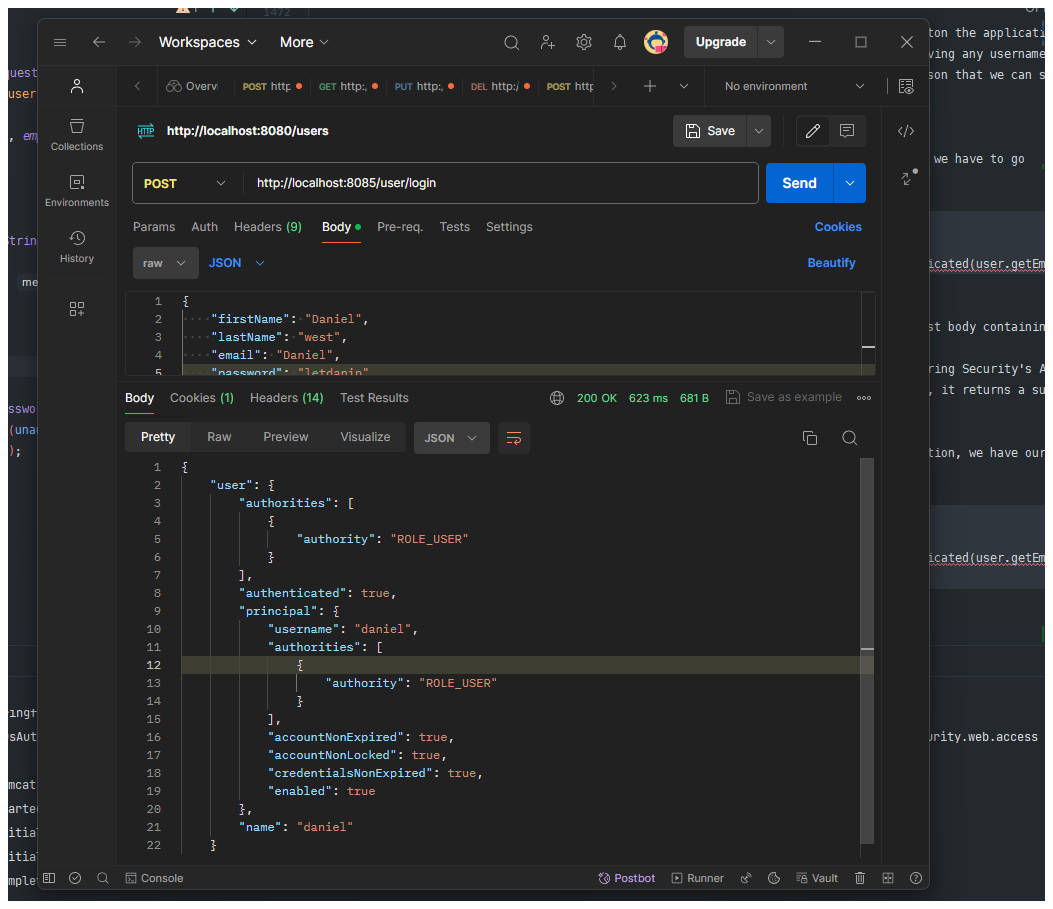 Now that we have taken control of the user login, we also have to take control of doing our own checks,
like checking if the password maches or not and if the password did not match we log a specific error, by defuly
spring has default password encoder that checks if the password matches and if not it returns a
 bad credentials message.
 But how do we takes this functinalities from spring, how do we take control of it.
Whenever we are going to take control of the authentication provider we need to give spring security
our own a userdetails and also an unauthenticated authentication which is going to be our UsernamePasswordAuthenticationToken
This authenticate method is responsible for verifying the user's credentials and returning an authenticated Authentication object if the credentials are valid.
If the credentials do not match, the method throws a BadCredentialsException indicating that the user is unable to log in. It compares the credentials the credentials of the user coming from the request with the credentials of the user retrieved from the database. If the credentials match, the method returns a UsernamePasswordAuthenticationToken object with the authenticated user.
    @Override
    public Authentication authenticate(Authentication authentication) throws AuthenticationException {
        var user = (UsernamePasswordAuthenticationToken) authentication; //User coming in from the request.
        //Comparing both users from db and User from Request
        var userFromDb = userDetailsService.loadUserByUsername((String) user.getPrincipal()); //Load user
        //if the user credemtials is the same as user from Db credentials.
        if((user.getCredentials()).equals(userFromDb.getPassword())) {
            return UsernamePasswordAuthenticationToken.authenticated(userFromDb, "[PASSWORD PROTECTED]", null);
        }
        throw new BadCredentialsException("Unable to login");
    }
The next thing we have to work on now is the Authority, we need this because we are going to define the role of the user in the database.
So now that we have created our own authentication provider we have to let spring knon we have our own authentication provider and since its a bean that makes it easier. In other to do that we need the tell the manager becuase its the one that is been used to do the authentication.
 @Bean
    public AuthenticationManager authenticationManager(UserDetailsService userDetailsService) {
        MyOwnAuthenticationProvider myOwnAuthenticationProvider = new MyOwnAuthenticationProvider(userDetailsService);
        return new ProviderManager(myOwnAuthenticationProvider);
    }
So now we have our Security Filter chain, UserDetails, Authentication Manager, Authentication Provider. So now when we run the application we got a 403 error
Tip Keep in mind that Spring send 403 when ever there is any error in the application
Spring was failig because it wasnt able to do the comparison of the credentials, what i did to fix that is basically the password coming from the authority(users) to string.
var user = (UsernamePasswordAuthenticationToken) authentication; //User coming in from the request.
        //Comparing both users from db and User from Request
        var userFromDb = userDetailsService.loadUserByUsername((String) user.getPrincipal());
        //if the user credentials is the same as user from Db credentials.
        var password = (String)user.getCredentials();
        //if((user.getCredentials()).equals(userFromDb.getPassword())) {
        if(password.equals(userFromDb.getPassword())){
            return UsernamePasswordAuthenticationToken.authenticated(userFromDb, "[PASSWORD PROTECTED]", userFromDb.getAuthorities());
        }
And also because we have an encoder (defaultpasswordencoder), what i did to fix that is basically cancle our the password encoder and then pass in {noop} signifing that the password is not encrypted.
    @Bean
    public UserDetailsService inMemoryUserDetailsManager() {
        return  new InMemoryUserDetailsManager(
                User.withUsername("Daniel")
                        .password("{noop}letjamesin")
                        .roles("USER")
                        .build(),
                User.withUsername("Daniel")
                        .password("{noop}letjamesin")
                        .roles("USER")
                        .build()
        );
    }
Then we rerun, because we dont have any password encoder at all we dont need the {noop}.
We are able to login sucessfully:
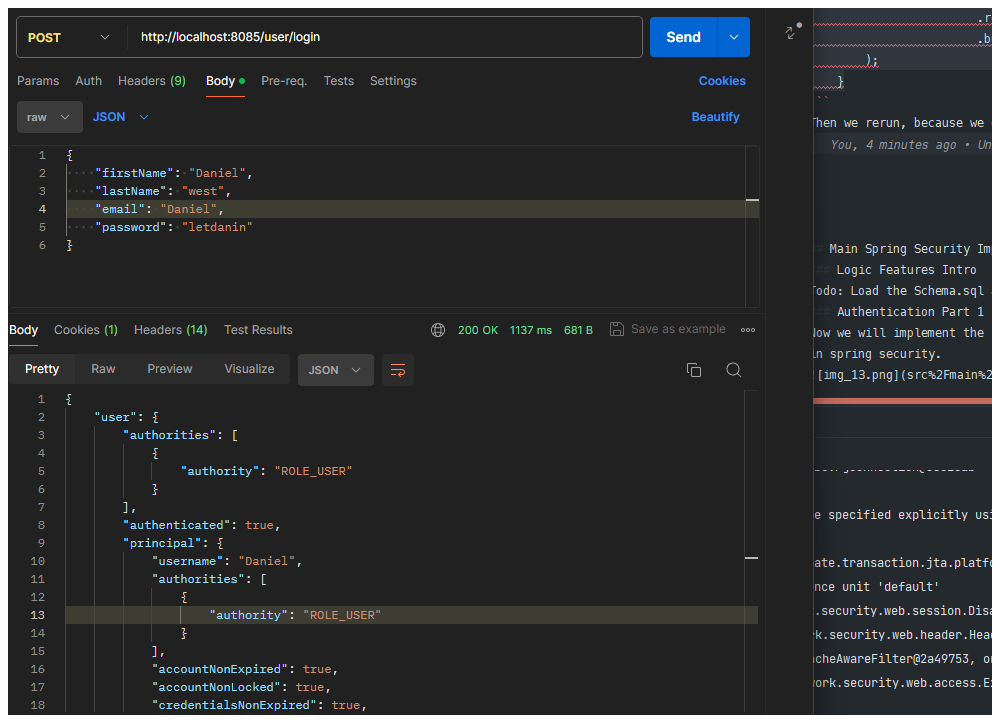 and if we provide a bad password, we get a 403 forbidden error
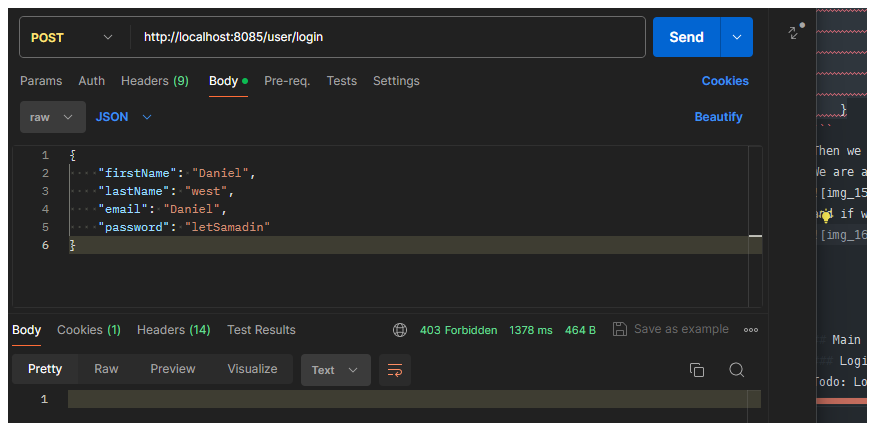
And that one approach to configure spring security for a more beoader understading I design a PKM explaining
Spring Security.
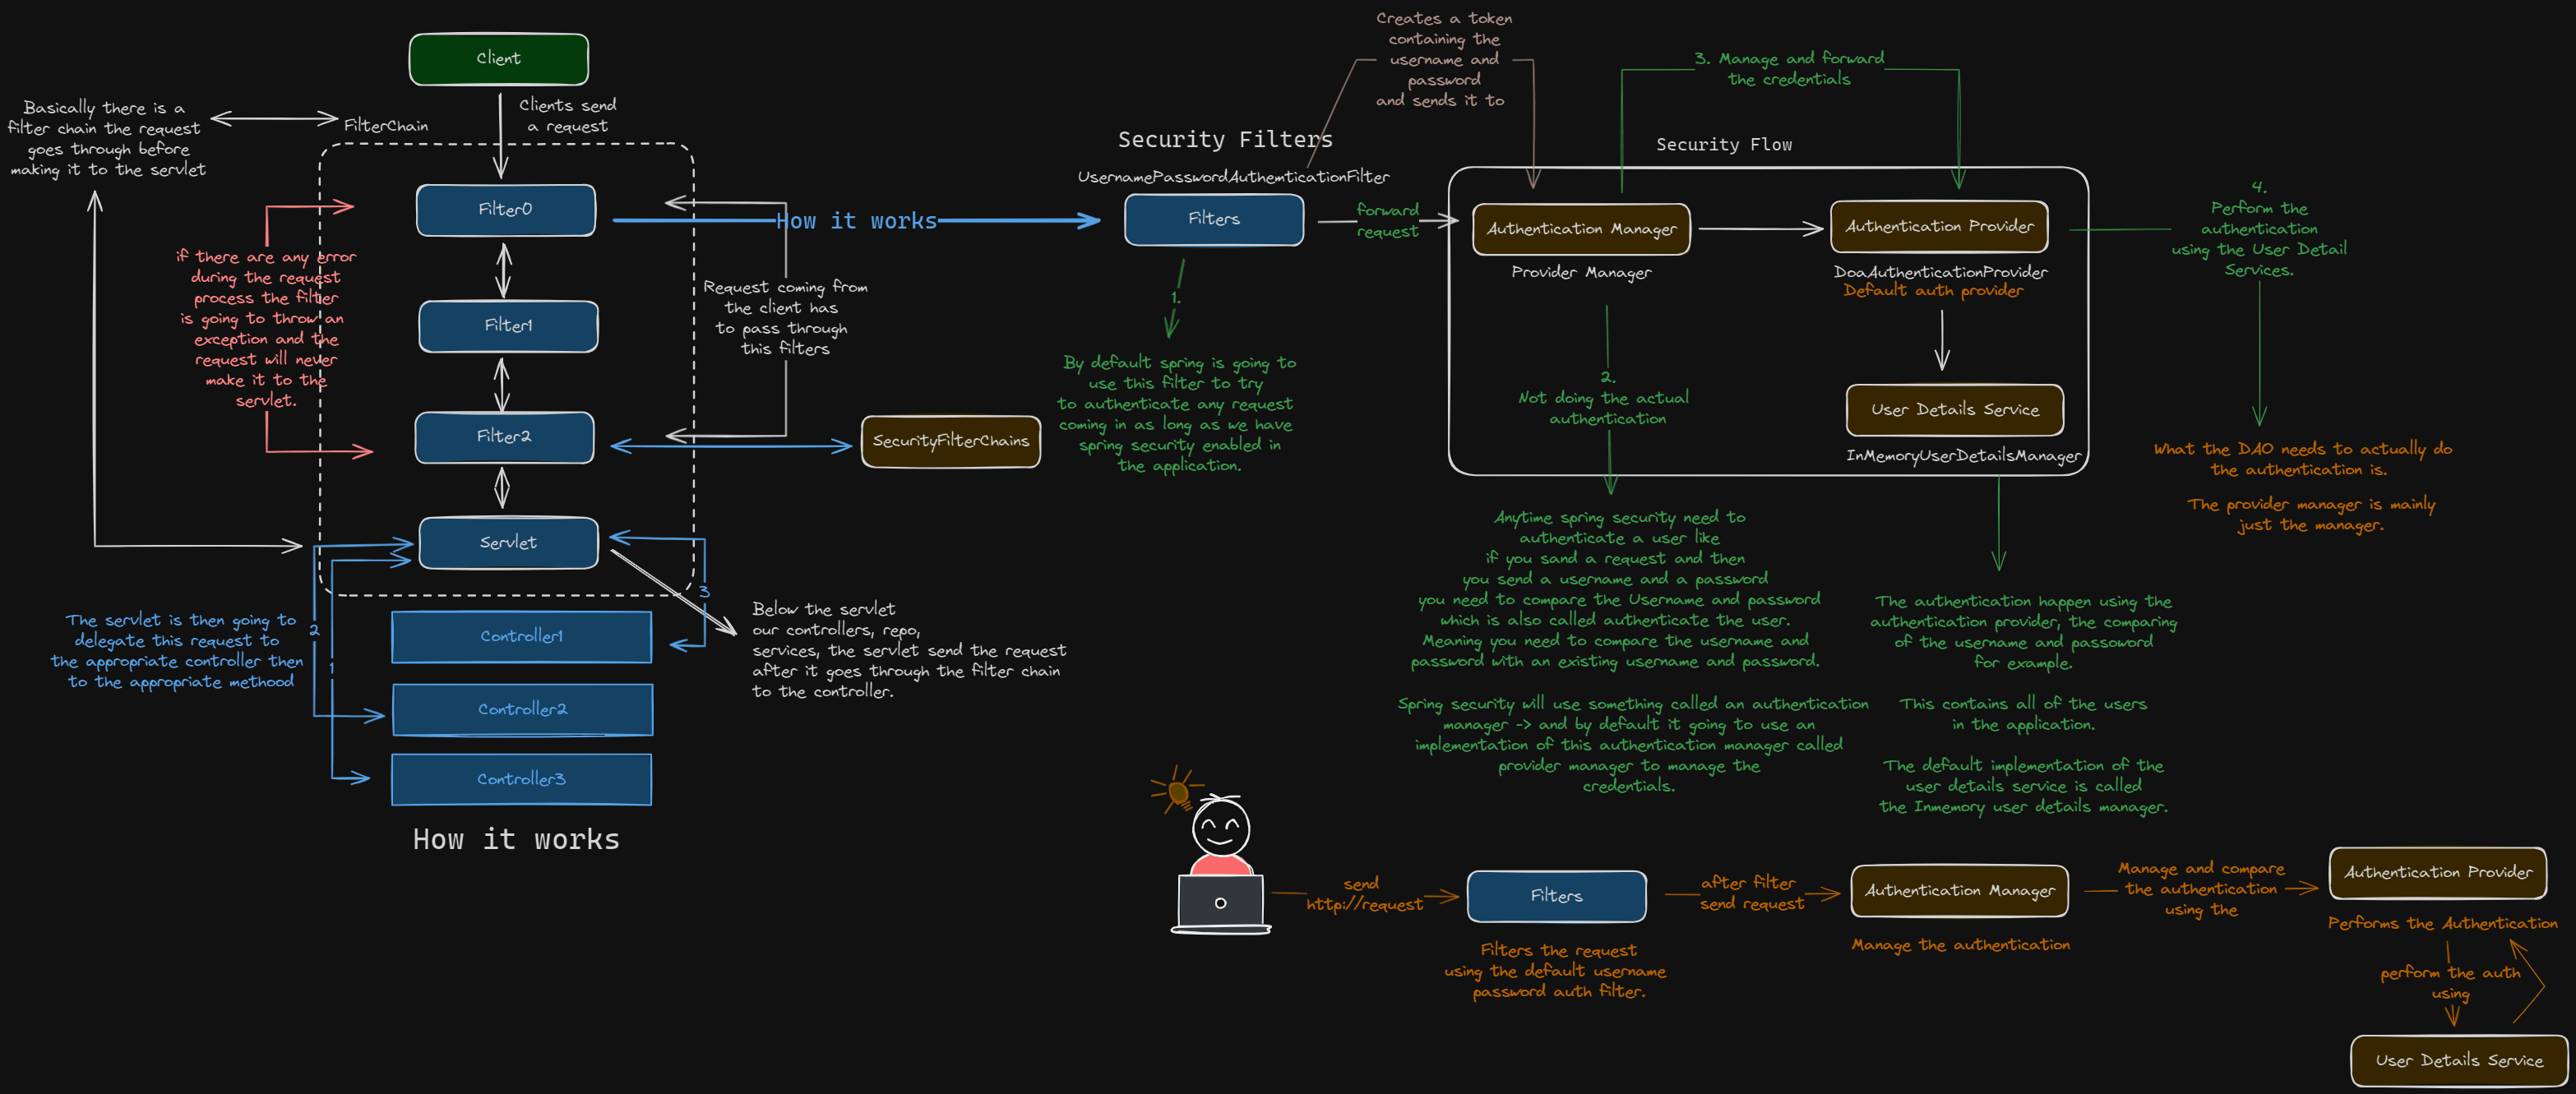
Todo: Load the Schema.sql and Data.sql in other to create the tables and add constraints.
Now we will implement the following functinalities using what i've learn
in spring security.

This is the equivalent of the usernamePasswordAuthenticationToken It contains the user that we are going to be working with in the application when we are not dealing with the application or saving to the database. We will have some kind of mapper that is going to take the user from the database and then maps it to this class(User class) and vise versal.
So now that we have created the user class,we need to extend the authentitcation and make sure we can pput
in the same pattern that we saw with usernamepasswordAuthenticationToken.
We extended the abstract authentication token because that class has some certain method that are just convinient working
with.
We created two constructor, the one we vare going to call when ever we are are going to start the authentication,
    public ApiAuthentication(String email, String password) {
        super(AuthorityUtils.NO_AUTHORITIES);
        this.password = email;
        this.email = password;
        this.authenticated = false;
    }
And the one we call when the user has been authenticated
    public ApiAuthentication(User user, Collection<? extends GrantedAuthority> authorities) {
        super(authorities);
        this.user = user;
        this.password = PASSWORD_PROTECTED;
        this.email = EMAIL_PROTECTED;
        this.authenticated = true;
    }
So we dont want to call the constructor diretly so we make them public and then create two public
static unauthenticated and authenticated method
The unauthenticated method is returning the email and password because that is what we passes in the request and when we staring the
authentication.
  public static ApiAuthentication unauthenticated (String email, String password) {
        return new ApiAuthentication(email, password);
    }
And the authenticated is returning the user and the authorities, we use this when the authentication is successful. We will call this so that we can create the actual fully authenticated user.
    public static ApiAuthentication authenticated (User user, Collection<? extends GrantedAuthority> authorities) {
        return new ApiAuthentication(user, authorities);
    }
Also becuase we dont want the password to be seen we passed in the PASSWORD PROTECTED to the credentials.
We then created a setAuthentication method because we want to make sure that they call the authentication
because we dont want anyone to be able to set the authentication with a setter so we have to make sure that.
    @Override
    public void setAuthenticated(boolean authenticated) {
        throw new ApiException("You cannot set authentication");
    }
Then we also create the isAuthenticated method and we retuen the autheticated boolean values for when ever we
have a fully authenticated user.
    @Override
    public boolean isAuthenticated() {
        return this.authenticated;
    }
So that is all for my authentication so i have my own class with my authentication and then when ever we
want we can pass in email and the password whenm ever we have an unAuthenticated authentication or Api
authentication or when ever the user is fully authentiacated we are going to call the constructor and pass in
the user and also authorities, spring by defauklt needs the authorities so that why we are passing in the super
  private ApiAuthentication(String email, String password) {
        super(AuthorityUtils.NO_AUTHORITIES);
and also the contructors are private so that they can be use and we are forcing everyone to use the
unauthenticated and then the authenticated helper method.Thats all we dont have to rely on the
usernamepasswordauthenticationtoken given by spring security.
What we want to do now is create a filter similar to the UsernamePasswordAuthenticationFilter this ist he filter
class that intercept the request coming in and then it tries to do the authentication and spring is using a
filter to do this so its only write that we also use a filter with the same pattern they had in mind.
So now instead of having our endpoint in our resources we are nnot going to do it this way
//Before
    @PostMapping("/login")
    public ResponseEntity<?>test(@RequestBody UserRequest user) {
We are going to have this endpoints in the filter and then we are going to authenticate all the request coming in using the filter so thats what I am going to be working on next.
We created a new class Authentication filter extending the abstractAuthenticationProcessingFilter then reason why I am extending
this class is because it is a good class to use if you just want to do the authentication.
After we implemented the atemptAuthentication this is the method that gets called when we want to initiates the authentication
process.
Then we created a constructor this helps whenever we want to pass something to the super class..
the authenticationFilter basically helps to tell the super class that for any Post Request that comes for the
path(/user/login) then it's the ome it should listen-to to trigger the attemptAuthentication method.
 public AuthenticationFilter(AuthenticationManager authenticationManager, UserService, JwtService jwtService) {
        super(new AntPathRequestMatcher("/user/login", POST.name()), authenticationManager);
    }
then we importted the userservice and the Jwtservice, the userServices for when we need to featch the user whenever
we get their username from the request and we need to update their login attemps and do some other things.
So now we need to define some method in the userservices so that we can update the login attempt and we are also going to
need the JWT services so that we can pass in a token to the response.
For the response we implement another method called the successfulAuthentication this gets called when ever the
authenticamtion is successful.
So far the class is is listening on user login and then its going to call the attemptAuthentication and if the
authentication is successful, it going to call successfulAuthentication.
So now we are going to be working on the userServices so that we can update the login attempt of the user.
The first thing we are going to do is define some ENUM, we created a class called LoginType this class
will give us the type of login that is happening.
public enum LoginType {
    LOGIN_ATTEMPT, LOGIN_SUCCESS
}
Also I am not creating a converted for this enums because we are not saving these to the database so they dont need to be converted to columns and all.
So in our userservices we created a new field called updateLoginAttempt we are creating this so we can basically update the
login attempt so then we can update how many times a userlogin into the application to keep track so that we can lock
their account. So it will update it in the database.
void updateLoginAttempt(String email, LoginType loginType);So now we will implement the method, in the method updateLoginAttempt we getting the user entity by email and also getting the
user id so in case something is saved in the database we know who did it and then we are also creating a sitch to switch
between the loginTypes -> LOGIN ATTEMPT AND LOGIN_SUCCESS.
In the LOGIN ATTEMPT -> if its a login attept we need to check to see if the user has already been in the cache. The cache we dont have yet and still needs to create and then if the user is not the cache then we need to set their login attempt to ZERO(0) then give a message ('Your account not locked').
Otherwise we need to increase their login attempt and if their login attempt is bigger than 5, like 6 or greater then we are going to lock their account.
In the LOGIN SUCCESS -> They are going to reset their account because we are going to set their login attempt to ZERO(0) and them remove them from the cache and set their last login to the current instance because that means they logged in successfully.
So what we need now is the cache because if we dont have the cache, their is not way we are going ton knw if the user is in the cache of not and what login attempt that they have.
So first go to your browser and type in google guava maven, click on the maven link showing first and
click on the latest version, I would advise version 33.0.0jre because its still the most stable version.
Then after the download head to your pom file and add the copied dependency.
Then after that we created a new package called cache, anything cache related is going to be inside of this cache package. Then we created a class called cacheStore that takes in a Key and a Value. A key and a value is uaully what is needed when every we need to cache anything in an application.
Then we created a cnstructor called cacheStore, that takes in an expiry Duration and a TimeUnit, so when ever we create a construtor for the type we want to cache, it going to build the cache and then wait for a certain duration of time before it then expires.
The cache store takes the key and the value for the type of cache that you need to creates, so if you need to pass in a String, and then a User, the K(Key) will be the string and trhe V(Value) will be the User.
public class CacheStore <K, V>{so whatever value that we pass in the K and the V will be the value that is then passed into the catual cache.
private final Cache<K, V> cache;In other to create a cache with the use of tis constructor
    public CacheStore(int expiryDuration, TimeUnit timeUnit) {
        //Example: Expiry duration = 5, TimeUnit = Min -> 5 min
        cache = CacheBuilder.newBuilder()
                .expireAfterWrite(expiryDuration,timeUnit)
                .concurrencyLevel(Runtime.getRuntime().availableProcessors())
                .build();
}- Getting from the cache
Then whenever we need to get a value from the cache, is going to be through(by) the type that was
define as the value. Because we are getting the values and the key is going to be the key of the cache.
Example: Let say the values is a User and then the Key is a String so if you waant to get the
useryou have to pass in the String which is the key.
   public V get(@NotNull K key) {
        log.info("Retrieving from Cache with Key {} ", key.toString());
        return cache.getIfPresent(key);
}- Putting into the Cache
    public void put(@NotNull K key, @NotNull V value) {
        log.info("Putting into Cache with Key {} and Value {}", key.toString(), value.toString());
        cache.put(key, value);
    }
This method takes in the key and the value which are both needed in other to put something into the cache.
- Removing from the Cache
    public void remove(@NotNull K key) {
        log.info("Removing from Cache with Key {} ", key.toString());
        cache.invalidate(key);
    }
In we want to remove from the cache this method takes in a key and then helps to invalidate the cache based on the key. So that is all about the cache store, how ever this is just a cache store we have to do an implementation of the cache store. Thats what we going to be working on next.
Now that we have the cache store we can define bean for specific implementations, we can pretty much use this
cache store for any key value pair that we want to cache.
We are going to create an other class in the same cache pakage, in the class we created a cache userCache
where we can pass in a key for the String and an Integer for the Value and its going to
expire after 900 sec which is a min. All the values and entries of the cache are going to
expire after 900 sec of the time that we put them in the cache.
So now we have the cache and we can also create another cache if we want we can create as many cache as we want.
public class CacheConfig {
    @Bean(name = "userLoginCache")
    public CacheStore<String, Integer> userCache() {
        return new CacheStore<>(900, TimeUnit.SECONDS);
    }
But we will stick with this for now what we are going to do now that we have the cache is go back to the login attempt method in the userserviceimpl class and imput our logic.
So the logic updateLoginAttempt. we have a swtich statement that is going to check if the login type is LOGIN ATTEMPT or LOGIN SUCCESS.
In the case of -> LOGIN ATTEMPT: it checks if the user not in the cache, and if the user is not in the cache, it then set the login attemto 0 and then set the account non lock to true, meaning the user account is not locked. Otherwise, if the user is already in the cache meaning the user already tries to login then it increase their loginattempt by 1, and then put thier email and their loginattemps numbers in the cache. It also check if the user login attempt is greater than 5, if it is then it locks their account. Then we save the user In the case of -> LOGIN SUCCESS: We set the account non lock to true, meaning the user account is not locked, set their login attempts to 0, and remove them from the cache. Then we save the user.
Now that we have done the updateLoginAttempt method we need to find a way to get the logic credentials from the HttpServletRequest and pass that into the authentication manage so that we can trigger the authentication process.
    @Override
    public Authentication attemptAuthentication(HttpServletRequest request, HttpServletResponse response) throws AuthenticationException, IOException, ServletException {
        userService.updateLoginAttempt("danielolaibi@gmail.com", LOGIN_ATTEMPT);
        return null;
}- Update login credential from httpserveletrequest First we are going to define a new Request -> Login Request in the dto package, How that we have the request we will try to map the value from the request to the email and the password in the Login Request.
So after we created update login attempt, we then try to get the login credentials from the http request, in other for us
to do that we have to create a new login request class that has the emial and password fields then map the
email and password coming from the httpservlet request to the loginRequest email and password.
public Authentication attemptAuthentication(HttpServletRequest request, HttpServletResponse response) throws AuthenticationException, IOException, ServletException {
        try {
            //Grab the user information to create the authentication after getting the login types
            var user = new ObjectMapper().configure(AUTO_CLOSE_SOURCE, true).readValue(request.getInputStream(), LoginRequest.class);
After maping the crediential we the call the userservices to update the login attempt by passing the email gotten fromn the mapped credentials.
  var user = new ObjectMapper().configure(AUTO_CLOSE_SOURCE, true).readValue(request.getInputStream(), LoginRequest.class);
            userService.updateLoginAttempt(user.getEmail(), LOGIN_ATTEMPT);
Then we try to create the authentication object which takes an unauthenticated authentication, pass in the credentials and then get the authenticationManager and then authenticate the user.
  var authentication = ApiAuthentication.unauthenticated(user.getEmail(), user.getPassword());
            //Pass the credentials to the authentication manager
return getAuthenticationManager().authenticate(authentication);Class(RequestUtils.java) In the attempt authentication method we used a try catch block to handle the exception in case there is an error while trying to authenticate the user. So now we will work on the handleErrorResponse method, this method is to handle an error response by writing the error response inside the response body of the http request,response.
-
handleErrorResponse method If the exception is an instance of AccessDeniedException, it calls the getErrorResponse method to get an error response object with the appropriate status code and error message. Then, it calls the writeResponse method to write the error response inside the response body of the response object. This method provides a way to handle and respond to errors during the authentication process.
-
The getErrorResponse method gets an error response based on the given parameter, it takes in the request and reponse http servlet and an exception and a status code, it then checks if the reponse contentype to a application_json_values and also set the status code of the response, it then returns an error response object.
   private static Response getErrorResponse(HttpServletRequest request, HttpServletResponse response, Exception exception, HttpStatus status) {
        response.setContentType(APPLICATION_JSON_VALUE);
        response.setStatus(status.value());
        return new Response(now().toString(), status.value(), request.getRequestURI(), HttpStatus.valueOf(status.value()), errorResponse.apply(exception, status), getRootCauseMessage(exception), emptyMap());
    }
}
Then we created an helper method that helps to writeResponse the given handleErrorResponse method object to the output stream of the HttpServletResponse using an ObjectMapper. This method is designed to handle the serialization of the response object and send it back as a response in an HTTP servlet context. The method ensures that the output stream is flushed after writing the response and catches any exceptions that occur during the process, rethrowing them as an ApiException.
Overall, all this was done so if we have an exception in the attenpt authentication method, we will get a well formatted error response.
So the next thing that we need to work on is the successful authentication process and for this we are going to need the JWT service so thats what we are going to be working in next.
Todo: In these approah we are going to make sure we add the token in a secure only cookie. First we created an interface for JwtServices, then in side this interface we define the following methods,
- CreateToken - This method helps to create a Jwt token for the USER. It takes in the user object and a funtion token object as a parameter. The aim of the funtion is to convert a jwt token to a string representation of the token, the method return a string representing the created token.
- extractToken - The method takes an an HttpServletRequest object and a tokenType string as parameters. The aim of the method is to extract the token from the request and return it as a string.
- addCookie - The method add a cookie to an HttpServletResponse object. The method add a cookie to the response with the user's token and token type.
- getTokenData - This method extract token data from a JWT token. The method takes in a token as a string. It takes a String token and a Function<TokenData, T> object as parameters. The Function<TokenData, T> object is used to convert a TokenData object to a generic type T. The method returns the extracted token data.
So before the proceed with the method we have to define the token first, so in the domain package we created a token class, which has two fields one is the access and one is the refresh. The access token fields allow us to access the token and the refresh token allows us to refresh the token..
The next thing we want to also do is define the token data, so we created a new class tokenData inside this class,w e defined the fields, user, claims, valid and authorities. The use is going to be the user associated with the token and the claims is going to be the claims associated with the token and the valid is going to be a boolean that indicates if the token is valid or not and the authorities is going to be the authorities associated with the token.
Now that we have the token data we need to define the token type, which is going to be an enum so we will create an enum class inside this class we define the token type enum. ACCESS, REFRESH, the access enum has a valu of "access-token" and the refresh enum has a value of "refresh-token".. Then we define a field value which will allow us to later get the value of the token type .
JWT PART 2
So now we need to give an implementation for all these methods which are in the JWTService
business layer package, so what we did fi rs₫t was head to the jjwt gitgub lirary and then copy the maven dependency
and added it to the POM file so now we have it in our class path as our dependencies.
Then we import the claims from the libabry in the TokenData class, then next thing we will do is give an
implementation for the methods in the JwtService class and also a JwtConfig class.
The Jwt config is going to fetch some configuration for us.
In the Jwtconfig file class, we defien two values which are expirating and secret, the expiration is the expiration time of the token and the secret is the secret key for the token. However we did not directly pass in the values, what we did was pass in the values from the environment variables, then define the values fro the environment variables the application.yml file. We set the expiration to 5 days so the token will expire after 5 days.
public class JwtConfiguration {
    @Value("${jwt.expiration}")
    private Long expiration;
    @Value("${jwt.secret}")
    private String secret;
}
When we going to run the application then we will pass in the secret key..
After we head back to the JwtServicesImpl and extend the JwtConfig also implement the JwtService.
@Service
@RequiredArgsConstructor
@Slf4j
public class JwtServiceImpl extends JwtConfiguration implements JwtService { }
Then we implement the methods for this class, so that we can create a token and extract a token., add a cookie and get token data. We implemented our first helper method, SecretKey, the method takes in the secret key (Featch it for us) from the environment variables.
- Key fields
private final Supplier<SecretKey> Key = () -> Keys.hmacShaKeyFor(Decoders.BASE64.decode(getSecret()));- Claims Fields
Secondly we create another field function that takes in a String(token) and return the
claimsclaims are data that we set on the token. This is goin to give us the claims associated with the tokens.
   private final Function<String, Claims> claimsFunction = token ->
            Jwts.parser()
                    .verifyWith(key.get())
                    .build()
                    .parseSignedClaims(token)
.getPayload();- Claim Sibject fields Thirdly we created another one, we are going to give it the token and it is goig to give us the subject, which is the claims Subject.
- Authorities Forth we are going to create another for the authorities, this method is to construct a list of GrantedAutheorities Object based on the claims present in the token. The method takes a token as input, retrieves the values of two claims from the token (one claim representing authorities and the other claim representing a role), and combines them into a comma-separated string. The resulting string is then passed to a function named commaSeparatedStringToAuthorityList, which is assumed to convert the string into a list of GrantedAuthority objects. The resulting list of GrantedAuthority objects is then returned as the result of the method.
Next we need another helper method to extract the token,the extractoken method will return an optional of stream(something) otherwise it will throw an error. When we call get cookies and it is null then a new array will be created with the values of empty because we dont just want it to return when it cant find any cookies otherwise it will call the getCookie. So basically it will filter the request for the cookies, map the cookie to the values and return it.
 private final BiFunction<HttpServletRequest, String, Optional<String>> extractToken = (request, cookieName) ->
            Optional.of(stream(request.getCookies() == null ? new Cookie [] {new Cookie(EMPTY_VALUE, EMPTY_VALUE)} : request.getCookies())
                    .filter(cookie -> Objects.equals(cookieName, cookie.getName()))
                    .map(Cookie::getValue)
                    .findAny())
                    .orElse(empty());
Then we define an other method extractcookie, this method is forgetting the cookie itself, a bit similar to the extracttoken, where we were trying to get value of the cookie.
Then we define a JWT Builder which will be use to create a JWT, the builder is configured to set the header of the JWT to contain a single entry with the key "type" and the value "JWT". The audience (recipient) of the JWT is set to "THE_IN3ROVERT_LLC". The id (unique identifier) of the JWT is set to a randomly generated UUID. The issued at (creation time) of the JWT is set to the current time. The not before (start time) of the JWT is set to the current time. Finally, the JWT is signed with a specified key and the HS512 signature algorithm.
After creating the builder we then need a mthod that is going to add the cookie to the response, i want
this cookie to be a consumer cookie and also want it to accept three values so I created a functional interface class
named triConsumer this class is going to take three arguments and accept them.
After i created the addCookie method i need to add a method that is going to add the cookie to the response. Because we need to know if its a access token that we will be working with or its a refresh token so we will be using a switch statement.
The aim and objective of the addCookie method is to add a cookie to the HttpServletResponse object. The method takes three arguments: the HttpServletResponse object, a User object, and a TokenType object. The method uses a switch statement to determine the type of token being added. If the type is ACCESS, it creates an access token for the user using the createToken method and the Token::getAccess function. It then creates a new Cookie object with the token value and sets various properties such as HttpOnly, MaxAge, and Path. Finally, it adds the cookie to the HttpServletResponse object using the addCookie method. Overall, the addCookie method is used to add a cookie to the response when the user logs in or performs an action that requires authentication. Then in the case of the refresh token it does the same thing.
So what i want to do now is understand the code and come back before proceeding to the methods.
-- Date: 29/08/20024 Today we want to work on the authentication filter, when ever the authentication filter gets called it is going to call the authentication and when the authentication is successsful, then its going to call the successful authentication method, so what we want to do now is, assuming that the authentication is successful, we are going to do whatevr we need to do with the authentication, the response, the filter chain or with the request because we have access to everything we need inside of the authentication.
So for the successfulAuthentication method, now if the user login and the autentcation is successful, the update login attempt gets triggers and then a login attempt is updated.
  var user = (User)authentication.getPrincipal(); //This is going to be user.
        userService.updateLoginAttempt(user.getEmail(), LOGIN_SUCCESS);
So now wnat we need to do is determine what kind of response we need to send back to the user, when the login is successful, because if the user is using mfa we need to send them a diff message and if they are not using mfa we also need to send a diff message.
So we created a var httpResponse then we use a mapper to write the body of our httpResponse to the servletHttpResponse, so its going to look like a normal controller return these values.
So now we have to to work on the important method, sendRessponse and sendQrCode .
The sendResponse method add cookie to the httpServletResponse and then construct a Response object with the information about the user and a success message. The SendQrcode method is going to send the qrcode to the user if the user has MFA enabled.
So what we want to do next is go back and work on the authentication provider, and also need to work on the filterchain config class alo, this has to be done before we run the application.
Based on our previous AuthenticationProvider class, we passed in the UserDetailsServices related to spring security, but that was just for testing case, now that we have our own user details service we are just going to pass in our own user services.
The authenticate method represents the authentication logic in a custom authentication provider. It verifies the user's credentials by checking if the user exists, if the credentials are not expired, and if the passwords match. If all conditions pass, it returns an authenticated ApiAuthentication. Otherwise, it handles exceptions for expired credentials or incorrect login attempts. If the user does not exist, it throws an exception stating that the user could not be authenticated.
The next thing we need to do, is work on the method we define in the authenticate method, which are the getCredentialsById and getUserByEmail methods and we also have to define a bean for the BCryptPasswordEncoder.
Currently all the user services implementation are returning null, that needs to be fixed.
The getUserByUserId method retrieves a user from the repository based on their user ID. If the user is not found, it throws an ApiException with the message "User not found". The getUserByEmail method retrieves a user from the repository based on their email. The getUserCredentialById method retrieves the credentials of a user from the repository based on their user ID. If the credentials are not found, it throws an ApiException with the message "Unable to find user credentials".
    //Retrieve users based on their id
    @Override
    public User getUserByUserId(String userId) {
        var userEntity = userRepository.findUserByUserId(userId).orElseThrow(() -> new ApiException("User not found"));
        return fromUserEntity(userEntity, userEntity.getRole(), getUserCredentialById(userEntity.getId()));
    }

    //Retrieve users based on their email
    @Override
    public User getUserByEmail(String email) {
        UserEntity userEntity = getUserEntityByEmail(email);

        return fromUserEntity(userEntity, userEntity.getRole(), getUserCredentialById(userEntity.getId()));
    }
    //Retrieve users credentials based on their id
    @Override
    public CredentialEntity getUserCredentialById(Long userId) {
       var credentialById = credentialRepository.getCredentialEntitiesById(userId);
        return credentialById.orElseThrow(()-> new ApiException("Unable to find user credentials"));
    }
The next thing we have to work on is the user principal, we have to put an impelmentation for all of the methods, all of the informationn we need to do that is already in the user, so we just need to pass in the user to the user principal.
What we are going to work on today is the user principal, we need to put in an implementation for all the methods, So what we did was return the values associated with the methods in the userpricipal class, the methods from user entity in the UserUtil class has the necessary properties needed for the user so we basically return those properties that is needed by the userprincipal.
 public static User fromUserEntity(UserEntity userEntity, RoleEntity role, CredentialEntity credentialEntity) {
        User user = new User();
        BeanUtils.copyProperties(userEntity, user); //Copy all the fields from the userEntity and put in the user.
        user.setLastLogin(userEntity.getLastLogin().toString());
        user.setCredentialsNonExpired(isCredentialsNonExpired(credentialEntity));
        user.setCreatedAt(userEntity.getCreatedAt().toString());
        user.setUpdatedAt(userEntity.getUpdatedAt().toString());
        user.setRoles(role.getName());
        user.setAuthorities(role.getAuthorities().getValue());
        return user;
    }
public String getUsername() {
return user.getEmail();
}
@Override
public boolean isAccountNonExpired() {
return user.isAccountNonExpired();
}So what i am going to work on next is the encoder for the password, so i am going to create a new class called security config, we just need to define the BCryptPasswordEncoder bean becuase we want to use it to encode the password of the application.
public class SecurityConfig {
    @Bean
    public BCryptPasswordEncoder passwordEncoder() {
        return new BCryptPasswordEncoder(STRENGTH);
    }
}
One lasy thing we have to work on is the authorisation filter, this is the filter that we have to work on before we intercept any request, because this is the filter that is going to intercept every request, and determine which route that user is trying to access and if the uses has access to this route, like if the user is authenticated or not.
These filter will be the one to determine if the user is authenticated or not and also where will put the login that change if the access token is expired.
So first we create a new method called doFilterInternal, this method is going to intercept the request and determine if the user is authenticated or not, first it extract the token from the request then it checks if the token is expired or not and if its valid, when true it then create an authenticaion then set the authentication into the securitycontextkholder, and then it set the userId into the request context.
 protected void doFilterInternal(HttpServletRequest request, HttpServletResponse response, FilterChain filterChain) throws ServletException, IOException {
        try{
            //First we extract the token
            var accessToken =jwtService.extractToken(request, ACCESS.getValue());
            //Check if the accessToken is present and valid
            if(accessToken.isPresent()&& jwtService.getTokenData(accessToken.get(), TokenData::isValid)) {
                //Set the authentication in the current thread
                SecurityContextHolder.getContext().setAuthentication(getAuthentication(accessToken.get(), request));
                //Tell it who is logged in
                RequestContext.setUserId(jwtService.getTokenData(accessToken.get(), TokenData::getUser).getId());
            }else {
        }
What is a securityContextholder and what is the use.
The getAuthentication method that helps to get the authentication before we set it into the securityContextHolder is a helper method that takes in a token and a request object and returns an authentication object.
  private Authentication getAuthentication(String token, HttpServletRequest request) {
        var authentication = ApiAuthentication.authenticated(jwtService.getTokenData(token, TokenData::getUser), jwtService.getTokenData(token, TokenData::getAuthorities));
        authentication.setDetails(new WebAuthenticationDetailsSource().buildDetails(request));
        return authentication;
}So what we want to do next is that whenever the Access token is false or expired meaning if its not present, then we are going to look for the refresh token and then from the refresh token we will generate a new access token.
In the refresh token method we first extract the token from the request and then get the values of the refresh token, after that we check if the refresh token is valid or not, if it is valid then we extract the user from the token and then set the authentication in the securityContextHolder by first creating authenticated a new access token before setting it into the securityContextHolder. Then we created a new cookie and set the cookie into the response object and pass the userId into the request context
Its kind of similar to the access token method just a bit different becuase we created a new token if its a refresh token, However is there is not access or refresh token we just clear the securityContextHolder.
 }else {
                var refreshToken = jwtService.extractToken(request, REFRESH.getValue());
                if(refreshToken.isPresent() && jwtService.getTokenData(refreshToken.get(), TokenData::isValid)) {
                    //If the request token exist then a new token has to be created for the user
                    var user = jwtService.getTokenData(refreshToken.get(), TokenData::getUser);
                    //Set into the security context a newly created access token and then set it to the authentication
                    SecurityContextHolder.getContext().setAuthentication(getAuthentication(jwtService.createToken(user, Token::getAccess), request));
                    //Then we create a new cookie
                    jwtService.addCookie(response, user, ACCESS);
                    //Pass it to the Request Context
                    RequestContext.setUserId(user.getId());
                } else {
                    //Todo: For clearing the context if we dont have an access token adn a refresh token
                    SecurityContextHolder.clearContext();
                }
            }
##Authentication filter 3
So what we are going to do next is the condition for when we want to call the doInternalFilter method or when it shuld
execute, we are just cheking for when we have a access or refresh filter but not when we wnat to actually use the fillter which
is what we will be working on next.
We basically wnat to check if the refresh or access token is coming for the regsiter, login or reset password,w e could have
added it to the doInternalFilter method but i dont thnk that is the best way to do it.
So we created a shouldNotFilter method which is a method that belongs to the OnePerRequestFilter class, the method checks if the request equals to some certain URL that we dont want to filter, we have some public endpoint that we dont want to filter so it it is, it just sets the UserId to the request context.
    protected boolean shouldNotFilter(HttpServletRequest request) throws ServletException {
        var shouldNotFilter = request.getMethod().equalsIgnoreCase(OPTIONS_HTTP_METHOD) || Arrays.asList(PUBLIC_ROUTES).contains(request.getRequestURI());
        if (shouldNotFilter) {
            RequestContext.setUserId(0L);
        }
        return shouldNotFilter;
    }
So thats all for the filter for now, what we want to work on next is finsh up two more peice of the filterchainConfiguration before we can
finsh up the comfiguration and this is going to happen here.
 @Bean
    public SecurityFilterChain securityFilterChain(HttpSecurity http) throws Exception {
        return http
                .csrf(AbstractHttpConfigurer::disable)
                .authorizeHttpRequests(request ->
                        request.requestMatchers(LOGIN_PATH).permitAll() //For every http request that matches a specific pattern permit them.
                                .anyRequest().authenticated()) //Any other user that does match "Authenticate them"
                .build();
}So the first piece we will finsh with today is the Exception handler, so we create a new package called
handler and then a class called ApiAuthenticationHandle this class implement the AccessDeniedHandler and the
main aim of this class is to handle the exception that is thrown by the doFilterInternal method.
Then we create a new class called the AuthenticationEntryPoint this class implemented the AuthenticationEntryPoint, the entry point is where the athenticationis going to be throwing an exception if there is an exception and the accessdeniedhandler is for if we have an access denied exception So thats all, basically just some overriding so that we can send the request we want to send the way we want it to to be sent. Doing this becuase we want to always send the same response every single time incase we want to do some other logic with the errors.
So the next thing we want to do is, in other to make sure that we can keep the filterChainConfiguration a little bit cleaner, we will define something called an http configurer.
So we created a new class called the ApiHtttpConfigurer and then we override two need methods in this class,
the init method and the configure method.
The init method is where we do all our initialization like passing in our userdetails service or authtication provider and many more why. The configure is where we do all the configuration for the filter chain. So bascally we created a custom configurer for our API by setting up special filters like the authenntication provider and the authentication manager to handle the auth and authorization of the Http requests.
The AuthorizationFilter is a custom filter that is added before the UsernamePasswordAuthenticationFilter. It is responsible for performing authorization checks and validating access permissions for the incoming requests.
The AuthenticationFilter is another custom filter that is added after the UsernamePasswordAuthenticationFilter. It is responsible for authenticating the user based on the provided credentials and generating a JWT token for further authentication. It requires the authenticationConfiguration.getAuthenticationManager(), userService, and jwtService objects to perform its functions.
By adding these filters, the code ensures that security checks are performed at the appropriate stages of the request processing pipeline, enhancing the overall security of the API.
Now that we have the Exception Handler, AuthenticationFilter and AuthorizationFilter we can add them to the filterChainConfiguration
So we dont need the authentication manager called in the filter chain anymore, because we now called the authentication manager in the ApiHttpConfigurer class.
  public void configure(HttpSecurity http) throws Exception {
        http.addFilterBefore(authorizationFilter, UsernamePasswordAuthenticationFilter.class);
        http.addFilterAfter(new AuthenticationFilter(authenticationConfiguration.getAuthenticationManager(), userService, jwtService), UsernamePasswordAuthenticationFilter.class);
    }
And also because we have our users in the database now we dont need the userdetailservice also.
    public UserDetailsService inMemoryUserDetailsManager() {
        return  new InMemoryUserDetailsManager(
                User.withUsername("Daniel")
                        .password("letdanin")
                        .roles("USER")
                        .build(),
                User.withUsername("james")
                        .password("letjamesin")
                        .roles("USER")
                        .build()
        );
    }
So we basically working with the securityFilterChain method only, we will need the csrf and also the corsConfigurer in the filter chain configuration and we also need to set the session to be stateless because we are dealing with token we dont have any cookie that we're tracking for the logged in user. We are still using the cookie to save the token but we are not doing a cookie authentication.
This code snippet defines a method securityFilterChain that configures security filters for HTTP requests. It sets up CSRF protection, CORS configuration, session management policy, exception handling, and authorization rules for various HTTP methods and endpoints. Finally, it applies additional HTTP configurations and builds the security filter chain.
This code defines a method corsConfigurationSource that creates and configures a CORS (Cross-Origin Resource Sharing) configuration. It sets allowed origins, headers, methods, and max age for CORS requests, and registers this configuration with a UrlBasedCorsConfigurationSource object.
    public CorsConfigurationSource corsConfigurationSource() {
        var corsConfiguration = new CorsConfiguration();
        corsConfiguration.setAllowCredentials(true);
        corsConfiguration.setAllowedOrigins(List.of("http://-.com", "http://localhost:4200", "http://localhost:3000"));
        corsConfiguration.setAllowedHeaders(Arrays.asList(ORIGIN, ACCESS_CONTROL_ALLOW_ORIGIN, CONTENT_TYPE, ACCEPT, AUTHORIZATION, X_REQUESTED_WITH, ACCESS_CONTROL_REQUEST_METHOD, ACCESS_CONTROL_REQUEST_HEADERS, ACCESS_CONTROL_ALLOW_CREDENTIALS, FILE_NAME));
        corsConfiguration.setExposedHeaders(Arrays.asList(ORIGIN, ACCESS_CONTROL_ALLOW_ORIGIN, CONTENT_TYPE, ACCEPT, AUTHORIZATION, X_REQUESTED_WITH, ACCESS_CONTROL_REQUEST_METHOD, ACCESS_CONTROL_REQUEST_HEADERS, ACCESS_CONTROL_ALLOW_CREDENTIALS, FILE_NAME));
        corsConfiguration.setAllowedMethods(Arrays.asList(GET.name(), POST.name(), PUT.name(), PATCH.name(), DELETE.name(), OPTIONS.name()));
        corsConfiguration.setMaxAge(3600L);
        var source = new UrlBasedCorsConfigurationSource();
        source.registerCorsConfiguration(BASE_PATH, corsConfiguration);
        return source;
}So far we have been able to register a user and also login the user, we've encountred quite a few error along the way, like the user not found error, confirmation not found error, role not found error and also credential not found error. Most of these error a linked to the repo class, and due to some variabnles spelt wrong. In other to solce these error i used a basic debugging skill like printing out each line and tracing the not found error, it was quiter useful but the downside is the time taken.
So now what we are going to work on is, the MFA, allowin users to set multifactor authentication, and enabling their multifactor authentication, so thats what we are going to do.
So the first thing we did was create the endpoints that are going to be responsible for the MFA, The setupMfa endopoint, for creating MFA for the user and the Cancel endpoint for cancelling endpoint.
    @PatchMapping("/mfa/setup")
    public ResponseEntity<Response> setupMfa(@AuthenticationPrincipal User userPrincipal, HttpServletRequest request) {
        var user = userService.setUpMfa(userPrincipal.getId()); //Set up mfa for each specific id
        return ResponseEntity.ok().body(getResponse(request, Map.of("user", user), "Mfa set up successfully", OK));
} @PatchMapping("/mfa/cancel")
public ResponseEntity<Response> cancelMfa(@AuthenticationPrincipal User userPrincipal, HttpServletRequest request) {
var user = userService.cancelMfa(userPrincipal.getId());
return ResponseEntity.ok().body(getResponse(request, Map.of("user", user), "User MFA cancel successfully", OK));
}In the both endpoint we created two helper method, the setupMfa method and the canclMfa method, this method will define the logic for both methods, so what we are going to be working on next is putting an implementation for this method.
Today we will be working on the QR code utils, so we creat a method and two helper method,qrcodeimageuri this method help to create qrcode uri, then we defined an helper method qrDataFunction, this helper method will help in the creation of the qr data, which will then be used in the imageuri method to generate the data for the QR code.
After we then defined a methood called qr code secret, this method helps basically to generate the qr code secret. So overall, we have a way to get the secret to the qrcode, we have a way to get the QRcodeImageUri and we also have a way to get the data that will be passed to the imageUri, the data we generate is when we use in creating the uri.
So what we are going to do next is give an implementation for the method, setUpMfa and cancelMfa making use of the utils method just created.
The setupMfa method is takes in parameter Long, then it first retrived the userEntity object associated with the give id, using the getUserEntityById Method, then it retrieved a secret code using the qrCodeSecret.get method, more about the mentioned method can be found in the QR Code util section.
Next, it sets the qrCodeImageUri and qrCodeSecret properties of the userEntity object with the retrieved values. it also sets the mfa property to true.
After that, it saves the updated userEntity object in the repository using userRepository.save(userEntity). Finally it then return a User object created by calling the fromUserEntity method with the userEntity.
Similar this was also done for the CancelMfa, we get the userEntity asscoaited with the id of the user, then we set the mfa to false and then the qrcode and the qrcode secret to empty, then we save the userEntity to the database, this will delete the mfa record in the database.
After we tested the setupMfa endpoint and also the cancelMfa endpoint, by providing the user login details, and
we were able to get a qrcodeimageUri for the user and also send the MFA to true, so after we then copy the qrcodeimageuri
and pasted in into the browser which then displayed the QR image.
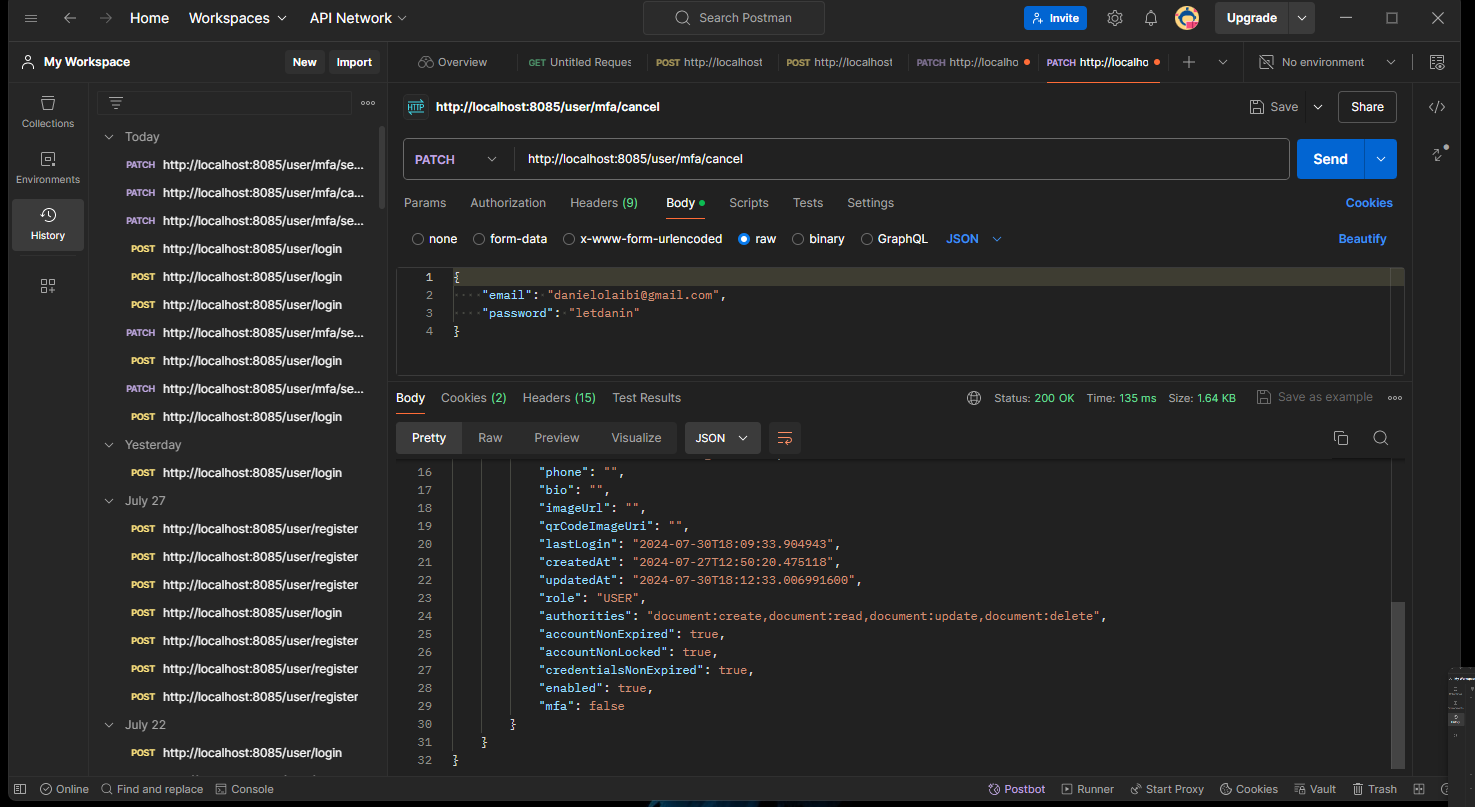
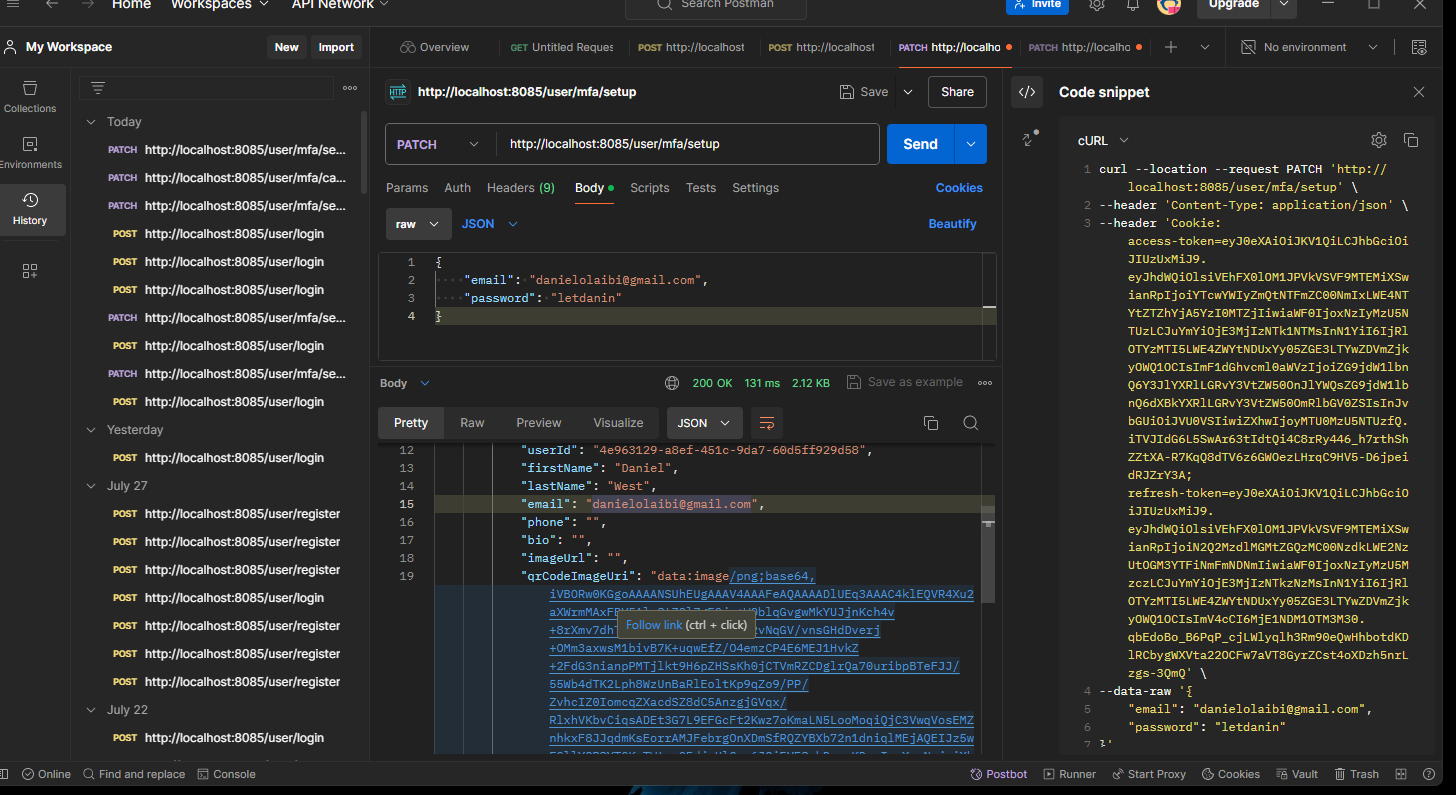
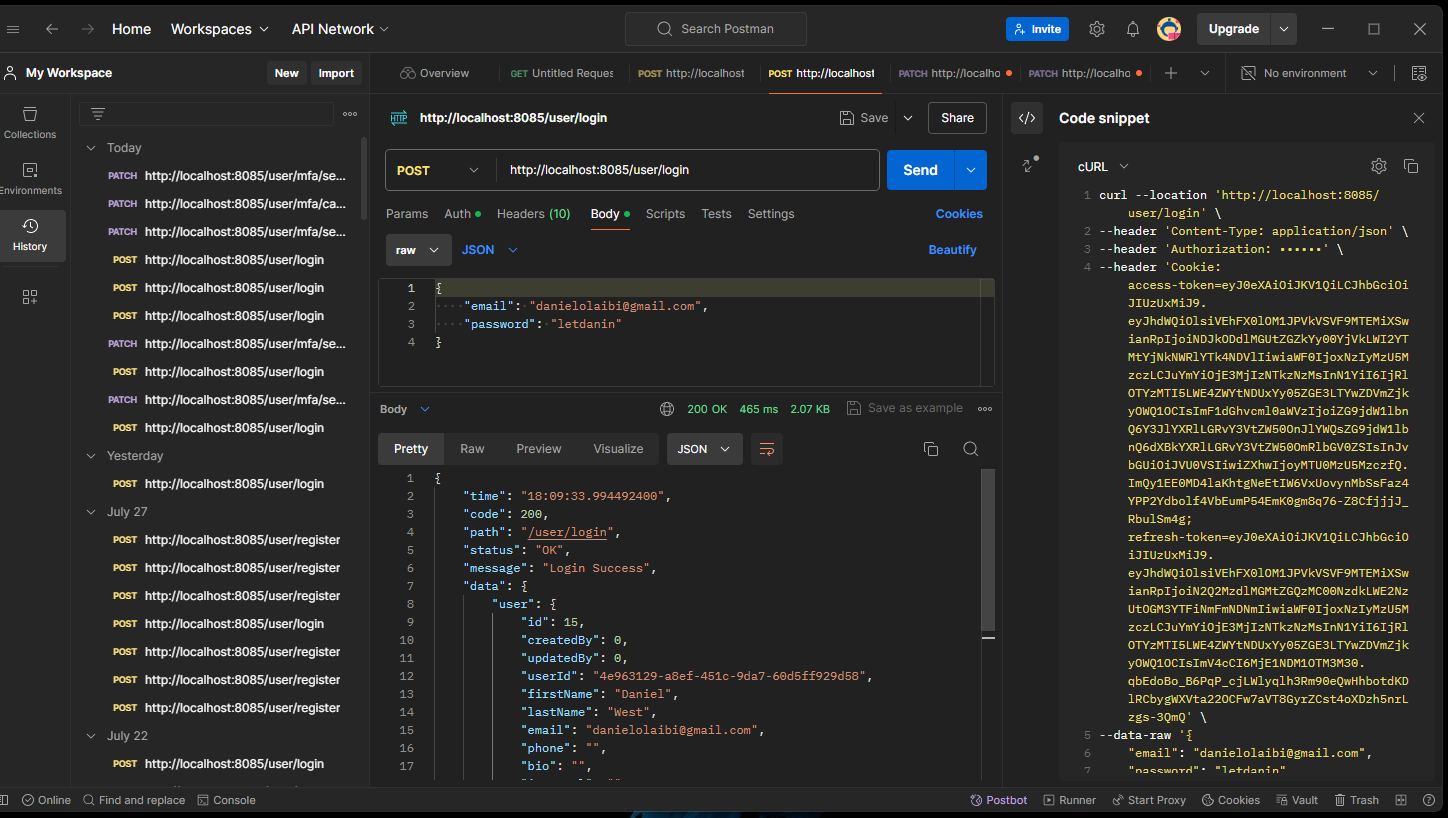 We futher confirmed the QR code image by scanning the QR code with Google Authenticator app, which then generates
a code.
The next thing we going to be working on is verifying the QR code.
Notes - make sure to add the doc explanation
We created a verfiyQrCode methood in the UserService then implemented the method, the method takes in a userID and also
a QRcode, because we want to get the userEntity we had to create a new getUserEntityByUserId method, which we use in geting
the userId.
    public User verifyQrCode(String userId, String qrCode) {
        var userEntity = getUserEntityByUserId(userId);
        verifyCode(qrCode, userEntity.getQrCodeSecret());
        return fromUserEntity(userEntity, userEntity.getRole(), getUserCredentialById(userEntity.getId());
    }
private UserEntity getUserEntityByUserId(String userId) {
var userByUserId = userRepository.findUserByUserId(userId);
return userByUserId.orElseThrow(() -> new ApiException("User not found for qr verification"))
}This method get the userId xssciate with the user from the database, then after created a new helper method called
verifyCode this method is a boolean method, that takes in a qrCode and a qrCodeSecret, this method makes use of the
TimeProvider, CodeGenerator and the CodeVerifier method, this method use the codeVerifier to verify the generatedCode
and the timeProvider, then it check if the qrCodeSecrrt and the QrCode are valid, if they are it returns true and vice
versal.
 private boolean verifyCode(String qrCode, String qrCodeSecret) {
        TimeProvider timeProvider = new SystemTimeProvider();
        CodeGenerator codeGenerator = new DefaultCodeGenerator();
        CodeVerifier codeVerifier = new DefaultCodeVerifier(codeGenerator, timeProvider);
        if (codeVerifier.isValidCode(qrCodeSecret, qrCode)) {
            return true;
        } else {
            throw new ApiException("Invalid QR code. Please try again")
        }
    }
Now we are ready to verfiy the QR code whenever we send a request to the verfyQrCode method endpoints, kso what we are going to do now is test these all the methodhiy resposible for the MFA.
Make sure to update this part with screenshots and steps if possible.
Encounter an error when i tired to loginn the user, i entered the wrong password and tried to login the user and it still gave the user and login in the user.
- Need to fix issue with logining wrong user.
Next i tested the email by entering the wronmg emial and that seems to work fine, no error so far, so i think the issue is just with the
credentials, so i need to debug where the issue comes from.
My thought are the issue has something to do with the authenticate method, i purposely bypass a pevious issue i was having with the user credential by reversing the logic of the if condition that checks if the encoded password matches the password from the database, if it matches the password then the user should be authenticated and if it doesnt match the password it should throw an api exception error." If i fix the issue that should resolve it.
  if(!encoder.matches(apiAuthentication.getPassword(), userCredential.getPassword())) {
                System.out.println("Password dont match" + apiAuthentication.getPassword() + " " + userCredential.getPassword());
                return ApiAuthentication.authenticated(user, userPrincipal.getAuthorities());
            } else throw new ApiException("Bad Credentials(Email and /or password incorrect. Please try again");
        } throw new ApiException("Unable to authenticate user");
so until this error is solved, we cant test to bruteforce implementation we had, which is basically when a user enters the wrong passoword for the 5th time, it should lock the account of the user.
For now we will move forward with the next usecaases which is the RESET PASSWORD, and then come back to that later.
# Reset password
1. The application should allow users to reset their password
2. The application should send a link to the user 'email' to reset their password (link to be invalid after being click on).
3. The application should present a screen with a form to reset the password when the linked is clicked. (FRONTEND)
4. If the password has been reset successfully, user should be able to login using the new created password
5. The application should allow user to reset their password anytime they want as manay time as possible.
All of this is when the user is not logged in, they can reset only when they are not logged in. So this is how the reset password method work, we are going to take in a request for the resetpasword
@PostMapping("/resetpassword")This request is going to accept an email and the http request body and then we are going to pass this to the resetpassword method then we return the response which will be the 200 OK response.
    @PostMapping("/resetpassword")
    public ResponseEntity<Response> resetPassword(@RequestBody @Valid EmailUserResetPasswordRequest emailRequest, HttpServletRequest request) {
        userService.resetPassword(emailRequest.getEmail());
        return ResponseEntity.ok().body(getResponse(request, emptyMap(), "Kindly check your email for the link to reset your password", OK));
    }
So now we are going to be working on implementing the reset password method, the method resetPassword takes in a email, then get the userEntity associated with the email, after it then try to get the confirmation for the user, if the user confirmation exist it then send the email to the user, if the user confirmation did not exist it create a new confirmation for the user, then save the new one to the database and forward the email to the user.
    @Override
    public void resetPassword(String email) {
        //Lets get the user
        var user = getUserEntityByEmail(email);
        //Let get the user confirmation
        var confirmation = getUserConfirmation(user);
        if (confirmation != null) {
            //Send existing confirmation
            publisher.publishEvent(new UserEvent(user, RESETPASSWORD, Map.of("key", confirmation.getKey())));
        } else {
            // Create new confirmation, save and send
            var confirmationEntity = new ConfirmationEntity(user);
            System.out.println("Confirmation Entity for ResetPassword -------------: " + confirmationEntity);
            confirmationRepository.save(confirmationEntity);
            publisher.publishEvent(new UserEvent(user, RESETPASSWORD, Map.of("key", confirmationEntity.getKey())));
        }
    }
So after the implementamtion of this method we just tested the endpoint and all is woking fine.
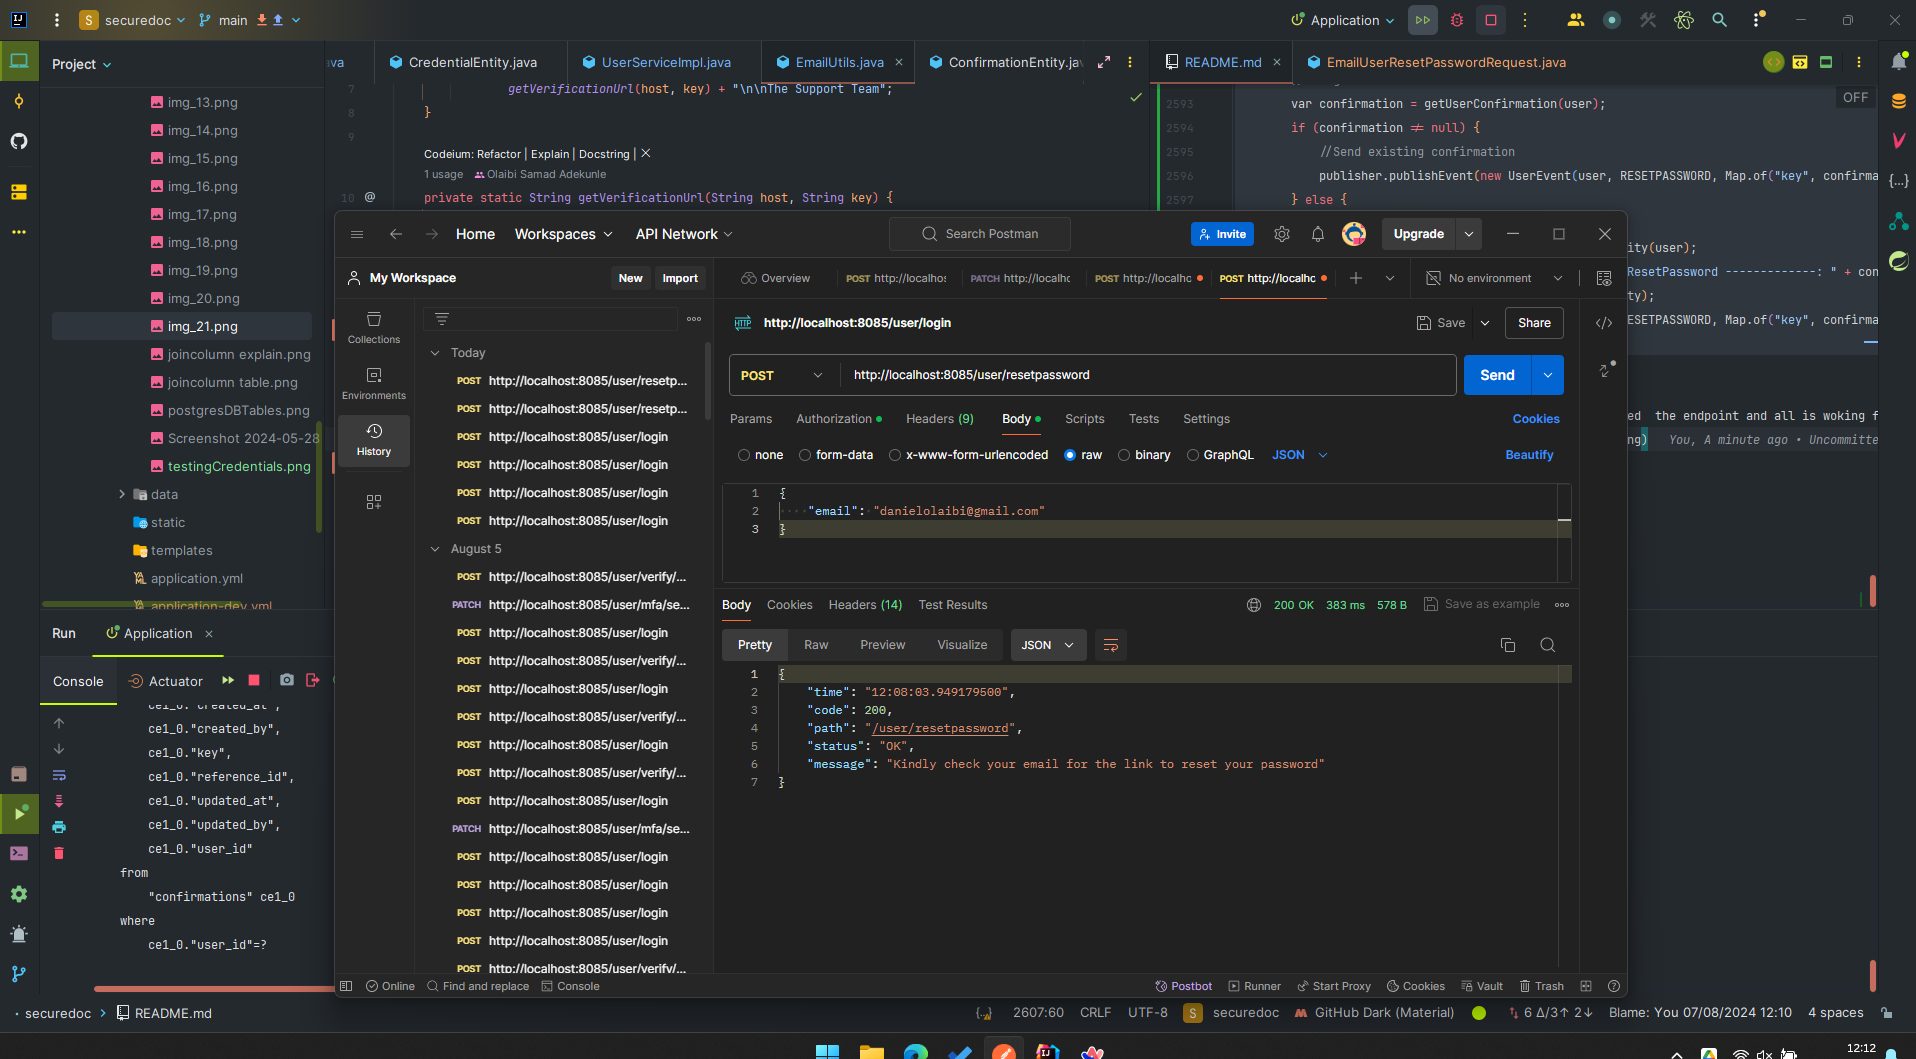
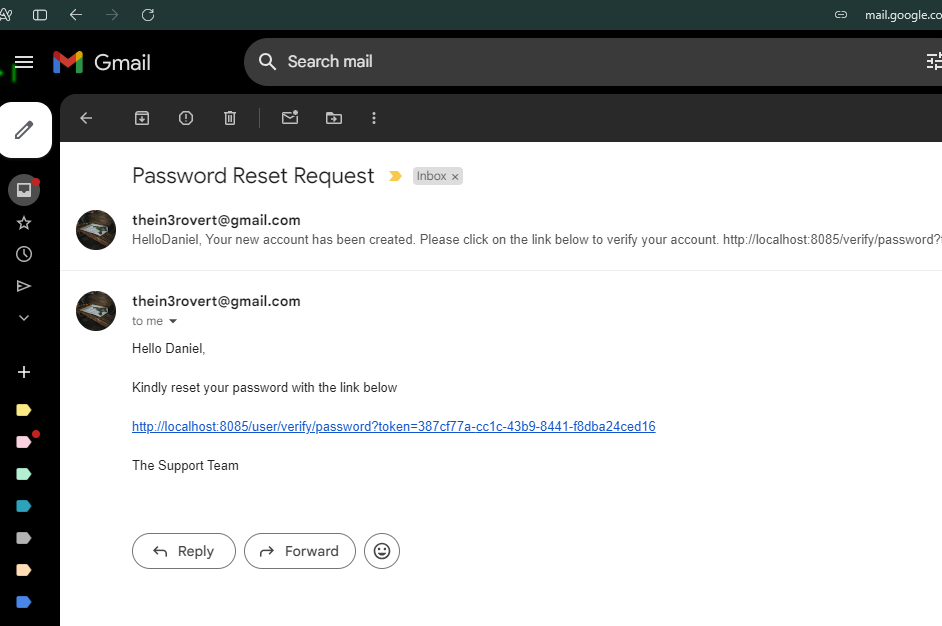 .
.
So the next thing we want to work on is the actiavtion of the link send to the email so user can enter a new password, we created a
new endpoint verifyResetPassword this method handles the POST request to the verifypassword endpoints, it also expected a
query parameter with name "key" this key is a uuid generated, the method then calls thee verifyPasswordkey method in the
userservices, which is yet to be implementedm, passing the value of the key param. If the verification is successful thema response 200 OK status
is given and then a response body containing a massage that prompt user to enter a new password, the response body also incliude a user obnject.
  @PostMapping("/verify/password")
public ResponseEntity<Response> verifyResetPassword(@RequestParam("key") String key, HttpServletRequest request) {
    var user =  userService.verifyPasswordKey(key);
    return ResponseEntity.ok().body(getResponse(request, of("user", user), "Kindly enter a new password", OK));
}
So the next thing we want to work on is the implementantion of the verifyPasswordKey method.
The verifyPasswordKey takes in a key as parmeter, the method first tires to find the confirmationEntity by passing it the key
then, it checks if the key exist or not, if the key is not found meaning of its null , it throws an Apiexception error, if the key
is found it then tires to get the userEntity by passing it the email.
An addtional conditon for when the userEntity is not found, if its not found then that means the key passes is incorrect so it throws
a new api exception error, however if the userEntity is found it then verifyAccontStatus, which is a method that checks if the user
account is enable, locked and expired.
    public static void verifyAccountStatus(UserEntity user) {
        if (!user.isEnabled()) {
            throw new ApiException("User Account is disable, unable to verify ResetPassword cannot be verified");
        }
        if (!user.isAccountNonExpired()) {
            throw new ApiException("User Account is Expired, unable to verify ResetPassword");
        }
        if (!user.isAccountNonLocked()) {
            throw new ApiException("User Account is Locked, unable to verify ResetPassword");
        }
After it verify's the account status of the user, it then delete the confirmationEntity from the database and returns a User Object.
   @Override
    public User verifyPasswordKey(String key) {
        // Find the confirmation entity in the database, it confirmation not found
        var confirmationEntity = getUserConfirmation(key);
        if (confirmationEntity == null) { throw new ApiException("Unable to find the token (key) for confirmation");}
        // If the confirmation is found
        var userEntity = getUserEntityByEmail(confirmationEntity.getUserEntity().getEmail());
        // If userEntity not found
        if (userEntity == null) { throw new ApiException("Incorrect token)key");}
        verifyAccountStatus(userEntity);
        confirmationRepository.delete(confirmationEntity);
        return fromUserEntity(userEntity, userEntity.getRole(), getUserCredentialById(userEntity.getId()));
    }
So now what we have to do next is to allow users to change their password, for now that can only enter request to change passsword, enter a new password when verified but now we need them to be able to change their password, that is what we are goign to be working on next.
We created a new endpoint to handle the request when a user enter their new password and tries to reset their password, this
method handles a POST request to the endpoint, it takes in a resetPasswordRequest dto object as a request body, it then validates it and
then use the updatePassword method to update the user's password.
Finally it return the status code 200 and then a response body containing a success message.
  @PostMapping("/resetpassword/reset")
    public ResponseEntity<Response> activateResetPassword(@RequestBody @Valid ResetPasswordRequest resetPasswordRequest, HttpServletRequest request) {
        userService.updatePassword(resetPasswordRequest.getUserId(), resetPasswordRequest.getNewPassword(), resetPasswordRequest.getConfirmNewPassword());
        return ResponseEntity.ok().body(getResponse(request, emptyMap(), "User password reset successful", OK));
    }
so now we will work on the updatePassword method.
The method updatePassword takes in a userId, newPassword and confirm new password, the reason we have a userId is because the users are currently not logged in so in other to reset their password we need to have their id, so when the user enter a new password and then enter the confirm new password, the method checks if both password matches
   public void updatePassword(String userId, String newPassword, String confirmNewPassword) {
        if(!confirmNewPassword.equals(newPassword)) {
            throw new ApiException("Password don't match. Please try again");
        }
    //..................
if they dont it throws a new ApiException message saying password dont match and when they match it gets the user by user id then it set the new password to the credential and encode the password then it saves the credential to the databse.
 var user = getUserByUserId(userId);
        var credentials = getUserCredentialById(user.getId());
        credentials.setPassword(encoder.encode(newPassword));
credentialR# Profile
1. Application should allow users to update their basic profile
2. Application should allow users to update their password while they are logged in
3. Application should allow users to update their account settings while they are loffed in
4. Application should allow users to update their profile while they are logged inThese are what we will be working on, we want to make sure we allow the user to see their information, as of now, we dont have anyway to allow users to see their information or to show te show the profile of the user.
We created an endpoint called profile, this endpoint is responsible for providing the neccessary user profile data basically,
the userEntity, it has a method profile annotated with AuthenticatedPrincipal and takes in a UserPrincipal and Htttp
Request.. The reason why we used the Authenticated Principle annotation is because this is an authenticated routes, user
has to be authenticated before they can be allowed to view their profile.
Then we created get the userId from the userPrincipal and return a response body with a user object and a message "User profile has been retrived".
@GetMapping("/profile")
public ResponseEntity<Response> profile(@AuthenticationPrincipal User userPrincipal, HttpServletRequest request) {
var user = userService.getUserByUserId(userPrincipal.getUserId());
return ResponseEntity.ok().body(getResponse(request, of("user", user), "User Profile Retrieved", OK));
}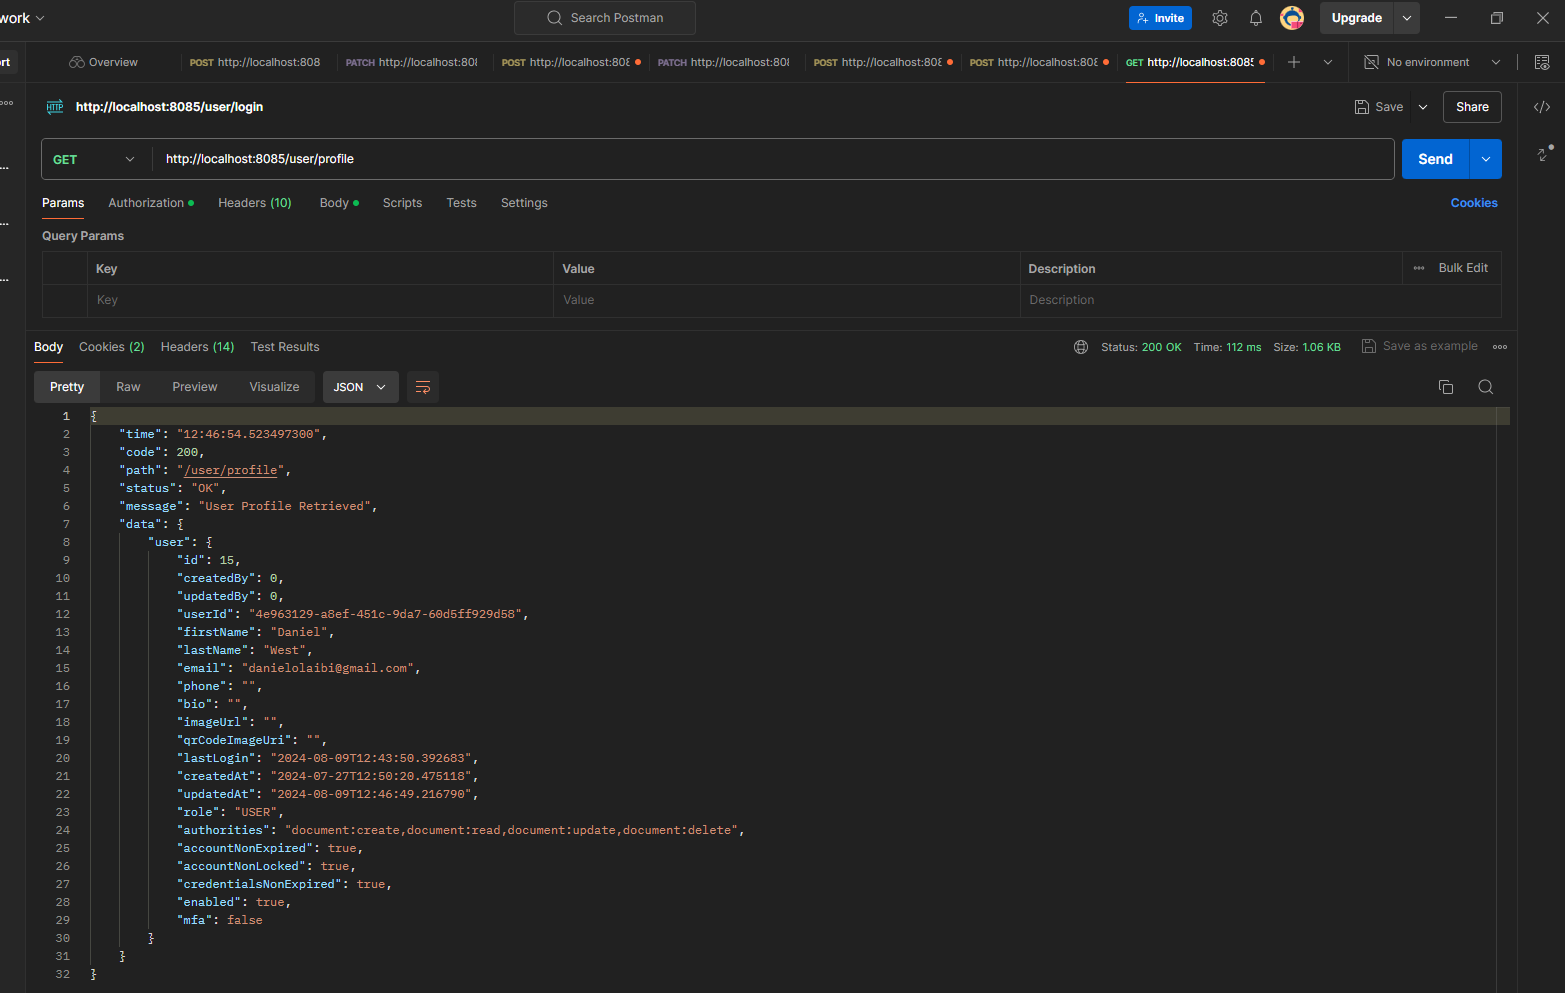 So now we have a way to get the user, the other thing we have to do now, is that we have to allow them to update this
information so thats why we are going to be working on.
We created a endpoints called update this endpoint is responsible for updating neccessary user profile details, like the
first name, last name, email, bio and phone number, this endpoint is annotated with the @AuthenticationPrincipal and
@RequestBody becuase the user has to be authenticated before they can update their profile and also because its a
PatchMapping we need to get the user data from the UserRequest.
Then we created a method updateUser, this method takes in a userId, and some data from the userRequest like the firstname,
lastname, email, bio and phone. Then return a responsebody of a user Object and a message.
@PatchMapping("/update")
    public ResponseEntity<Response> update(@AuthenticationPrincipal User userPrincipal, @RequestBody UserRequest userRequest, HttpServletRequest request) {
        var user = userService.updateUser(userPrincipal.getUserId(), userRequest.getFirstName(), userRequest.getLastName(), userRequest.getEmail(), userRequest.getPassword(), userRequest.getBio());
        return ResponseEntity.ok().body(getResponse(request, of("user", user), "User updated Successfully", OK));
    }
So what we are going to be working on now is the updateUser method in the userServices.
In the method. the main thing we want to do is find the user and also update the user information. The method takes in a userId (only when the user log in), firstname, lastname, email, phone and bio beause these are the things we want to be chaning in the application, then we get the user Entity with the userId of the user when logged in, after we set the data that needs to be updated, save it to the database and return a user object including the updated data.
   @Override
    public User updateUser(String userId, String firstName, String lastName, String email, String phone, String bio) {
        var userEntity = getUserEntityByUserId(userId); // UserId is coming from the logged-in user
        userEntity.setFirstName(firstName);
        userEntity.setLastName(lastName);
        userEntity.setEmail(email);
        userEntity.setPhone(phone);
        userEntity.setBio(bio);
        userRepository.save(userEntity);
        return fromUserEntity(userEntity, userEntity.getRole(), getUserCredentialById(userEntity.getId()));
}- First login
- Hit the endpoints!
So now user can chage the basic information on their profile, next we need to allow them to change the advance setting like their roles and setting on account.
So we created an endpoint called the updaterole, responsible for updating the user roles, similar to the update endpoint it takes in the authenticated user, which mean if the user is not logged in or authenticated, the user cannot update, also takes in the role request and httpservlet request. Then we created a method called updateRole, which was the implemented in the user services, this method takes in the userID of the authenticated userRole.
void updateRole(String userId, String role);We get the userEntity then we set the role to the user entity and save the userEntity to the database.
   @Override
    public void updateRole(String userId, String role) {
        var userEntity = getUserEntityByUserId(userId);
        userEntity.setRole(getRoleName(role));
        userRepository.save(userEntity);}
So what we want to work on next is makig user able to update their settings like the accountLocked, accountExpied,
accountEnable and CredentialExpired.
So we created two endpoints for each of them:
- toggleCredentialsExpired: This endpoints takes in the authenticated User and Http request, it has a toggleCredentialsExpired method that takes in a UserId, this method is responsible for making user account expire, in case the admin or manager want to make a user account expire it can be toggled on and off. The toggleCredentialsExpired created a userEnitty and also a credentialEntity, if then checks if the credentials of the user is more than 90 days, if it is more than 90 days it updates the credentials and if its not not more than 90 days it set the user credentials to more than 90 days, which means the user account is expired.
- toggleAccountEnabled: This method also takes in a userId as param, then it created a userEntity set the user account enable to false, if the user is enabled and viseversal. Then save the userEntity to the database
- toggleAccountExpired: Thus method takes in a userId as param, it then creates a userEntity by usging the getUserByUserId method to get the userEntity by Id. Then it set the accountNonExpired to false and vise versal after it saved the userEntity to the database.
- toggleAccountLocked : Similar process for the toggleAccountLocked method.
So the next thing we want to do is an implementation that is going yo allow the user to update their password, when they are logged in.
We created a new endpoint called the updatePassword, this method takes in a the Authenticated User, becuase the user has to be
logged in before they can make an atmpt to chage their password in the settings, then it also takes in a @RequesBody
updateUserPasswordRequest this request has the password(currentPassword, newPassword and confirmNewPasssword). Then we created
a new helper method in the userServices called the updatePassword, this method updatePassword is similar to the updatePassword
method used for when not logged in user what to reset their password. However this latest update password, takes in different
parameters from the not logged in update password.
So the updatePassword method first checks if the confirnNewPassword is similar to the newPassword, it is not similar
it throw an api exception error with a message.
if (!confirmNewPassword.equals(newPassword)) { throw new ApiException("New currentPassword don't match"); }Then we get a new userEntity by passing in the UserId of the user requesting to update their password, then we verify
the user with the verifyAccountStatus method to check if the user is allowed to make an update on their account.
If true, then we get the user credentials by passing in the userId, gotten from the userEnity and then, this gives us the
user current password which we then compare with the newPassword provided by the user, if the currentPassword provided
by the user is not equal to the password from the database(which belongs to the user) then we throw an api exception,
if otherwise we then endcode the newPasword save it to the database replacing the old password.
var user = getUserEntityByUserId(userId);
verifyAccountStatus(user);
        var credentials = getUserCredentialById(user.getId());
        if (!encoder.matches(currentPassword, credentials.getPassword())) { throw new ApiException(" Existing currentPassword is incorrect, Kindly try again"); }
        credentials.setPassword(encoder.encode(newPassword));
        credentialRepository.save(credentials);
Then we run test on the endpoint and it went well.
For more details on this please check my blog -> [Link]
What we first did was create an enpoint called /photo this endpoint is responsible for handling the user photo upload,
and it uses a PatchMapping annotation. Then we created the method uploadPhoto responsible for handling Patch request to the /photo endpoints.
The endpoint is a protected route so the method takes in a an authenticated user, so the user has to be logged in before
that can change their profile so the method takes in an Authenticated User, MultipartFile which is the file the user
is uploading and HttpServletRequest.
Then we created an upload photo method in the userservice this method is responsible for uploading the photo, it takes in a userId and a file.
    @PatchMapping("/photo")
    public ResponseEntity<Response> uploadPhoto(@AuthenticationPrincipal User user, @RequestParam("file") MultipartFile file, HttpServletRequest request) {
        // In this case we are not returning a user, we are only updating the roles of the users
        var imageUrl = userService.uploadPhoto(user.getUserId(), file);
Then it returns a responseEnity OK and a body containining the imageUrl and a success message.
...
        return ResponseEntity.ok().body(getResponse(request, of("imageUrl", imageUrl), "Profile Photo Update Successfully", OK));
}
The uploadPhoto Method takes in a userId and a MultipartFile file, then we creates a userEntity and a photoFunction method. Then we set the imageUrl passing in the photoUrl and append a timestamp to the photoUrl to ensure that the url is different everytime the image is updated, this is done so that when the browser featch the image everytime the sources attribute will be different and then save the user object to the database and return thr photoUrl.
    @Override
    public String uploadPhoto(String userId, MultipartFile file) {
        //Get the user entity
        var user = getUserEntityByUserId(userId);
        //Create helper method
        var photoUrl = photoFunction.apply(userId, file);
        /* Make sure the url is diff everytime its updated so the will not refetch the image
        The reason we want to change the url everytime is because
        we want the browser to fetch the image everytime the sources attribute is different
         */
        user.setImageUrl(photoUrl + "?timestamp=" + System.currentTimeMillis());
        userRepository.save(user);
        return photoUrl;
    }
The photoFunction called by the uploadPhoto method takes in two param, a string Id and a MultipartFile file.
The Function create a filename with the uuid and a concat "png"
 private final BiFunction<String, MultipartFile, String> photoFunction = (id, file) -> {
        var filename = id + "png";
Then we create a file Storage location in the user's home diretory in the Downloads folder, it create a new folder called uploads, if the in happends that the directory does not exist it will create a new one and then copy the content of the file which will be an image to a specific location. Finally it creaTED a URI String using the current context path and the filename and rhen return it. If an error occurs during the process, it thows an ApiException message "Unable to find Image".
 try{
            var fileStorageLocation = Paths.get(System.getProperty("user.home") + "/Downloads/uploads").toAbsolutePath().normalize();
            if(!Files.exists(fileStorageLocation)) {
                Files.createDirectories(fileStorageLocation); }
            Files.copy(file.getInputStream(), fileStorageLocation.resolve(filename), REPLACE_EXISTING);
            return ServletUriComponentsBuilder
                    .fromCurrentContextPath()
                    .path("/user/image/" + filename).toUriString();
        }catch (Exception exception) {
            throw new ApiException("Unable to save image");
        }
    };
New we need to create a get request so that we can see the image when the imageUrl is clicked. So the next thing we have next is to implement the lgout functionality.
So for the logout feature, we created a logout endpoint, it had a method logout that handler the logout request, this method
takes in the Httpservelet Request, response and Authentication, the reason why we use authentication and not the
authenticated principal is because we need some other things in the authentication, AuthenticationPrincipal and Authentication
are kind of the samething, the authentication is what we have as the authenticate entity for the request in the current thread.
After we created a ApiLogoutHandler class in the handler package and inject it into the field, this ApilogoutHandle handles
the logout, it has a method called logout that takes in the request,response and Authentication, then create a logoutHandler
object using the SecurityContextLogoutHandler. Then passes in the response,request and authentication.
  @Override
    public void logout(HttpServletRequest request, HttpServletResponse response, Authentication authentication) {
        //SecurityContextLogoutHandler logoutHandler = new SecurityContextLogoutHandler();
        var logoutHandler = new SecurityContextLogoutHandler();
    logoutHandler.logout(request, response, authentication);
Then we uses the JwtServices.removeCookie method to remove the cookies from the request.
      // We need to remove the cookie
        jwtService.removeCookie(request, response, ACCESS.getValue());
        jwtService.removeCookie(request, response, REFRESH.getValue());