The Web Application Boilerplate (WAB) is a template for how to build a small self-contained application with an embedded user interface.
The goal of this project is to showcase how an application can be built without any of the business logic. It can be used to trial new technology and ensure the core functions (protobuf generation, HTTP/2, cancellations, etc) are all working in a nice happy isolated environment.
It's a bit too complex to just be used as a template as it does come out of the box with a sample application based on the Vue 3 template
If you want to see WAB in action, just clone this repo, build with make, then
run:
make
./bin/wab --log-requests
You should be able to open up a browser window to http://127.0.0.1:8080 and see the WAB UI.
If something isn't quite working, go check out the prerequisite section, this will show you how to install all the development tools (nearly from scratch).
Once things are working, have a look at the various exercises.
WAB ships out of the box with fully vendored dependencies so you should be able to get it built without any external dependencies.
When you want to edit the protobuf files though, you'll need to make sure you have a few more tools installed to recompile the proto files.
make- You'll need a copy ofmakethis is likely installed by your system.go-go1.20+ is required to build the backend code. You could probably get away with an older version with some modifications.nodejs- Needed to install/transpile the VueJS UI
This project uses protocol buffers (protobuf). These must be compiled from a
.proto file using the protoc compiler. If you want to change the .proto
files included under the proto/ directory, you'll need the following.
-
protoc - I recommend installing via
brewor your system's package manager. -
protoc-gen-go, protoc-gen-go-grpc - Used to generate gRPC bindings for go.
Install with:go install google.golang.org/protobuf/cmd/protoc-gen-go@latest go install google.golang.org/grpc/cmd/protoc-gen-go-grpc@latest
-
protoc-gen-grpchan - Used to generate binding for in-memory gRPC channels, Install with:
go install github.com/fullstorydev/grpchan/cmd/protoc-gen-grpchan@latest
To setup your ui development area make sure you have a copy of
go install github.com/fullstorydev/grpchan/cmd/protoc-gen-grpchan@latestThe go backend can contain the user interface automatically
embedded to produce a single, dependency-free build,
but for now and for development, it's very useful to see how to build them
separately.
# Build an executable in ./bin/wab without the VueJS UI
make noui
Now you can just run it! I highly recommend enabling the --log-requests flag
which will print when a request comes in and the response that was sent to a
client.
You'll also want to enable --dev when running the user interface in dev mode.
This will add CORS
headers
to the routes so the web UI won't reject them.
./bin/wab --log-requests --dev
2023-05-13T15:58:28.147+0100  INFO  wab/main.go:53  Starting HTTP server: http://127.0.0.1:8080
2023-05-13T15:58:28.147+0100  INFO  wab/grpc_server.go:175  server listening at [::]:5050  {"part": "grpc"}
2023-05-13T15:58:28.179+0100  WARN  wab/web_server.go:80  DevMode enabled; your server is not secure against CORS based attacks.
2023-05-13T15:58:28.179+0100  INFO  wab/web_server.go:107  Setup grpcweb at /grpc
2023-05-13T15:58:28.180+0100  INFO  wab/web_server.go:127  Setup GRPC UI at /grpc-ui
You should be able to open a web browser to http://127.0.0.1:8080 and see the following message:
No UI embedded in this copy of wab
This is great! The reason this is desplayed is because when we ran our make
above, we ran make noui which did not embed the VueJS front-end app.
You should also be able to see the grpcui interface if you browse to
http://127.0.0.1:8080/grpc-ui/, but that is covered later in the debugging
gRPC section.
Keep reading to see how to build and run the UI, then building a fully embedded application.
The VueJS ui is pretty easy to build, and if you are familiar with npm
commands you're welcome to use those. For convenience I've provided make
targets for all operations so make can be the "one stop shop".
If you customized the address of your development backend to something other
than http://127.0.0.1:8080 be sure to replace that in the export below. These
instructions use bash syntax.
Now build and run the UI in HMR Development
mode1 using make as shown:
# Only required the first time and when npm packages change
make setupui

# Set the address of the go backend
export VITE_API_ADDR=http://127.0.0.1:8080

# Start the Vue development server
make dev-ui
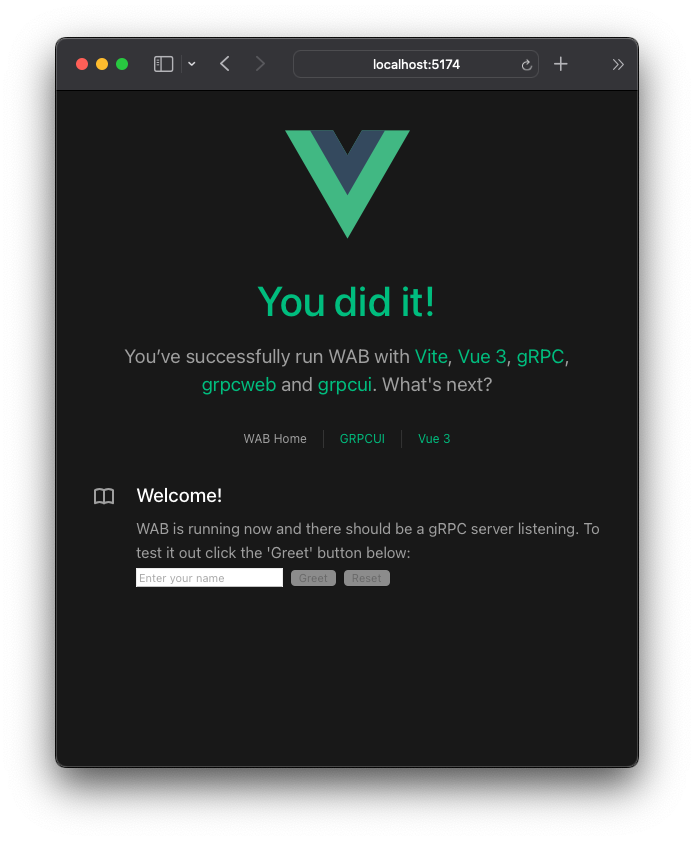
Now you should be able to open a web browser to the address shown (likely http://localhost:5174/) to see the following UI:
At this point, you can either skip to the getting started with WAB or continue to building the complete embedded backend/frontend embedded into one file.
NOTE: This assumes you've already read the above sections and can build both the backend/frontend:
Now with an additional make target, we can build an entirely embedded
application using go's wonderful embed
directive2
make fullYou should see the vite build scripts run, followed by the go build (although this is very quiet).
Once it finishes you're left with a single executable in the ./bin folder
called ./bin/wab.
To run everything, you can simply run3:
./bin/wab --dev --log-requestsGreat! Now regardless of which way you're running WAB let's move on to learning a bit about how this is setup with getting started with WAB.
TODO
WAB is built to showcase how various pieces of technology fit together to build an application, however it includes a lot of individual tech. If you'd like to see a deep dive on the individual pieces of tech, have a look at the technology section.
Welcome! If you're looking to get started, make sure you have a copy of WAB running. This section assumes it's running fully embedded, but it should still make sense if you're running in split mode.
Start wab with the following command (if you haven't already):
./bin/wab --log-requestsThis will:
- Start an HTTP server on
127.0.0.1:8080which will serve up- The compiled VueJS App. This is where your business logic would go
- A GRPC Debuggging User Interface (totally separate from the Application)
- An embedded copy of grpcweb that the VueJS App will talk to (see below)
- Start a
gRPCserver on127.0.0.1:5050-
This can be used by other gRPC clients or test software like grpCURL:
% grpcurl -plaintext localhost:5050 list
Greeter
grpc.reflection.v1alpha.ServerReflection
% grpcurl -plaintext localhost:5050 list Greeter
Greeter.Greet
Greeter.GreetMany
-
See configuring WAB for more details on the options
A quick note about grpcweb
The embedded grpcweb server is really important for this demo. gRPC cannot
be natively run in the web due to some browser limitations. Here's a decent
write-up on it: https://grpc.io/blog/grpc-web-ga/. There are a few options you
have:
To make WAB work "batteries included" I have opted to use the third option,
grpcweb which turns any HTTP request that is sent to /grpc/* into a GRPC
call.
Ok, now that you have the UI up it should look like this:
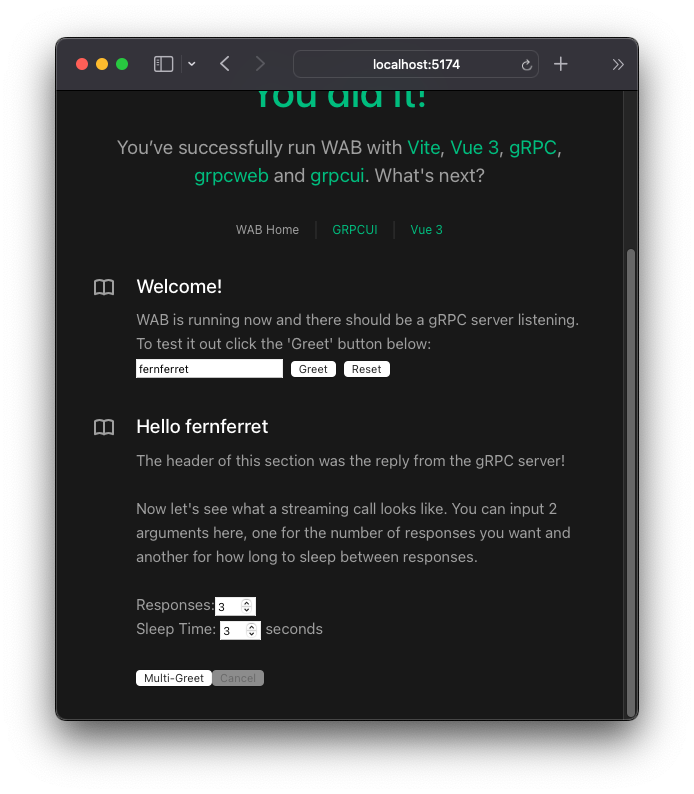
To test things out, enter your name in the textbox and click Greet, you should see the following response:
Cool, so what happened, well, When you clicked the Greet button, a GRPC call
was sent from the VueJS webui to the backend, and it returned the message Hello fernferret. This is an example of a web based unary
call.
That's cool, but a lot of the time you'll want to stream responses to the client, and this is where things get more interesting...
In the next block we're given 2 input boxes and a Multi-Greet button. These
let you play with what happens when you close a browser tab, or cancel a request
mid-run.
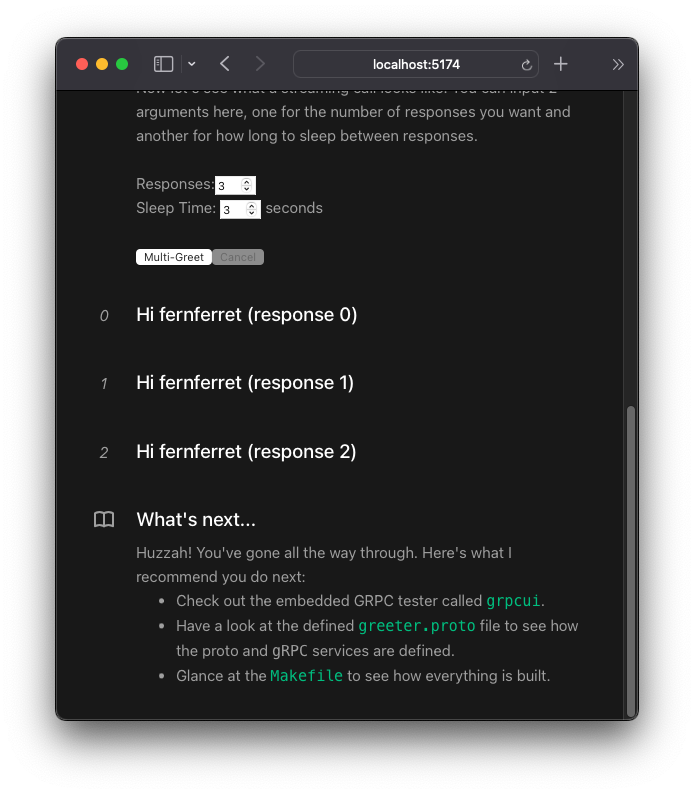
Go ahead and leave both text boxes at 3 and 3 and click Multi-Greet. In
roughly 9 seconds you should see this output:
Awesome, you should have seen these 3 responses come in 3 seconds apart from each other. This shows the streaming request is working! Feel free to open up your browser's Dev Tools and watch the requests as they go.
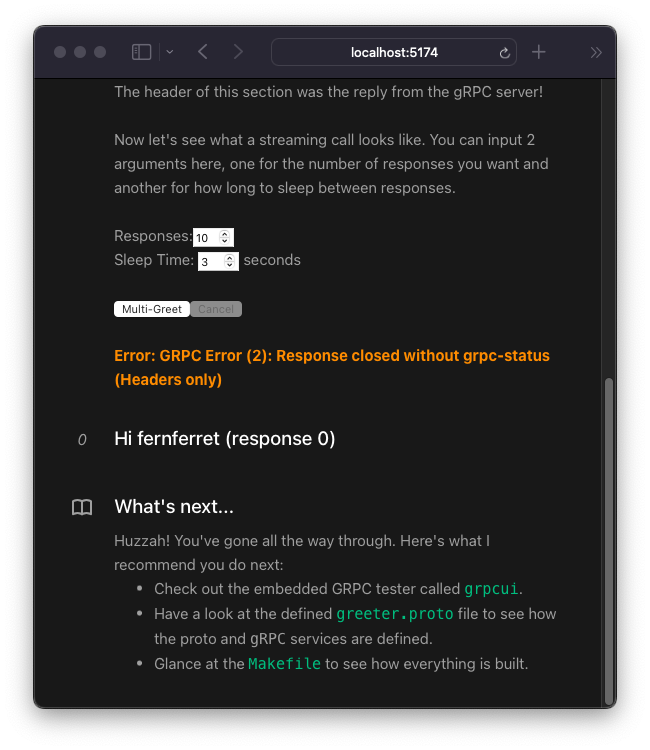
Before we wrap things up, let's see if something interesting happens if we stop
the server as it's serving a request. Set the inputs to 10, 3, respectively and
click Multi-Greet again.
Now, type Ctrl + C in the terminal where you're running WAB. Look at that, the
browser recognized that there was an error and displayed it!
This shows that just like with websockets, the browser and server can interact with unexpected operations and inform users correctly. The Cancel button will do the opposite and you can try it out too.
This is all the demo does. It'e intentionally bland so you can see how interactions work and not focus on business logic.
Next, let's move on to a faster development loop by running in split mode.
The embedded UI is fantastic for distributing to other users, it makes it really
easy to run your app, however for development having to rebuild the javascript
and go code every time you want to tweak a color or a <div> attribute is very
slow.
To speed up our dev-loop we'll combine 2 techniques shown above to achieve a very fast dev loop.
NOTE: You will need to use the --dev flag here, since we'll be running the
backend on port 8080 and the frontend on port 5173 (the vite default).
First, let's build the go code without an embedded ui. This means if you change your go code, you can quickly rebuild it without having to rebuild the javascript:
make noui && ./bin/wab --dev --log-requestsThe noui target will pass a golang buildtag -tags noui which will embed a
blank file instead of the full javascript. It will still continue to serve up
gRPC and grpcweb requests, so you can keep developing!
Now, in another hterminal, let's run the vite HMR development server. This spins up a quick server that will immediately reflect changes you make to your typescript/Vue files without any reload.
There is one extra step here though, since we've split the frontend from the backend, the front-end does not know where to talk to the gRPC server.
I've plumbed this in as an environment variable named VITE_API_ADDR. So since
our backend is presumably running on http://127.0.0.1:8080 we can just set the
VITE_API_ADDR env var before running the make target, like so:
export VITE_API_ADDR=http://127.0.0.1:8080
make dev-ui
Here's what this looks like, I usually split my terminal like so:
If I need to recompile the backend I can just press Ctrl + C, Up Arrow and
Enter and I'm recompiled and running again.
The main reason I don't use go run ./cmd/wab is because I find attaching the
debugger is easier with an independent binary.
Making changes to a .proto file and having it re-generate all your languages
source code is one of the most satisfying things ever.
Let's say you wanted to modify the proto file and then re-build the interfaces, great!
- Make sure you have all of the prereqs met including the generic and others
- Modify the proto file to your liking
- Run
make proto
That's it!. Feel free to have a look at the
Makefile
for more details.
How proto compiling works in general is that protoc will do the heavy lifting,
then other folks will write plugins like protoc-gen-go. protoc will
autodiscover the plugins by their name if they're passed as a command line
option, like --go_opt. For example, the --go-grpc_opt flag will look for a
protoc-gen-go-grpc binary.
If you'd like more information on protoc or it's plugins, have a look at
these:
I should note that I'm using buf in other
projects and I really like it! I just wanted to keep things a bit simpler so you
can understand the ecosystem around protoc and how plugins work before diving
into an abstraction layer like buf.
WAB ships with 2 built-in debugging profiles for VSCode.
You'll need the go plugin installed. Go do that and come back here.
- Run WAB via
./bin/wab ... - Place some breakpoints where you want to do some debugging.
- Switch to the debugging view and run the
Attach to Processconfiguration - Select
wabfrom the list. - Make a call via the WAB UI,
grpcuiorgRPCurl - Watch as dlv does all the hard work and your code pauses on the breakpoint
gRPCurl is a great tool to debug
gRPC calls but what if there was a full UI to do that too?
Spoiler alert: The gRPCurl devs wrote one of those too, it's called
grpcui.
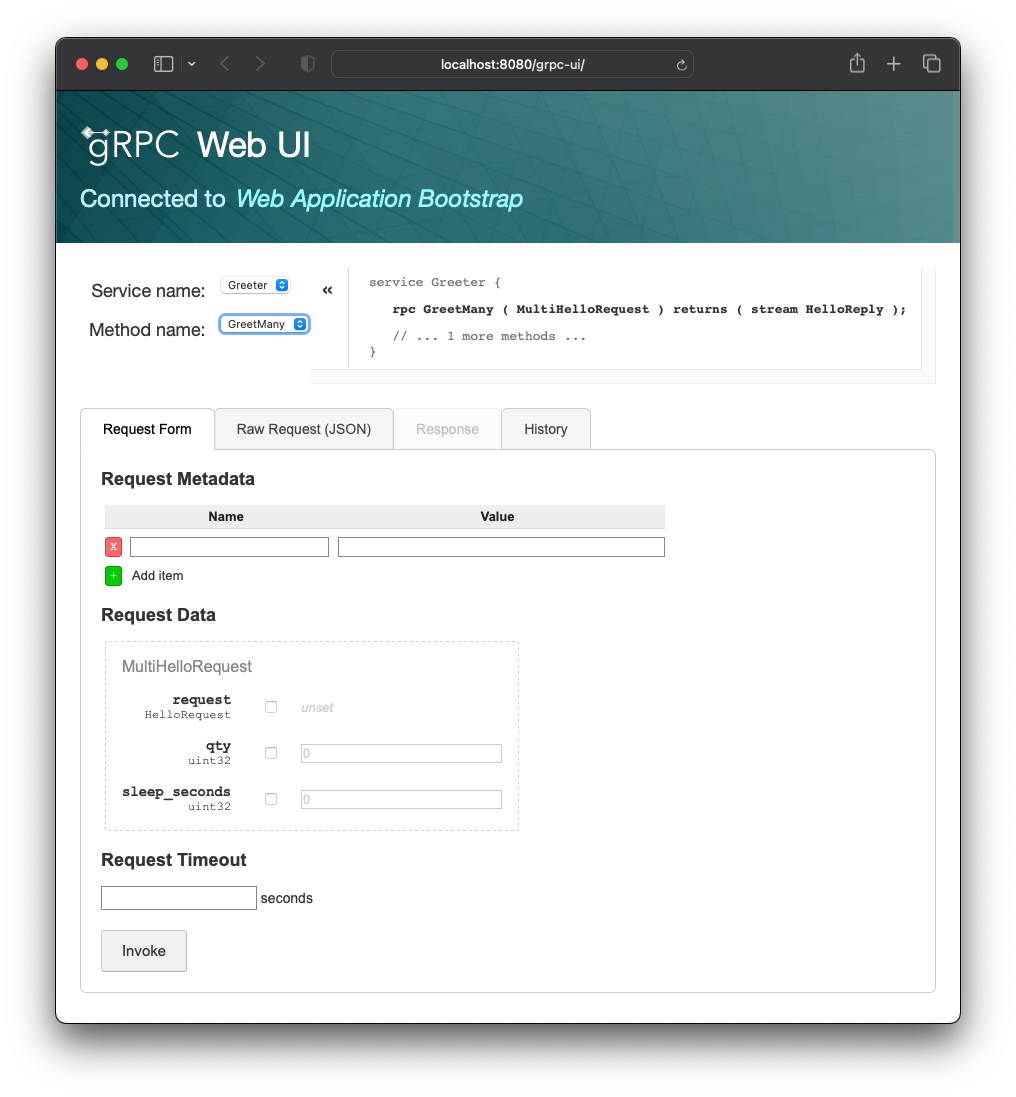
It comes embedded at http://127.0.0.1:8080/grpc-ui/ (note the trailing slash) and looks like this:
You can use it by just typing in the values you want and clicking Invoke. It
will run even with --no-grpc as it operates on an in-memory gRPC
channel,
which is super great for testing and plumbing a UI like this.
The grpcui embeds the greeter.proto file within the
binary,
so whenever you change the proto file and run make proto the UI will
automatically have the latest spec. This is done so it doesn't have to use the
reflection
api
(which it can). I just like the idea that it can be run with a built copy of the
code and just include everything that it should.
I think the grpcui is probably my favorite way of testing and debugging gRPC
services right now so give it a try! You can also run it non-embedded as an
executable that uses the reflection
api.
WAB has a ton of options to showcase how various things work, let's take a look at some common options and configurations.
You can also have a look at the source or run with --help to get more info.
By default, WAB opens 2 ports, 8080 and 5050. The 8080 port is an
echo webserver that also routes the
grpcui debugging tool and
grpcweb
proxy.
The 5050 port is the native gRPC port which can be used by external tools like
gRPCurl
The HTTP port cannot be disabled. You could theoretically do that, but the name of this project is the web application bootstrap!
By default there are 3 items exposed on it:
/grpc/*-grpcwebtraffic. This is what the VueJS app uses to talk to the backend./grpc-ui/*-grpcuiA fully embedded copy of thegrpcuithat can be used to debug yourgRPCapp./*- Anywhere else routes to the VueJS application. THere are some sub-divisions for/static/*and/assets/*that ensure that these contents are always served up, but for most purposes anything else just gets sent to the Vue app. This is so Vue can perform the routing it wants as a SPA.
wab --help
usage: ./bin/wab
  -b, --bind string        set the bind host for the http server (default "127.0.0.1:8080")
...
      --dev                if true, CORS headers will be insecure, use if you're splitting the API/Server for now.
      --log-requests       if true, http requests will be logged, pretty loud
      --no-grpcui          disable the GRPCUI debug endpoint at /grpc-ui/
      --no-grpcweb         disable the grpcweb endpoint at /grpc/, this means the embedded Vue app won't work
...
The -b/--bind flag will allow you to change what interface the HTTP server
binds to, in case you had multiple NICs or wanted to use a different port.
The --dev flag enables
CORS
headers so the UI can be split from the backend. It is
not needed if you're running in embedded mode. In production you should handle
CORS headers with your revers
proxy.
The --log-requests flag logs every http request. It's really nice for
debugging what's going on with reverse-proxy routing issues. It currently only
affects HTTP traffic and not gRPC traffic.
TODO: Implement a flag for gRPC based logging via an Interceptor.
The --no-grpcui and --no-grpcweb flags disable each of these features. This
can be useful to see how to do, as you'll likely want to disable grpcui in
production and might want to disable grpcweb if you're using something like
envoy as
a proxy
There are a few config options for the gRPC port:
wab --help
usage: ./bin/wab
...
  -g, --bind-grpc string   set the bind address for the gRPC server (default "127.0.0.1:5050")
      --no-grpc            disable the native gRPC binding, grpcweb will still be available
      --no-reflection      disable gRPC reflection, this will prevent gRPCurl from working
...
The -g/--bind-grpc flag will allow you to change what interface the gRPC
server binds to, in case you had multiple NICs or wanted to use a different
port.
The --no-grpc flag disables binding to the gRPC port altogether. If set, the
grpcweb proxy will still work, so the demo VueJS app will totally still work,
but other connections and tools, like gRPCurl will not.
Footnotes
-
Hot Module Replacement, or HMR, will allow you to change files and have them automatically reloaded in your browser. This makes it much easier to develop web applications. Vue 3 now uses Vite to perform this function, there's no configuration that you need to do when running in development mode. ↩
-
There are lots of great articles that cover how to do go embedding the this one by Carl is one of my favorites as he goes over both embedding directories and individual files. Both techniques are used in WAB: ui as a directory and proto file as a string. ↩
-
Note that we pass the
--devand--log-requestsdirectives here to see what's going on. This was first shown in running the grpc backend. ↩
