With this guide you can create an environment for the purposes of demonstrating AWS Transit Gateway Multicast features. The environment will deploy to the us-east-1 AWS region, and contains the following resources:
- A VPC with public and private subnets across two AZs.
- A Linux Bastion Host, accessible using SSM Session Manager, to be used as the multicast traffic source.
- An AutoScaling Group with three instances, accessible using SSM Session Manager and to be used as multicast traffic receivers.
- A Transit Gateway with Multicast support.
From your terminal run the following commands:
git clone https://github.com/flabat/aws-multicast-demo.git
cd aws-multicast-demo
npm install
cdk deploy
Confirm the deployment changes.
CDK will deploy the VPC and instances to your AWS account in the us-east-1 region, the process will take about 10-20 minutes.
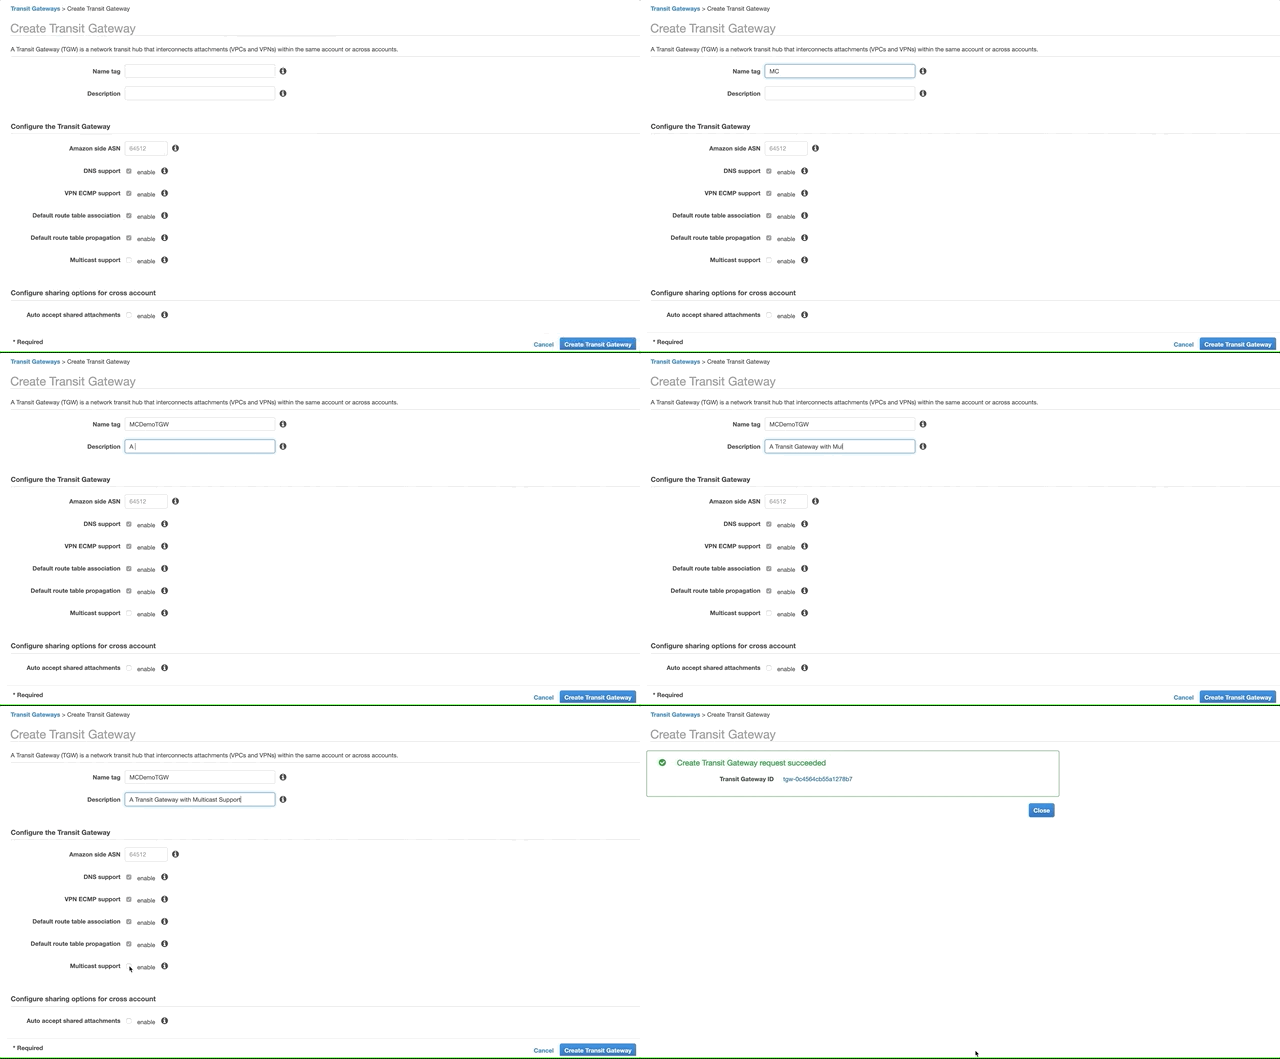
Go to the VPC console, Transit Gateways, and click Create Transit Gateway. Enter a Name Tag and Description. Select Multicast Support.
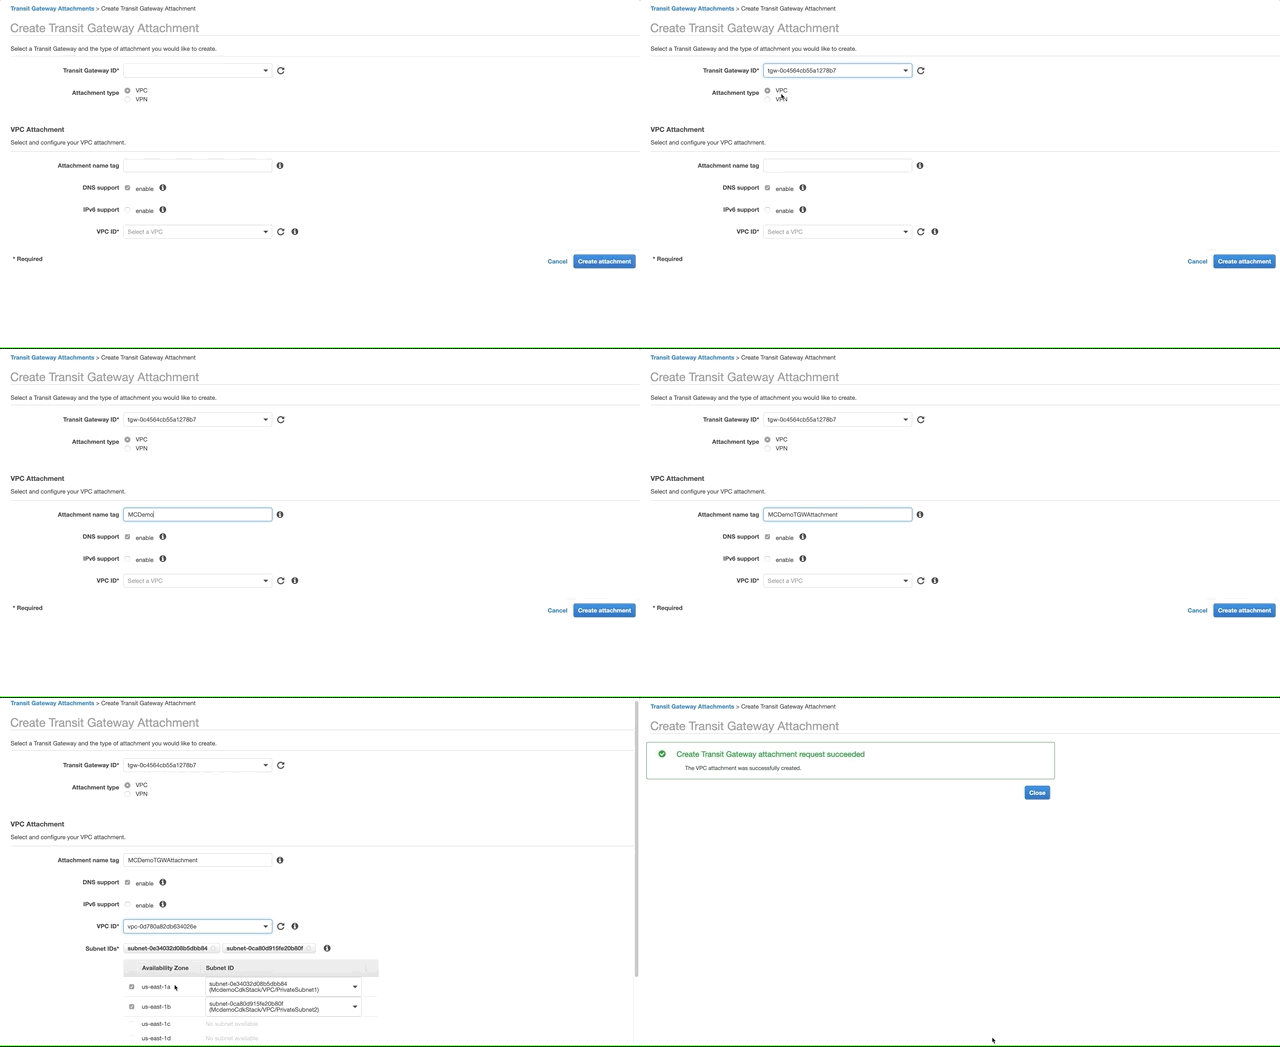
Go the VPC console, Transit Gateway Attachments and click Create Transit Gateway Attachment. Select the Transit Gateway you created in the previous step, VPC as the Attachment Type, fill Attachment name tag, in the VPC ID dropdown select the McdemoCdkStack/VPC. Select the two Private Subnets. Click Create Attachment.
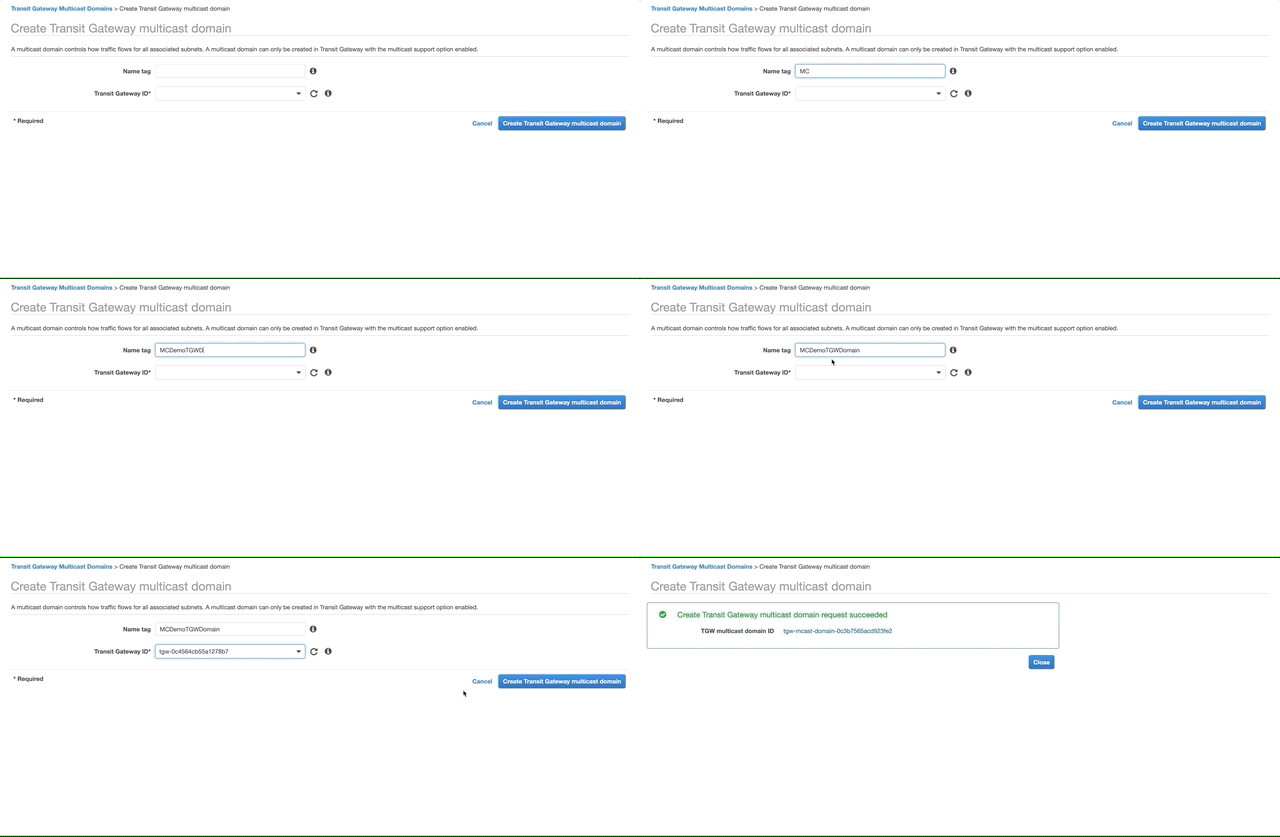
Go to the VPC console, Transit Gateway Multicast Domains and click Create Transit Gateway multicast domain. Fill the Name tag and select the Transit Gateway you created above. Click Create Transit Gateway multicast domain.
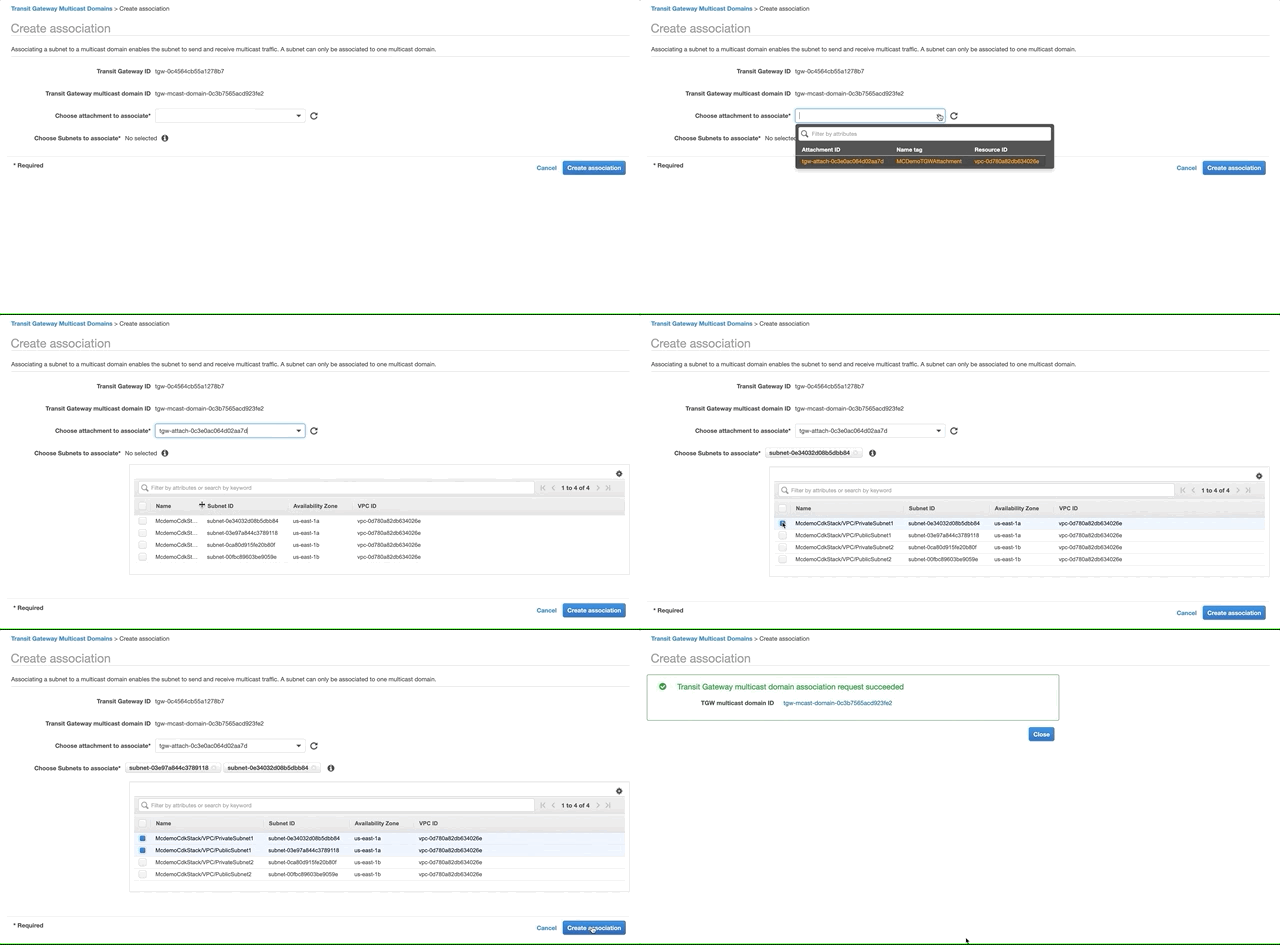
Select the domain you created above, open the Associations tab and click Create Association. Choose the attachment to associate and select the two private subnets. Click Create Association.
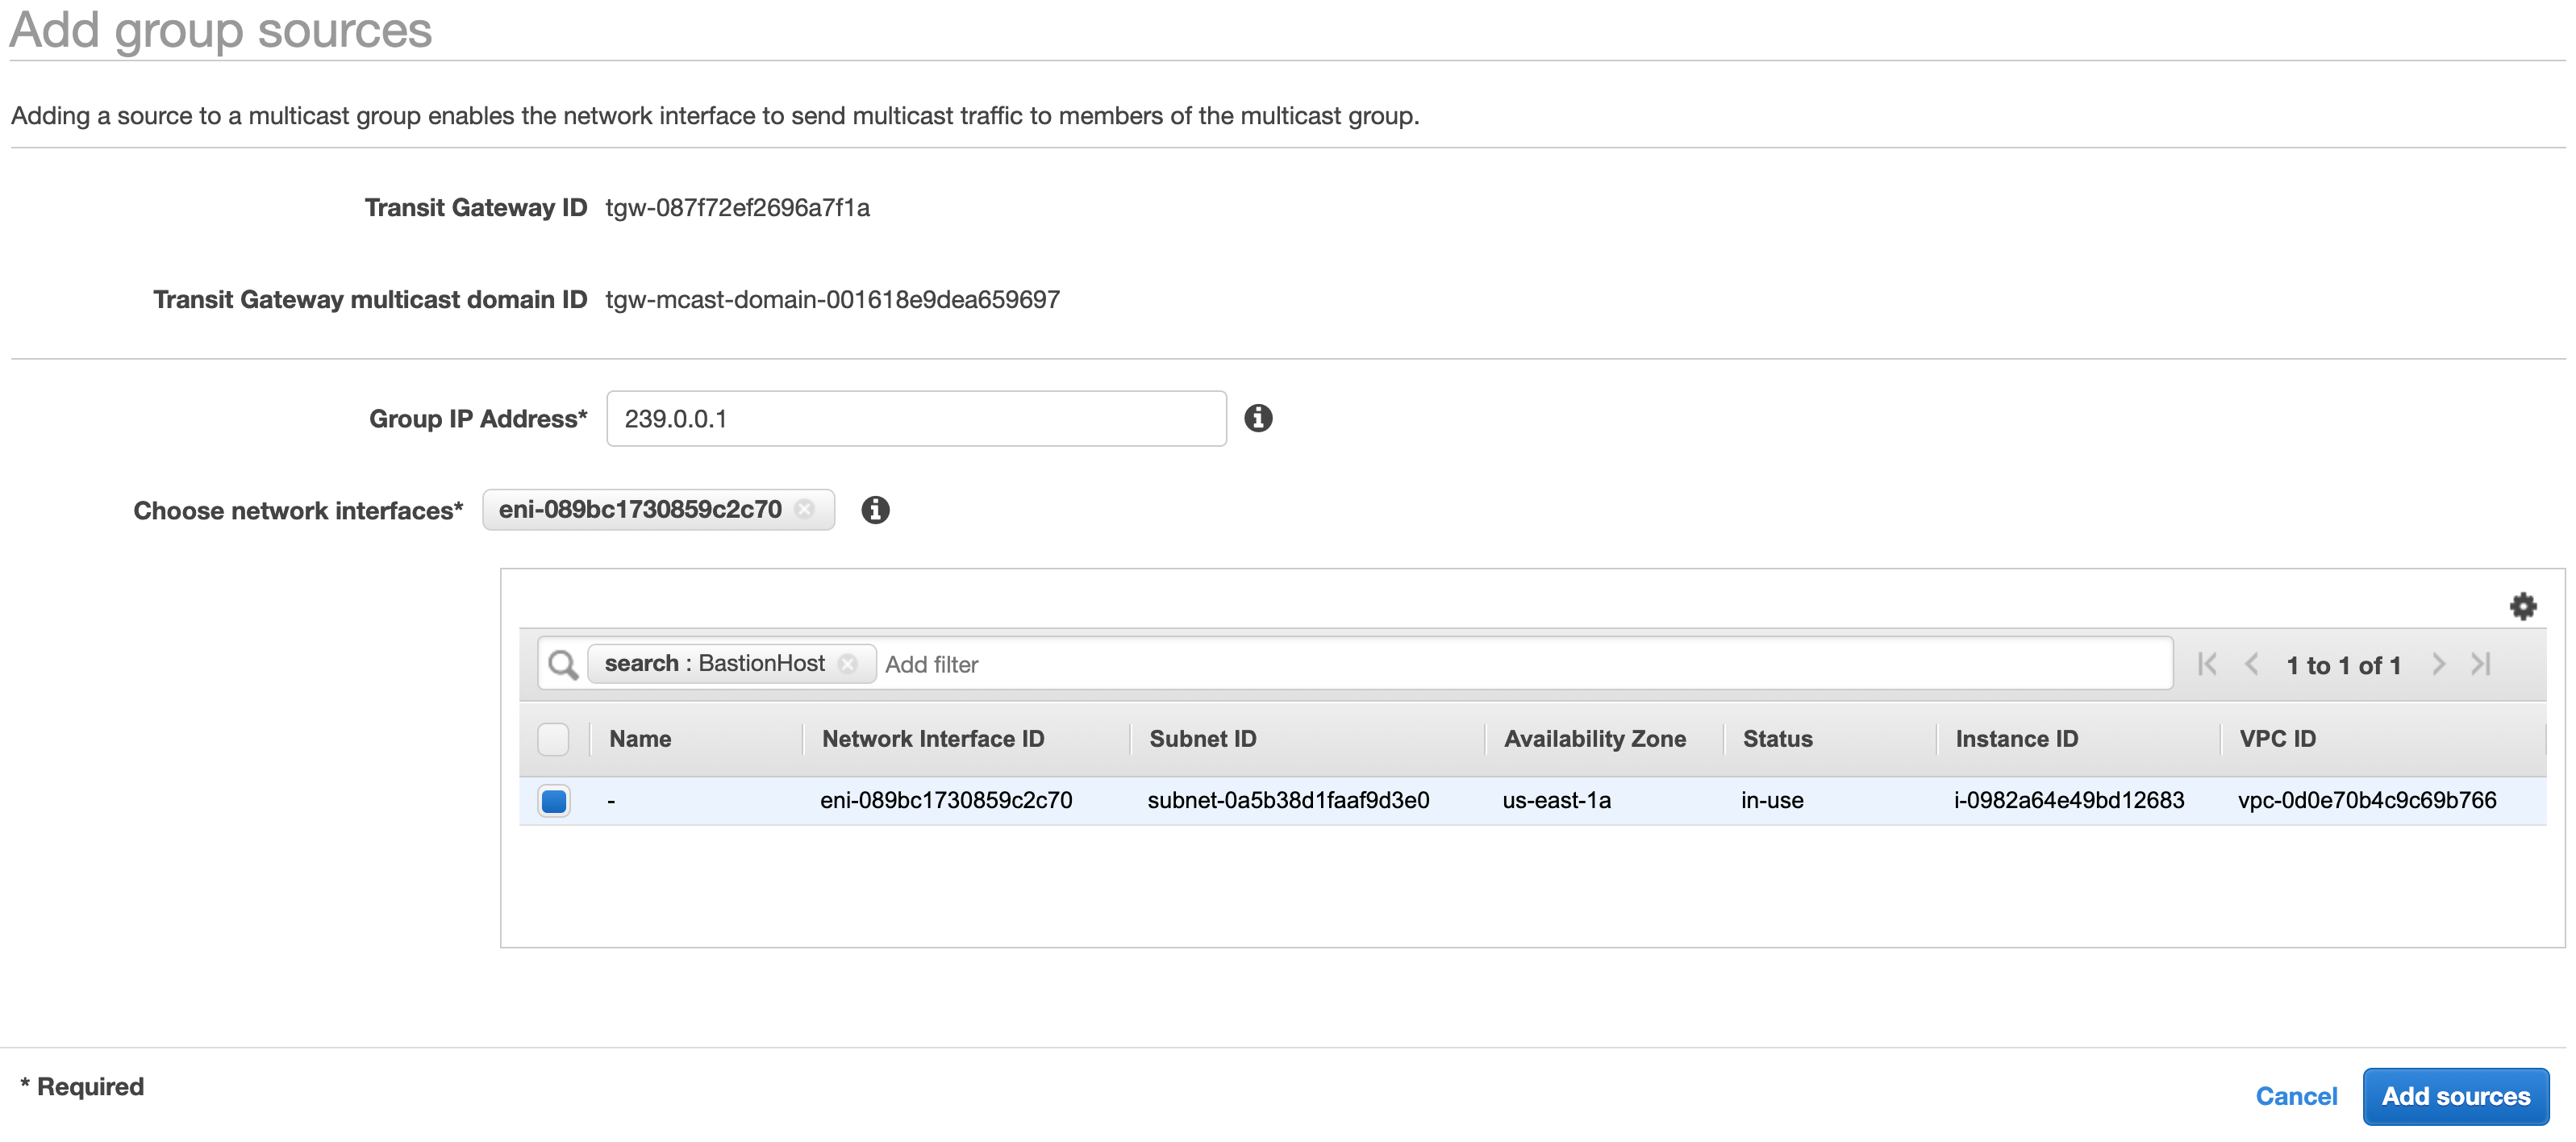
From the Transit Gateway Mulicast console, select the multicast domain you created earlier. Click the Groups tab and click Add source. Enter 239.0.0.1 in the Group IP Address field. In the Choose network interfaces filter field type BastionHost, select the ENI. Click the Add sources button to complete the operation.
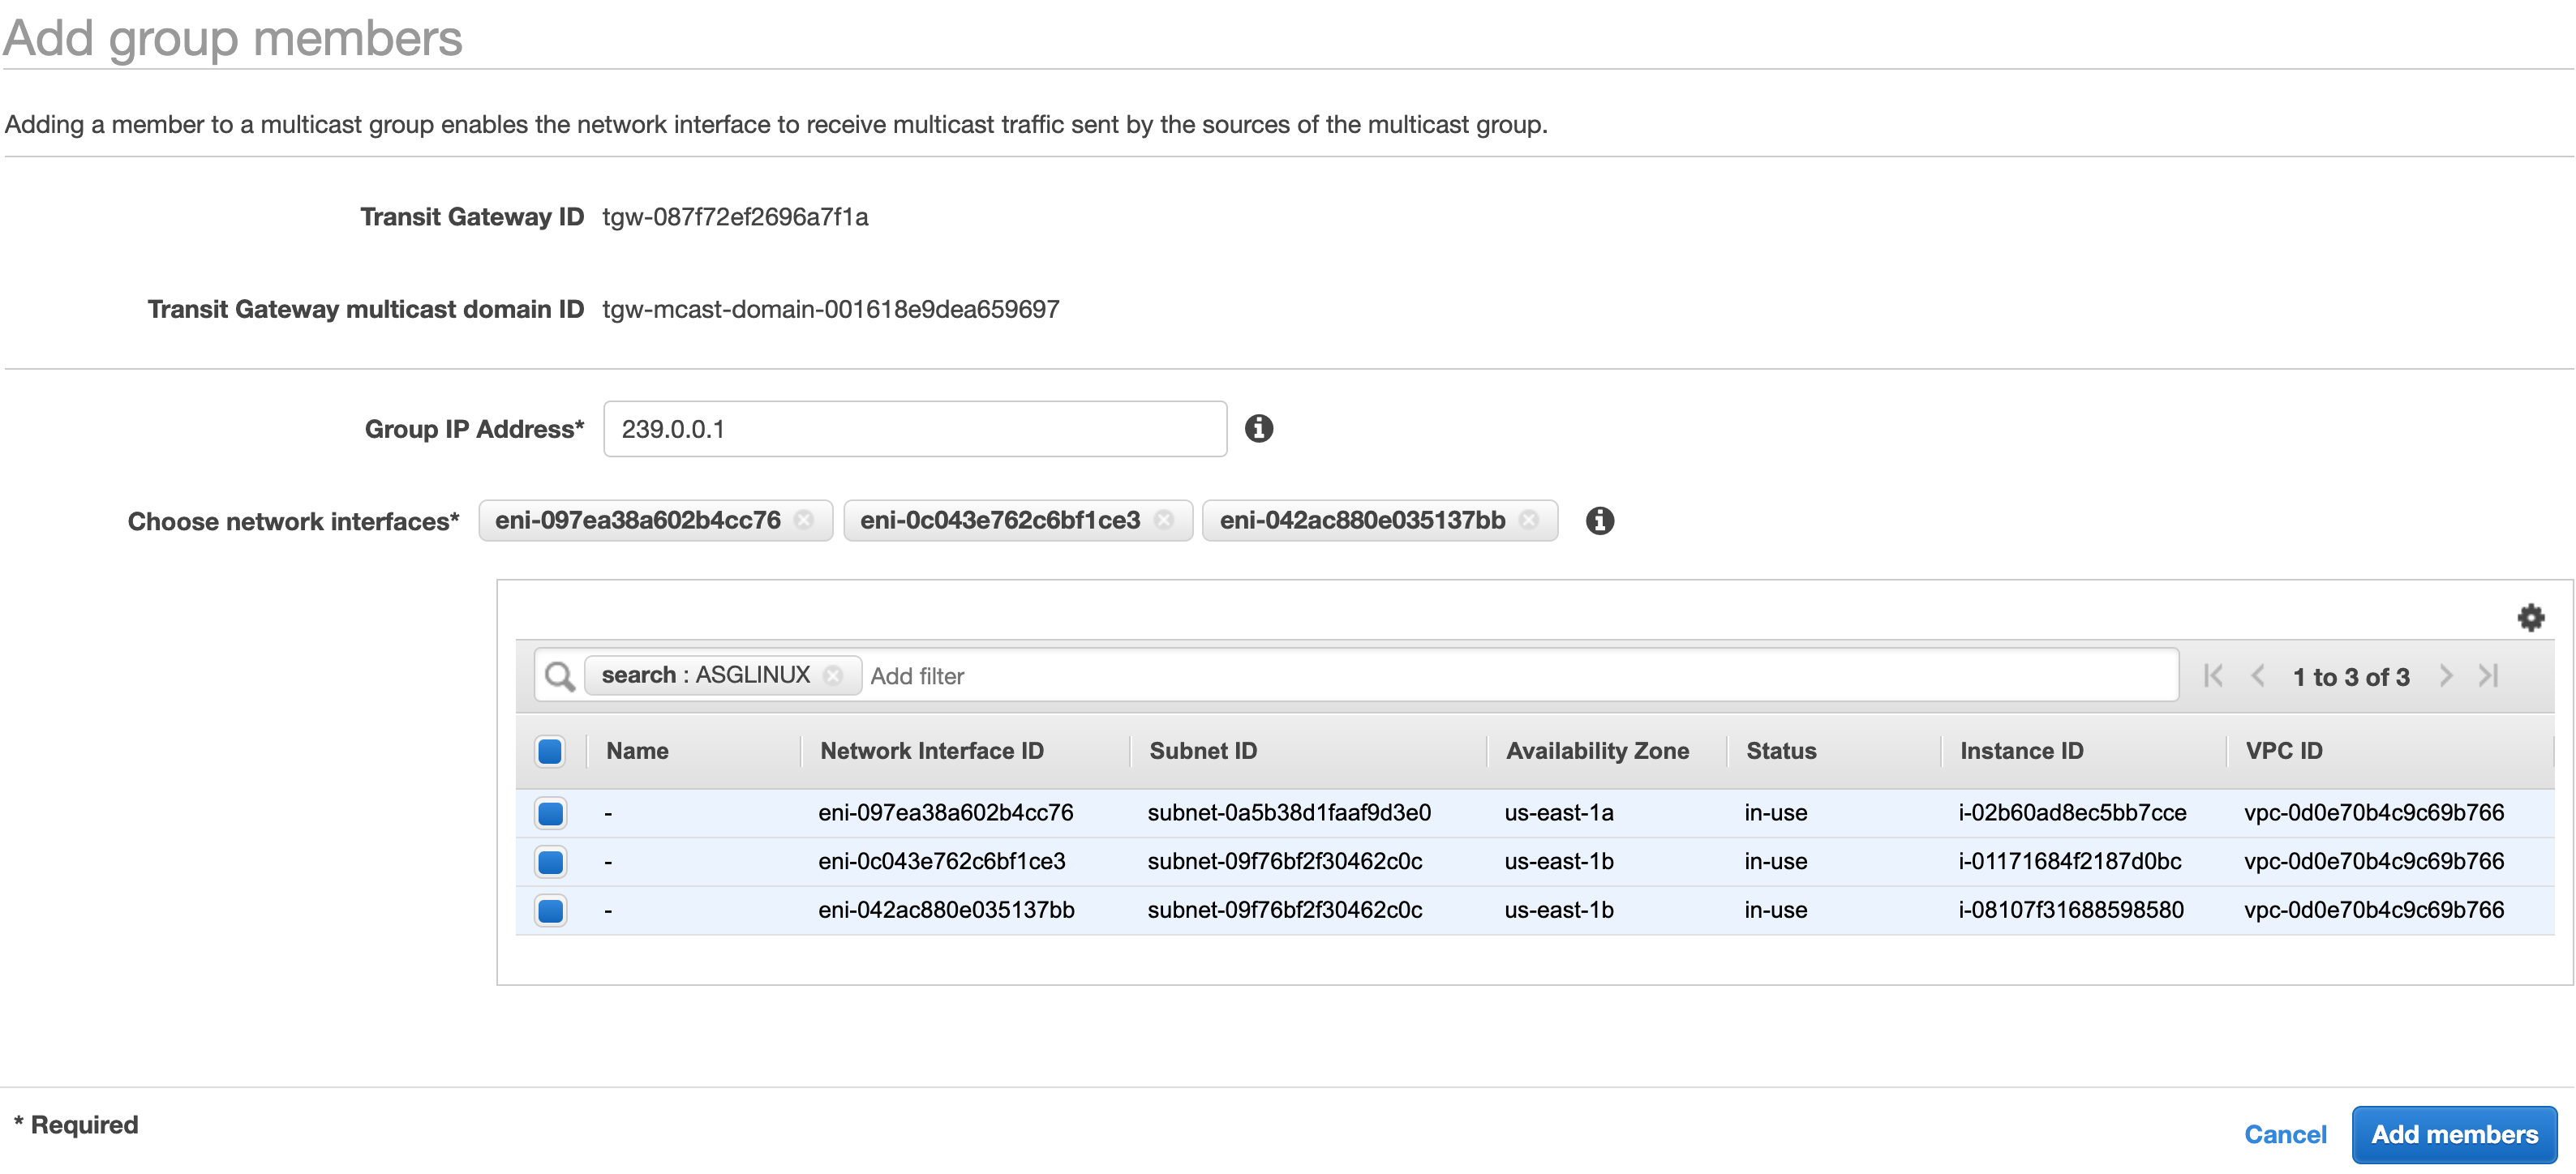
From the Transit Gateway Mulicast console, select the multicast domain you created earlier. Click the Groups tab and click Add member. Enter 239.0.0.1 in the Group IP Address field. In the Choose network interfaces filter field type ASGLINUX (these are the instances in the Autoscaling group), select all thhe ENIs. Click the Add Members button to complete the operation.
Now that you have a one source and multiple members, you will use iperf, omping, and a Python sample application to test connectivity and bandwidth between the EC2 instances in the multicast domain.
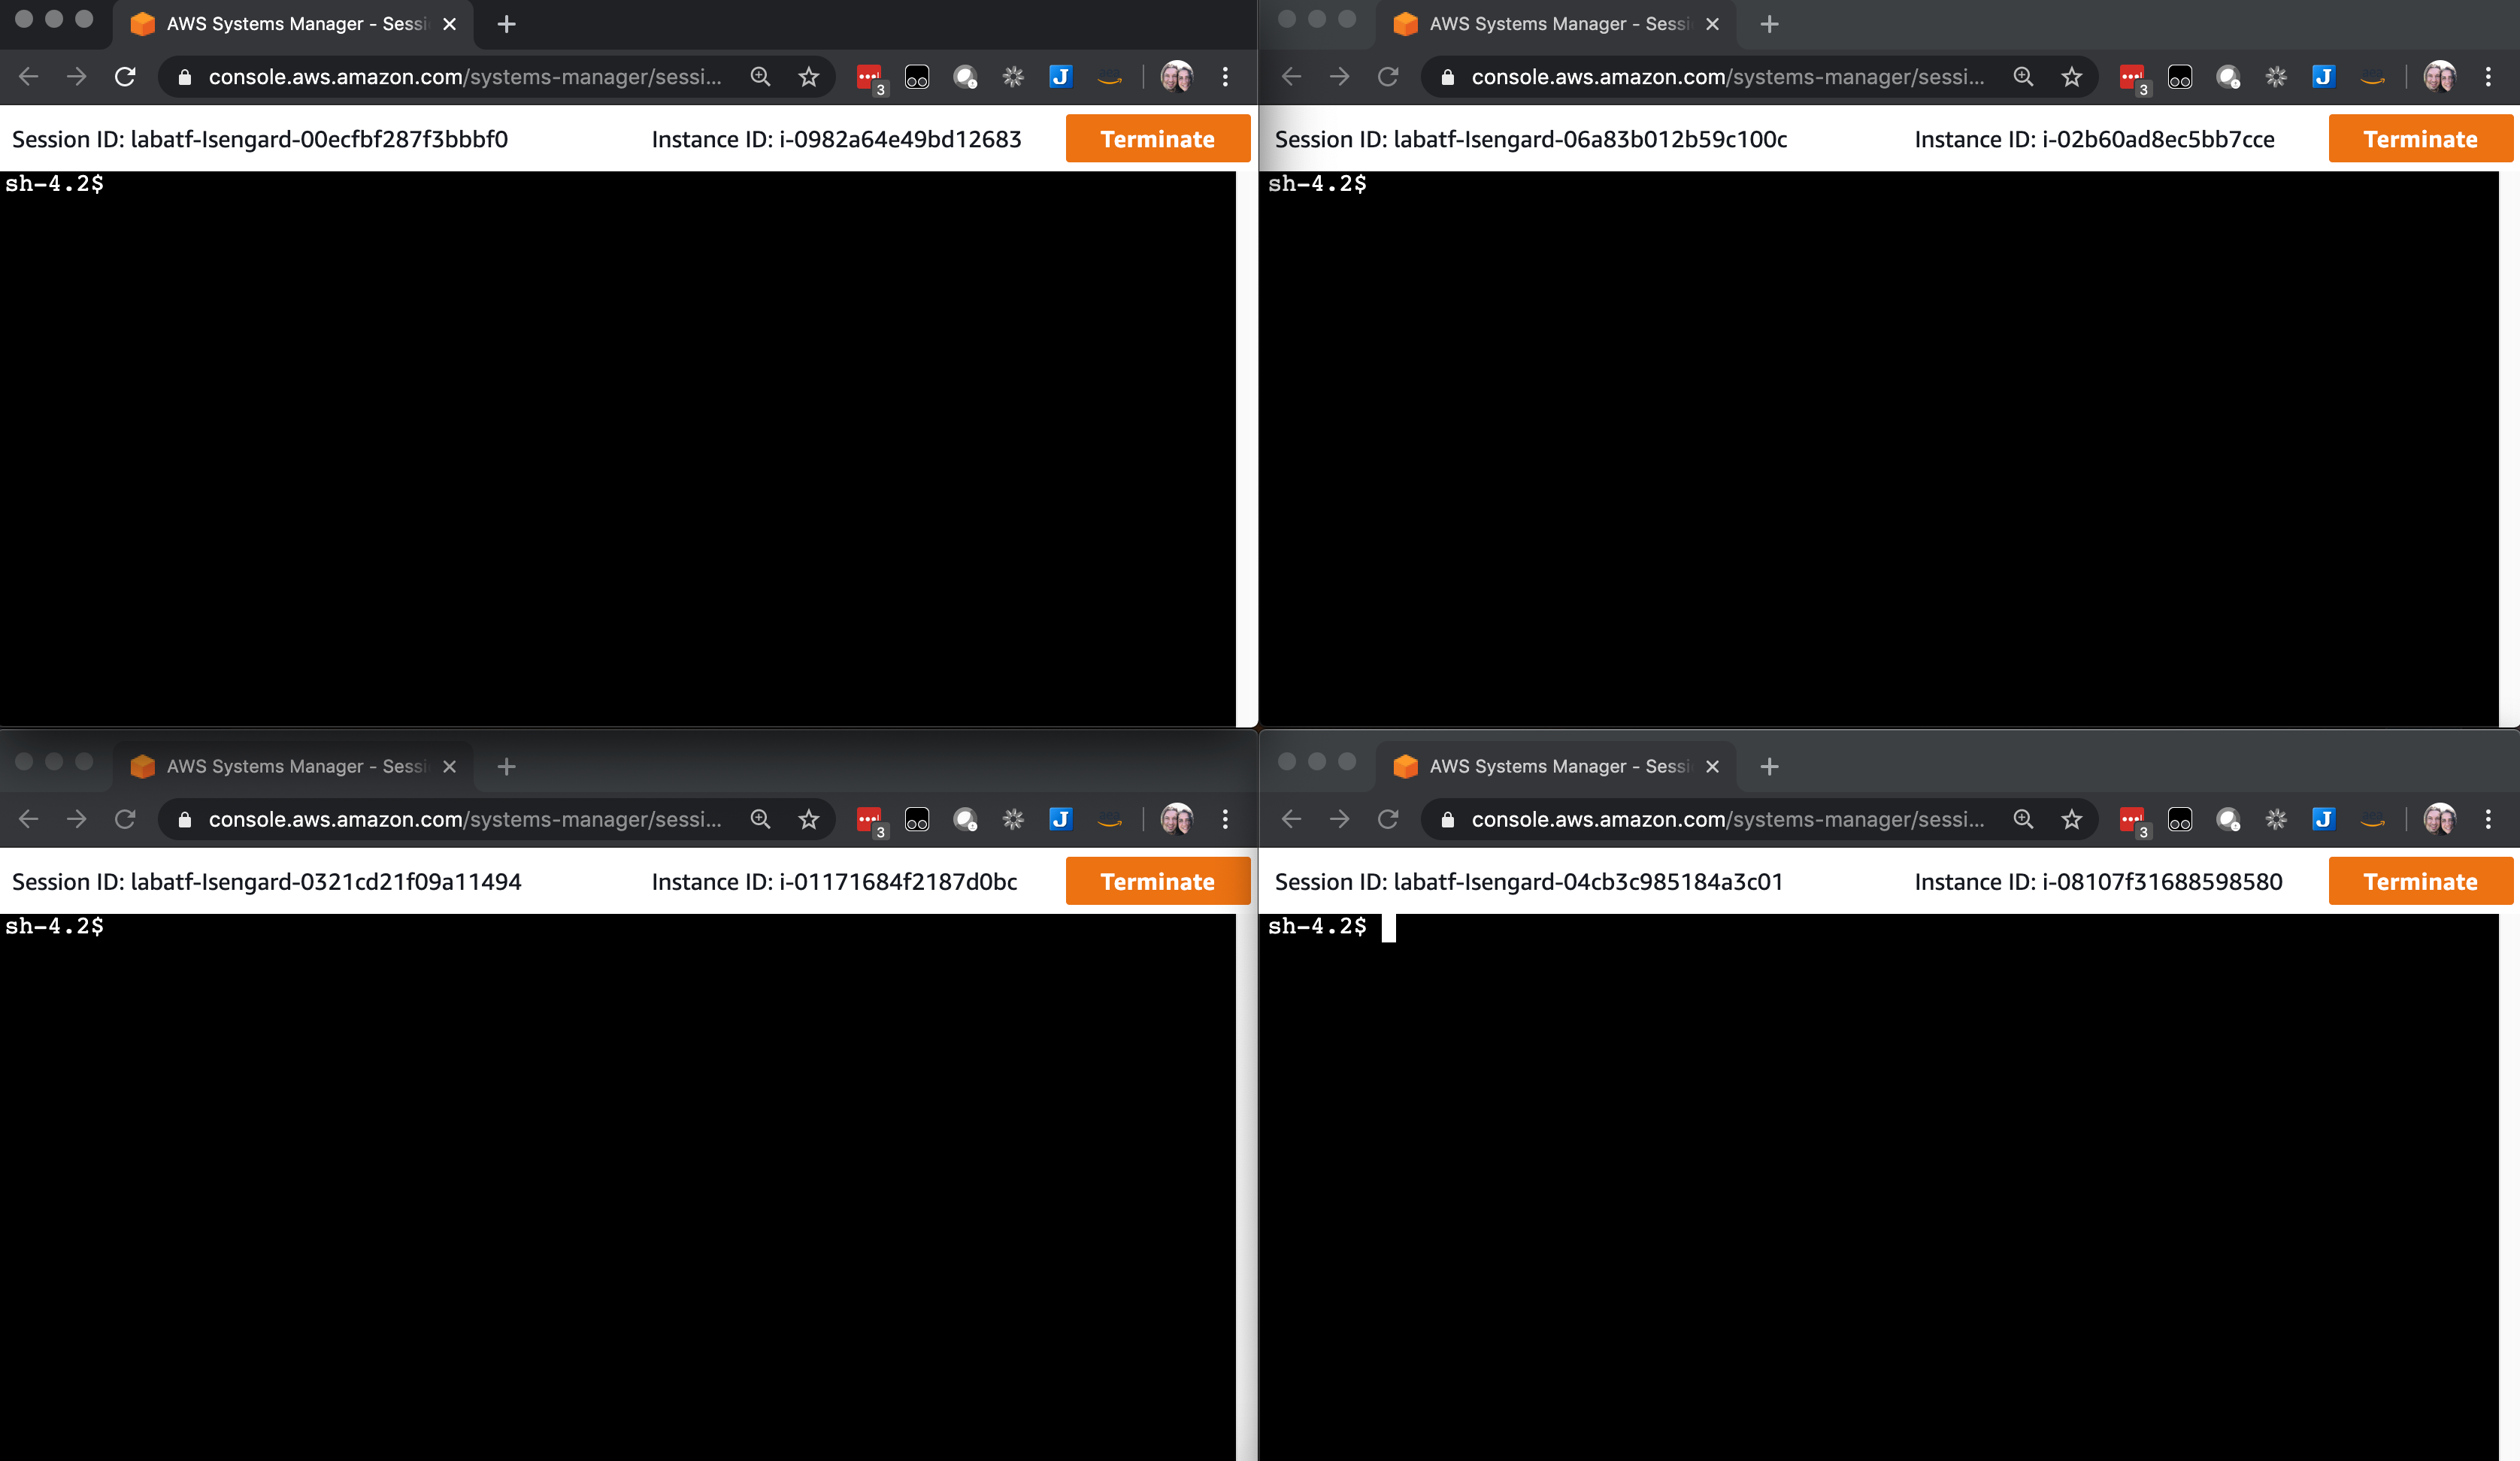
Open the EC2 console, select the BastionHost instance and click Connect. For Connection method, select Session Manager and click Connect. Leave this session tab open.
Open the EC2 console, select the McdemoCdkStack/ASGLINUX one at the time and click Connect. For Connection method, select Session Manager and click Connect. Leave these sessions tabs open.
You should now have four browser windows/tabs with sessions established to the source and member instances.
To learn more about iperf, you can visit the project documentation site here.
Start iperf servers in each of the instances part of the Autoscaling Group, these are the instances that will receive traffic from the source (BastionHost). Use the command below to listen for UDP multicast traffic on the group address 239.0.0.1
iperf -s -u -B 239.0.0.1
Start an iperf client in the BastionHost (source) instance. Use the command below to send UDP multicast traffic to the group address 239.0.0.1
iperf -u -c 239.0.0.1
You can also add parameters to iperf to create parallel connections, how long the test will run for, and how much bandwidth per connection to use. The command below will create a client with 10 connections, for 30 seconds, and 1Gb/s per connection.
iperf -u -c 239.0.0.1 -t 30 -P 10 -b 1G
To stop the iperf servers press CTRL+C twice.
The instances contain two Python scripts, a sender script to run in the BastionHost and a receiver script to run in the AutoScaling instances.
In the Autoscaling group instances (receivers) terminal sessions, execute the following:
python /opt/mcreceiver.py
In the BastionHost instance (sender) terminal session, execute the following to send one message to the receivers:
python /opt/mcsender.py
To send one message every one second continuously, you can use the following one liner:
while true; do python /opt/mcsender.py; sleep 1; done;
To stop the python scripts press CTRL+C.
To learn more about omping, you can visit the project documentation site here.
The omping tool needs the IP addresses of the instances you want to test connectivity, replace the 10.99.x.x addresses in the command below with your own and run the command on all terminal sessions starting with the BastionHost:
omping -m 239.0.0.1 -p 1234 10.99.x.x 10.99.x.x 10.99.x.x 10.99.x.x
For example, in my environment the command is: omping -m 239.0.0.1 -p 1234 10.99.169.17 10.99.147.76 10.99.195.70 10.99.248.153
You should see unicast responses in all instances from the other instances, but multicast responses only in the receiver instances.
To learn more about mcjoin, you can visit the project documentation site here.
-
Install
mcjoinon Amazon Linux 2 as follows:sudo yum update -y sudo yum groupinstall "Development Tools" -y sudo yum install git -y git clone https://github.com/troglobit/mcjoin.git cd mcjoin/ ./autogen.sh ./configure && make sudo make install-strip
-
On the multicast source server, start the sender with:
mcjoin -s 239.0.0.1
-
On the multicast member server(s), join the multicast group and start listening:
mcjoin -j 239.0.0.1
This will use the default UDP port 1234 for sending/ receiving packets. You can override it like -p 5678.
- Delete all the subnet associations from the Multicast domain.
- Delete the VPC attachment from the Transit Gateway Attachments console.
- Delete the Transit Gateway from the Transit Gateways console.
- Run
cdk destroyfrom your terminal in the folder you cloned this repo.
