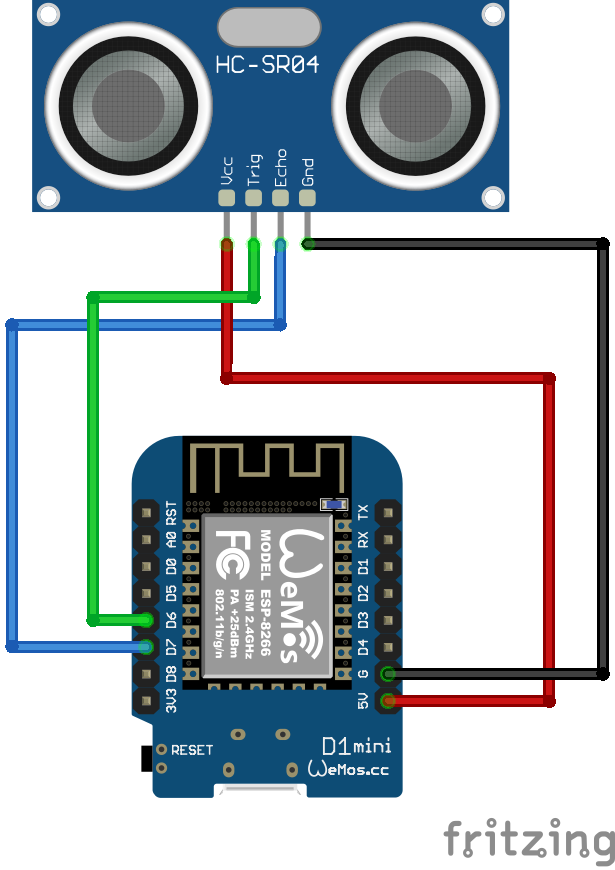
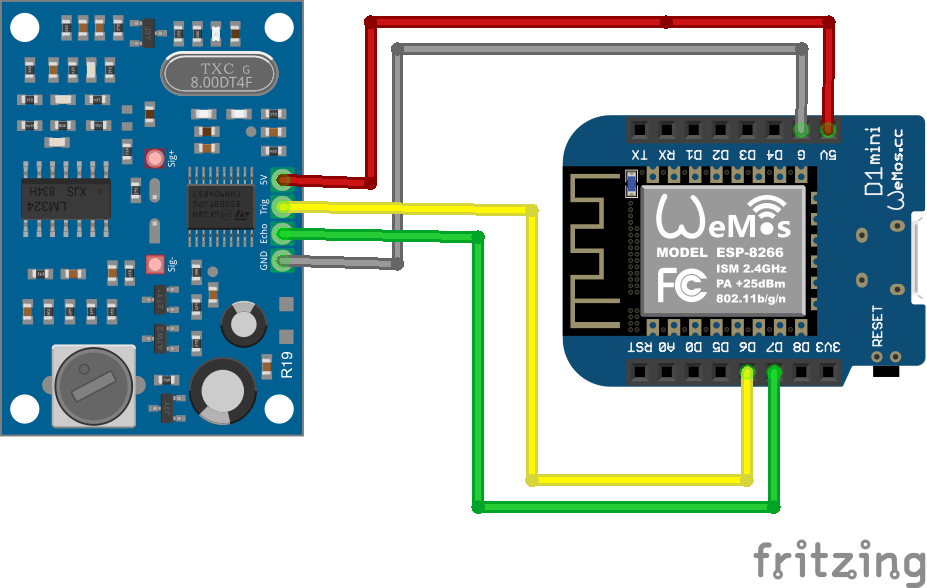
The whole project was inspired by the work described in the following posts:
- https://arduino-projekte.info/zisterne-fuellstandsanzeige
- https://arduino-projekte.info/zisterne-3-0-web-server-spiffs
In this project, the Wemos D1 mini is utilized. To install this board type in Arduino IDE,
- Add the following URL to File -> Preferences -> Additional Boards Manager URLs: http://arduino.esp8266.com/stable/package_esp8266com_index.json.
- Install the esp8266 board via the Boards Manager.
- Select "Wemos D1 mini" from the ESP8266 Boards as the currently used board.
At first, the HP-SR04 can be put into operation. One major problem however, is that the sensor has a high probability to break due to humidity.
A better option might be the AJ-SR04M. Here, the actual sensor is attached to a long wire and thus separated from the actual board. Thus, there is a better protection against humidity induced malfunction as it is possible to place the board outside the cistern.
The following libraries are required:
Just clone them into the Arduino/libraries folder.
Also add the ArduinoJson Library to the project.
- Navigate to the
Sketchfolder an create a now folder calleddata. In this folder, all website-related stuff like images,.cssor.htmlfiles are stored. - The flash size of the corresponding ESP8266 Board should be set to
4M (FS:1MB)or4M (1M SPIFFS). .html,.cssfiles and icons are uploaded using the Arduino ESP8266 filesystem uploader.- Download a release and put the resulting folder in the
toolsfolder of your Sketchbook folder.

