This repo is to help you get up and running quickly with the Astro Python SDK for local development. The DAGs and the workflow are adapted from the Astronomer Astro Python SDK tutorial. The tutorial is a walk through of the features and demonstrates how to write an Extract, Transform, Load (ETL) pipeline on your local machine using the Astro Python SDK. The Astro SDK is maintained by Astronomer and simplifies the pipeline authoring process with native Python functions for common data orchestration use cases.
The pipeline you build in this tutorial will:
- Extract a remote csv file into a local SQLite relational table.
- Transform that table.
- Load the transformed table into a reporting table.
The example DAG in this local version uses Minio S3 and SQLite, but you can replace these with any supported data sources and tables simply by changing connection information.
To complete this tutorial, you need:
- Docker Desktop installed.
- The Astro CLI
Clone this repo to your local machine:
git clone https://github.com/fletchjeff/astro_sdk_workshop
Start up the local astro services.
astro dev start
The the project setup DAG to configure the minio S3 buckets and the SQLite schema and tables.
- Open the Airflow UI at http://localhost:8080/
User: admin
Password: admin
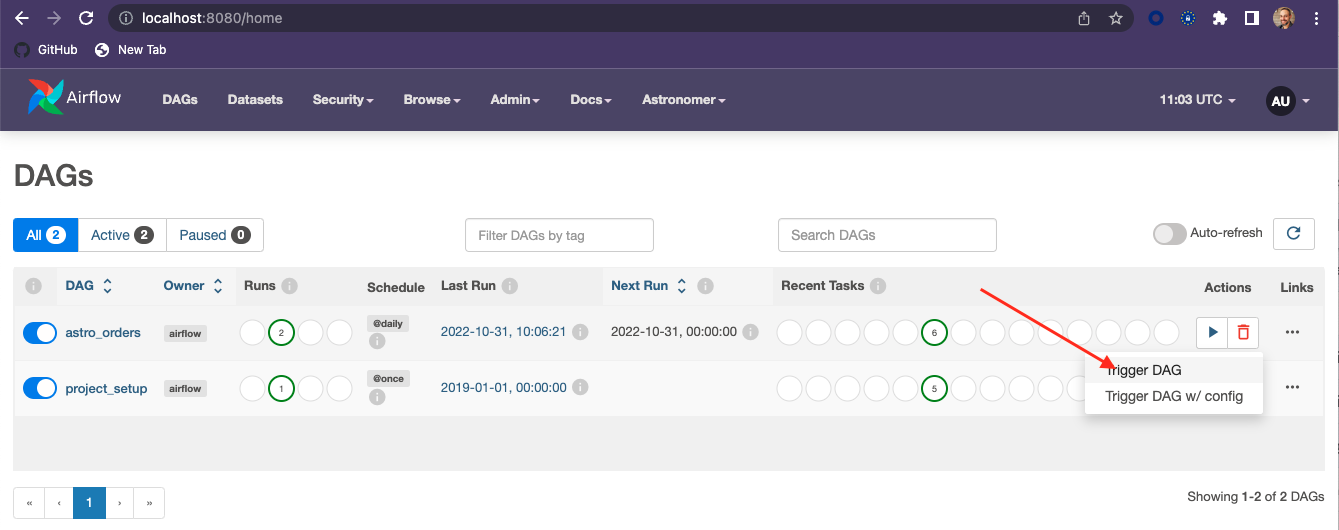
You should see 2 DAGs in the DAGs list, astro_orders and project_setup. Activate the project_setup DAG but clicking the slider next to the name.
The project_setup DAG only needs to be run once and will configure everything you need for the project. Once its complete, if you click on the project_setup name in the DAG list, you should see the following in the grid view.
If its still running, enabling the Auto-refresh with the slider in the grid view will update the grid as the DAG completes the various tasks.
- In the Airflow UI, you should see a DAG called astro_orders. Make it active by clicking the slider next to its name:
- Click the play button next to the DAG's name to trigger the DAG run:
- Click the DAG's name and then the Graph icon to see how it ran in the Graph view:
You can view the tables created for this tutorial by connecting to the local sqlite-web UI service created when astro launches.
- Open the sqlite-web UI at http://localhost:8088/
You can see the tables created by various DAGs here
You can view the files created for this tutorial by connecting to the local Minio console created when astro launches.
- Open the Minio console at http://localhost:9001/login
User: minioadmin
Password: minioadmin
The SQL used to the create the tables in the local SQLite instance is slightly different to that used for Snowflake in the original tutorial. Below is the SQL statements executed in the project_setup step.
CREATE TABLE customers_table (
    customer_id CHAR(10),
    customer_name VARCHAR(100),
    type VARCHAR(10)
    );
INSERT INTO customers_table (CUSTOMER_ID, CUSTOMER_NAME,TYPE)
VALUES
('CUST1','NAME1','TYPE1'),
('CUST2','NAME2','TYPE1'),
('CUST3','NAME3','TYPE2');CREATE TABLE reporting_table (
CUSTOMER_ID CHAR(30),
CUSTOMER_NAME VARCHAR(100),
ORDER_ID CHAR(10),
PURCHASE_DATE VARCHAR(100),
AMOUNT FLOAT, TYPE CHAR(10)
);INSERT INTO reporting_table (CUSTOMER_ID, CUSTOMER_NAME, ORDER_ID, PURCHASE_DATE, AMOUNT, TYPE)
VALUES
('INCORRECT_CUSTOMER_ID','INCORRECT_CUSTOMER_NAME','ORDER2','2/2/2022',200,'TYPE1'),
('CUST3','NAME3','ORDER3','3/3/2023',300,'TYPE2'),
('CUST4','NAME4','ORDER4','4/4/2022',400,'TYPE2');


