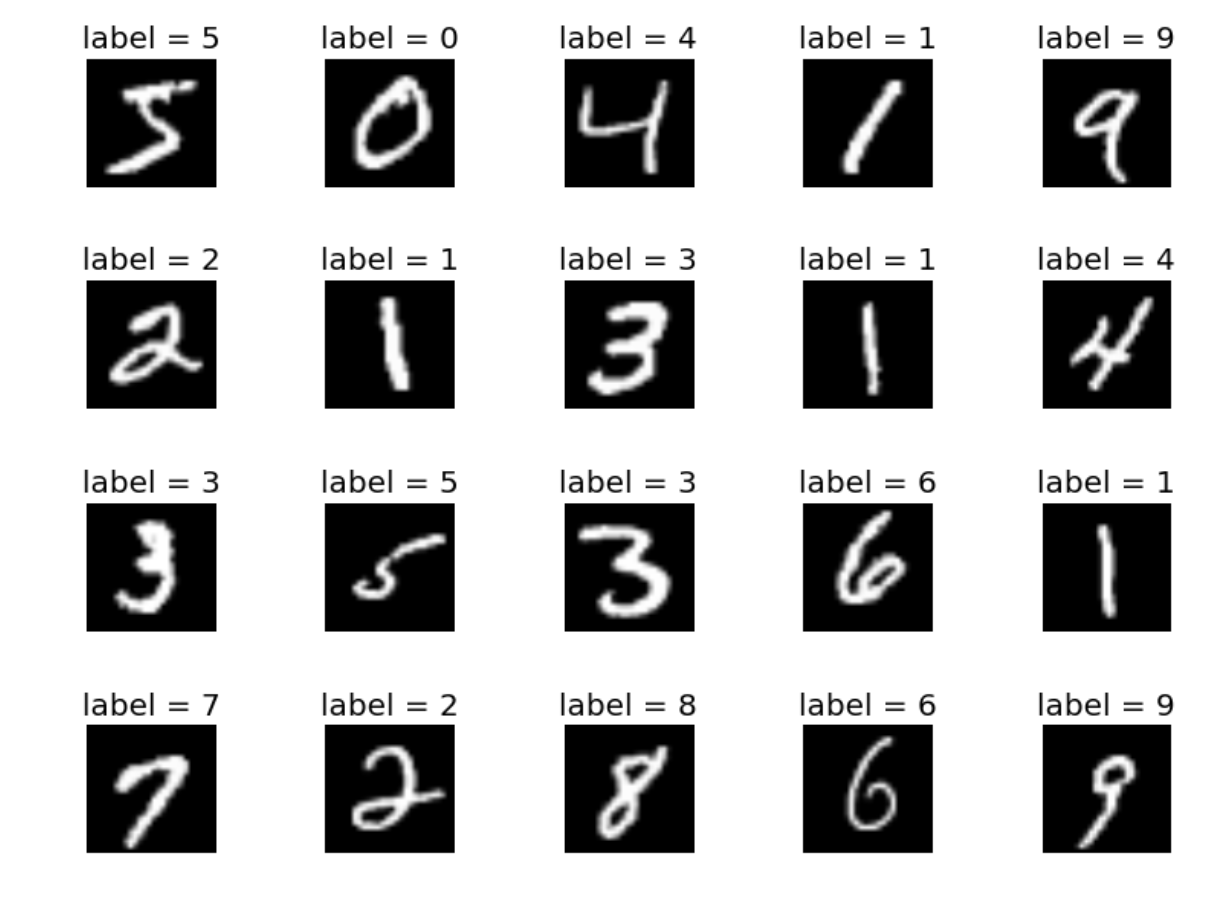
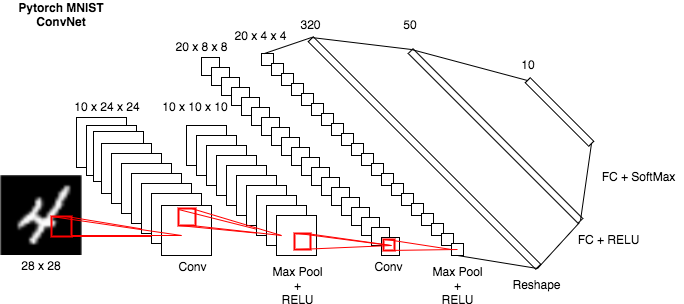
This project implements a beginner classification task on MNIST dataset with a Convolutional Neural Network(CNN or ConvNet) model. This is a porting of pytorch/examples/mnist making it usables on FloydHub.
Training/Evaluating script:
usage: main.py [-h] [--dataroot DATAROOT] [--evalf EVALF] [--outf OUTF]
               [--ckpf CKPF] [--batch-size N] [--test-batch-size N]
               [--epochs N] [--lr LR] [--momentum M] [--no-cuda] [--seed S]
               [--log-interval N] [--train] [--evaluate]

PyTorch MNIST Example

optional arguments:
  -h, --help           show this help message and exit
  --dataroot DATAROOT  path to dataset
  --evalf EVALF        path to evaluate sample
  --outf OUTF          folder to output images and model checkpoints
  --ckpf CKPF          path to model checkpoint file (to continue training)
  --batch-size N       input batch size for training (default: 64)
  --test-batch-size N  input batch size for testing (default: 1000)
  --epochs N           number of epochs to train (default: 10)
  --lr LR              learning rate (default: 0.01)
  --momentum M         SGD momentum (default: 0.5)
  --no-cuda            disables CUDA training
  --seed S             random seed (default: 1)
  --log-interval N     how many batches to wait before logging training status
  --train              training a ConvNet model on MNIST dataset
  --evaluate           evaluate a [pre]trained model
If you want to use more GPUs set CUDA_VISIBLE_DEVICES as bash variable then run your script:
# CUDA_VISIBLE_DEVICES=2 python main.py # to specify GPU id to ex. 2Here's the commands to training, evaluating and serving your MNIST ConvNet model on FloydHub.
Before you start, log in on FloydHub with the floyd login command, then fork and init the project (make sure you have already created the project on FloydHub):
$ git clone https://github.com/floydhub/mnist.git
$ cd mnist
$ floyd init mnistThis project will automatically dowload and process the MNIST dataset for you, moreover I have already uploaded it as FloydHub dataset so that you can try and familiarize with --data parameter which mount the specified volume(datasets/model) inside the container of your FloydHub instance.
Now it's time to run our training on FloydHub. In this example we will train the model for 10 epochs with a gpu instance and with cuda enabled. Note: If you want to mount/create a dataset look at the docs.
$ floyd run --gpu --env pytorch-1.0 --data redeipirati/datasets/pytorch-mnist/1:input "python main.py --train"Note:
--gpurun your job on a FloydHub GPU instance--env pytorch-1.0, PyTorch 1.0 on Python3--data redeipirati/datasets/pytorch-mnist/1mounts the pytorch mnist dataset in the/inputfolder inside the container for our job so that we do not need to dowload it at training time.
You can follow along the progress by using the logs command. The training should take about 2 minutes on a GPU instance and about 15 minutes on a CPU one.
It's time to evaluate our model with some images:
floyd run --gpu --env pytorch-1.0 --data <REPLACE_WITH_JOB_OUTPUT_NAME>:resume "python main.py --evaluate --ckpf /resume/<REPLACE_WITH_MODEL_CHECKPOINT_PATH> --evalf ./test"Notes:
- I've prepared for you some images in the
testfolder that you can use to evaluate your model. Feel free to add on it a bunch of handwritten images download from the web or created by you. - Remember to evaluate images which are taken from a similar distribution, otherwise you will have bad performance due to distribution mismatch.
We have provided to you a pre-trained model trained for 10 epochs with an accuracy of 98%.
floyd run --gpu --env pytorch-1.0 --data redeipirati/datasets/pytorch-mnist-10-epochs-model/2:/model "python main.py --evaluate --ckpf /model/mnist_convnet_model_epoch_10.pth --evalf ./test"FloydHub supports seving mode for demo and testing purpose. If you run a job
with --mode serve flag, FloydHub will run the app.py file in your project
and attach it to a dynamic service endpoint:
floyd run --gpu --mode serve --env pytorch-1.0 --data <REPLACE_WITH_JOB_OUTPUT_NAME>:inputThe above command will print out a service endpoint for this job in your terminal console. Or you can use the more name-friendly (static) serving URL that you will find in the Model API tab of your project(https://www.floydlabs.com/serve/<USERNAME>/projects/<PROJECT_NAME>)
The service endpoint will take a couple minutes to become ready. Once it's up, you can interact with the model by sending an handwritten image file with a POST request that the model will classify:
# Template
# curl -X POST -F "file=@<HANDWRITTEN_IMAGE>" -F "ckp=<MODEL_CHECKPOINT>" <SERVICE_ENDPOINT>

# e.g. of a POST req
curl -X POST -F "file=@./test/images/1.png" https://www.floydlabs.com/serve/BhZCFAKom6Z8RptVKskHZW
Any job running in serving mode will stay up until it reaches maximum runtime. So once you are done testing, remember to shutdown the job!
Some useful resources on MNIST and ConvNet:
- MNIST
- Colah's blog
- FloydHub Building your first ConvNet
- How Convolutional Neural Networks work - Brandon Rohrer
- An Intuitive Explanation of Convolutional Neural Networks
- Stanford CS231n
- Stanford CS231n Winter 2016 - Karpathy
For any questions, bug(even typos) and/or features requests do not hesitate to contact me or open an issue!

