______  _____ _____ _____ _____ ______ _____  ___  ___  ___ ___________
| ___ \|  _  |_   _/  ___/  __ \| ___ \  ___|/ _ \ |  \/  ||  ___| ___ \
| |_/ /| | | | | | \ `--.| /  \/| |_/ / |__ / /_\ \| .  . || |__ | |_/ /
| ___ \| | | | | |  `--. \ |    |    /|  __||  _  || |\/| ||  __||    /
| |_/ /\ \_/ / | | /\__/ / \__/\| |\ \| |___| | | || |  | || |___| |\ \
\____/  \___/  \_/ \____/ \____/\_| \_\____/\_| |_/\_|  |_/\____/\_| \_|
This is the firmware and associated files for the Botscreamer as seen on Botgrinder TV.
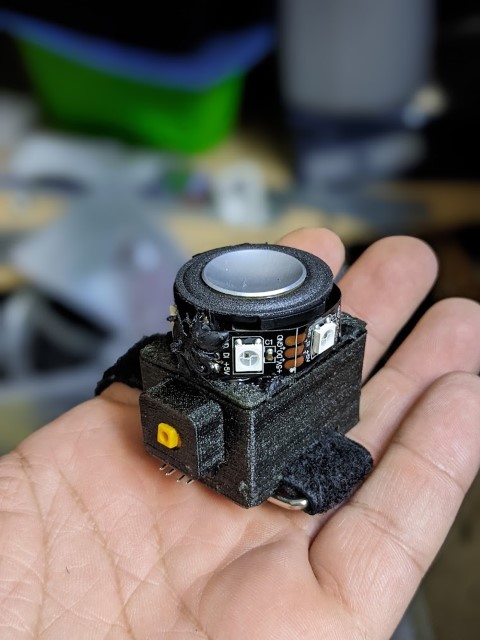
The Botscreamer is a tiny 3W speaker system that reacts on the attitude of your quad and is light enough to be mounted on top of your lipo. Did I say it's loud? It's freaking loud!
It comes with 4 pre-loaded sounds (simple 16bit PCM wav files) and even has a music maker mode that reacts on yaw (14 notes across 360 degrees).
See it in action here https://www.youtube.com/watch?v=8f52Pep6f3Y
Get the parts below:
1x ESP8266 Mini D1 (https://amzn.to/34F7Ud2)
1x MAX98357 I2S amplifier (https://amzn.to/3rzCkqs)
1x 4ohm/3w speaker with a large magnet (https://amzn.to/3Hz32op)
1x Tactile button
1x 10k resistor (for the button)
1x 4-wire that connects to your FC
If you want LED lights, you also need a some WS8212 RGB LED's.
See the picture below how to wire everything up. This expects you used the parts above.
Make sure you power the ESP8266 ONLY with 5V or you will burn the ESP8266.
There is a case in the /3d folder that fits all parts. Print with TPU95 with 20% infill to keep it light but still strong. The PCB material will stiffen it up. The case has cut outs on the bottom allowing you to use a up to 20mm strap.
Use the Arduino IDE to deploy the code to the ESP8266 and use the SPIFFS tool to upload the files. RandomNerdTutorials has way better explanation than I could do, so head over to https://randomnerdtutorials.com/install-esp8266-filesystem-uploader-arduino-ide/ to learn more how to do that.
If you haven't actually installed the ESP8266 board definitions you need to use the Arduino IDE Platform Manager to install the ESP8266. Once again RDT has you covered at https://randomnerdtutorials.com/how-to-install-esp8266-board-arduino-ide/
There are a few libraries needed that can be downloaded via the Arduino IDE Library Manager:
- Adafruit NeoPixel Library
- ESP8266Audio Library
Once done, hook up your ESP8266 and upload it.
There are some configurations that I explained in the code itself. Check it there.
There are 4 modes selectable through the button and the fifth mode is the music maker mode. Most modes have a minimum requirement of 1.2s in order to work which prevents false triggers. So you have to hold it for a least that time in order to enable.
| Mode | What | Comment |
|---|---|---|
| 1 | Goat | Screams like a goat on roll (upside down) |
| 2 | Human | Scary lady screaming like no other day on roll (upside down) |
| 3 | Duck | A rapid duck noise on roll (upside down) |
| 4 | Police | Police lights mode. Pitch forward to turn on sound and pitch backward to turn it off |
| 5 | Music Maker Mode | See below |
In Music Maker Mode the BS is playing a continues sound that can be modified using YAW. It plays 14 notes across the 360 degree. It runs on a static 100bpm so you have about 600ms to turn your quad to modify the sound which is plenty enough.
Make some tunez!
All audio files used are standard 16bit PCM encoded wave files with no compressions. Keep it short as the ESP8266 has about 2.5MB useable space. I recommend to keep it under 3s per audio file.

