Embedding an FMU into a standalone app
This project demonstrates how to simulate an FMI 2.0 source code FMU as a standalone app.
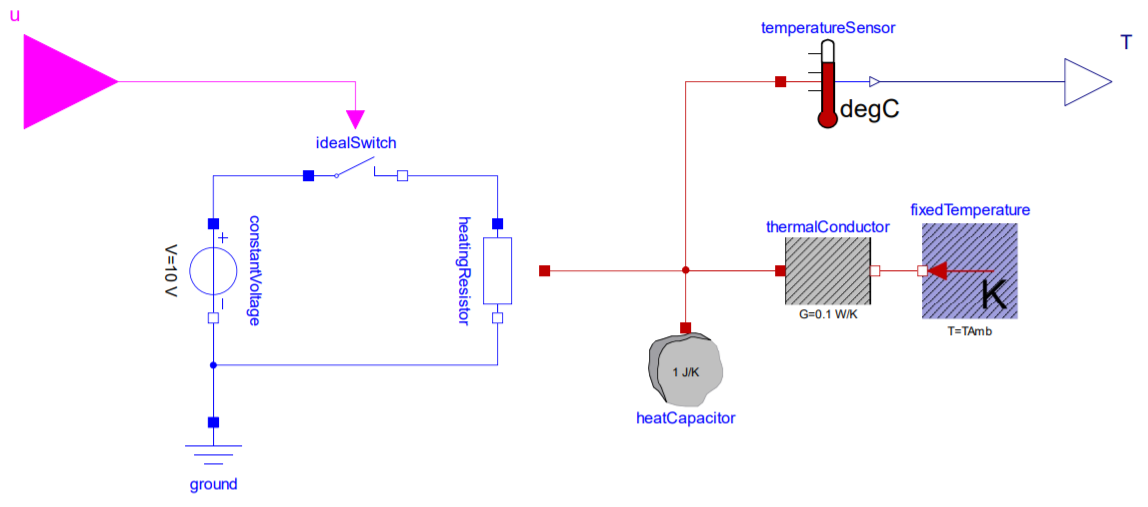
It consists of a simple C program that creates an instance of the Heater model. Its simulation loop turns the power for the heatingResistor on and off by setting the input variable u to keep the temperature T of the heatCapacitor at 40 °C.
For each time step the current simulation time, u and T are displayed on the command line:
time, u, T
0.00, 0, -7.15
0.10, 0, 20.72
0.20, 0, 21.43
0.30, 0, 22.14
...
3.40, 0, 39.82
3.50, 1, 40.28
3.60, 1, 40.73
3.70, 1, 40.26
3.80, 0, 39.79
3.90, 0, 39.32
4.00, 0, 39.78
4.10, 1, 40.23
4.20, 1, 40.68
4.30, 1, 40.21
4.40, 0, 39.74
...
Project Structure
- Heater.mo - Modelica model of the Heater
- model - extracted FMU (exported with Dymola 2021)
- include/fmi2*.h - FMI headers
- include/model.h - model specific constants
- src/simulator.c - source code of the standalone app
- import_fmu.py - Python script to reimport the FMU
- CMakeLists.txt - the CMake project for the console app
- Heater - Qt project for the graphical app
Building the Standalone App
Prerequisites
- a clone or extracted download of this repository
- CMake to generate the Visual Studio solution on Windows or Makefiles on Linux
- a supported toolchain to build the App (run
cmake --helpto get a list of all available generators) - Dymola to export the FMU (optional)
- Python and FMPy to reimport the FMU (optional)
Building on Windows with Visual Studio
-
run
cmake -G"Visual Studio 15 2017 Win64" -Bbuild .to generate a Visual Studio 2017 solution -
open
build/simulator.slnin Visual Studio 2017 -
In the Project Explorer right-click on the
simulatorproject and selectDebug > Start new instanceto build and run the app
Building on Linux with GCC
-
run
cmake -Bbuild .to generate the Unix Makefiles -
run
cmake --build buildto build the app -
run the app with
./build/simulator
Exporting the FMU
-
in Dymola 2021 click
File > Open > Load...and selectHeater.mo -
on the
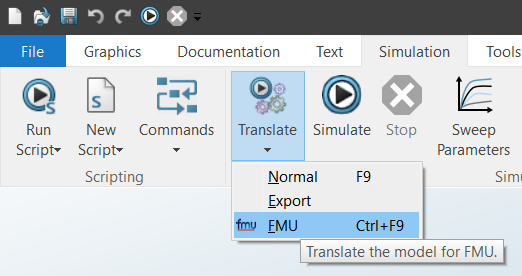
Simulationtab open theTranslatemenu and selectFMU
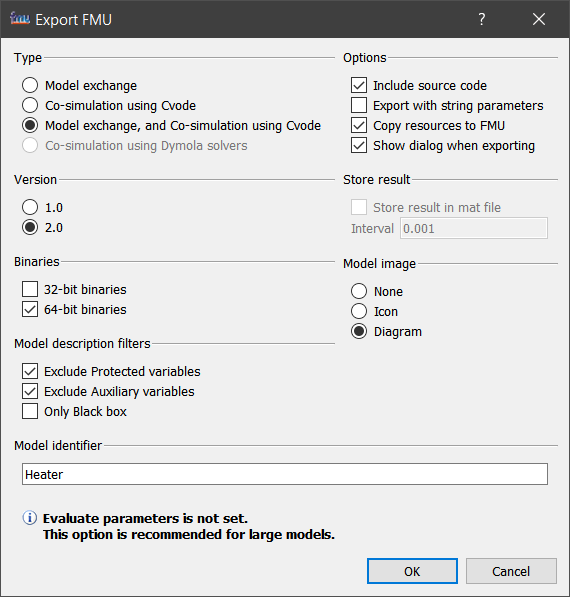
- in the
Export FMUselect the following options and clickOK
Reimporting the FMU
To reimport the FMU run the following command
python import_fmu.py Heater.fmu
This will extract Heater.fmu to the model directory and create a include/model.h with the model specific constant.
The script requires Python and FMPy.
Embedding an FMU into a graphical Qt app
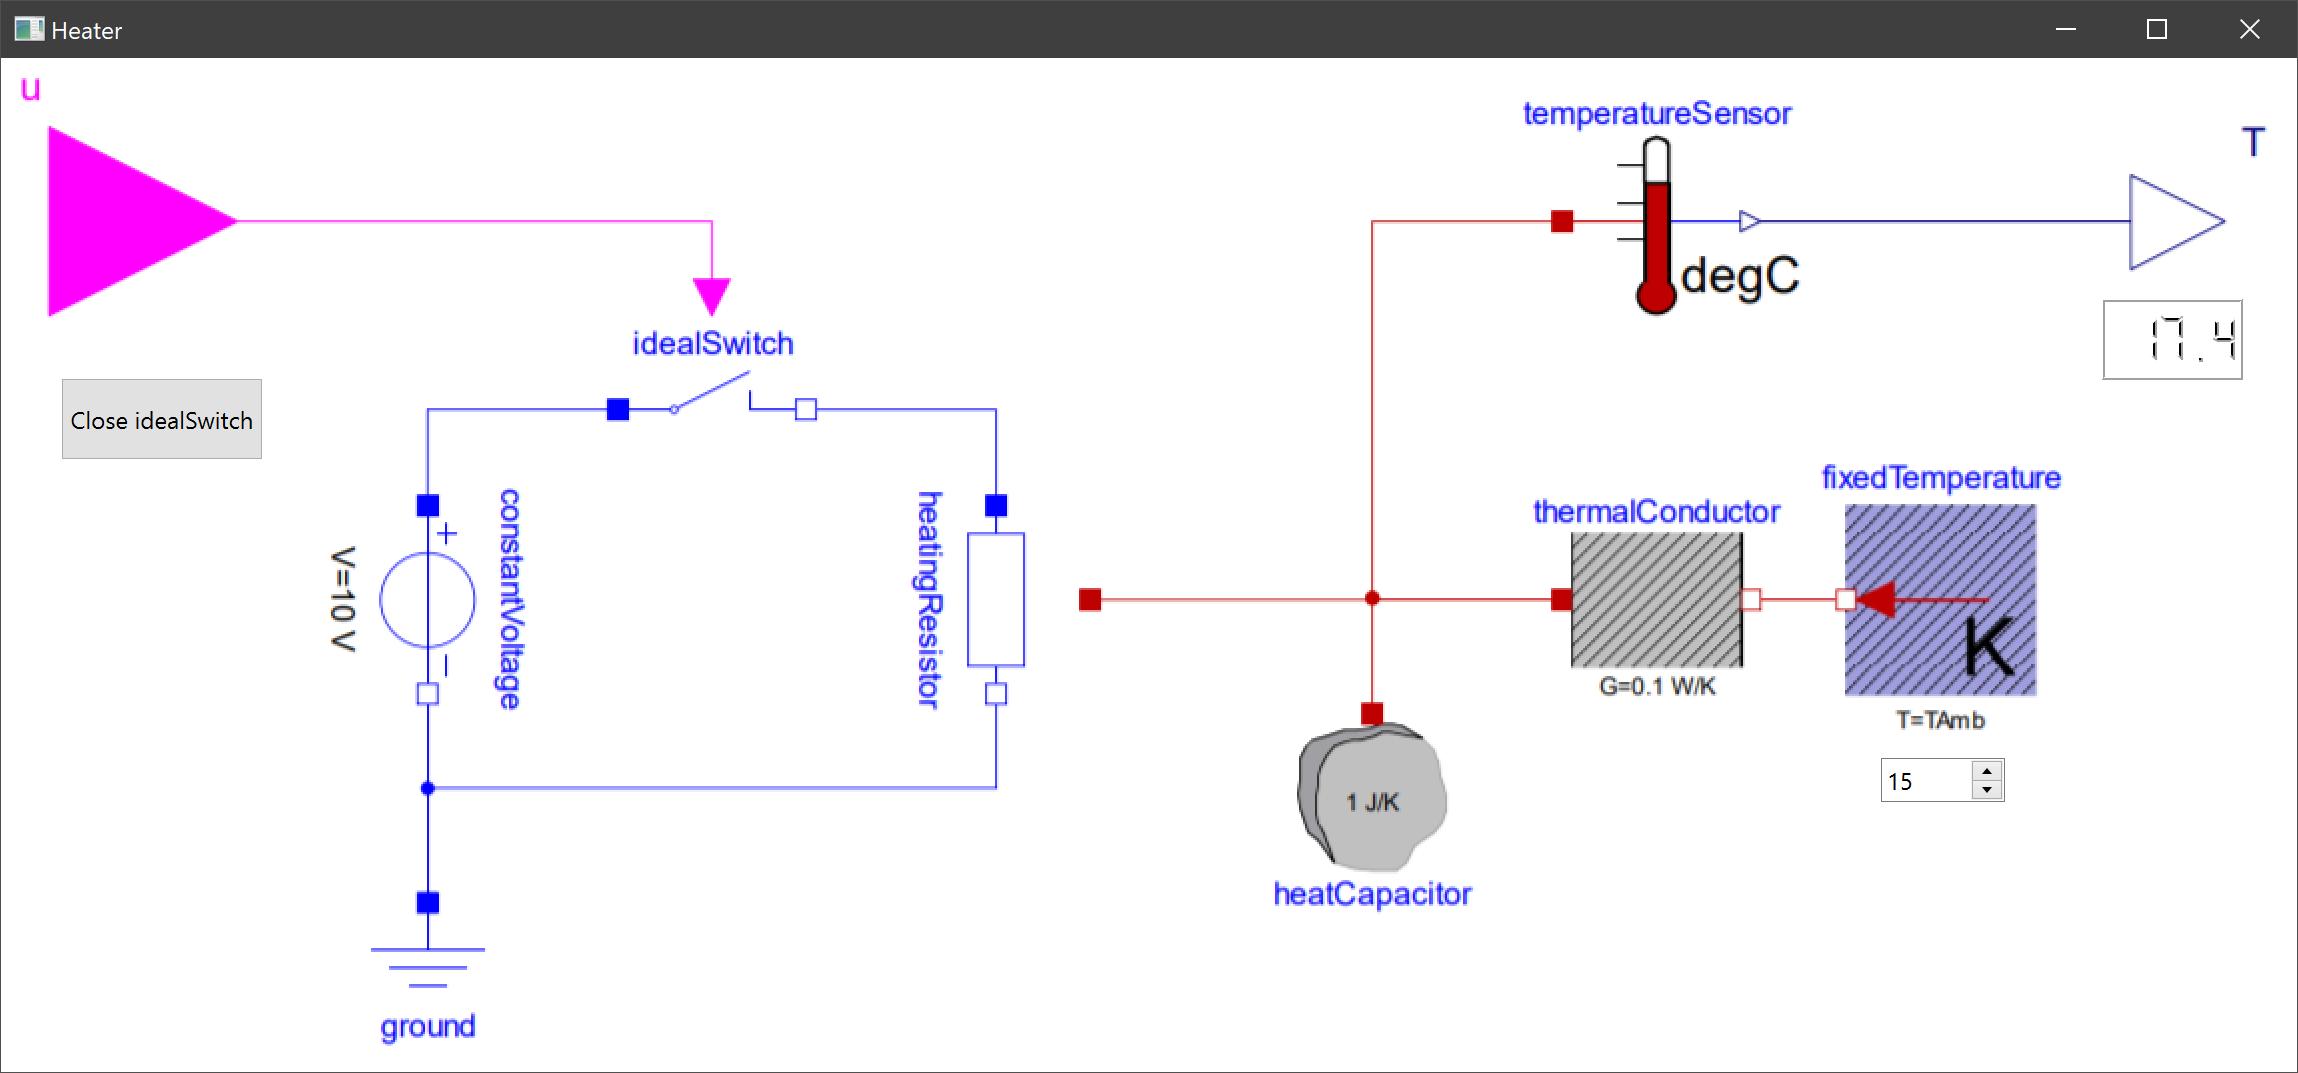
The "Heater" Qt app demonstrates how to embed an FMU into an application with a graphical user interface (GUI).
It has a spin box to set the TAmb parameter and a push button to control the input u that closes the idealSwitch. The temperature T is displayed as an LCD number.
Building the Qt App
- install Qt 6
- open QtCreator, import
Heater/CMakeLists.txtand conifigure the project - build the project and copy
model/binaries/win64/Heater.dllnext toHeater.exe - run the project
Deploying the Qt App
To deploy the Qt app use windeployqt.exe.


