This brief tutorial provides direct steps for beginners who are not familiar with Information Technology and refers to AWS's official documentation. Please feel free to share.
-
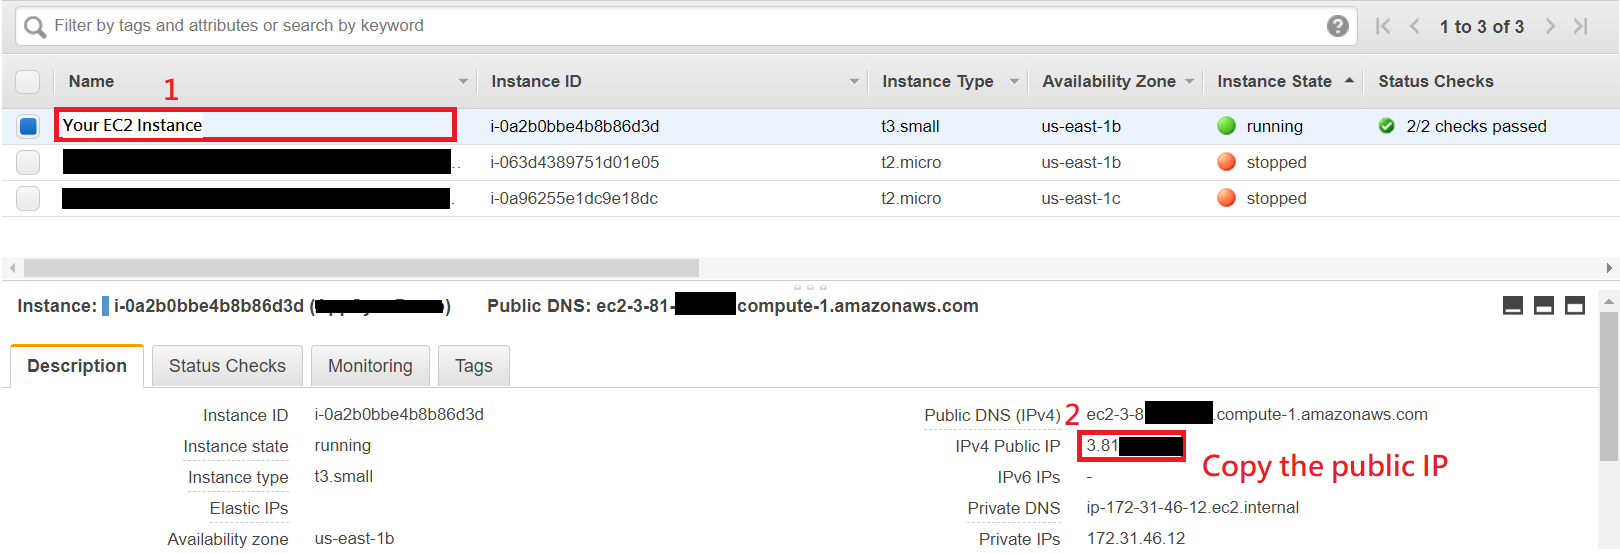
Go to EC2 Management Console.
-
Choose the EC2 Instance you want to connect.
-
On lower panel, you can see the instance's IPv4 Public IP.
-
Remember or copy the IP because you will use it later.

-
Download and install PuTTY from here. PuTTY is a free SSH client for Windows which can be used to connect to EC2 instances.
It is recommended to install PuTTY via official Windows Installer (the .msi file).
-
Before start connecting, we first need to use puttygen to convert our key pair file from .pem format to .ppk format since PuTTY requires .ppk format.
Execute puttygen.exe.
puttygen.exe should be installed together if you had installed PuTTY via official Windows Installer. If you can't find puttygen.exe, try to press
Win + S(Win + Ffor Win 7) and typeputtygento search the execution file. -
Click Load button and select the key pair file which you downloaded while creating instance.
Select
All files (*.*)in file browser, otherwise you won't be able to see the original key pair file in .pem format.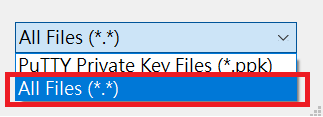
-
Click Save private key to save in .ppk format.
-
Click Yes to ignore the warning message.
-
Type a name and click Save.
-
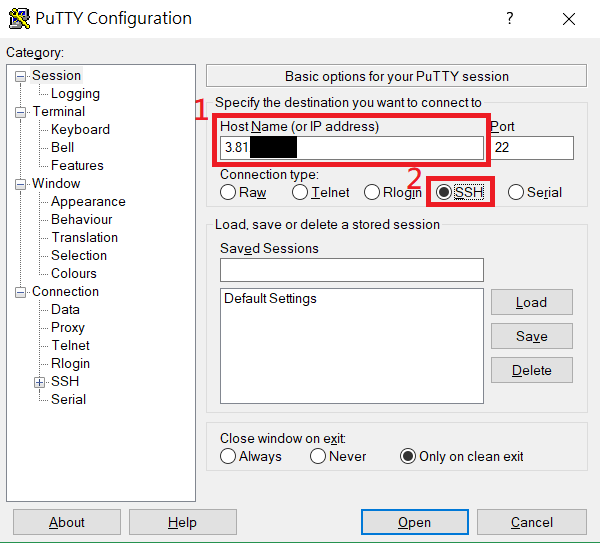
Execute putty.exe.
-
In the blank of Host Name(or IP address), paste or type the instance's public IP and select SSH as connection type.
-
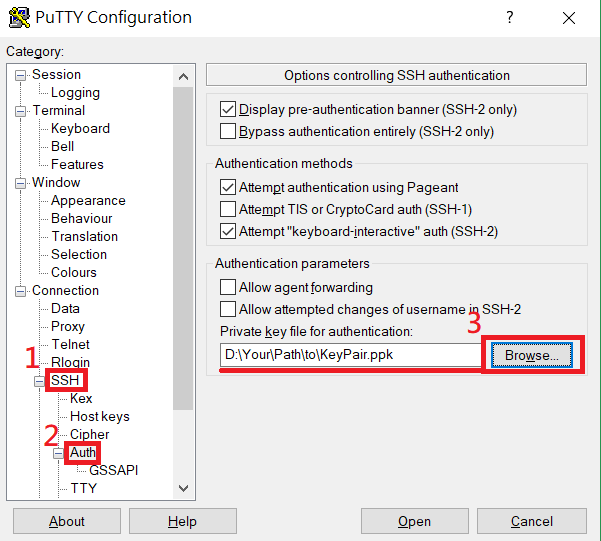
Double-click SSH category on left side to expand.
-
Click Auth category.
-
Click Browse... button to import your .ppk file.
-
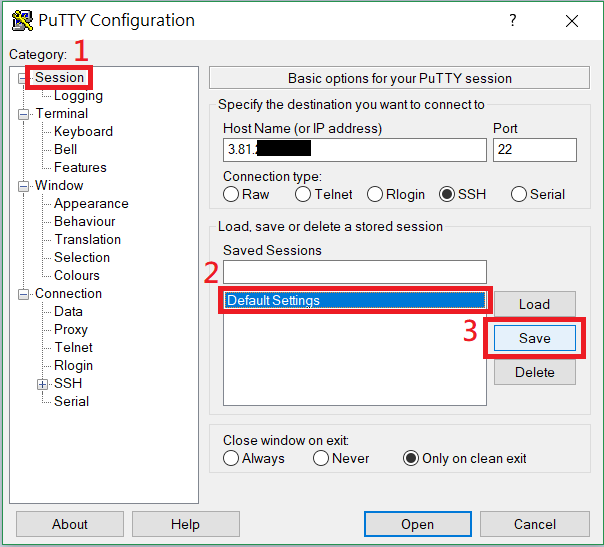
(Optional) You can save your settings as Default Settings so that you don't need to set up next time.
- Click Session category on left side.
- Click Default Settings below.
- Click Save button.
-
Click the Open button below to start connecting.
-
Click Yes to ignore the warning.
-
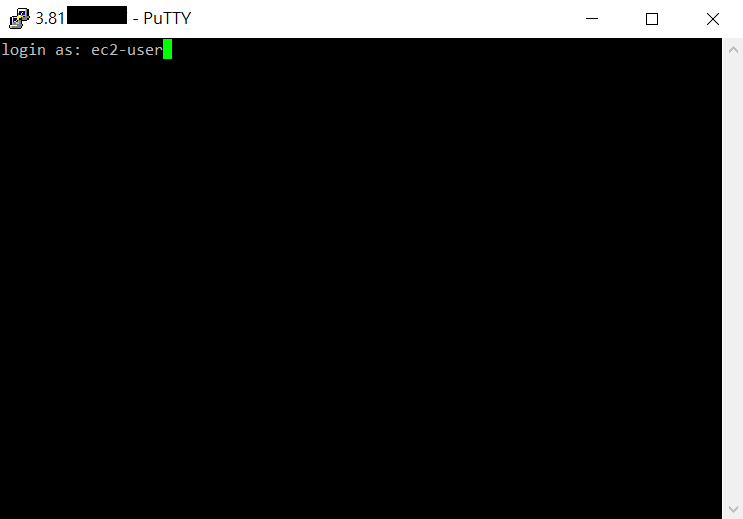
If you see
login as:, it means you have successfully connected to the instance. -
Type ec2-user to login.
ec2-user is the built-in user for most of EC2 Linux instance. If you can't login successfully, please check below:
- For Amazon Linux 2 or the Amazon Linux AMI, the user name is ec2-user.
- For a Centos AMI, the user name is centos.
- For a Debian AMI, the user name is admin or root.
- For a Fedora AMI, the user name is ec2-user or fedora.
- For a RHEL AMI, the user name is ec2-user or root.
- For a SUSE AMI, the user name is ec2-user or root.
- For an Ubuntu AMI, the user name is ubuntu.
- Otherwise, if ec2-user and root don't work, check with the AMI provider.
-
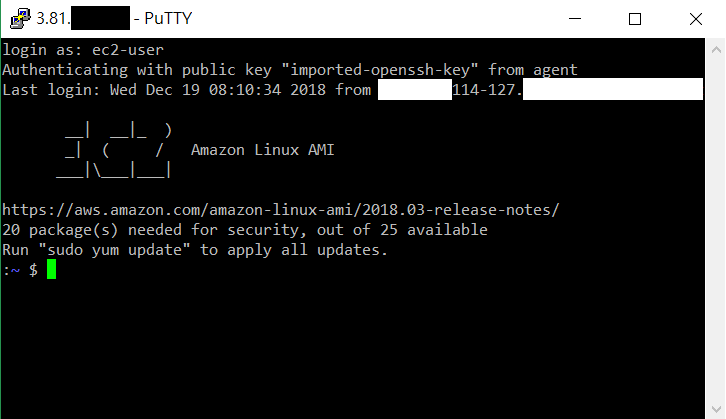
If you see the welcome message below, you can start managing your Linux instance.


-
If you don't have a SSH client yet, please check http://www.openssh.com/. In general, macOS and most Linux distributions have installed SSH client by default.
-
Open a terminal.
-
Change the directories to the location of your key pair file.
cd /path/to/yourKeyPair -
Use the following command to set the permissions of the key pair file.
chmod 400 yourKeyPair.pem -
Use the following command to start a SSH connection where
EC2_INSTANCE_IPis the public IP we mentioned in previous one section.Make sure that you have replaced
EC2_INSTANCE_IPwith the public IP of your instance.ec2-useris the built-in user for most of EC2 Linux instance. If you can't login successfully, please check below and replaceec2-userwith the user name corresponding to your AMI:- For Amazon Linux 2 or the Amazon Linux AMI, the user name is ec2-user.
- For a Centos AMI, the user name is centos.
- For a Debian AMI, the user name is admin or root.
- For a Fedora AMI, the user name is ec2-user or fedora.
- For a RHEL AMI, the user name is ec2-user or root.
- For a SUSE AMI, the user name is ec2-user or root.
- For an Ubuntu AMI, the user name is ubuntu.
- Otherwise, if ec2-user and root don't work, check with the AMI provider.
ssh -i yourKeyPair.pem ec2-user@EC2_INSTANCE_IP -
Enter yes when you see the following message.
The authenticity of host 'xxx.xxx.xxx.xxx (xxx.xxx.xxx.xxx)' can't be established. ECDSA key fingerprint is SHA256:H0NHIoNi1helKgCyYxG8pzECQm8tvhQ++xxxxxxxxxx. Are you sure you want to continue connecting (yes/no)? yes -
Start managing your instance after displaying welcome message.
Warning: Permanently added 'xxx.xxx.xxx.xxx' (ECDSA) to the list of known hosts.
Last login: Wed Dec 19 08:11:46 2018 from xxx-xxx-114-127

      __|  __|_  )
      _|  (     /   Amazon Linux AMI
      ___|\___|___|

https://aws.amazon.com/amazon-linux-ami/2018.03-release-notes/
20 package(s) needed for security, out of 25 available
Run "sudo yum update" to apply all updates.
:~ $