This repo contains the implementation of the convolutional neural network for tuberculosis diagnosis described in Efficient Deep Network Architectures for Fast Chest X-Ray Tuberculosis Screening and Visualization, which I will call tbcnn for short. The network uses frontal chest X-Rays images as input.
This code in this repository has now been updated to reflect the published version of the paper. In particular the new version has been improve to reduce the GFLOP count even further by using an architecture similar to resnet.
Some of the results below have been generated with a older version of the network, and therefore do not precisely reflect the state of the code anymore (but the results should be reproducible with the current code).
Imporant: The Belarus data used in the paper was taken by a website of the government of Belarus, which is not available anymore. Therefore the data used in the article cannot be downloaded from anywhere, making it impossible to reproduce the paper 1:1. Luckily, I still have a copy of a pre-processed version of this data (already scaled down to 512x512 and center-cropped) that I used for training. This data is available in the belarus folder. See also this issue.
Note: Images 2 and 75 of the Belarus dataset (see note above) have been reported not to be frontal CXR (see here). I decided to keep these two images in the dataset for reproducibility reasons, but new studies might want to delete them.
To run it properly:
- 16 GB of RAM.
- A nvdia GPU with cuda support (even a cheap one).
Training on CPU will be very slow.
First clone the repo to your preferred location:
git clone https://github.com/frapa/tbcnn.gitWe then need to install the dependencies. The network depends on (assuming python3):
# CUDA and CUDNN: install according to your platform. For ubuntu:
sudo apt-key adv --fetch-keys http://developer.download.nvidia.com/compute/cuda/repos/ubuntu1604/x86_64/7fa2af80.pub
wget http://developer.download.nvidia.com/compute/cuda/repos/ubuntu1604/x86_64/cuda-repo-ubuntu1604_9.1.85-1_amd64.deb
sudo apt install ./cuda-repo-ubuntu1604_9.1.85-1_amd64.deb
wget http://developer.download.nvidia.com/compute/machine-learning/repos/ubuntu1604/x86_64/nvidia-machine-learning-repo-ubuntu1604_1.0.0-1_amd64.deb
sudo apt install ./nvidia-machine-learning-repo-ubuntu1604_1.0.0-1_amd64.deb
sudo apt update

# Install CUDA and tools. Include optional NCCL 2.x
sudo apt install cuda9.0 cuda-cublas-9-0 cuda-cufft-9-0 cuda-curand-9-0 \
    cuda-cusolver-9-0 cuda-cusparse-9-0 libcudnn7=7.2.1.38-1+cuda9.0 \
    libnccl2=2.2.13-1+cuda9.0 cuda-command-line-tools-9-0

# Install dependencies
pip install -r requirements.txt
Once we have installed the needed dependencies, we need to download the
data to train the network on. You can get some from the NIH public dataset
here.
You can for example download the Montgomery dataset, open the zip and copy the
image files into the data directory. Another approach that I prefer is making
a directory montgomery copying the images into it and create a symlink called data
to this directory, as it makes swapping the database very easy:
ln -rs montgomery dataThen you can run the network running simply
python3 train.pyIf you want to run a cross-validation study (5-fold), you can run:
python3 train.py --cross-validationYou can also start a tensorboard server at http://localhost:6006 with
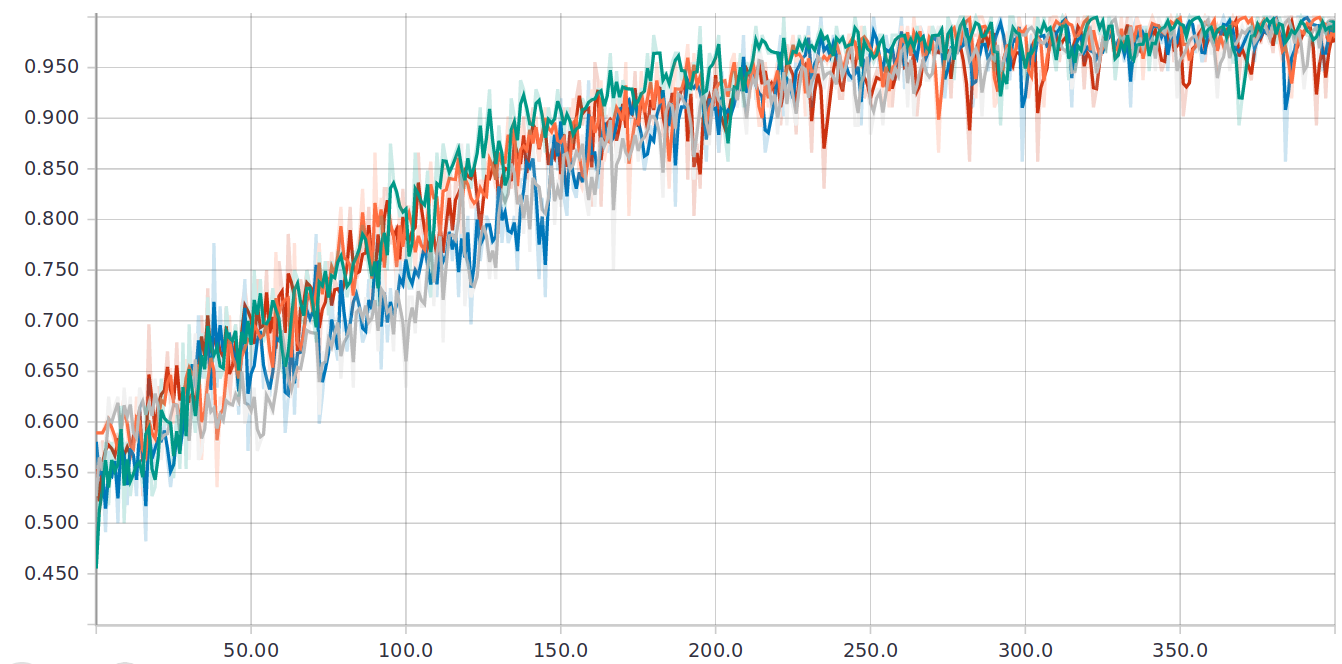
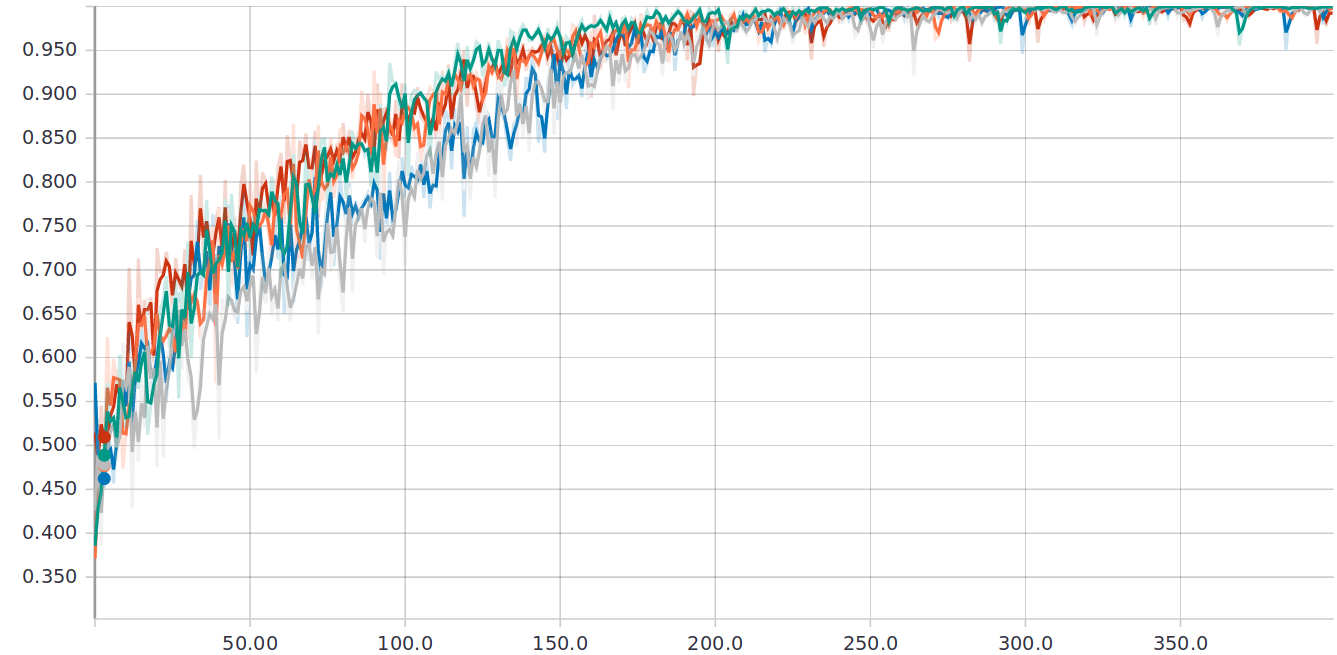
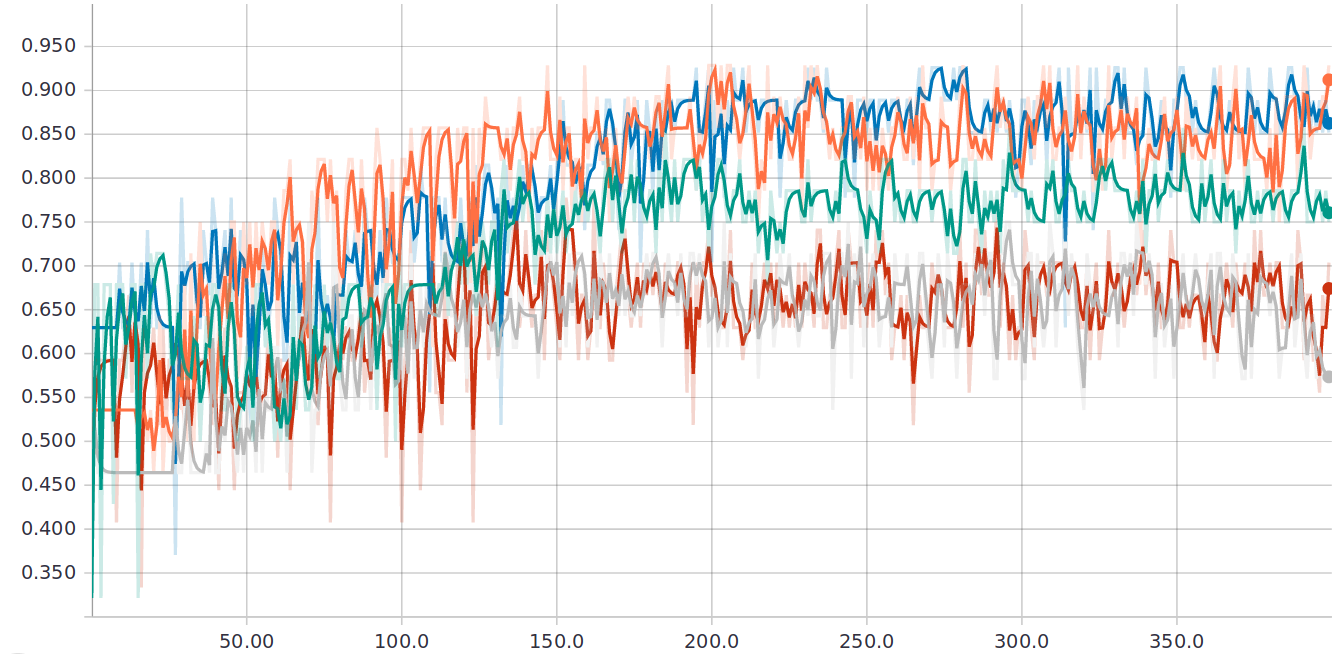
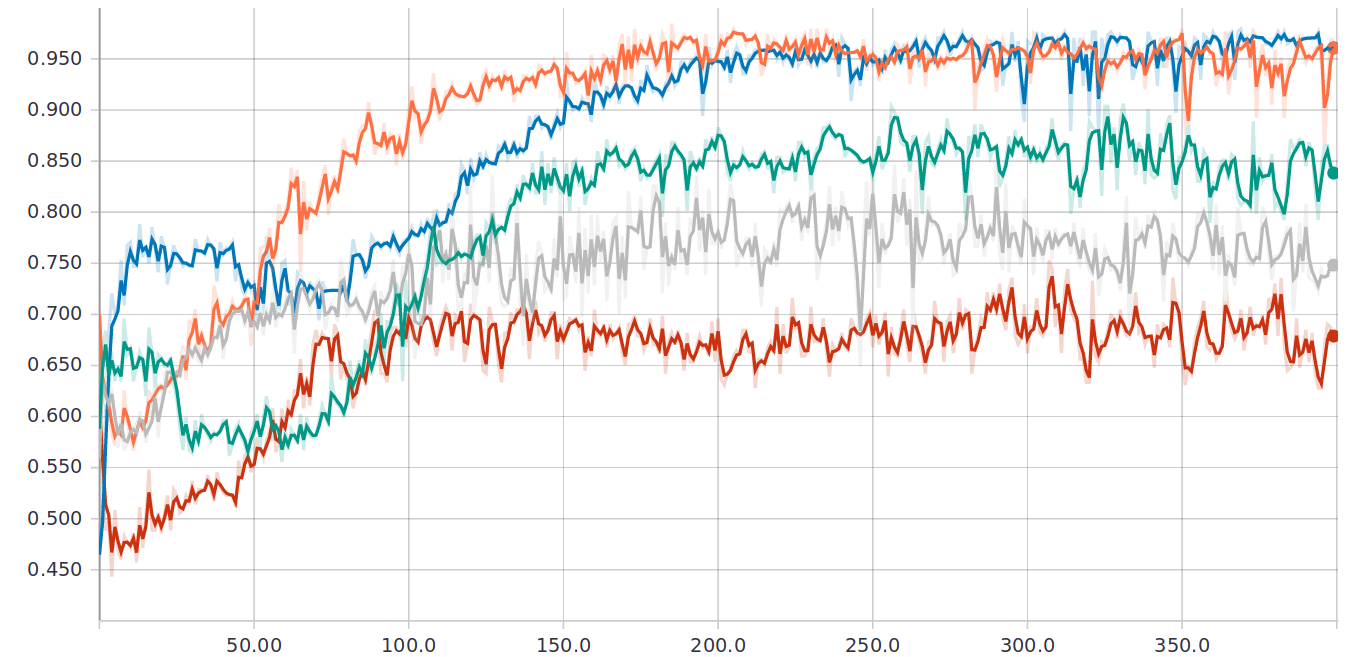
python3 -m tensorboard.main --logdir=./logs/and to check graphs the reporting training and test accuracy and AUC in real time.
There are no other options apart from these two, but the source code is well commented and should be easy to play around with.
The network is written in tensorflow. Training steps:
- The first time you run the script, the images in the
datafolder will be preprocessed (cropped and scaled) and cached to apreprocesseddirectory. If you change the data, you also need to delete thepreprocessedfolder, otherwise it will still use the old data. - After preprocessing the images, the input data is "prepared" which means that
it is converted to
float32with zero mean and unit standard deviation and is then cached to multipleinput*.npyfiles to be easily loaded at training time. As with preprocessing, you need to delete theinput*.npyfiles after changing the data for the new data to be used. - The implementation makes use of the tensorflow Dataset API, to parallelize augmentation on multiple CPU cores and training on the GPU.
- The Elastic deformation augmentation is implemented using SimpleITK which as far as I know is the only public implementation around.
I report here some training results for comparison. I trained on a GTX 1050 Ti with 4 GB of memory, while using 8 GB of main memory and an old quad-code i5.
These are the results of a 5-fold cross-validation study on the Montgomery dataset.
| Run | Epochs | Time | Test accuracy | Test AUC |
|---|---|---|---|---|
| 1 | 400 | 35min | 0.7500 | 0.8333 |
| 2 | 400 | 35min | 0.5714 | 0.7487 |
| 3 | 400 | 35min | 0.9286 | 0.9692 |
| 4 | 400 | 35min | 0.8519 | 0.9618 |
| 5 | 400 | 35min | 0.7037 | 0.6761 |
| Cross-validation | 2h 55min | 0.7611 | 0.8378 |


