Spring Boot Keycloak demo application using Keycloak 5.0.0 with Spring Boot 2.1.4.
You have to configure two clients in Keycloak. Both clients are configured the same. You can also import the ream-export
located in /src/keycloak/realm-export.json.
- create realm:
showcase - create client
keycloak-demo1andkeycloak-demo2 - Access Type: confidential
- Standard Flow enabled
- Valid Redirect URIs:
- keycloak-demo1:
http://localhost:8081/* - keycloak-demo2:
http://localhost:8082/*
- keycloak-demo1:
- create credential for each one and configure it in
application.propertiesandapplication-app2.properties - define a role
ROLE_PRODUCTSin each client - create a user with this role assigned
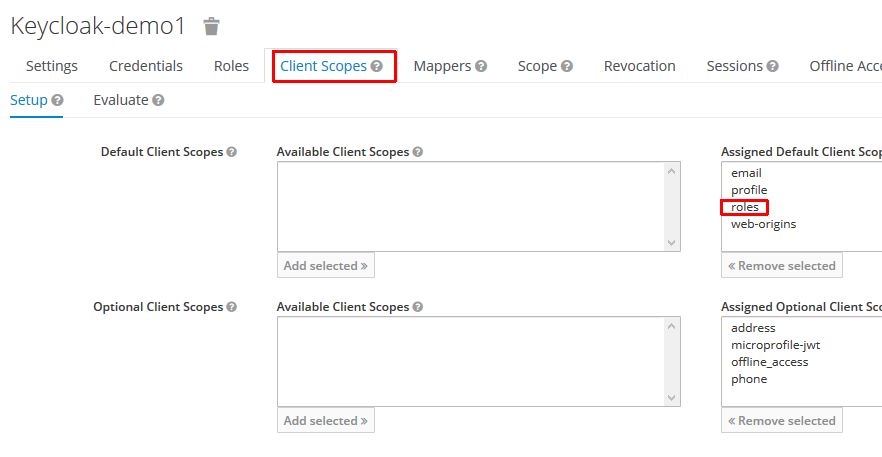
NOTE: Check if roles is assigned under the client scopes so that the roles will
be mapped (see Clients -> select you client -> Client Scopes -> Assign 'roles')
Customize the settings in application.properties and application-app2.properties for your needs:
- realm
- resource (clientId)
- auth-server-url
- secret
In the directory src/keycloak/theme you can find the showcase theme. Copy the showcase folder into
the KEYCLOAK_HOME/theme folder.
To use the theme select the showcase theme under Realm Settings -> Themes -> Login Theme -> showcase.
This showcase demonstrates Keycloak within Spring Boot. You can start the same application in two different profiles so that it behaves like two different applications.
After configuring keyloak you have to do:
Start keycloak.
Start application 1:
mvn spring-boot:runYou can open up application 1 at http://localhost:8081
Start application 2:
mvn spring-boot:run -Drun.profiles=app2You can open up application 2 at http://localhost:8082
