By Ottilie Coutaud and Alexis Tacnet at CentraleSupélec.
This project is an implementation of a curved lane auto-detection pipeline for self-driving car applications. It is divided in 3 Jupyter Notebooks for our different experiments and axes of research.
This Jupyter notebooks contains a full pipeline of our working algorithm with our best results, with a video processor pipeline at the end to process full videos and export their output.
We use our typical pipeline :
- Camera calibration
- Edge detection
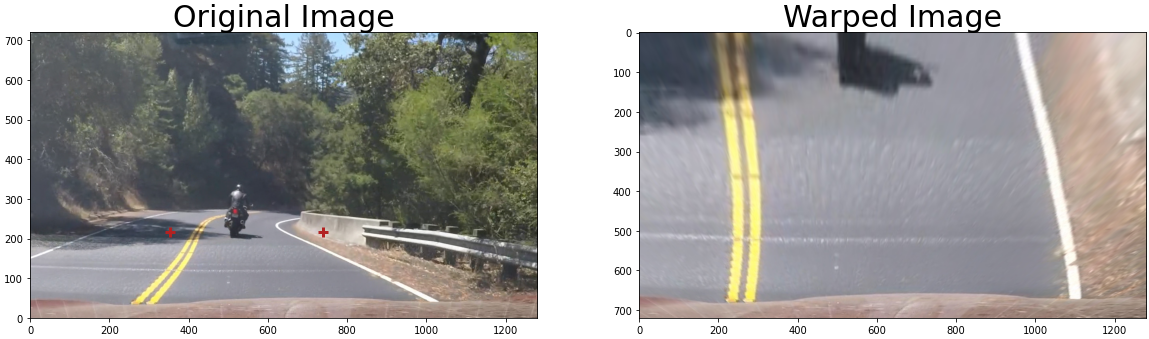
- Perspective warp
- Image sharpening
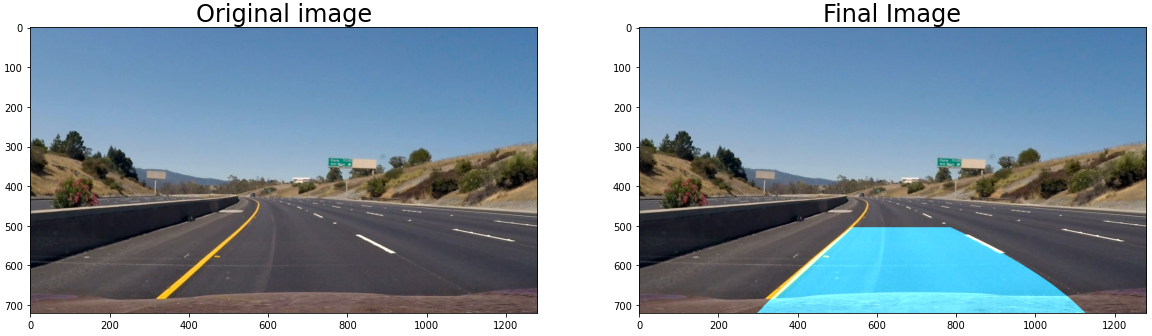
- Lane detection and polynomial fitting
- Lane drawing and perspective rollback
As the lane detection is very dependant from the edge detection, we researched and experimented several well-known methods to improve the detection of the lane lines that will then be detected through the sliding window algorithm.
Especially, we introduced :
- Sobel HLS edge detection vs Canny detection
- No blur vs Gaussian blur
We then tried to see the different impact of those changes on the lane detection and the final result.
In this notebook, we focused on a new approach we created to enhance the perspective warp. As this warp is taking 4 points to project the road in a aerial point-of-view, we tried to optimize the 2 upper points of the trapezis to have a better view for the lane detection.
We tried to implement a Hough line detection on the raw image (with a edge filtering of course) to determine roughly where the lines could be. We then take a margin on both sides of those lines and take the intersection between our horizon (30% of the image height) and this zone.

After cloning the repository, it is highly recommended to install a virtual environment (such as virtualenv) or Anaconda to isolate the dependencies of this project with other system dependencies.
To install virtualenv, simply run:
$ pip install virtualenv
Once installed, a new virtual environment can be created by running:
$ virtualenv venv
This will create a virtual environment in the venv directory in the current working directory. To change the location and/or name of the environment directory, change venv to the desired path in the command above.
To enter the virtual environment, run:
$ source venv/bin/activate
You should see (venv) at the beginning of the terminal prompt, indicating the environment is active. Again, replace venv with your desired directory name.
To get out of the environment, simply run:
(venv) $ deactivate
While the virtual environment is active, install the required dependencies by running:
(venv) $ pip install -r requirements.txt
This will install all of the dependencies at specific versions to ensure they are compatible with one another.
While the virtual environment is active, launch your Jupyter lab to run the notebooks with:
(venv) $ jupyter lab
This will normally open a new tab in your browser with the Jupyter lab.