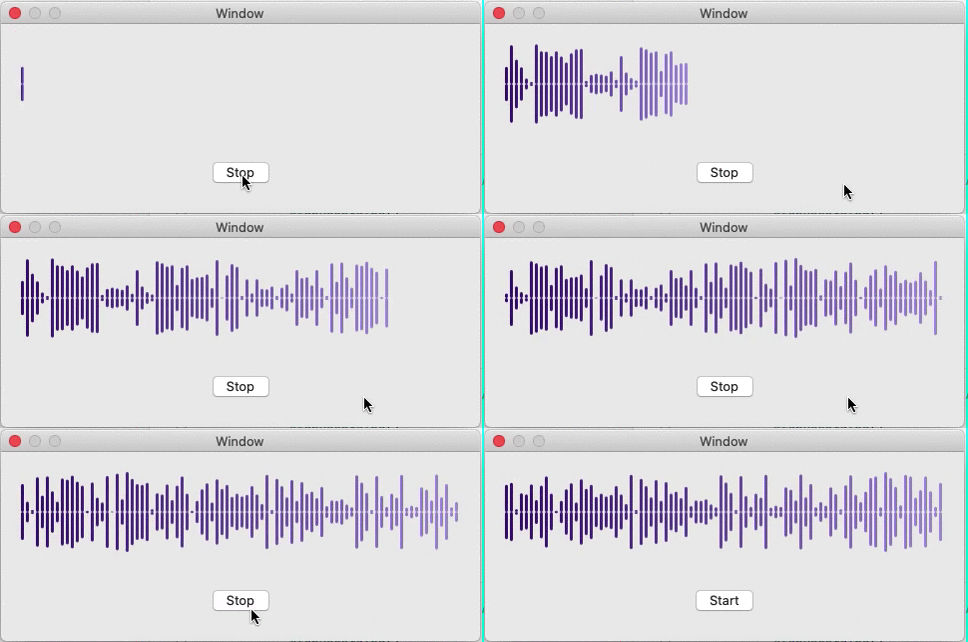
AudioWave is a customizable view representing sounds over time on macOS.
It is derived from https://github.com/bastienFalcou/SoundWave/
- Add and display audio metering level values on the fly
- Set array of pre-existing audio metering level and play / pause / resume
- Customize background, gradient start and end colors, metering level bar properties, etc.
- macOS 10.12+
- Xcode 11.0+
- Swift 5+
Check out the demo app for an example. It contains the following demos: record sound and display metering levels on the fly, play sound afterwards, resize view, change colors and multiple other properties.
JCKAudioVisualizationView can be added to storyboard or instantiated programmatically:
let audioVisualizationView = JCKAudioVisualizationView(frame: CGRect(x: 0.0, y: 0.0, width: 300.0, height: 500.0)))
view.addSubview(audioVisualizationView)JCKAudioVisualizationView inherits from UIView and consequently allows you to change all inherited properties (e.g. backgroundColor).
You can change width, corner radius and space inter bars for your graph. This will force the graph to redraw:
self.audioVisualizationView.meteringLevelBarWidth = 5.0
self.audioVisualizationView.meteringLevelBarInterItem = 1.0
self.audioVisualizationView.meteringLevelBarCornerRadius = 0.0
You can change style of level bar to single:
self.audioVisualizationView.meteringLevelBarSingleStick = trueYou can change grandient start and end color:
self.audioVisualizationView.gradientStartColor = .white
self.audioVisualizationView.gradientEndColor = .black
Those variables declared as
IBInspectablecan also be set from Interface Builder.
One sound metering level represents the power in decibels of a sound sample.
First make sure you are in write mode:
self.audioVisualizationView.audioVisualizationMode = .writeYour graph representing metering levels will (re)draw every time you pass a new value on the fly by calling the following. The value needs to be between 0 and 1.
self.audioVisualizationView.add(meteringLevel: 0.6)By setting sampleRate, you can change bar count. Its default value is 1, it means each meteringLevel value will be drawn as a single bar. If you set sampleRate greater than 1, several bar will be merged into one.
self.audioVisualizationView.sampleRate = 3You need to calculate a percentage of your decibel values, based on minimum and maximum decibel number of your recording system. If one value is above 1, the metering level bar will not be fully visible within the bounds of the view.
If you need to reset your graph, just call the following:
self.audioVisualizationView.reset()The JCKAudioVisualizationView can take an array of metering levels to play. Those levels are all gathered in its meteringLevelsArray property, array of Float values again between 0 and 1.
If there are not enough / too many values to fit the screen, those values will be respectively extrapolated / clustered in order to cover nicely the whole width of the screen.
self.audioVisualizationView.audioVisualizationMode = .read
self.audioVisualizationView.meteringLevels = [0.1, 0.67, 0.13, 0.78, 0.31]
self.audioVisualizationView.play(for: 5.0)
Specify the duration of your sound for the view to play exactly at the same pace (and your metering levels fit the sound power heard by the user).
Note: you can pause / resume / stop the process by calling:
self.audioVisualizationView.pause()
self.audioVisualizationView.play(for: durationLeft)
self.audioVisualizationView.stop()
As said before, you can also reset the view at any point calling reset().
AudioWave is available under the MIT license. See the LICENSE file for more info.
