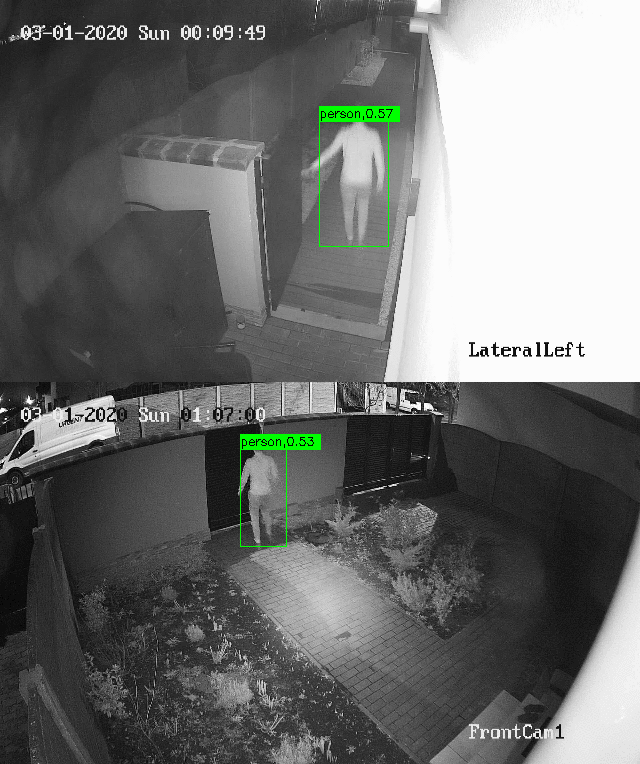
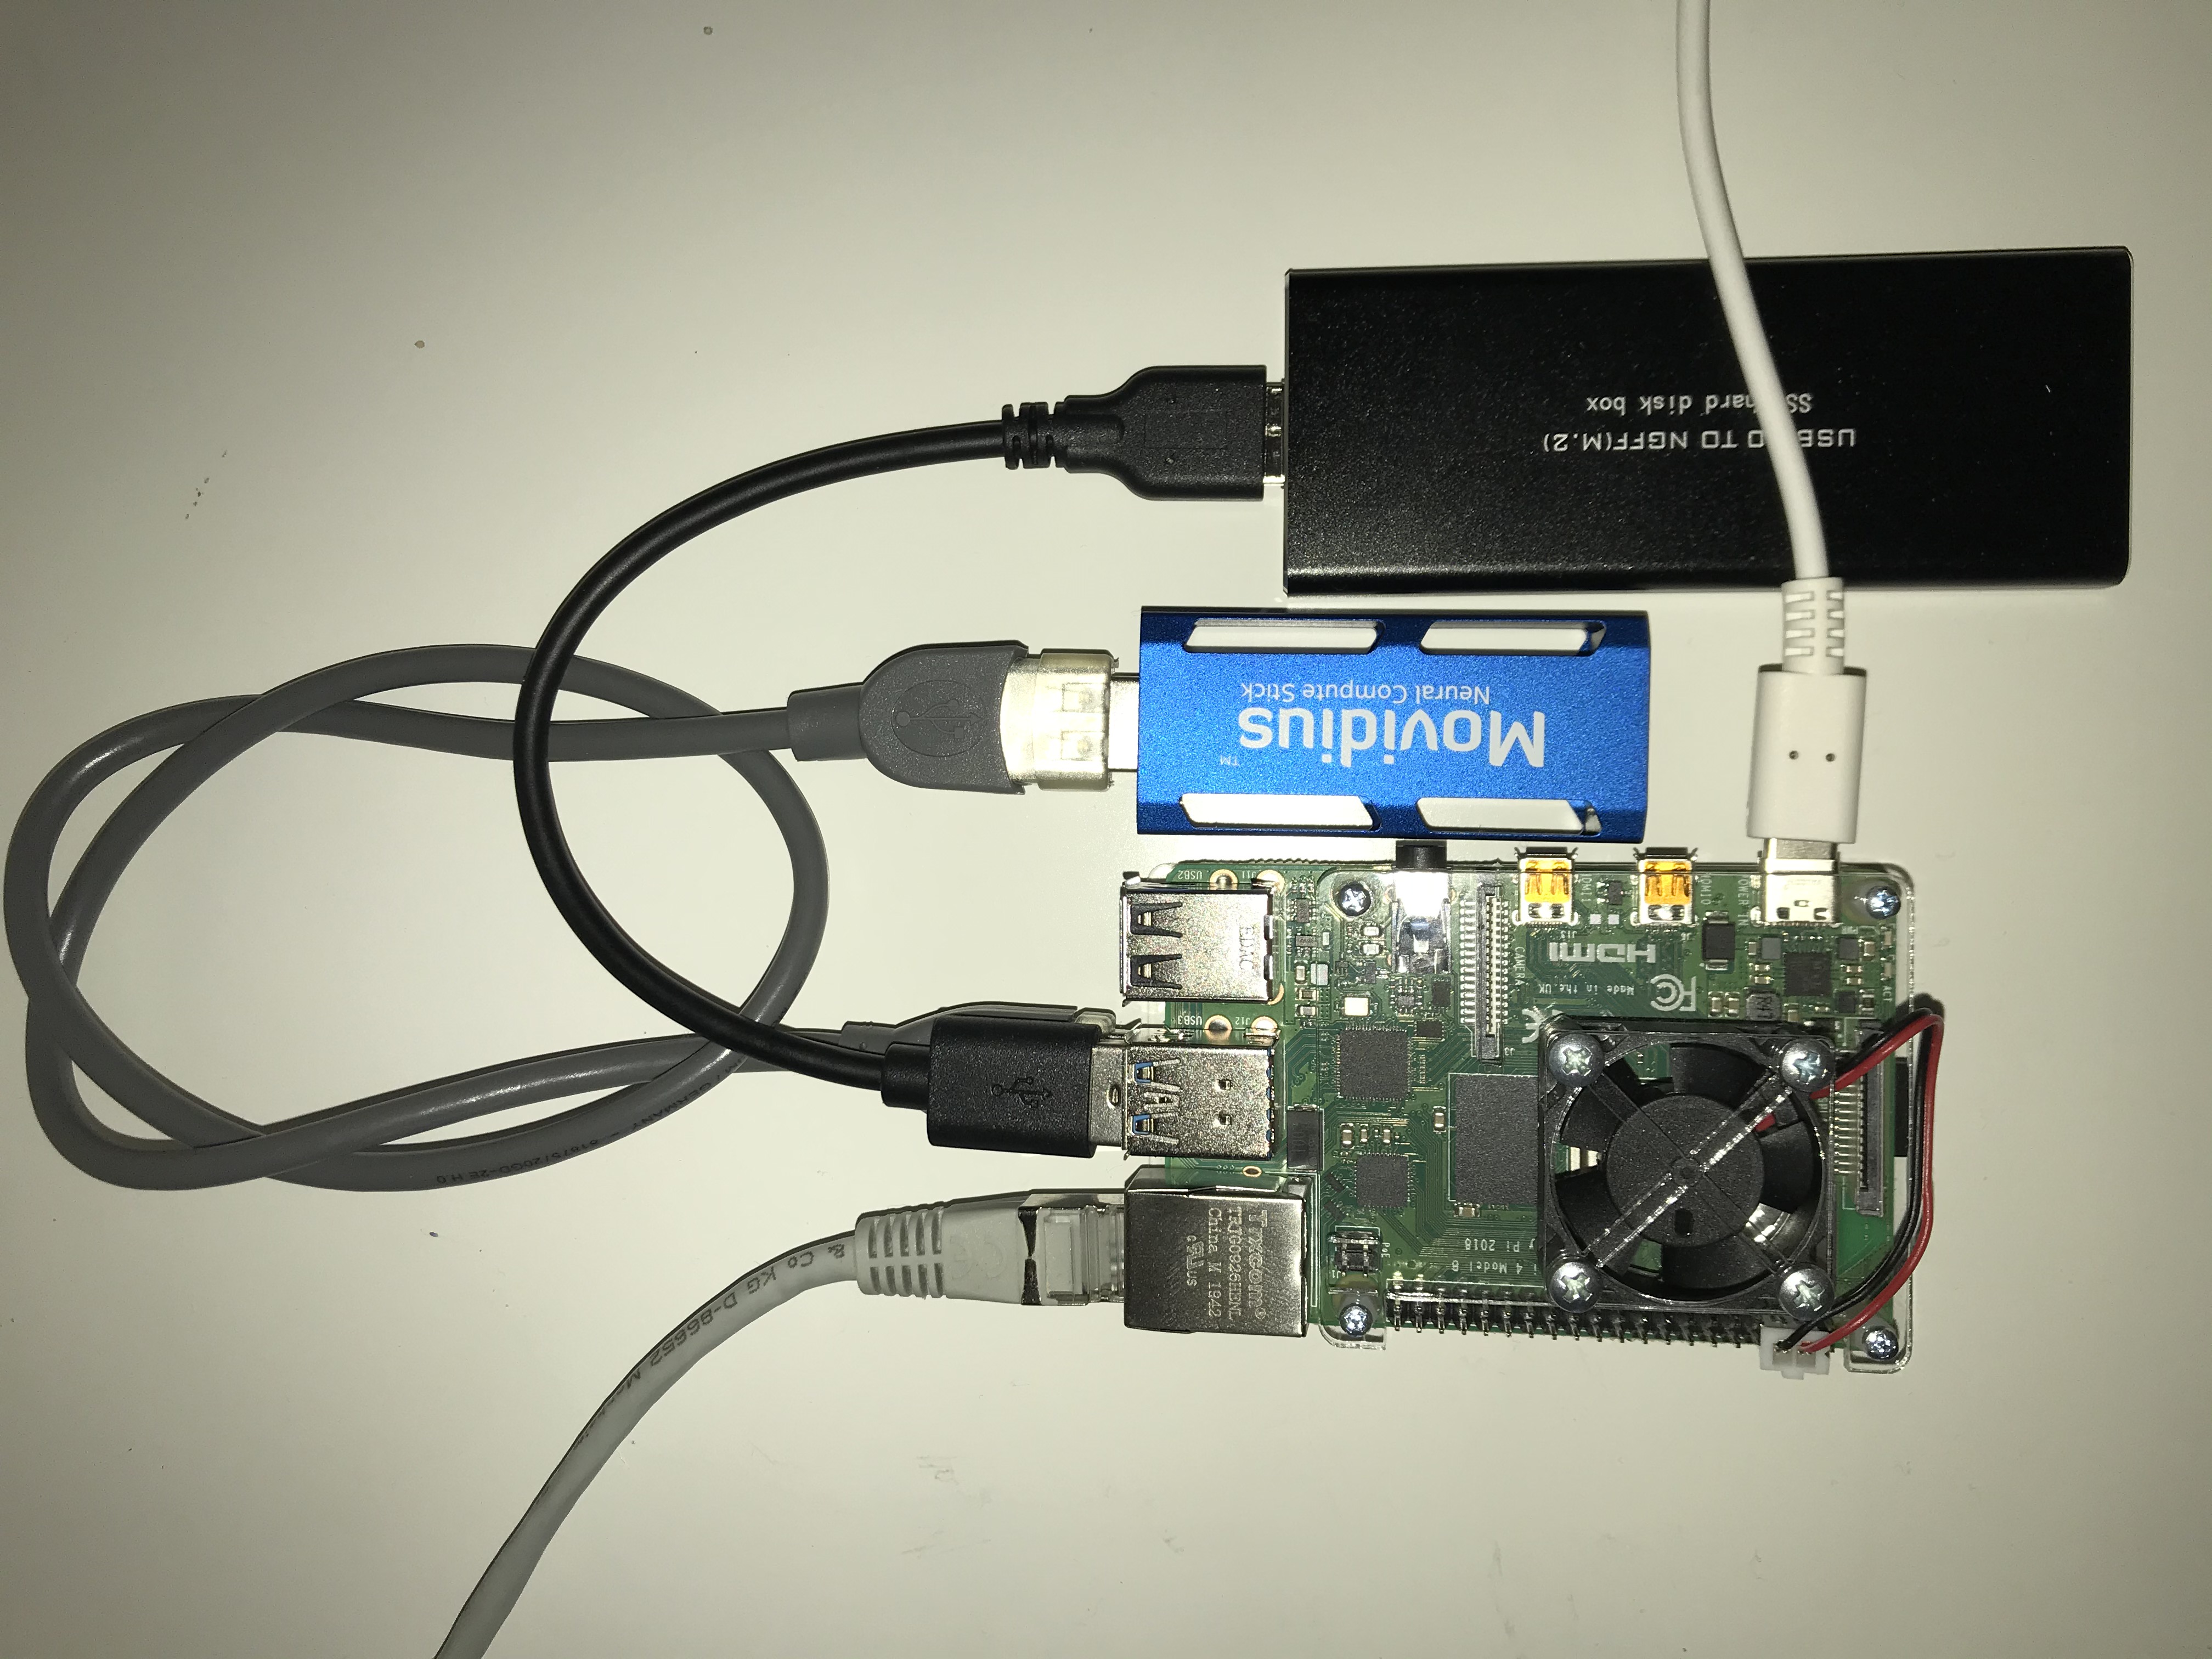
The project brings the usual IP cameras to the next level, adding deep neuronal networks for object detection and classification, using mobilenet-ssd detector with openvino framework. Works on Raspberry Pi4, using CPU or an NCS 1 compute stick. Suitable for home automatization or IoT applications for smart houses. The implementation works also with the attached USB camera, see the next section for available commands.
Before usage, the configuration file parameters must be adjusted to the needs (i.e. IP address of the cameras, ONVIF address to grab a picture, right credentials must be entered). Take a look in ./config.txt file
python3 ./smartcam.py --help
usage: smartcam.py [-h] [-cam camera] [-l labelfile] -c config
                   [-s showdetections] [-conf confidence] [-si showcmdinfo]
                   [-img loadimage] [-server servdata]

optional arguments:
  -h, --help         show this help message and exit
  -cam camera        use usb cam, id=[None,0,1,2,3], default=None - IPCams
                     will be used
  -l labelfile       label file, like ./labels.txt
  -c config          config file, holds the access credentials, urls, like
                     ./config.txt
  -s showdetections  show/ hide detection window [0,1], default=0
  -conf confidence   confidence value [0.0 - 1.0], default=0.8
  -si showcmdinfo    show cmd line info on detection, default=False
  -img loadimage     load an image, provide the path like ./test.jpg
  -server servdata   Use the selected server to publish detections [http,
                     mqtt, all], must be configured in config file.
Requirements:
- Raspberry Pi4B, with buster version
- Intel TM Movidius Neuronal Compute Stick
- (optional) USB3.0 M.2 SSD
- 16/32 Gb SSD card
- Openvino + OpenCV installation 2019R31, note: I had troubles using the latest version (model generated on PC with Model Optimizer was not working on RPi4).
- (optional) ncappzoo for additional models and guideline for Model Optimizer installation (MO) on RPi4. The recommendation is to use a PC (instead Rpi4) with Openvino installation to transform and optimize state-of-the-art models, then deploy on RPi4.
- To grab the pictures from IP cameras the 'requests' pip package was installed.
Extra steps are needed on Rpi4 if we want to run the smart_cam application on boot time. The method presented will create a service, which provides easy methods for start/stop/enable the application.
Use your favorite text editor to create a file nano -w /home/pi/smart_cam/run.sh
. /opt/intel/openvino/setupvars.sh # source the environment varialbles
/usr/bin/python3 /home/pi/smart_cam/smartcam.py -l /home/pi/smart_cam/labels/txt -c /home/pi/smart_cam/config.txt -conf 0.7 -s 0
Save and make it executable.
chmod +x /home/pi/smart_cam/run.sh
Please note the absolute paths used in the run script, will not work with relative ones. Info messages are deactivated (see -s 0 and config file parameters). The next step is to create the service and enable it.
sudo nano -w /etc/systemd/system/smart_cam.service
Fill with the following content and save it.
[Unit]
Description=Smart Cam Service
After=network.target

[Service]
Type=idle
EecStart=/bin/bash/ /home/pi/smart_cam
WorkingDirectory=/home/pi/smart_cam
StandardOutput=inherit
StandardError=inherit
User=pi

[Install]
WantedBy=multi-user.target
Now, start the service to test it.
sudo systemctl start smart_cam.service
If everiting is fine, you will see something like this:
Now, it can be enabled to start on boot time:sudo systemctl enable smart_cam.service
To run on a PC, the above-mentioned requirements are valid. Openvino with OpenCV. Here for testing purposes, the 'target' attribute from the configuration file could be settled to 'cpu' mode. USB camera (if attached), can be invoked easily with the command line parameter.
Thre are two methods provided to integrate in an IOT system:
- http server - servs the detections
- mqtt client - sends images to an mqtt broker
Both can work together, the http server is useful to verify easily the detections, response to GET requests, so refresh is needed after detections. If the chosen option is the mqtt client, an additional package is needed to be installed. Recommended is to use the Paho MQTT Python Client. The advantage of using mqtt, is that additional information is provided beside the picture with detections:
- status - indicates if the sensor is alive
- labels - detection and detection accuracy is available in a string format - providing more possibilities to filter the topic of interest
- a picture with detection (same as with http solution)
Before use this features, additional configuration si needed in the config.txt file:
#set mqtt connection parameters
mqttbroker=<smart_cam IP>
mqttport=1883
mqttstatustopic=/smart_cam/status
mqttlabelstopic=/smart_cam/labels
mqttdetections=/smart_cam/detections

#set http server parameters (to serve detections),
#use: http://<ip>:8080/test.jpg - responds only to GET requests (new detection needs browser refresh)
hostip=<smart_cam IP>
hostport=8080
Using Home Assintant as IOT platform, easy integration is available for both solutions. After integration, a live stream of detections is provided.
In the configuration.yaml file adds the followings:
camera:
  - platform: generic
    still_image_url: http://<smart cam IP>:<smart cam port>/test.jpg
    stream_source: http://<smart cam IP>:<smart cam port>/test.jpg
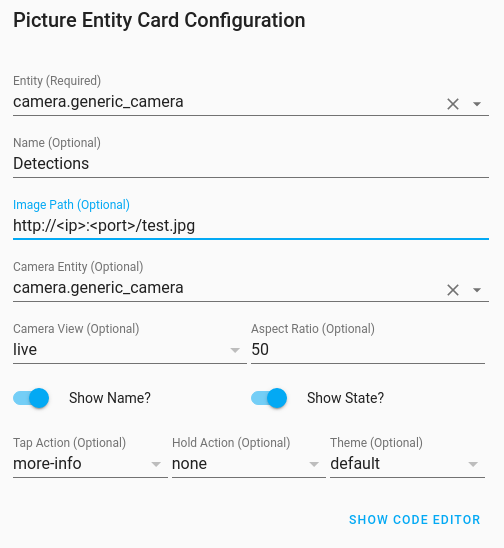
On hte home assistant graphical interface add Picture Entity Card Configuration with the following settings:
In the configuration.yaml file add the followings:
sensor:
  - platform: mqtt
    name: "smart_sensor"
    state_topic: "/smart_cam/labels"
    availibility_topic: "/smart_cam/status"
    payload_available: "ON"
    payload_not_available: "OFF"
and
camera:
  - platform: mptt
    topic: /smart_cam/detections
    name: smart_cam
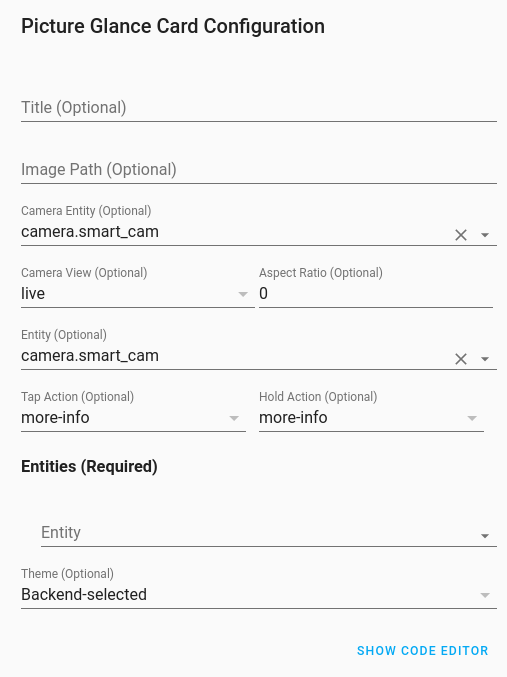
Usa a Picture Glance Card Configuration with the following settings:
https://github.com/movidius/ncappzoo
https://github.com/chuanqi305/MobileNet-SSD
https://www.raspberrypi.org/documentation/linux/usage/systemd.md
/Enjoy.


