Deploying a MEAN App
Learning Objectives
- Understand the steps to deploy a MEAN stack app
- Determine how to specify development mongodb vs. production
- Use Heroku logs to address deployment errors
- Explain the use of Procfile
- Describe what addons are and used for
- Introduce other deployment options such as Digital Ocean
Framing (5 mins)
At this point, you have deployed a few apps throughout the program. However, most (if not all) have been applications built with Rails. Heroku makes deploying a Rails app easy (right?). Minus a few complications, all it takes is heroku create, git push heroku master, and heroku run rake db:migrate. As long as your app is working locally, it should typically work in deployment.
MEAN apps require a little more work to deploy, as there is less "magic" built in compared to Rails. This lesson will run you through the steps to setting your Mongo DB to work in production, as well as use a little "error-driven" process to deploy the app. We will also briefly touch upon other deployment options; specifically Digital Ocean.
Setup
We're going to go ahead and deploy the When President app, and we're going to start under the assumption that you have only been working in development on this app so far.
Example deploy
If everything is set up properly, deploying can be as simple as 2 lines of CLI!
heroku creategit push heroku master
But, as we all know, nothing is ever that simple right? Let's get into it.
You Do: Initial Create (5 mins)
cd into your whenPresident directory, then git checkout deploy_starter.
If that doesn't work, try to fetch the branch from upstream and then checkout. If that doesn't work, just go ahead and clone the app down into a new folder (again)
Run the basic setup commands:
heroku creategit push heroku deploy_starter:master- note, make sure you run the above command from the
deploy_starterbranch
- note, make sure you run the above command from the
heroku open
Most likely you will receive the standard heroku error:
But wait, why doesn't that work? How do we figure out what went wrong?
Heroku Logs
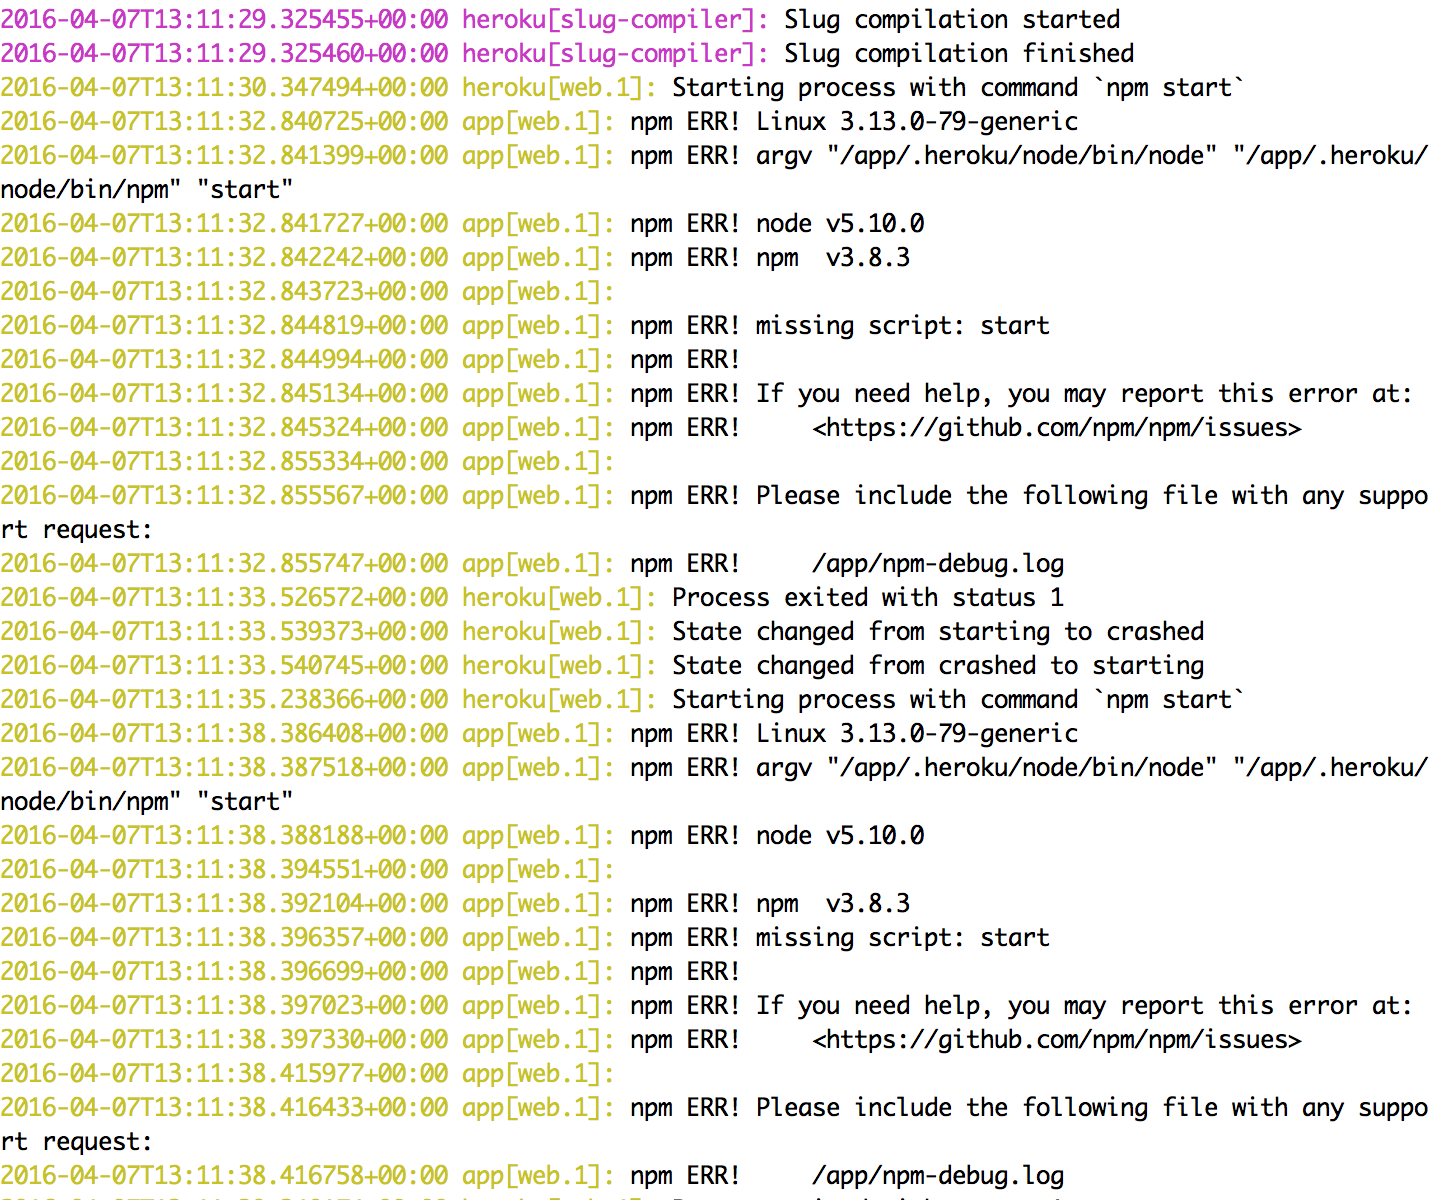
In your console, run heroku logs, and see what you can find. You should see something like the below:
What do all of these NPM errors mean??
Think/Pair/Share (10 mins)
Do a couple minutes of research on stack overflow (or elsewhere) on your own. Then pair up and discuss what might be the issue.
Hint: try to google one line at a time
Procfiles (10 mins)
Notice the error in the log:
npm ERR! missing script: start
Looking into our package.json (more info), you should see something like the following:
{
  "name": "whenpresident",
  "version": "1.0.0",
  "description": "",
  "main": "index.js",
  "scripts": {
    "test": "echo \"Error: no test specified\" && exit 1"
  }
Heroku runs through this file and tries to find a start script, which as we can see, does not exist here.
A Procfile is a text file that explicitly defines the commands that Heroku should run while starting your application. Heroku will automatically look into your package.json file, and run whatever start command is in the scripts object.
Instead of editing that file, we create a new file called Procfile in the root of our directory. Heroku will find this, and run what we specify. Specifically, we want Heroku to run our index.js file to set up the express application. Therefore, we input web: node index.js.
web is important here! It specifices to Heroku to receive web traffic and provide the proper HTTP routing based on what is defined in the index.js file.
You Do: Catch up (5 mins)
Go ahead and add in the Procfile with the correct line of code to the root of your directory.
add, commit, and git push heroku deploy_starter:master again, and open the app in the browser. What do you see now?
T/P/S (10 mins)
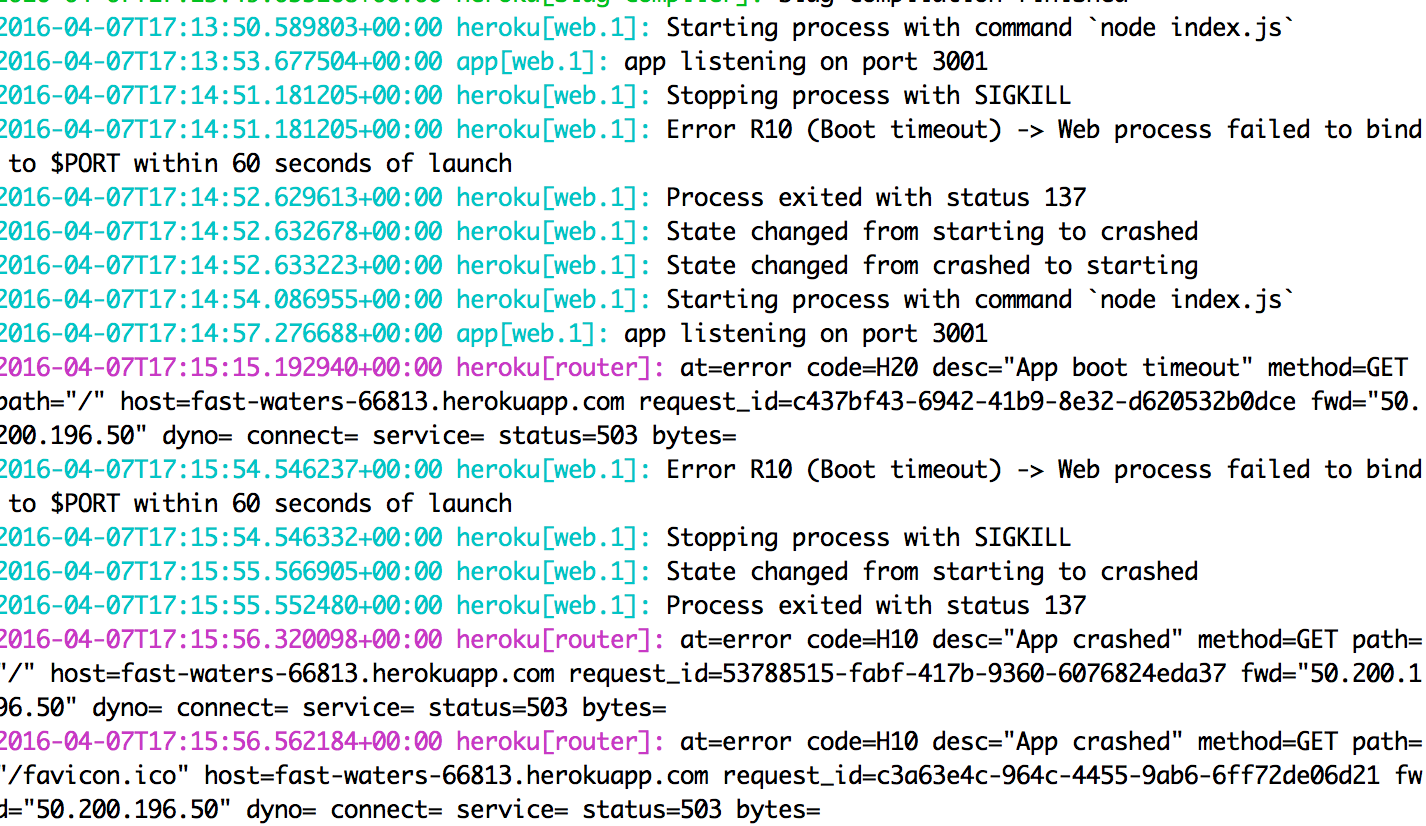
Looks like another error!
Do a couple more minutes of research on this error log. Then pair up and discuss what might be the issue.
Break (10/55)
Setting the Server (10 mins)
Take a look at the bottom of the index.js file:
app.listen(3001, function() {
  console.log("app listening on port 3001")
})
We need specify to Heroku not to use our our local server, and connect to http://localhost:3001/. In Rails, the default local server is http://localhost:3000/, but we never need to specify that, and Heroku understands to switch to its own server once we push up. With this app, we specify what server we want to run, and we therefore need to take that further and specify what server we want run and when.
To do this, we are going to set the port to work through either local or production:
// on line 8 add..
app.set("port", process.env.PORT || 3001);
We can then change edit the file futher so that our app knows to listen on the proper port:
app.listen(app.get("port"), function(){
  console.log("It's aliiive!");
});
You Do: Commit Again! (15 mins)
Success! Your app should be up and running.. Or is it?
Try the following:
- run heroku open and then heroku logs immediately after
- what do you see?
- Try adding a new candidate
- what happens?
T/P/S (10 mins)
Take 5 minutes to think and do some research on this
Heroku Addons (10 mins)
Heroku provides useful tools called addons that one can install to make your deployed app must easier.
These are similar in a sense to Rails gems, or npm modules, except they reside only in your deployed application.
There are addons for optimizing your database, monitoring the performance of your app, saving errors from your app like heroku logs, and much more.
Installing many of them can be simple, as we are about to prove! The most recent issue with our app is due to the fact that we have not told Heroku what database to use.
MongoLab
MongoLab is a cloud database service that easily connects your Heroku app to a protected MongoDB. There are two ways to add MongoLab to our app:
- Through the addon catalog
- By simply running a heroku command in the command line
heroku addons:create mongolab
Let's use the second option, and once done, run heroku config and check to make sure you have a new ENV variable. A little more info
If you head to your heroku.com dashboard and check the app, you will see that MongoLab has been added!
Alternative: MongoLab Deployment Sans Heroku Addons
-
Go to www.mongolab.com and sign up / sign in
-
Create a new "Single Node" database with the "Sandbox" tier
-
Click on the database
-
Click "Users"
-
Create a new user. (This is not the user with which you logged in to Mongolab.) "User" in this context really means "an app that has access to your database". There's no need for security now; I used the username "test" with a password of "testerson".
-
Copy the "To connect using a driver" URL from the top of the Users page.
-
Set the URL as an environment variable called MONGOLAB_URL using
heroku config:setas below, filling in the username and password you just created on the "Users" page. For example:$ heroku config:set MONGOLAB_URL=mongodb://test:testerson@ds015760.mlab.com:15760/yourappname -
$ heroku run node db/seed.js -
$ heroku open
What Now?
Once we've added MongoLab, we only have one step left for a fully functioning app! We still need to let our app know when to use MongoLab as our database, and when to use our local DB.
In the connection.js file, we add the following:
if(process.env.NODE_ENV == "production"){
  mongoose.connect(process.env.MONGOLAB_URL);
}else{
  mongoose.connect("mongodb://localhost/whenpresident");
}
Node provides a built-in environment variable, NODE_ENV. When a node app is deployed, the ENV variable is set as "production". Therefore, the above is simply stating that we should use the MongoLab URI (in other words, the link that connects us to the MongoLab database) when in production, and the local db all other times.
Break (10/110)
Digital Ocean (40 mins)
Digital Ocean has its benefits over Heroku:
- Quick set-up. Can set up a new Virtual Private Server (VPS) in 60 seconds.
- Very fast. Their VPS's run on solid state drives.
- Cheaper. (when necessary) In a sense. You're paying for convenience and reliability.
You do: Create a Digital Ocean account (15 mins)
Digital Ocean only offers paid accounts, but they charge fractions of a cent per hour your server is running.
- Create Account.
- Feel free to delete your droplet/account after this class.
- If you prefer not to create an account at all, sit with a partner and run through the exercise together
Create a Droplet
A "droplet" is simply a virtual private server (VPS) in Digital-Ocean-speak.
Once you have set up a Digital Ocean account, click the "Create Droplet" button in the upper-right corner of your dashboard. Once there, do the following...
- Name your droplet. This can be anything.
- Select Size. The $5 option works fine in this case.
- Select region. We'll go with the default option of New York 3.
- Select Image. Choose Ubuntu 14.04 x64.
- Add SSH Key. Generate one by running this in your Terminal:
$ cat ~/.ssh/id_rsa.pub | pbcopy
- This automatically copies your SSH key to your clipboard.
- Provides increased security and easy log-in from your computer.
Log into Droplet
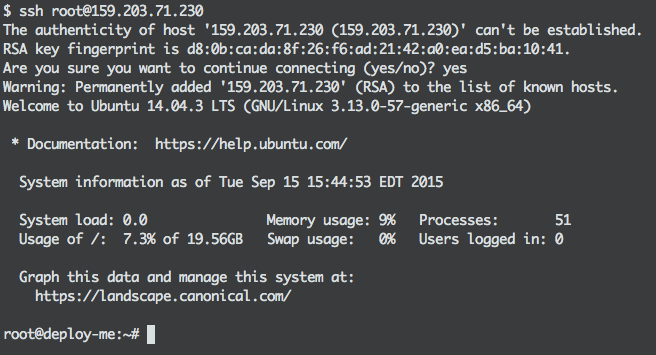
Once your server is up and running, let's log into it via the Terminal: $ ssh root@your-droplets-ip
- We'll be logging in as the
rootuser. - Your droplet's IP address is available on the droplet dashboard.
- You might be prompted for a new password. Keep it simple for this example.
Install Node, Npm and Git
Because we're running an Express application and need to clone it from a GitHub repo, we need to install Node, Npm and Git.
sudo apt-get update
sudo apt-get install nodejs npm git
sudo ln -s /usr/bin/nodejs /usr/bin/node
apt-getis Ubuntu's package management program, not unlike npm for Node and gem for Ruby.
sudo apt-get updatedownloads package lists from their source repositories and downloads the latest version. Essentially,bundle updatefor Ubuntu. It's good practice to do this before adding new dependencies viaapt-get.
That last line aliases
nodefrom the existingnodejsso we can later run commands likenode app.js.
- You won't see any output after running this line of code.
lncreates links between files.
You can verify if Node and Git were properly installed by typing $ which git or $ which node into the server console.
- You should see something like this:
/usr/bin/node
Install MongoDB
We also need to set up a Mongo database for our application.
sudo apt-get install mongodb
STOP
Install a web server
- Today we'll be using one called nginx.
What is nginx?
A fast web server with low memory usage.
- Key feature is that it can also act as a reverse proxy server. More on that later.
- Apache is a popular alternative.
- We can install nginx like so...
sudo apt-get install nginx
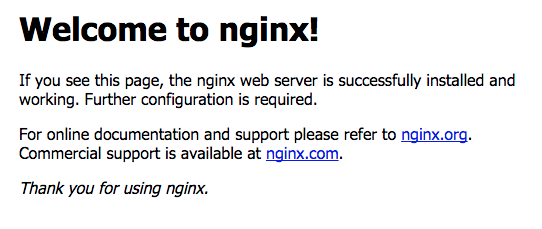
You'll know nginx is up and running it you visit your server's IP address (e.g., http://INSERT.IP.ADDRESS) in the browser. You should see something like this...
nginx is ready! Now we need our application to tell it what exactly to do with those HTTP requests...
You do: Clone the app to VPS (10 mins)
Typically you would create a user account to handle deploys and permissions. Why is that?
- If you're logged in as root, that means every application is running with root privileges. Any security vulnerability in one of those applications could allow for unwanted access everywhere, whether that be by a third party or accidental deletion of files.
- If we're logged in as a user that is given superuser privileges, we need to explicitly say (e.g.,
sudo) when we want to run an administrative task that requires root privileges.
In the interest of time, however, we'll continue using the root user.
mkdir /var/www
cd /var/www
git clone https://github.com/ga-wdi-exercises/whenpresident.git
/var/wwwis going to be the base directory for all applications in this server.
cd whenpresident
git checkout deploy_starter
npm install
node db/seed.js
node index.js
Note: if you get an error here, follow the steps in this link
Then, type in node -v
If another error shows up saying -bash: no such file or directory, run the following ln -sf /usr/local/bin/node /usr/bin/node
Visit http://YOUR.IP.ADDRESS:3001/
It works!
STOP
Set up Domain
Ultimately, we don't want to access our application by typing its IP address into our browser. Instead, we'd like to use a custom domain. Let's see how that would work...
Enter the following into your local terminal, not your droplet! $ sudo vim /etc/hosts
- Enter whatever password you use to log into your computer.
Once in that file, enter the following line below the one that reads: 127.0.0.1 localhost
your-droplet-ip-address whenpresident.com
What do you see when you visit http://whenpresident.com:3001 in the browser?
- WOAH. We just aliased the
whenpresident.comURL to our droplet's IP address. - We already do the same thing with
localhostandhttp://127.0.0.1. - We're going to make a similar adjustment to our server next.
- You may have gotten the sense that we're "faking" a URL here. And you're right!
Configure a Reverse Proxy Server
Now we're going to use nginx to receive and direct HTTP requests (i.e., act as a "reverse proxy server").
Enter the below commands in your droplet console...
cd /etc/nginx/sites-enabled/
sudo vim whenpresident.com
Each file in this
sites-enableddirectory is a "virtual host" that represents an application hosted on our server. We don't actually host whenpresident.com, but because we set up a local proxy server we can pretend we do!
Enter the following in our new file, or "virtual host"...
Make sure to actually remove the comments below first! Those are there for your knowledge.
server{
  server_name whenpresident.com;
  listen 80;
  root /var/www/whenpresident/public;
  location / {
    // First checks to see if the requested file exists in the assigned root directory.
    // If not, then asks the app if it's storing it elsewhere.
    try_files $uri @whenpresident;
  }
  location @whenpresident {
    // Allows us to log incoming requests to our application.
    proxy_set_header X-Real-IP $remote_addr;
    proxy_set_header X-Forwarded-For $remote_addr;
    proxy_set_header Host $host;
    proxy_pass http://127.0.0.1:3000;
  }
}
Now, restart nginx. What do you see?
service nginx restart
node /var/www/whenpresident
Hm, a "bad gateway" error...
- This just means are app isn't running.
- We could fix this by going back and running
node index.js. Or we could make it so our app runs..."forever."
npm install -g forever
cd /path/to/app
forever start index.js
Forever is an npm module that allows a node script to run continuously. Learn more about it here.
Ta-da! All done!


