Android屏幕适配方案,直接填写设计图上的像素尺寸即可完成适配。
非常感谢 : 吃土豆的人 的协作。
讨论群:99913714
最大幅度解决适配问题,并且最大化方便开发者。
so,看下用法:
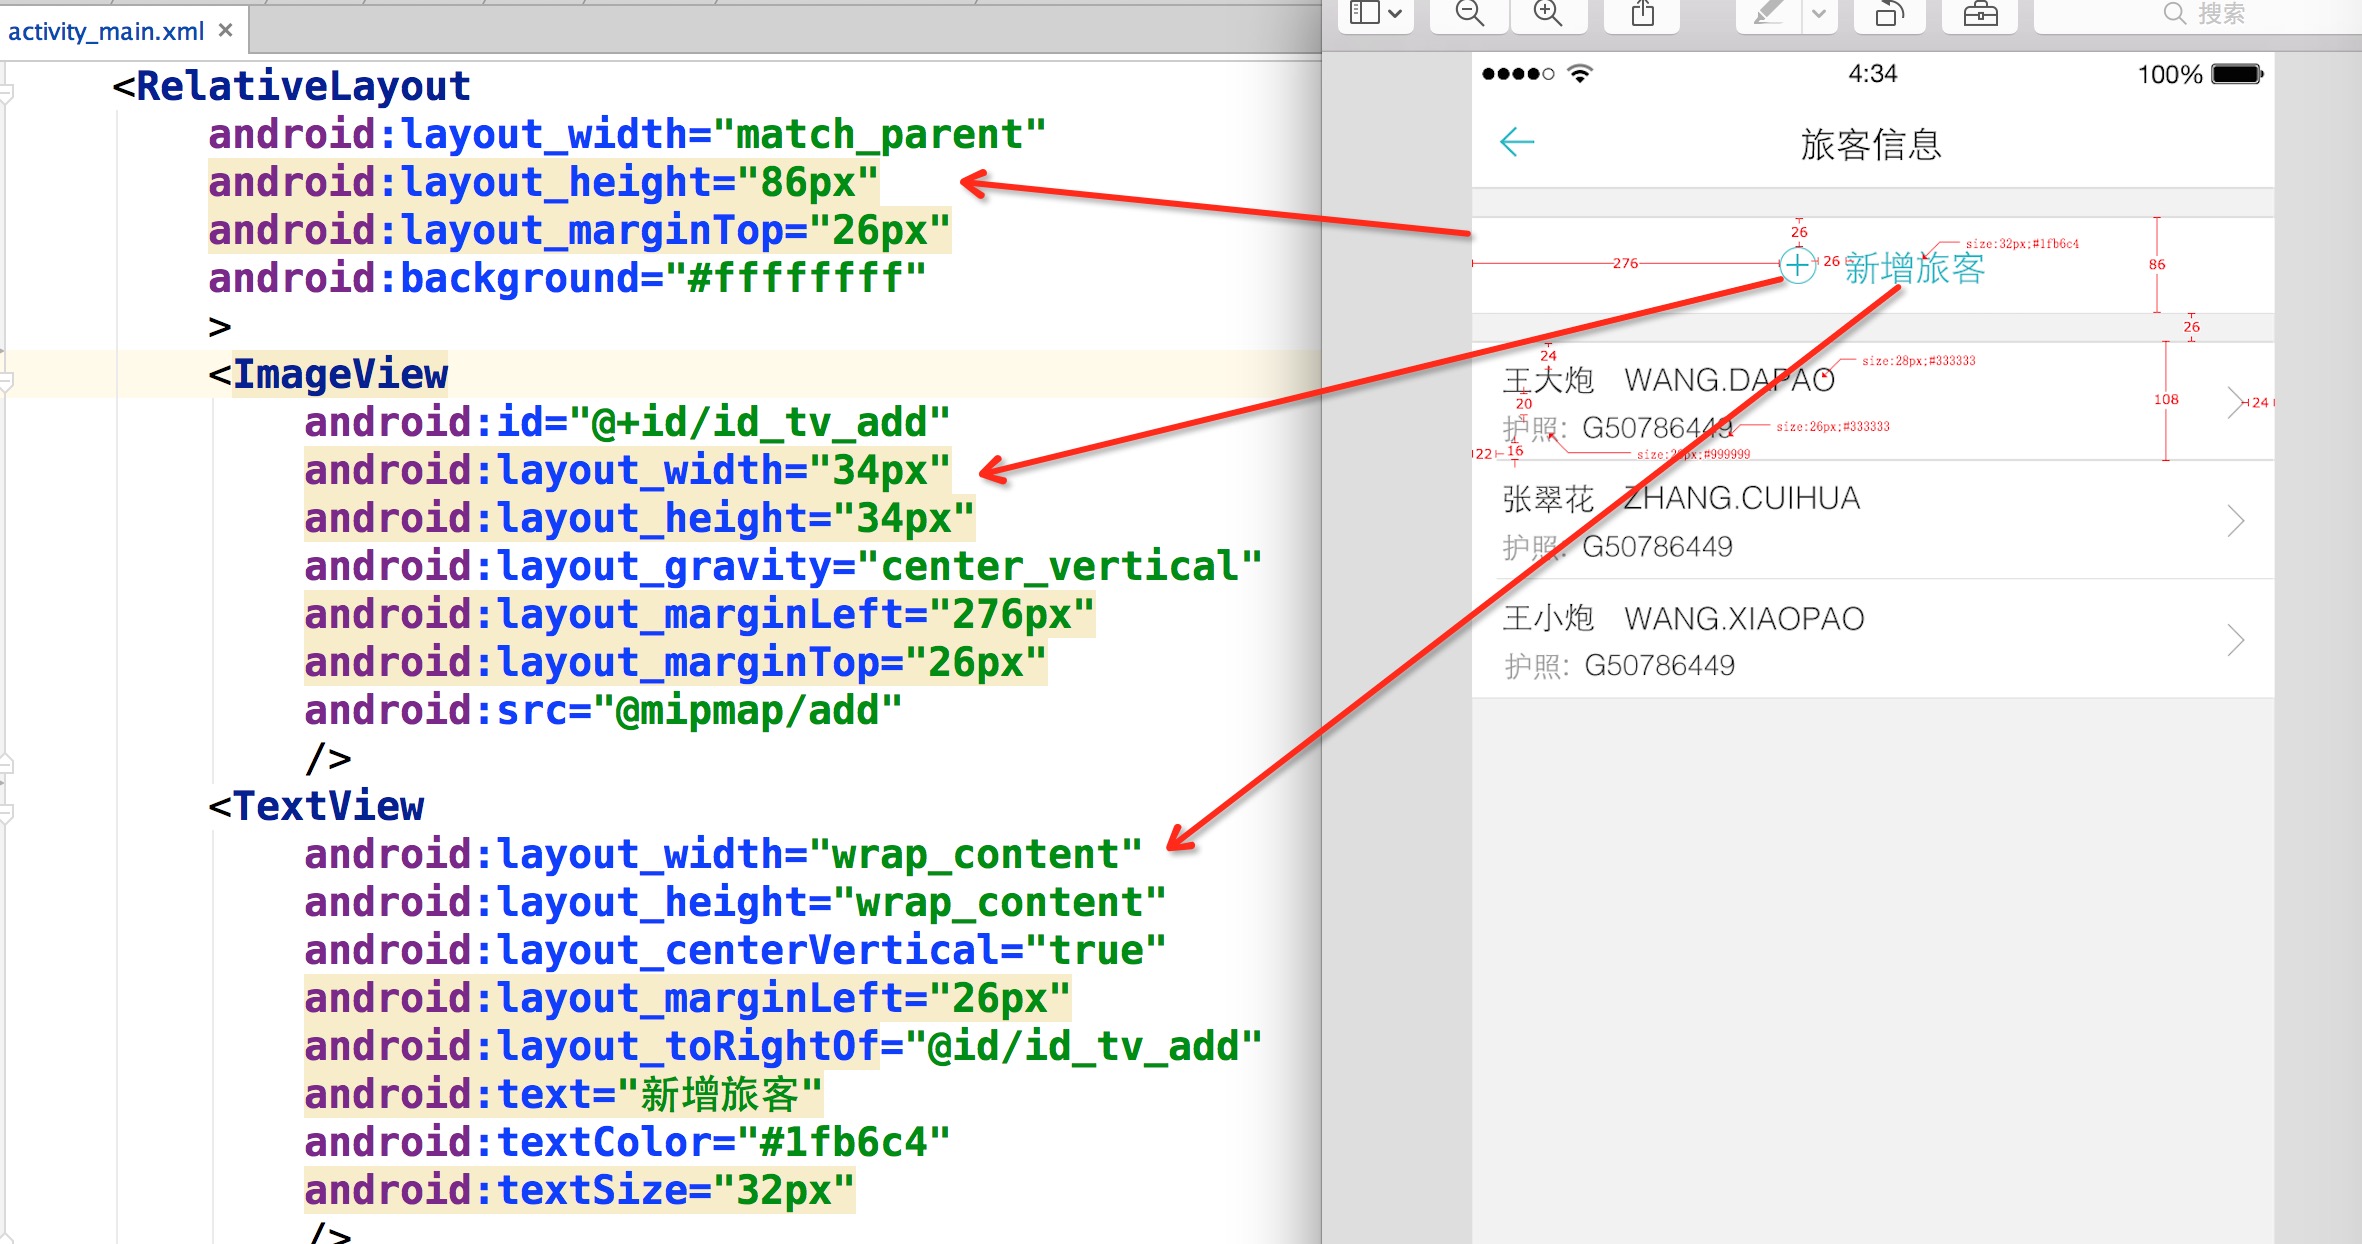
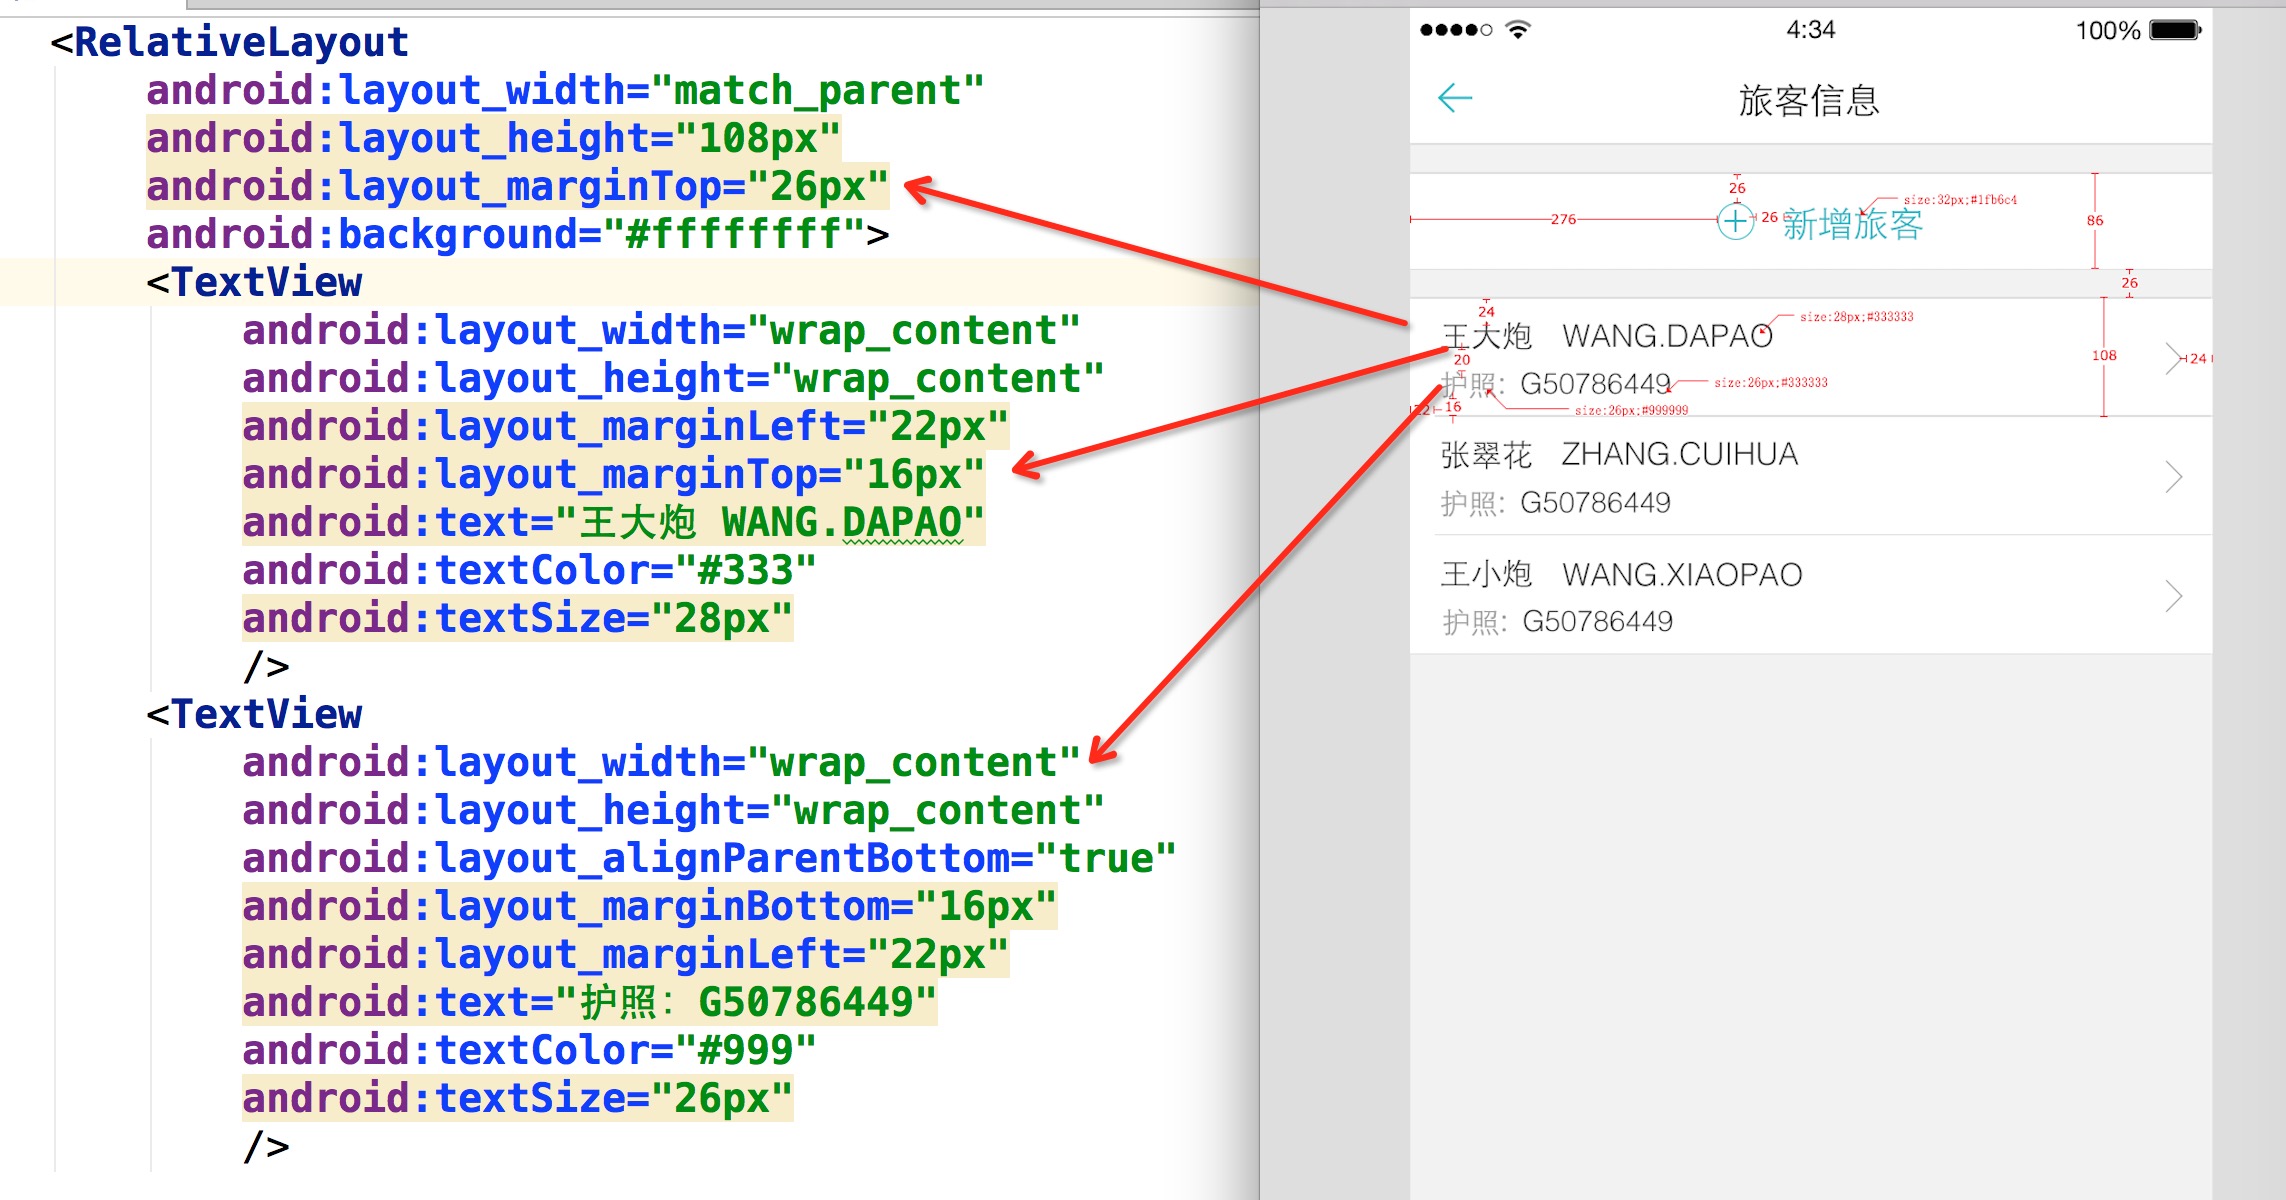
你没有看错,拿到设计稿,在布局文件里面直接填写对应的px即可,px:这里的px并非是Google不建议使用的px,在内部会进行转化处理。
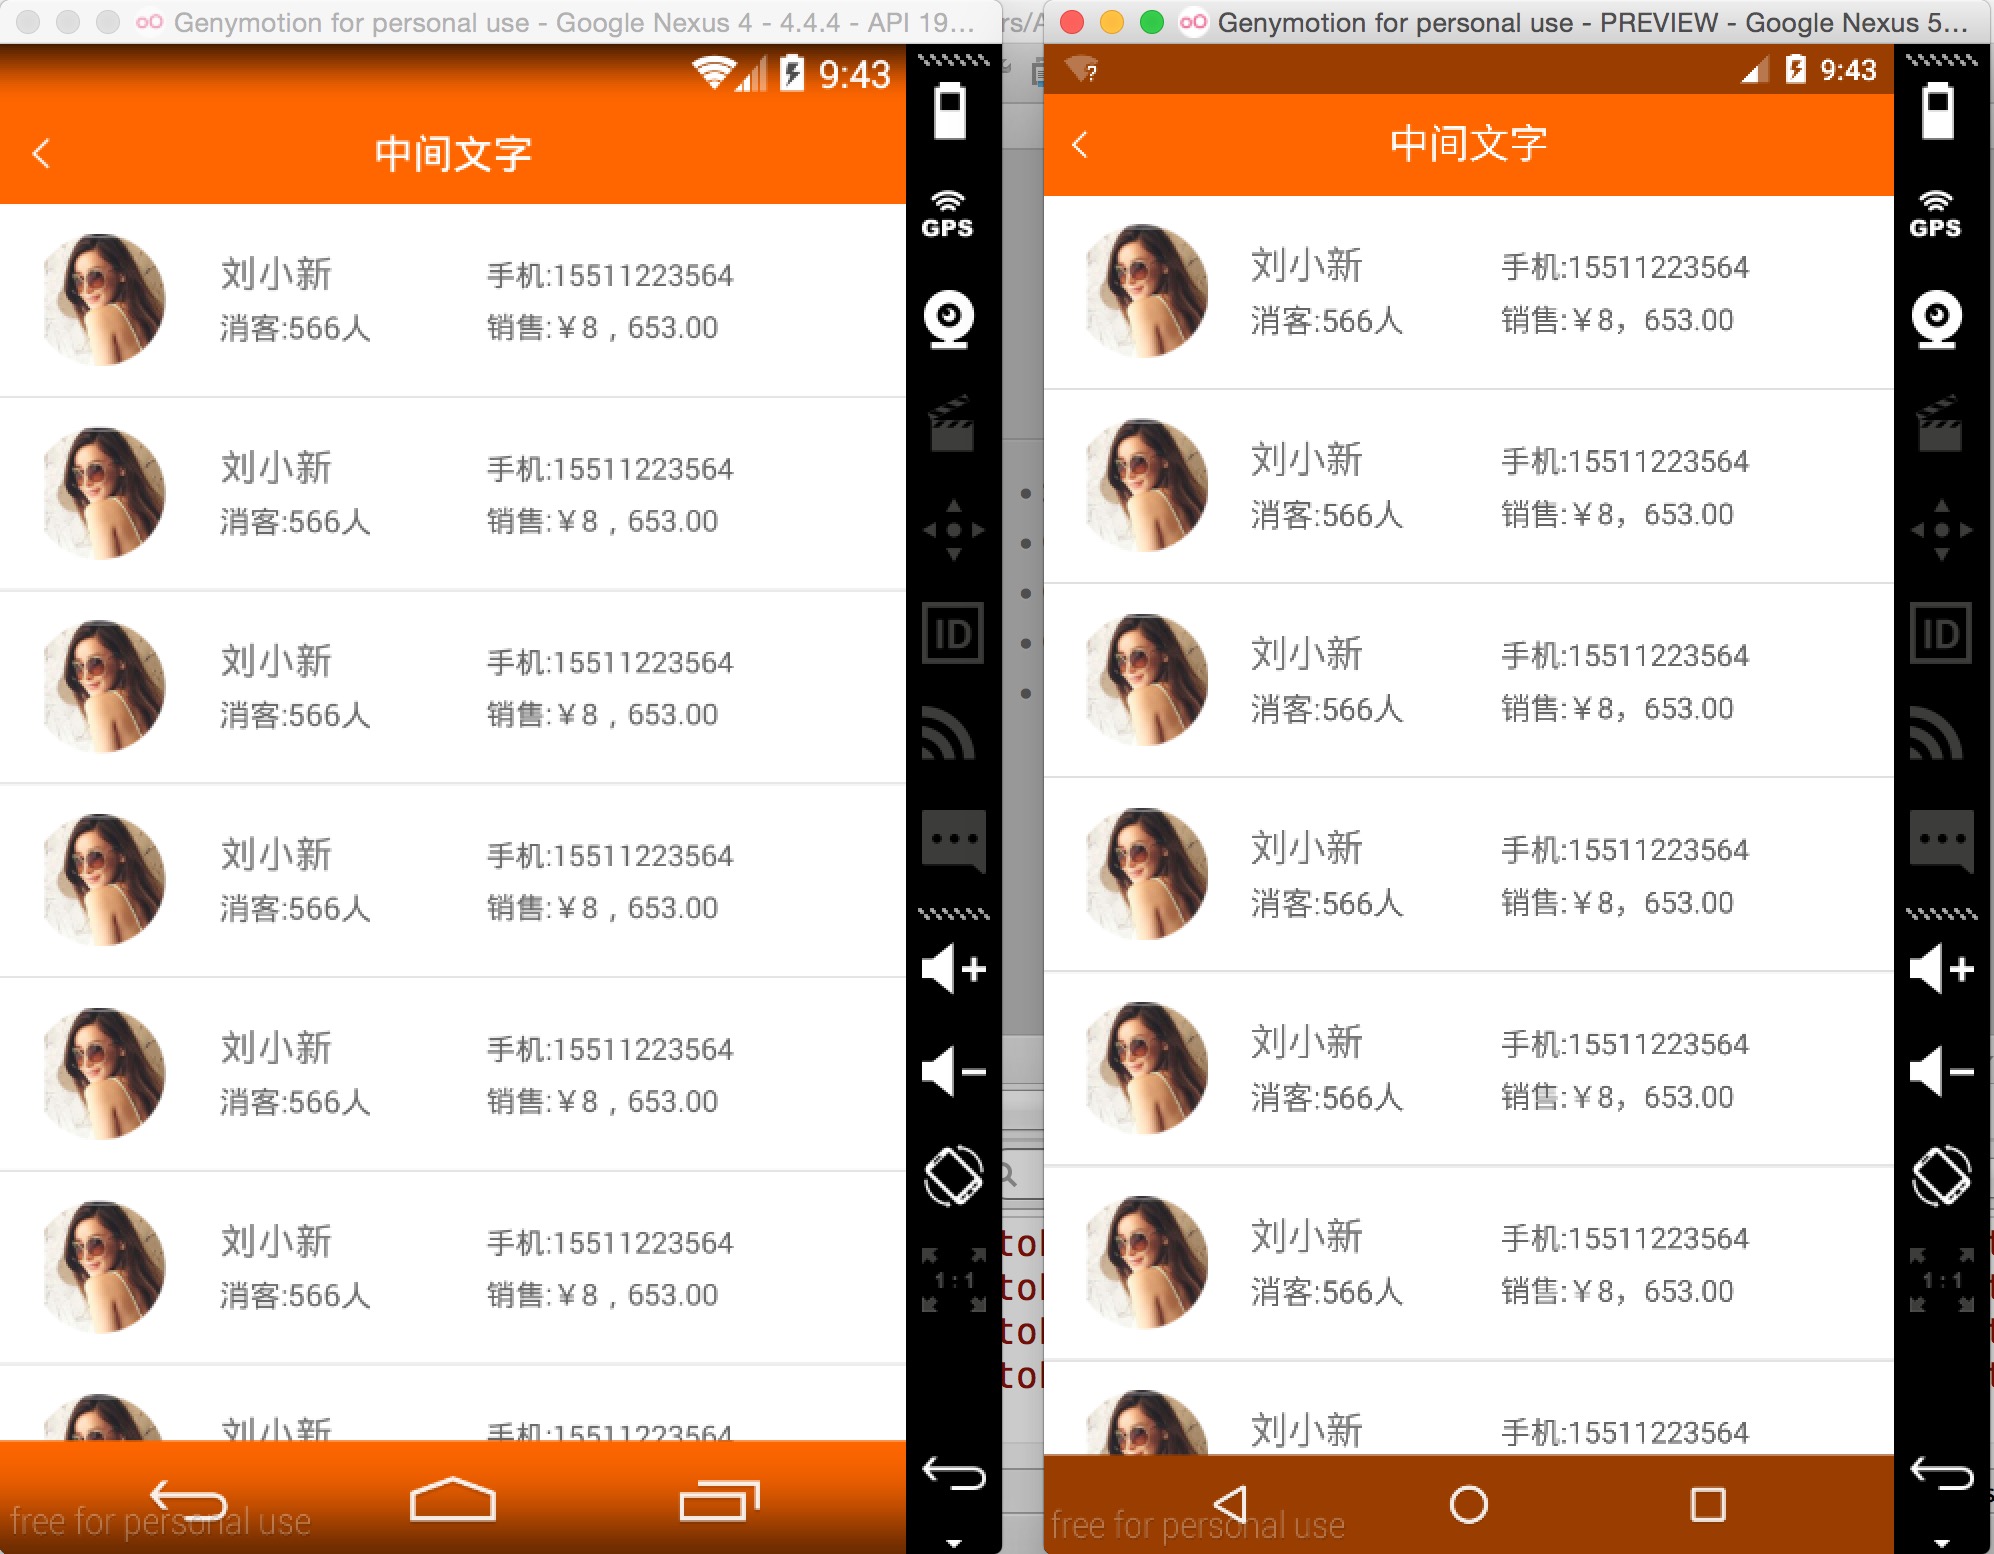
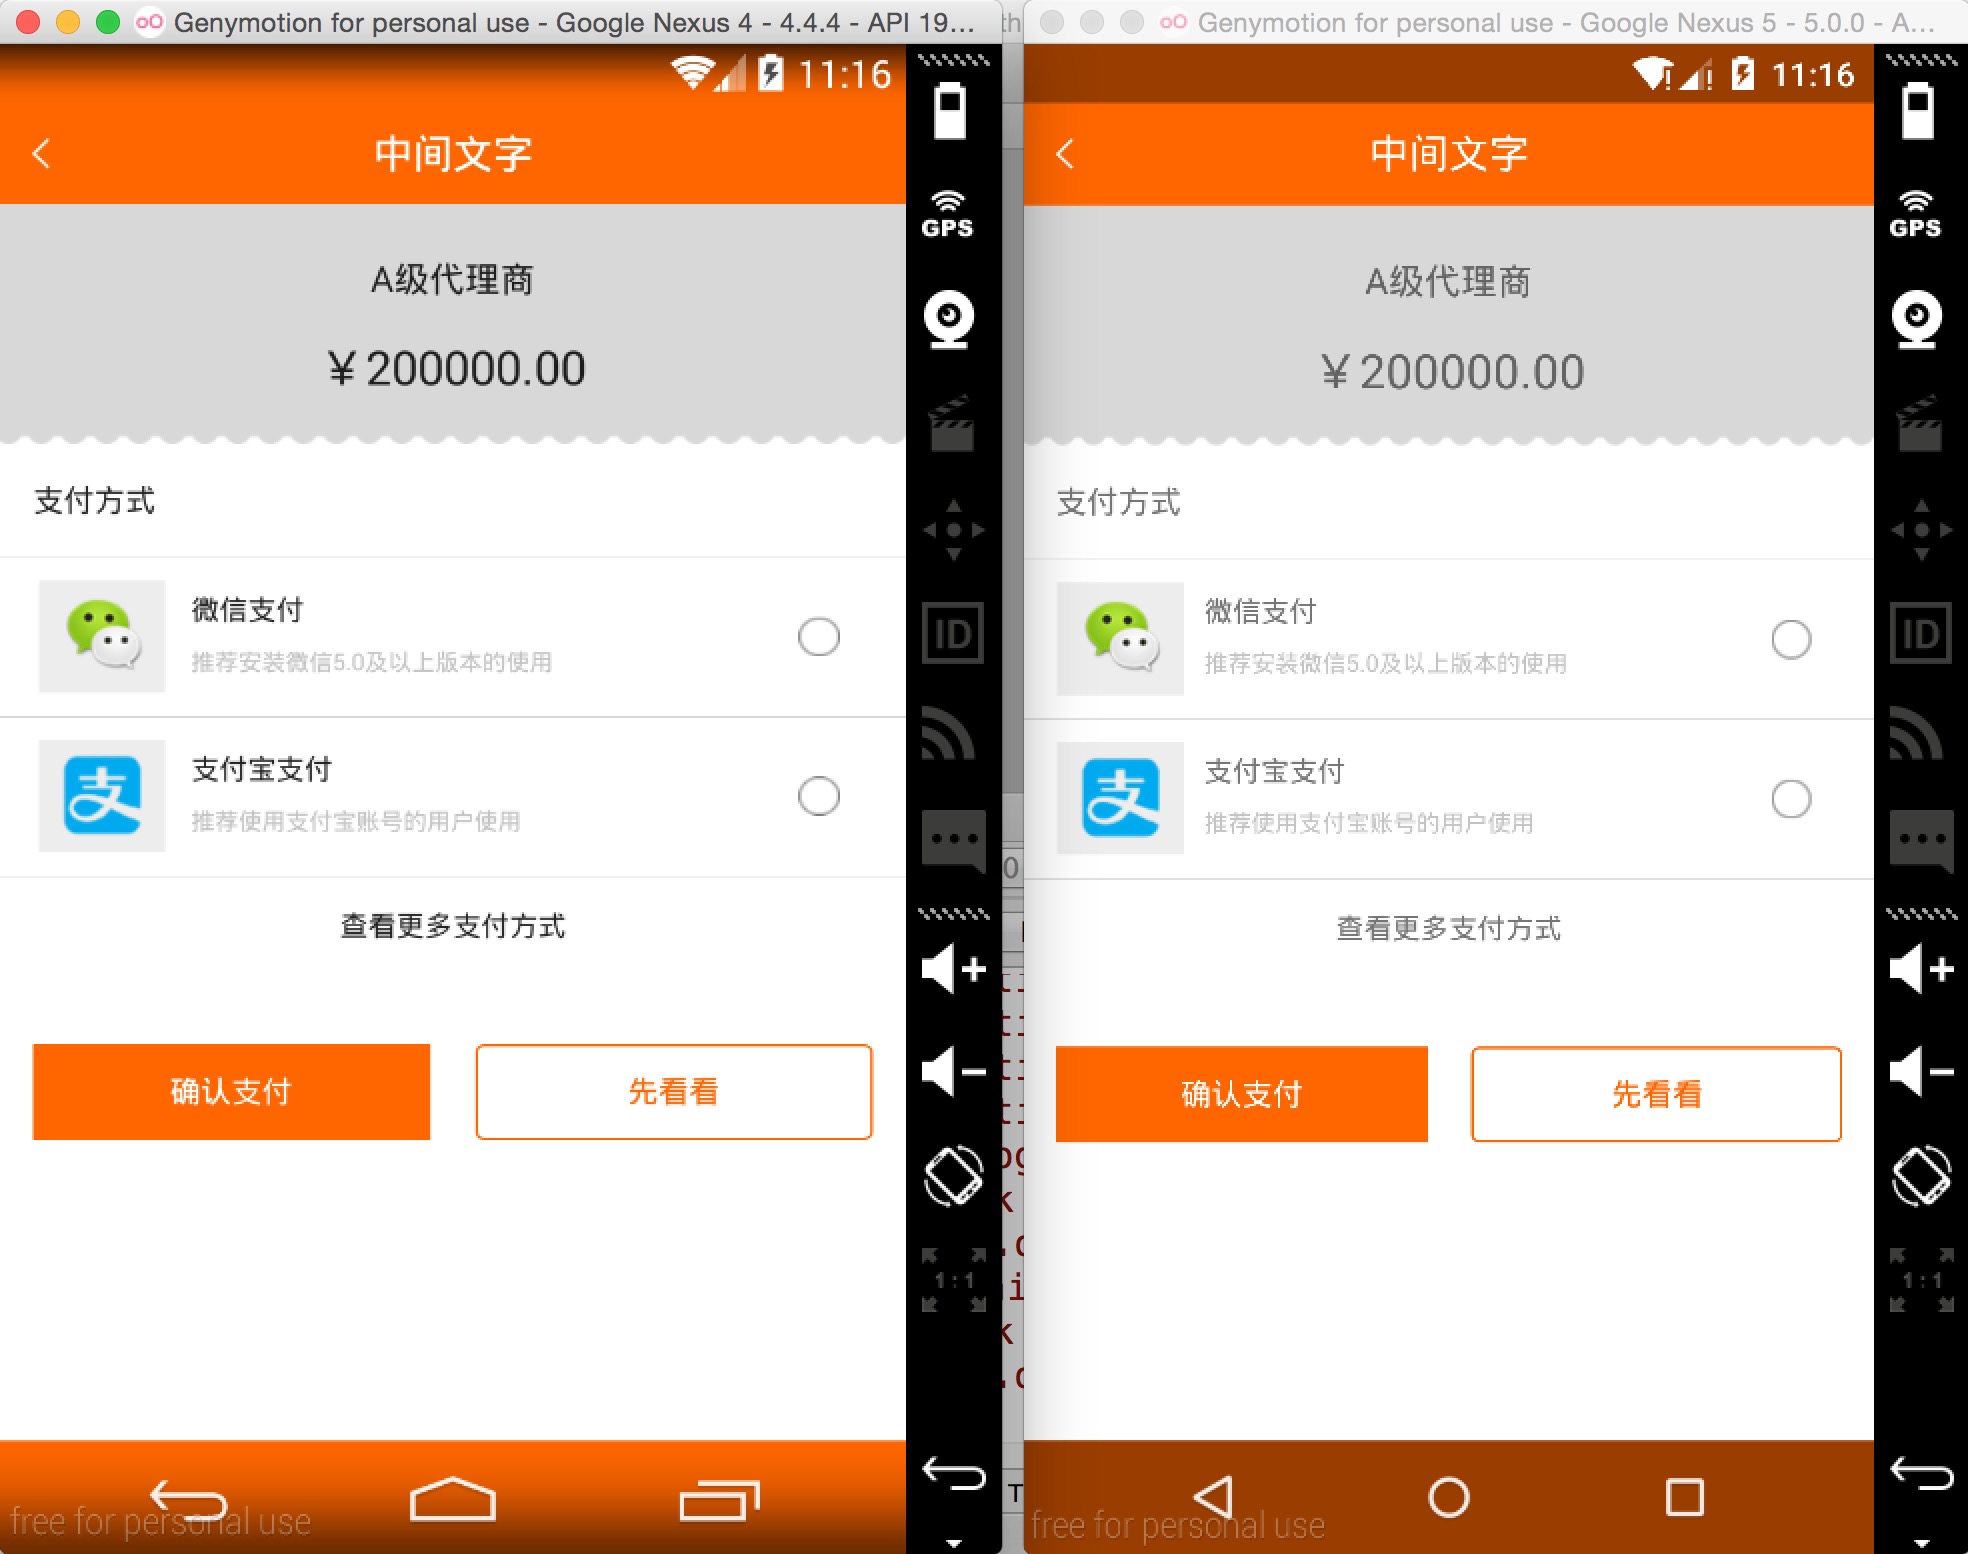
ok,拿一些实际项目的页面,看下不同分辨率下的效果:
左为:768 * 1280 ; 右为:1080 * 1920
上述两个机器的分辨率差距挺大了,但是完美实现了适配,最为重要的是:
- 再也不用拿着设计稿去想这控件的宽高到底取多少dp
- 再也不用去为多个屏幕去写多个dimens
- 再也不用去计算百分比了(如果使用百分比控件完成适配)
- 再也不用去跟UI MM去解释什么是dp了
你所要做的就是抄抄设计稿上面的px,直接写入布局文件。
还有很多好处,比如上面的Item里面元素比较多,如果标识的比较全面,一个FrameLayout,里面的View填写各种marginLeft,marginTop就能完美实现,几乎不需要嵌套了。
- Android Studio
将autolayout引入
dependencies {
    compile project(':autolayout')
}
也可以直接
dependencies {
    compile 'com.zhy:autolayout:1.4.3'
}
- Eclipse
建议使用As,方便版本更新。实在不行,只有复制粘贴源码了。
在你的项目的AndroidManifest中注明你的设计稿的尺寸。
<meta-data android:name="design_width" android:value="768">
</meta-data>
<meta-data android:name="design_height" android:value="1280">
</meta-data>
让你的Activity继承自AutoLayoutActivity.
非常简单的两个步骤,你就可以开始愉快的编写布局了,详细可以参考sample。
如果你不希望继承AutoLayoutActivity,可以在编写布局文件时,将
- LinearLayout -> AutoLinearLayout
- RelativeLayout -> AutoRelativeLayout
- FrameLayout -> AutoFrameLayout
这样也可以完成适配。
- layout_width
- layout_height
- layout_margin(left,top,right,bottom)
- pading(left,top,right,bottom)
- textSize
- maxWidth, minWidth, maxHeight, minHeight
默认使用的高度是设备的可用高度,也就是不包括状态栏和底部的操作栏的,如果你希望拿设备的物理高度进行百分比化:
可以在Application的onCreate方法中进行设置:
public class UseDeviceSizeApplication extends Application
{
    @Override
    public void onCreate()
    {
        super.onCreate();
        AutoLayoutConifg.getInstance().useDeviceSize();
    }
}大家都知道,写布局文件的时候,不能实时的去预览效果,那么体验真的是非常的不好,也在很大程度上降低开发效率,所以下面教大家如何用好,用对PreView(针对该库)。
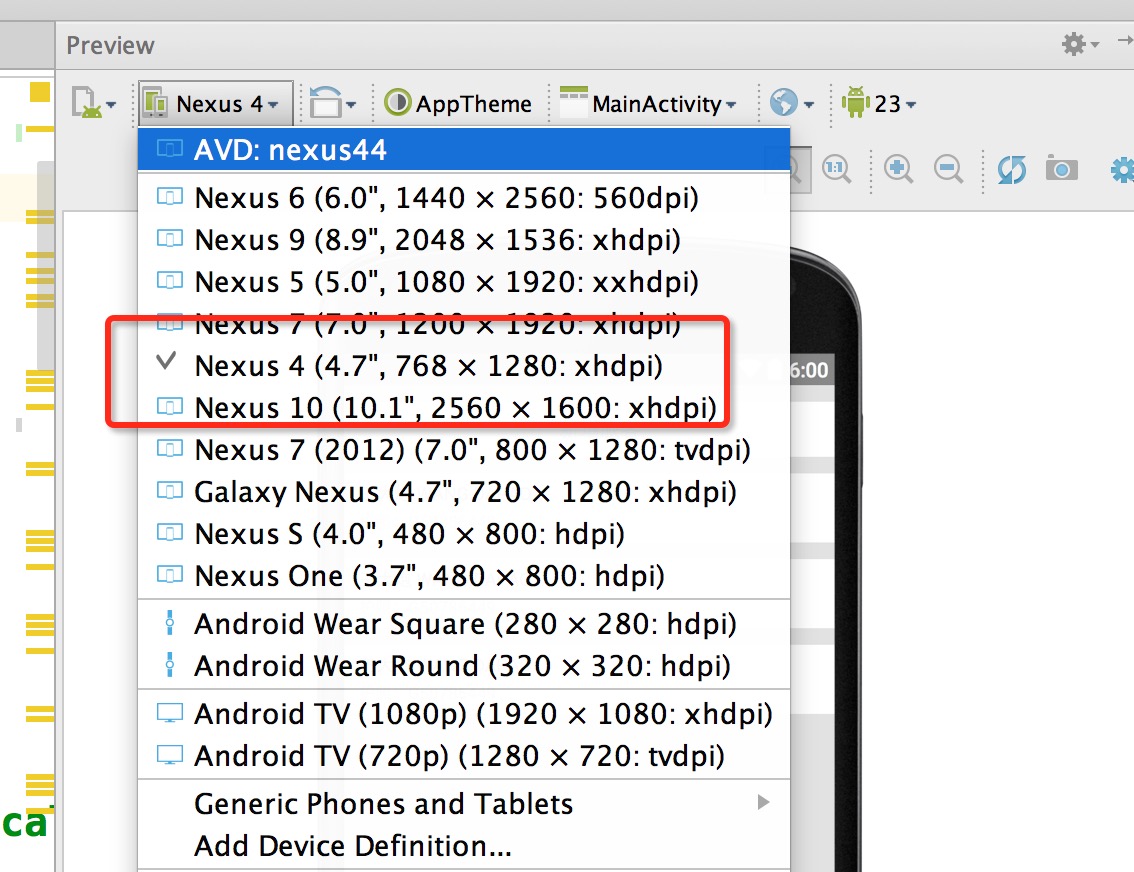
首先,你要记得你设计稿的尺寸,比如 768 * 1280
然后在你的PreView面板,选择于设计图分辨率一致的设备:
然后你就可以看到最为精确的预览了:
两个注意事项:
- 你们UI给的设计图的尺寸并非是主流的设计图,该尺寸没找到,你可以自己去新建一个设备。
- 不要在PreView中去查看所有分辨率下的显示,是看不出来适配效果的,因为有些计算是动态的。
对于其他继承系统的FrameLayout、LinearLayout、RelativeLayout的控件,比如CardView,如果希望再其内部直接支持"px"百分比化,可以自己扩展,扩展方式为下面的代码,也可参考issue#21:
package com.zhy.sample.view;

import android.content.Context;
import android.support.v7.widget.CardView;
import android.util.AttributeSet;

import com.zhy.autolayout.AutoFrameLayout;
import com.zhy.autolayout.utils.AutoLayoutHelper;

/**
 * Created by zhy on 15/12/8.
 */
public class AutoCardView extends CardView
{
    private final AutoLayoutHelper mHelper = new AutoLayoutHelper(this);

    public AutoCardView(Context context)
    {
        super(context);
    }

    public AutoCardView(Context context, AttributeSet attrs)
    {
        super(context, attrs);
    }

    public AutoCardView(Context context, AttributeSet attrs, int defStyleAttr)
    {
        super(context, attrs, defStyleAttr);
    }

    @Override
    public AutoFrameLayout.LayoutParams generateLayoutParams(AttributeSet attrs)
    {
        return new AutoFrameLayout.LayoutParams(getContext(), attrs);
    }

    @Override
    protected void onMeasure(int widthMeasureSpec, int heightMeasureSpec)
    {
        if (!isInEditMode())
        {
            mHelper.adjustChildren();
        }
        super.onMeasure(widthMeasureSpec, heightMeasureSpec);
    }


}
sample中包含ListView、RecyclerView例子,具体查看sample
- 对于ListView
对于ListView这类控件的item,默认根局部写“px”进行适配是无效的,因为外层非AutoXXXLayout,而是ListView。但是,不用怕,一行代码就可以支持了:
@Override
public View getView(int position, View convertView, ViewGroup parent)
{
    ViewHolder holder = null;
    if (convertView == null)
    {
        holder = new ViewHolder();
        convertView = LayoutInflater.from(mContext).inflate(R.layout.list_item, parent, false);
        convertView.setTag(holder);
        //对于listview,注意添加这一行,即可在item上使用高度
        AutoUtils.autoSize(convertView);
    } else
    {
        holder = (ViewHolder) convertView.getTag();
    }

    return convertView;
}
注意 AutoUtils.autoSize(convertView);这行代码的位置即可。demo中也有相关实例。
- 对于RecyclerView
public ViewHolder(View itemView)
{
      super(itemView);
      AutoUtils.autoSize(itemView);
}

//...
@Override
public ViewHolder onCreateViewHolder(ViewGroup parent, int viewType)
{
     View convertView = LayoutInflater.from(mContext).inflate(R.layout.recyclerview_item, parent, false);
     return new ViewHolder(convertView);
}一定要记得LayoutInflater.from(mContext).inflate使用三个参数的方法!
由于该库的特点,布局文件中宽高上的1px是不相等的,于是如果需要宽高保持一致的情况,布局中使用属性:
app:layout_auto_basewidth="height",代表height上编写的像素值参考宽度。
app:layout_auto_baseheight="width",代表width上编写的像素值参考高度。
如果需要指定多个值参考宽度即:
app:layout_auto_basewidth="height|padding"
用|隔开,类似gravity的用法,取值为:
- width,height
- margin,marginLeft,marginTop,marginRight,marginBottom
- padding,paddingLeft,paddingTop,paddingRight,paddingBottom
- textSize.
设计稿一般只会标识一个字体的大小,比如你设置textSize="20px",实际上TextView所占据的高度肯定大于20px,字的上下都会有一定的间隙,所以一定要灵活去写字体的高度,比如对于text上下的margin可以选择尽可能小一点。或者选择别的约束条件去定位(比如上例,选择了marginBottom)
###(1)导入后出现org/gradle/api/publication/maven/internal/DefaultMavenFactory
最简单的方式,通过compile 'com.zhy:autolayout:x.x.x'进行依赖使用,如果一定要以module引用,参考该issue#74
###(2)RadioGroup,Toolbar等控件中的子View无法完成适配
这个其实上文已经提到过了,需要自己扩展。不过这个很多使用者贡献了他们的扩展类可以直接使用,
参考autolayout-widget,
如果没有发现你需要的容器类,那么你就真的需要自行扩展了,当然如果你完成了扩展,可以给我发个PR,或者让我知道,我可以加入到
autolayout-widget中方便他人,ps:需要用到哪个copy就好了,不要直接引用autolayout-widget,因为其引用了大量的库,可能很多
库你是用不到的。
作者信息:
- hongyangAndroid
- 吃土豆的人
灵感来自:
