This is an experimental project by Phoenix ReactJS (see this event). The idea is to provide a simple app idea and shell, have multiple people implement it (wire it up to fetch data, etc), and share our different strategies for doing so.
The actual app idea (Dev Dictionary) is a collection of developer terms and definitions from the community. It's by the (React) community and for the community. Thus it's intentional and good to have definitions geared a little more toward React developers than, say, desktop app programmers. Definitions should have more of a web perspective, compared to, say, a low level C++ programmer perspective.
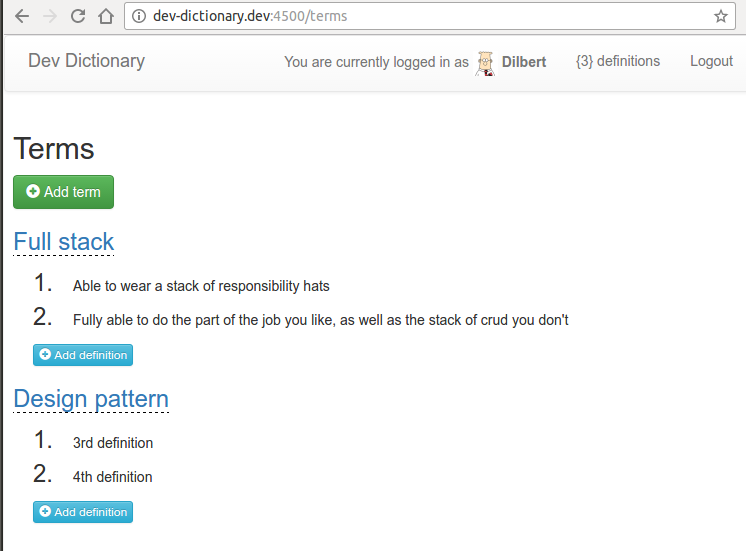
Here's a preview of the site:
Multiple people will do this take-home project. Each person will read the instructions below and follow them in their own way. When we convene, each person will have a few minutes to explain their approach, especially if they think it's unique. Unique approaches are desired, and of course you want your way to have advantages. It's ok if there are disadvantages too, as long as you can explain the context in which your approach is advantageous (e.g. better caching, better code readability, faster prototyping, etc).
Expected time: 2-8 hours
-
Fork the repo.
-
yarnto install (ornpm install) -
Start the backend API server.
$ npm run json-serverThis spins up a simple API server, using json-server. It serves the data from
data/db.json. It runs on port 4501, but you can change that inpackage.json. -
Familiarize yourself with URLs for fetching data from json-server. Read their doc. It's simple. E.g. fetching terms would use
http://localhost:4501/terms. To embed definitions, usehttp://localhost:4501/terms?_expand=definitions. -
Start the frontend dev server.
$ PORT=4500 npm startThis runs the dev server which was originally created from create-react-app. The above command will run it on 4500, but if you don't specify the port, it'll default to 3000.
-
Visit the site at http://localhost:4500.
-
Login by clicking Login. I put Dilbert characters in at first to keep it easy. There's no true authentication. It stores the user in React context, as well as
localStorageso that it remembers when your browser is refreshed. You'll need the user ID when POSTing a term to the server. -
Note the
package.jsonhas aproxysection, redirecting to 4501. This is read by json-server, and so fetching from the dev server will forward to API server. Thus, when you fetch, you can just use absolute paths (such as/terms) without specifying the host and port.
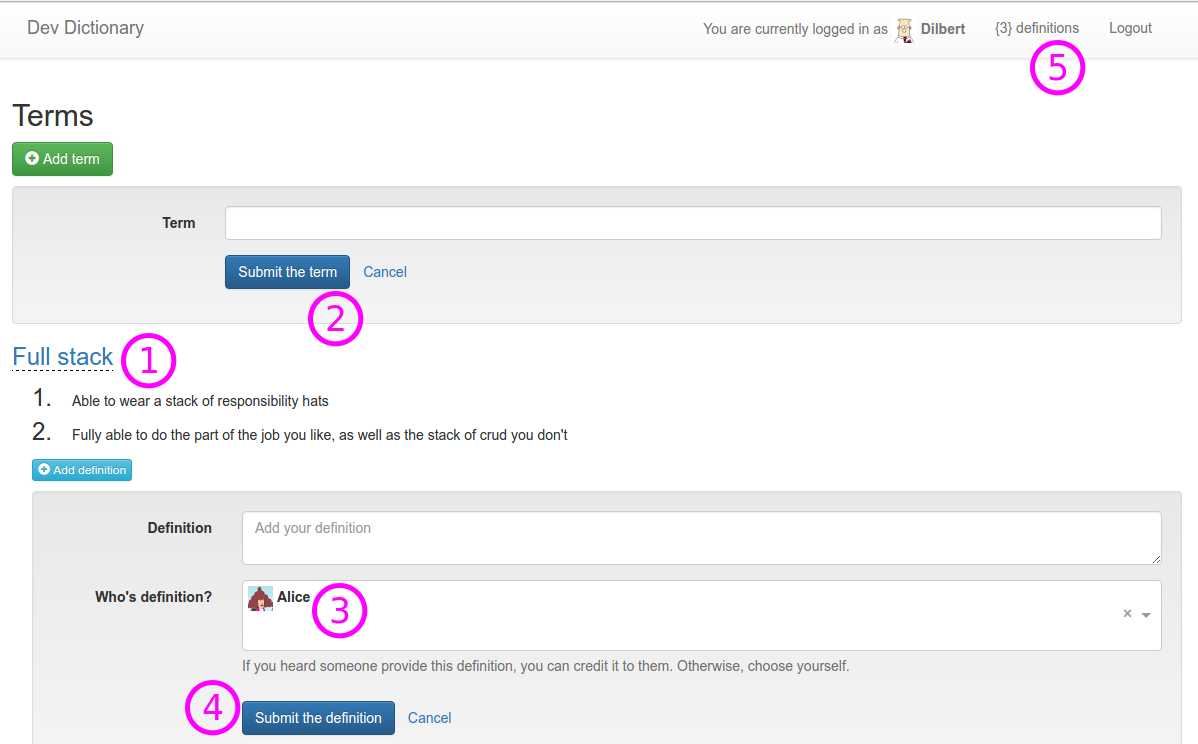
Note the numbers in the following screenshot.
Here are the pieces you need to wire up. "Wire up" here means fetch the data and connect it to the components to display it.
-
Fetch terms and definitions. See
Dictionarycomponent. -
Post new terms. See
AddTermcomponent.When a term is posted, be sure to include the
userIdin the data, so the term is attributed to the logged in user. -
Fetch user list. See
AddDefinitioncomponent. -
Post new definitions. See
AddDefinitioncomponent. In the data sent to the server, be sure to include the selected user from #3. -
Fetch count of definitions attributed to current user. See
Navigationcomponent.
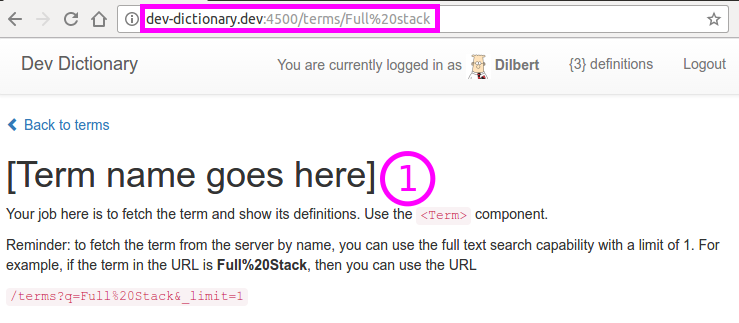
There's one more screen:
- Show the term on this page. If the user refreshes their browser, you must fetch the term from the server.
Be sure to push your changes to your public fork so you can share them with others!
This app is relatively straight-forward. However, you should consider the real-world issues. For example, what happens when a fetch or POST fails? You can't just ignore this possibility. What if the fetch takes a while? You should show the user some type of spinner. Consider how you will force errors or slow-loading during your presentation to show how you handle these scenarios.
The point of the project is for us to have a well known app idea at the start, so it's easy to compare the changes we've each made. You can make changes wherever you like, for whatever reason (such as aesthetics, etc). Just don't stray too far or you won't have common ground to teach others. For example, don't fetch data with Relay/GraphQL, as that would make the project too different from what others are doing. You could make the site look prettier, perhaps more responsive, but take care not to clutter up the files too much. If someone else looks at your code, you want them to quickly find the "wiring" changes and not too much else.
This project was bootstrapped with Create React App, which doesn't allow configuration by design. But you can provide configuration by first "ejecting" from create-react-app. Search Google for "create-react-app eject".
Please contact Tyler Collier with any feedback. Is it too easy? Too hard / taking too long?
The idea for the site came from Jess in Eric McKay's Learn Web Development meetup.
I like the light-hearted definitions too. Here are a few responses to "What does full stack mean to you?" from @samrocksc on azwebdevs slack #random on 2017-01-12:
- Full stack means not having to get your changes past the Java team (Joe Fleming)
- Full stack means your cheapass boss won't pay a proper devops person and makes you do that part too (Luis Montes)
- Full stack means adding an extra line to your resume after reading a hello world tutorial on Express. (Nick Klepinger)


