A VSCode extension for managing your Fabric tenant using the Fabric REST API and modify Fabric items directly from within VSCode.
The extensions can be installed directly from within VSCode by searching for this extension (GerhardBrueckl.fabricstudio) or downloaded from the official Visual Studio Code extension gallery at Fabric Studio and installed manually as VSIX.
- GUI to browse your workspace and artifacts - see Workspace Browser
- Custom FileSystemProvider for Fabric items (
fabric://) from VSCode- create/update/delete
- publish from VSCode to the Fabric Service
- Supports VSCode and vscode.dev alike with all features also available in the web!
- Run arbitrary REST API calls in a notebook using
%apimagic - see Notebooks - Integrate Fabric GIT APIs with VSCode GIT - see Fabric GIT Integration
- Connect to remote tenants where you are invited as a guest user - see Configuration
- Soon to come:
- GUI to manage Pipelines
- Integration of Fabric GraphQL in notebooks
The extension supports the following VSCode settings:
| Setting | Description | Example value |
|---|---|---|
fabricstudio.tenantId |
(Optional) The tenant ID of the remote tenant that you want to connect to. | A GUID, abcd1234-1234-5678-9abcd-9d1963e4b9f5 |
fabricstudio.clientId |
(Optional) A custom ClientID/Application of an AAD application to use when connecting to Fabric. | A GUID, 99887766-1234-5678-9abcd-e4b9f59d1963 |
fabricstudio.itemTypeFormats |
(Optional) A list of Fabric Item Types with an optional Format as list of objects. | [{"itemType": "Notebook", "format": "ipynb"}, {"itemType": "Report"}] |
Fabric.workspaceFilter |
(Optional) A regex to filter workspaces by name. Only workspaces matching this regex will be shown in the Fabric Workspaces view. | Project A|Sales to see only workspaces that have "Project A" or (|) "Sales" in the name |
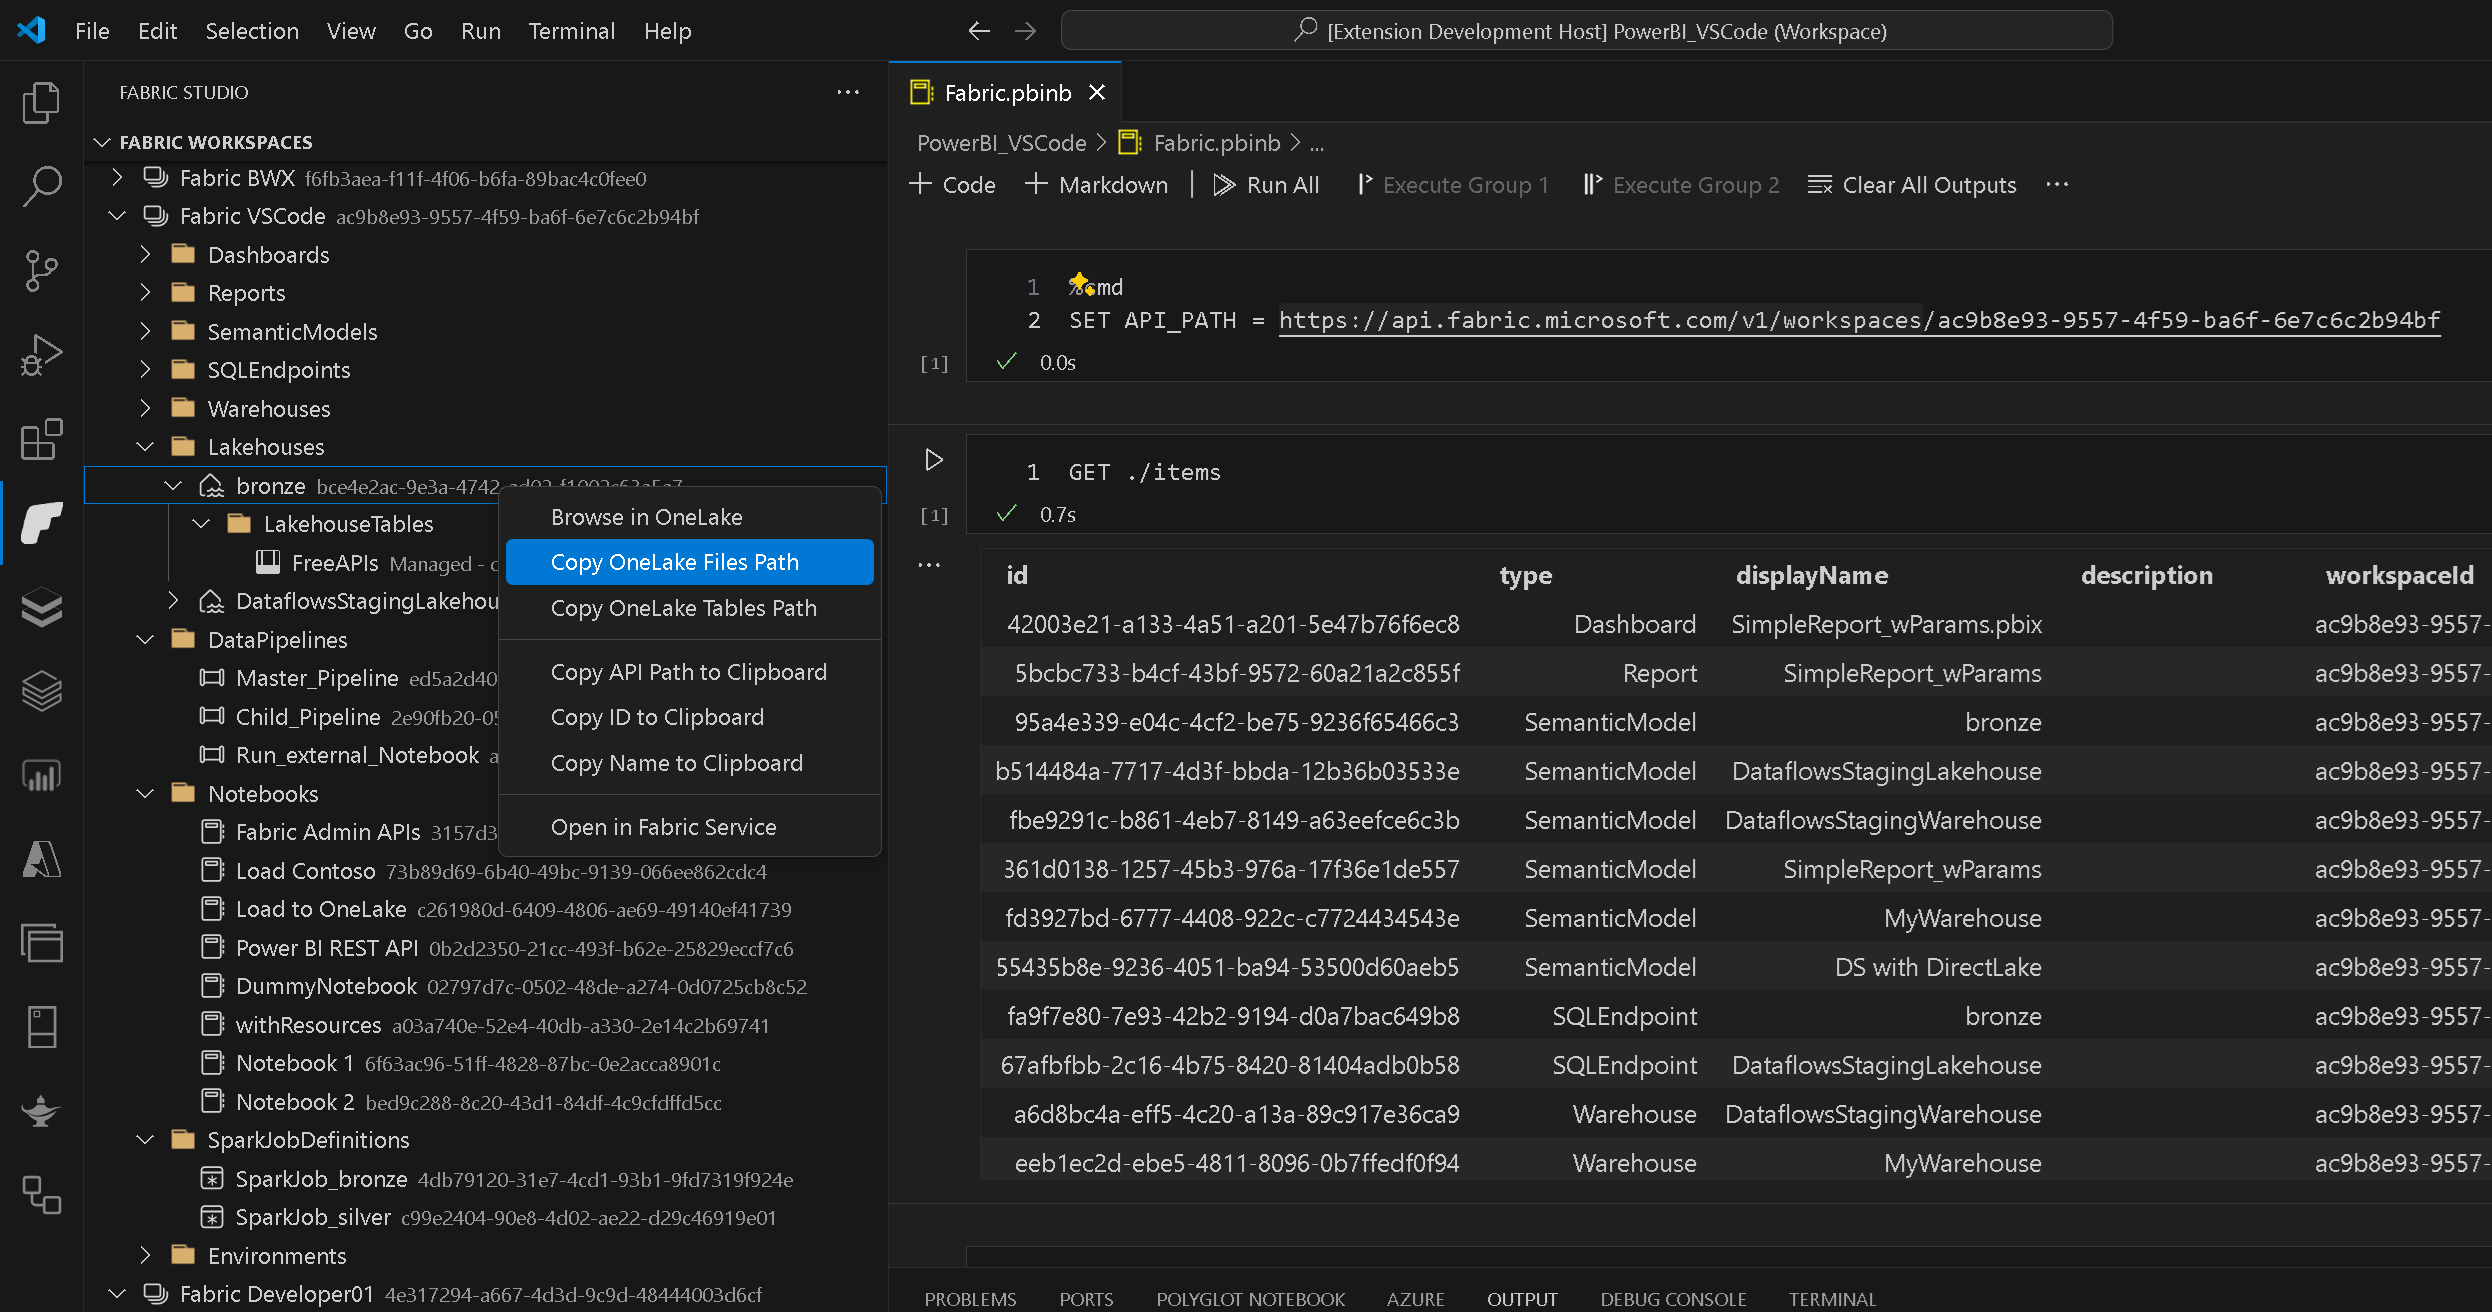
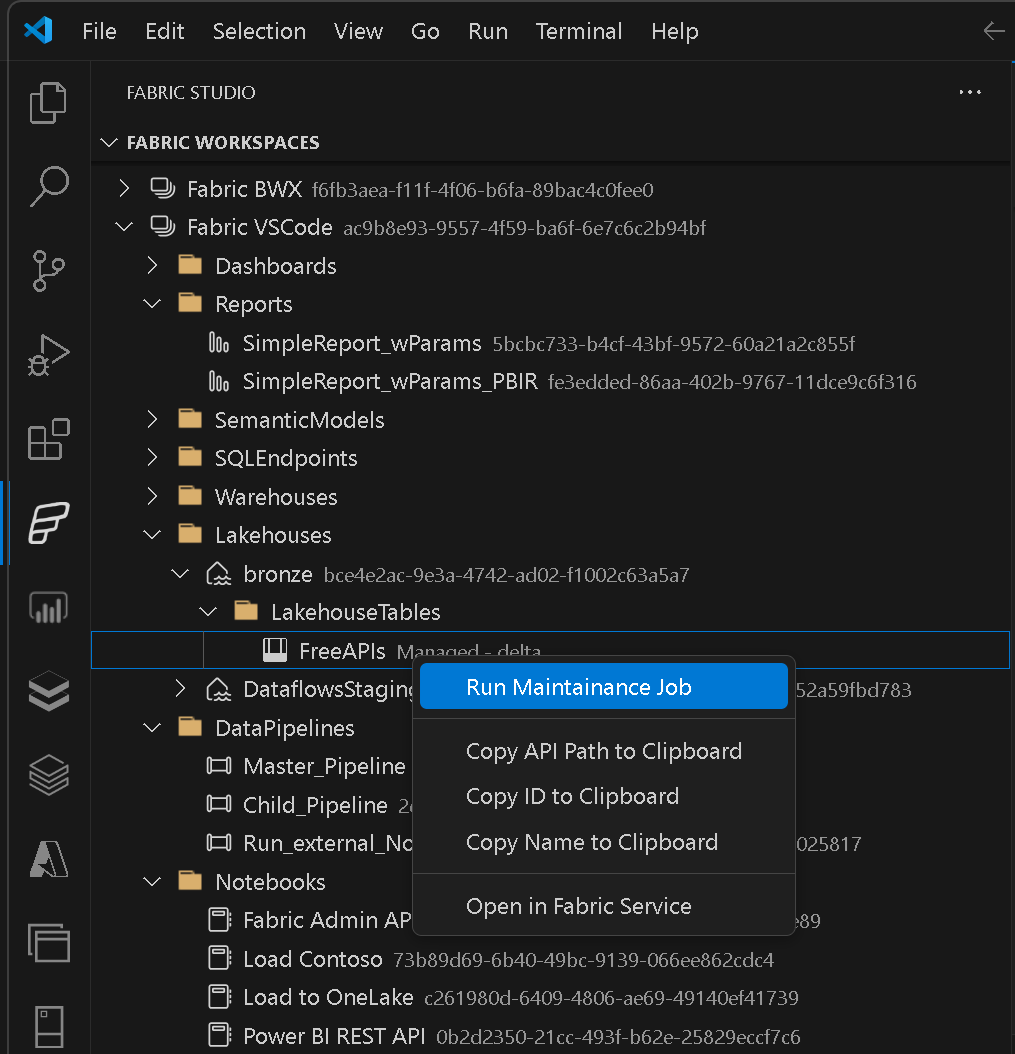 The workspace browser is usually the starting point for all activities. It allows you to browse through your Fabric workspaces, the individual items and sub-items and execute various action based on the current selection.
As of now, not most items are read-only but actions will be added in the future and when the Fabric REST APIs support them!
You can open a new Fabric notebook via the UI from the header of each treeview or by running the command Open new Fabric Notebook (command FabricStudio.Item.openNewNotebook). Fabric notebooks have the file extension .fabnb and will automatically open in the notebook editor.
The following features are supported by notebooks and can be used using magic tags in the first line of the cell:
- running arbitrary REST API calls (magic
%api) - setting variables to be used in subsequent cells (magic
%cmd)
There are also dedicated languages for each of the magics which you can also use see the rigth bottom of your notebook cell. Next to the magic itself you can also specify a custom API endpoint for every cell right after the magic tag:
%api
GET /workspaces
This overwrites the API_PATH set for the notebook to run DAX queries. You can now run multiple API calls against different endpoints from within the same notebook without changing the API_PATH every time. For example if you want to run the same query against TEST and PROD to compare results etc.
Custom API endpoints work for all magics except %cmd which does not interact with the API at all.
For proper visualization of the results I highly recommend to also install the Data Table Renderers extension!
To run a REST API call from the notebook you can simply write the following:
METHOD endpoint
{JSON-Body}
For example to create a new dashboard in My Workspace you can run the following command:
POST /dashboards
{
  "name": "SalesMarketing"
}
The JSON-body can also be omitted, e.g. for a GET request.
Supported METHODs are GET, POST, PUT, PATCH and DELETE. the endpoint can either be absolute (e.g. https://api.fabric.microsoft.com/v1/workspaces), relative to the root of the API (e.g. /workspaces) or relative to the path set via notebook variables API_PATH (e.g. ./items) (see Using Variables below)
You can also define and use variables within the notebook. To set a variable you can use
%cmd
MY_VARIABLE = my_value
Please note that variable names are note case sensitive and are converted to UPPER when you define them. However, you reference them using any casing you want.
There are some special variables that can be used to make your notebooks more generic.The main variable that needs to be set is the API_PATH (aliases are also ROOT_PATHor API_ROOT_PATH) to set the starting point for relative API paths:
%cmd
SET API_PATH = /workspaces/d1f70e51-1234-1234-8e4c-55f35f9fa758
Relative API paths always start with ./:
GET ./notebooksCurrent values of variables can be retrieved by running SET MY_VARIABLE.
Variables can be used via the pattern $(<variableName>). Assuming the variable My_Variable is set to 123:
EVALUATE ROW("MyVariable", $(My_Variable))
Note: you can also set/get multiple variables within the same notebook cell!
Another special variable is _cells which allows you to refernce the output of other cells. The full syntax is _cells[<relativeCellIndex>]<XPathInResult>. This variable can then be used like this:
GET /groups
------ CELL -------
GET /groups/$(_cells[-1][2].id)/datasets
The first cell would return the list of all workspaces. The second cell gets the result of the previous cell ([-1]), and reads the id of the 3rd row ([2].id). This syntax can not only be used in the API path but anywhere in the cell, e.g. also in the body! To reference the whole output, you can also omi the <XPathInResult> and only use _cells[<relativeCellIndex>].
This approach can also be used to simply copy settings from one Power BI object to another by first running a GET on the source object and then a POST/PUT/PATCH on the target referencing the output of the preceding GET. Common scenarios would be to copy users/permissions or dataset refresh schedules but there are definitely much more use-cases!
The extension also provides an easy way to interact with all items hosted in Microsoft Fabric. You need to use a VSCode Workspace when working with VSCode.
The easiest way to configure and use the custom FileSystemProvider is to right-click the item (or parent or workspace) in the Workspace Browser and select Edit Defintion:
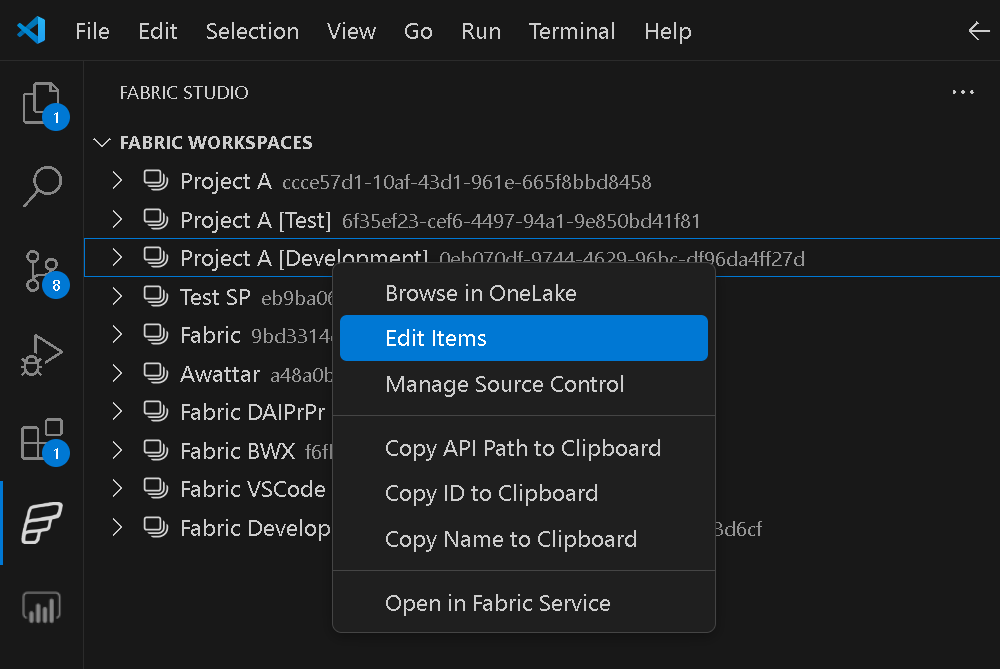 Alternatively you can also add the path to your Fabric Workspace (or item) directly to your workspace settings file using an URI in the format of
 fabric://workspaces/<workspace-guid>:
{
	"folders": [
		{
			"path": "."
		},
		{
			"uri": "fabric://workspaces/f6fb3aea-f11f-4f06-b6fa-89bac4c0fee0",
			"name": "My Fabric Workspace"
		}
	]
}
Once this is set up, you can browse your Fabric items as if they were local. In fact, we use the Fabric APIs to download them and cache them locally in memory for you. You can also add, modify or delete the Fabric items or modify individual definition files. As it is now like a local file system, you can also Drag&Drop or Copy&Paste between local folder structures and Fabric items or within Fabric - e.g. to copy an existing Fabric item!
Locally changed files will be displayed similar to changed items in GIT:
- green with
Abadge -> Added - yellow with
Mbadge -> Modified - red with
Dbadge -> Deleted
To publish your local changes back to Fabric, right-clicking on the Item-folder (e.g the Dataset, the Report, the Notebook, ...) and select Publish to Fabric.
To undo your local changes or force the reload of content from Fabric (e.g. if you changed/created a new item in the Fabric UI), you can use Reload from Fabric from the context menu.
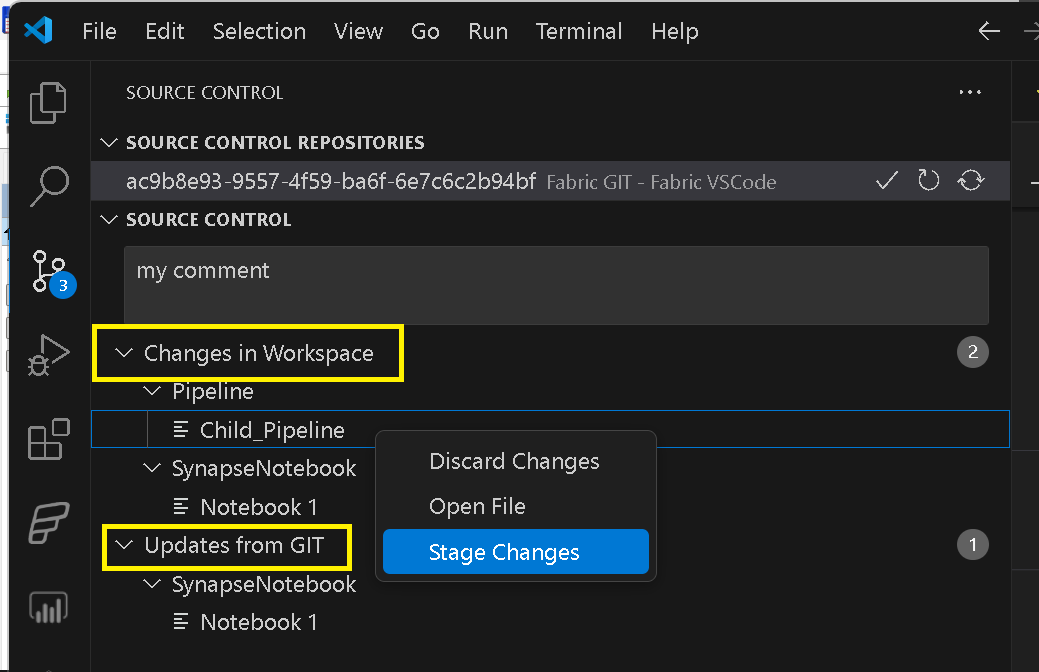
If you have your Fabric workspace connected to a GIT repository, you can from now on start managing your GIT workflow from within VSCode. To do so, simply right-click the Fabric workspace and select Manage Source Control. This action will integrate your Fabric workspace GIT workflows into VSCode as if it were a regular repository.
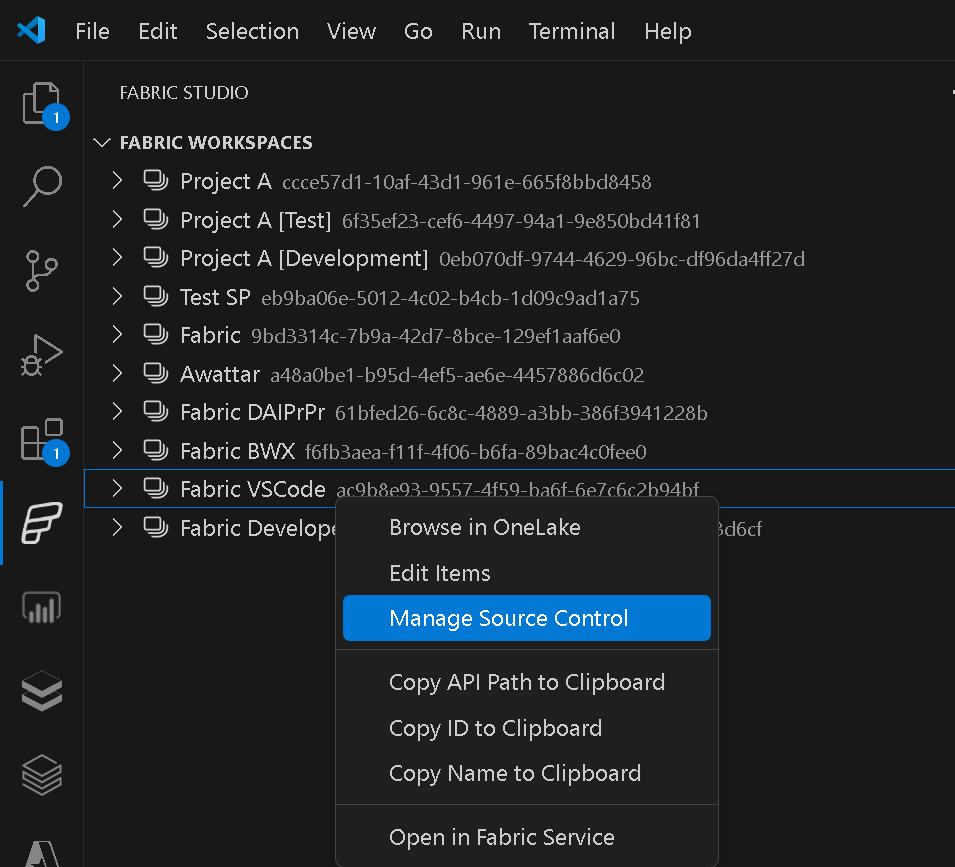 Once the GIT repository is managed via VSCode, you can stage, commit, undo your changes from within VSCode:
Q: I have so many workspaces and its hard to find the one I need, what can I do?
A: Please check the config setting fabricStudio.workspaceFilter to pre-filter workspaces. Also, every treeview (like the Fabric Workspace Browser) in VSCode is searchable by default. Simply click into the treeview and press CTRL + ALT + F as you would do in any other application to start a search
Q: I have a guest account in a remote client, can I still use this extension?
A: Yes! The only thing you need to do is to specify the TenantID of the remote tenant in the setting fabricStudio.tenantId. I would recommend to create a separate VSCode workspace in this scenario and change the setting there.
Q: I tried to run a command from the context menue but the dropdown that appears does not contain the values I want to use. What can I do?
A: Unfortunately VSCode is quite limited in the way how users can enter data (e.g. a dropdown box) and we simply display the last 10 items that the user selected or expanded. So if you e.g. want to do a rebind of a report and the target dataset does not show up, please make sure to select/click it the Workspace Browser just before you run the rebind.
Q: Something went wrong or the extension is stuck, what can I do?
A: Unfortunately this can happen, sorry! Please try to restart VSCode or run the command FabricStudio.initialize from the command menu. If the problem persists, please open an issue at our Git Repository.


