Dataverse Tests helps you to test the operational requirements of your Dataverse installation to maintain stability and lower risk. It offers tests for integration, system and risk-based testing. In addition to the tests, utils offers a CLI of common workflow actions to help you with your testing activities.
Tests are written in Python with pytest, requests and Selenium. They are easy to adapt and extend. They are open source and well documented. The tests do not contain common frontend or backend unit tests, which are part of Dataverse development itself.
Funded by:
Features
General
- Tested with Dataverse 4.18.1, 5.2, 5.6 and 5.7
- Settings management
- Flexible and easy to use for your own Dataverse instance
- Integration of dataverse_testdata and dataverse-sample-data
- Open source (MIT)
Tests (testing/)
- Modular test architecture, optimized for use on Jenkins or similar build/testing tools
- Supports Firefox and Chrome
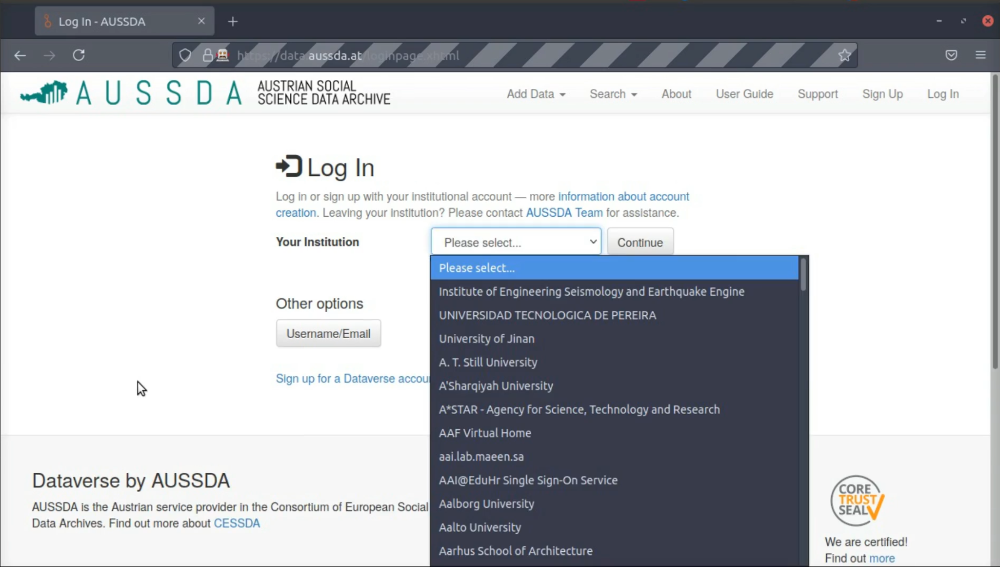
- Tests: Login (normal + Shibboleth), Data Completeness, Create Dataverse Frontend, Installation / Server, Search, OAI-PMH, Sitemap, robots.txt, Terms of Use
Helper functions (utils/)
- CLI integration
- Collect (all) data of your installation: Dataverses, Datasets, Datafiles
- Upload defined set of testdata
- Remove (all) testdata
- Create users
Use-Cases
- Installation: Test a fresh, customized Dataverse installation
- Upgrade: Test configuration and data completeness after upgrade
- Monitoring: Frequent testing during operation
Demos
Login testing:
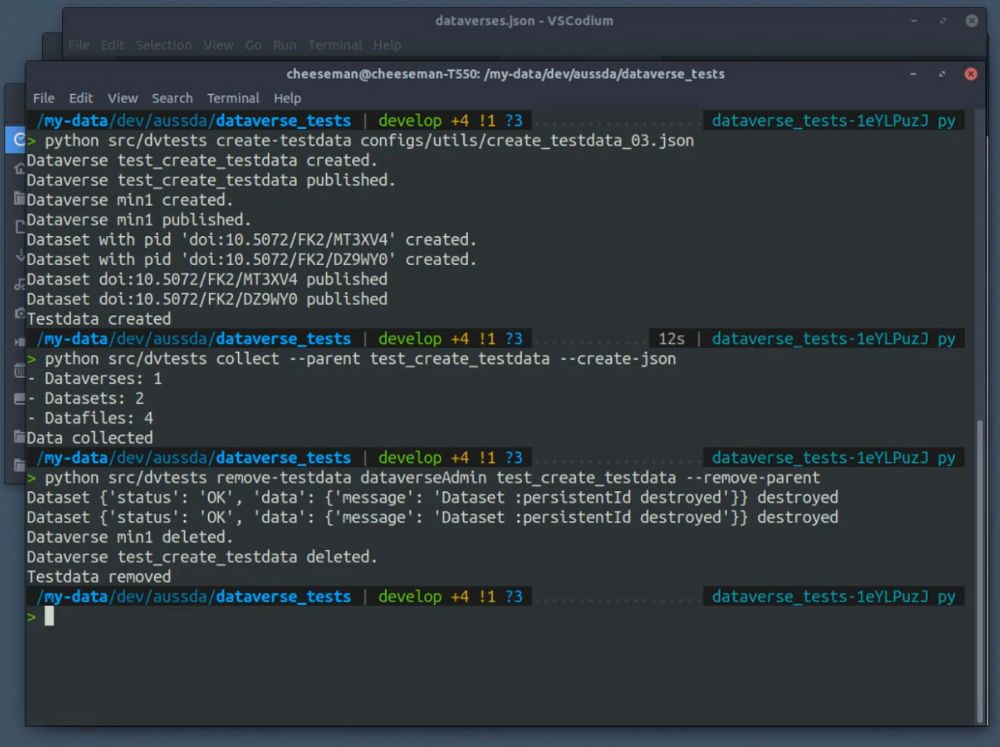
Using utils for your data workflow:
Pre-requisites
Python >= 3.6
Python packages:
Browser engine(s) (optional for Selenium-based tests):
- Geckodriver (Firefox)
- Chromedriver
Clone repository + init submodules
git clone --recurse-submodules https://github.com/gdcc/dataverse_tests.git
cd dataverse_tests/
Install requirements
pipenv installActivate virtual environment
pipenv shellInstall dataverse_tests
pip install .Before you can start with either testing or utils, you have to configure the settings management. You need to create an .env-file for each Dataverse installation, and set the needed variables in it. Start by using the env-config/example.env template. The .env file filename is your central identifier for actions done with your Dataverse installation and then later on used for other naming purposes, so use a descriptive one (e. g. ORGANISATION_INSTALLATION.env => aussda_production.env). Once set up, you have to set the ENV_FILE environment variable in your terminal to your absolute path of your .env-file.
export ENV_FILE="/ABSOLUTE/FILE/PATH/TO/ENV/FILE.env"Note: To not track testing activities with you web-analytics service (e. g. Matomo or Google Analytics), you should set the user agent and exclude calls from it in your web-analytics service.
Note: Environment variables set via command line will overwrite the ones defined in an .env-file.
Environment variables are documented in src/dvtests/settings.py.
For some tests and utils functions, you need at least one user who has proper rights to do API requests, create Datasets, to login or do perform other actions. These user credentials are stored inside a JSON file under user/.
The user JSON file consists of user-specific information to be used both for testing and utils functionality. We recommend to copy user/example.json, rename it after your instance (e. g. aussda_production) and add all your users with their credentials.
Beware: This file consist of secret, critical data and should not be versioned or shared with anybody.
3.a. Find tests
The tests can be found inside src/dvtests/testing/. They are separated into:
default/: basic tests applicable to a normal Dataverse installation with default configurationcustom/: tests to verify installation-specific customizations of a Dataverse installation
3.b. Setup browser engines (only if Selenium tests are used)
To run selenium tests, you have to have at least one browser engine running and callable by pytest-selenium.
For this, set the PATH environment variable in the terminal. You have to add the directories for all the browserengines you want to use (e. g. geckodriver, chromedriver) to your path. Check out pytest-selenium for supported browserengines.
Example:
export PATH=$PATH:/folder/to/your/browser/engine/`Note: The browserengine file must be executable
3.c. Create test configs
A test normally works like this: You define the test input and the expected result and the test resolves to true if the actual result equals the expected one.
As the test input and expected results differ from installation to installation, you need to define them before you can execute the tests. These test-configs can be found in the config/installations/ directory, inside a sub-directory named after your .env-file (e. g. aussda_production/). For each installations, you now have to create a settings.json inside it. Use the config/installations/TEMPLATE_testing-settings.json template for it.
Inside the Dataverse installation folder must be a directory named testing/, in which all the core tests are placed inside the default/ folder. Example path: configs/installations/aussda_production/testing/default/.
Inside there, you then have to place for each test a config file. They all have the test_ prefix and are written in JSON. If you want to find out how the configs work, first check out the tests and/or other test-configs.
Best Practice: Start by copying the config/installations/aussda_production folder, rename it to your .env-filename and adapt the test-configs to your own setup.
3.d. Run test
Tests are executed by pytest.
pytest -v src/dvtests/testing/default/test_api.py
If you want to use a Selenium frontend test, you have to pass the browserengine:
pytest -v --driver Firefox src/dvtests/testing/default/test_create-frontend_dataverse.py
We have defined several markers for the tests, which you can find out about in setup.cfg. Most markers tell you, if the test was already used with a specific Dataverse version, or if it uses utils or Selenium to run properly.
pytest -v -m "v5_6" src/dvtests/testing/default/test_shibboleth.py3.e. Optional: Adapt Shibboleth login function
As every Shibboleth login works differently, you have to adapt/overwrite custom_shibboleth_institution_login inside src/dvtests/testing/conftest.py to your own Shibboleth login procedure to use it.
3.f. Optional: Collect data with utils for data completeness
If you want to test the data completeness of your installation (e. g. after an upgrade or migration), you first need to collect the data from the existing/old Dataverse installation. Find out more at utils create-testdata.
Utils intends to offer helpful functions for your testing workflow - like collecting all data before a migration, uploading testdata for automated and/or manual testing or cleaning up after testing. These functions can be called by the command line.
Note: Execute step 1. and 2. before you start using utils.
Commands
collectgeneratecreate-testdataremove-testdatacreate-user
Find out more about the functionalities in the docstrings inside src/dvtests/utils/__init__.py.
Generally, you can call them like this
python src/dvtests FUNCTION_NAME [FUNCTION_VARIABLES]Create testdata uses a JSON file to know, which data should be created how, in which order and by whom.
Note: The :root Dataverse is not published on a fresh installation and often the superuser (dataverseAdmin) account is not verified. This can lead to problems related to adding new data.
Call
python src/dvtests create-testdata CONFIG_FILENAMEFILENAME is the path to the JSON file with the orders, e. g.:
python src/dvtests create-testdata configs/utils/create_testdata_01.jsonJSON format
Actions are executed in sequential order.
id: id of data related to the actionid-type: id type of the parentdvtestsif defined by user in JSON file,aliasif Dataverse alias,pidif Dataset PID.action: defines which kind of action should be done (createDataverse or Dataset,publishDataverse or Dataset,uploadDatafile)user-handle: defines by which user the action should be executed (user must be defined in the users JSON)parent-id: id of the parent to which the data should be attached to.parent-id-type: same asid-typemetadata: data related to the metadataupdate: list of metadata attributes from the metadata file, which should be updated before further steps.filename: metadata filename
filename: Datafile filename
See how the named actions differ in detail:
Create Dataverse:
- If
parent-id-typeorid-typeis not set, it assumes theidto be the alias.
{
  "data-type": "dataverse",
  "action": "create",
  "parent-id": ":root",
  "user-handle": "dataverseAdmin",
  "metadata": {
    "filename": "dataverse_testdata/metadata/json/dataverse/dataverse_upload_full_01.json",
    "update": {
      "alias": "test_create_testdata",
      "name": "Test Create Testdata"
    }
  }
},
Publish Dataverse:
{
  "id": "test_create_testdata",
  "data-type": "dataverse",
  "action": "publish",
  "user-handle": "dataverseAdmin"
},
Create Dataset:
- If
id-typeis not set, it assumesidis the PID. idis set by ourselves, soid-typemust be set todvtests(name of the module).
{
  "id": "harvard-open-source-1",
  "id-type": "dvtests",
  "data-type": "dataset",
  "action": "create",
  "metadata": {
    "filename": "dataverse_testdata/metadata/json/dataset/dataset_upload_default_full_01.json"
  },
  "parent-id": "test_create_testdata",
  "user-handle": "dataverseAdmin"
},
Publish Dataset:
id: The identifier used before to create the data at first or a pid.id-type:dvtestsif the identifier is the one from the creation before orpidif a pid should be used
{
  "id": "harvard-open-source-1",
  "id-type": "dvtests",
  "data-type": "dataset",
  "action": "publish",
  "release-type": "major",
  "user-handle": "dataverseAdmin"
},
Upload Datafile:
{
  "data-type": "datafile",
  "action": "upload",
  "filename": "dataverse_testdata/files/dta/10002_da_de_v0_9.dta",
  "metadata": {
    "filename": "dataverse_testdata/metadata/json/datafile/datafile_upload_full_01.json"
  },
  "parent-id": "harvard-open-source-1",
  "parent-id-type": "dvtests",
  "user-handle": "dataverseAdmin"
},
JSON files
configs/utils/create_testdata_03.json: small data collection (2DV, 2DS, 2DF)
Help
To get all information for the CLI integration, add --help. It lists all commands.
Best Practice
We recommend using the JSON files configs/installations/aussda_production/utils/ to find out how it works and adapt it to your needs.
Remove testdata cleans up your Dataverse installation after the usage of testdata.
Call
python src/dvtests remove-testdata USER_HANDLE PARENT [OPTION]USER_HANDLE must be present in user JSON and PARENT must be the top node of the data tree, which should be removed.
python src/dvtests remove-testdata dataverseAdmin test_create_testdata --remove-parentCollect data collects all metadata from a top-node down. This can be used to collect all data necessary to make a complete data check during an upgrade or migration.
The data is stored under data/, in a sub-directory named after the .env-file and another sub-directory named after the USER_HANDLE.
Note: The tests automatically look after data inside data/DATAVERSE_INSTALLATION/public, where DATAVERSE_INSTALLATION is the name of the .env-file.
Call
python src/dvtests collect --parent PARENT [OPTION]USER_HANDLE must be present in the related user JSON and PARENT must be the top node of the data tree, which should be removed.
python src/dvtests collect --parent test_create_testdata --create-jsonJSON Format
USER_FILENAME: filename to the user JSON (e. g.dataverse_testdata/metadata/json/user/user_01.json)PASSWORD-> ATTENTION: do not share the password!
{
  "data-type": "user",
  "action": "create",
  "filename": "USER_FILENAME",
  "update": {
    "password": "PASSWORD"
  }
}
Call
python src/dvtests create-user CONFIG_FILECONFIG_FILENAME must be a filename where actions are defined. Have a look at configs/utils/create_user_01.json.
python src/dvtests create-user configs/utils/create_user_01.jsonThe next steps for the project are:
- Get it used by the broader community
- Add compatibility with newer Dataverse versions
- Extend existing tests
- Add new tests
Sustainability
As for now, there is no ongoing, steady funding available, so no actual developments are planned. If you have feature requests or other ideas or concerns regarding the future of dataverse_tests, please contact the GDCC.
Please see CONTRIBUTING.rst.
To everyone who has contributed to this project - with an idea, an issue, a pull request, developing an application, sharing it with others or by any other means: Thank you for your support!
Open source projects live from the cooperation of the many and Dataverse Tests is no exception to that, so to say thank you is the least that can be done.
Special thanks to all Slava Tykhonov from DANS and all the people who do an amazing job by developing Dataverse at IQSS.
Dataverse Tests is funded by AUSSDA - The Austrian Social Science Data Archive and through the EU Horizon2020 programme SSHOC - Social Sciences & Humanities Open Cloud (T5.2).
Copyright Stefan Kasberger, 2020-2022.
Distributed under the terms of the MIT license, Dataverse Tests is free and open source software.
Full License Text: LICENSE.txt


