COG is a RESTful Web API for ingesting normal GeoTIFFs, converting to Cloud Optimized GeoTIFF (COG) and finally publishing them into a Minio bucket in order to serving out of the box from a generic and open source object storage server.
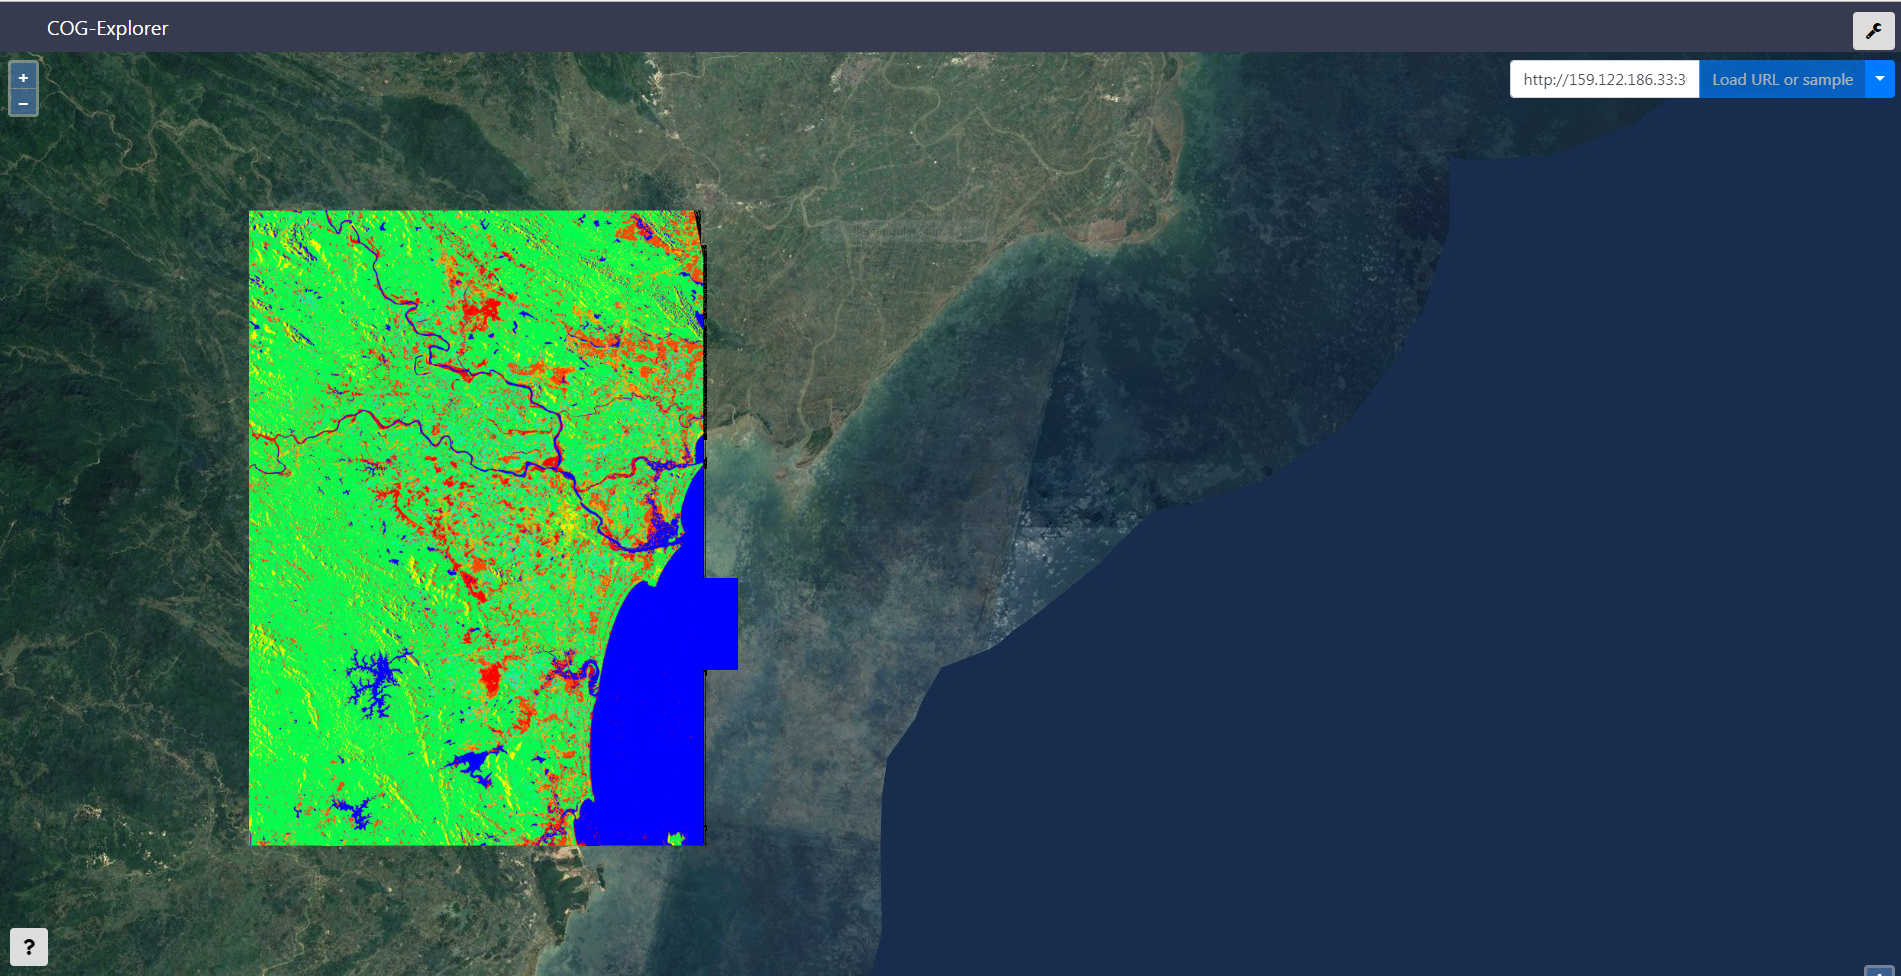
The server has been developed in Django and has embedded COG-Explorer a COG viewer built with OpenLayers, geotiff.js and React.
The architecture of COG is composed by the following components for web serving geotiff files out of an object storage bucket once they are converted into the cloud optimized format:
- A REST API for COG objects built with Django Rest Framework
- A database for objects information built with PostgreSQL
- A web mapping viewer for COGs built with React and OpenLayers
- A bucket storage server for COGs built with Minio
Allowed actions for now are:
- View all available COG-ready GeoTIFFs
- View a COG-ready GeoTIFF resource
- Upload a GeoTIFF and publish it as a COG
- Delete a COG-ready GeoTIFF resource
Assuming you have a normal GeoTIFF image called my-awesome-image.tif then you can ingest and exploit
it as described in the following paragraphs.
Note: At the moment there are some limitations which are considering a GeoTIFF valid for ingesting as COG only if it has tiled overviews. Please see here for further information on the matter.
The operation needs an authorization header with a Basic Authentication from an administrator
curl -X POST \
    http://159.122.186.33:30800/api/cogs/ \
    -H 'Authorization: Basic YWRtaW46YWRtaW4=' \
    -H 'Cache-Control: no-cache' \
    -H 'Content-Disposition: attachment; my-awesome-image.tif' \
    -H 'Content-Type: image/tif' \
    -H 'content-type: multipart/form-data; boundary=----WebKitFormBoundary7MA4YWxkTrZu0gW' \
    -F image=@/tmp/CallForCode/my-awesome-image.tif \
    -F name=my-awesome-image.tif \
    -F compression=raw
and you might expect such response:
HTTP/1.1 201 Created

Allow: GET,POST,HEAD,OPTIONS
Connection: close
Content-Length: 0
Date: Fri, 28 Sep 2018 14:11:07 GMT
Server: gunicorn/19.7.1
Vary: Accept, Cookie, Origin
X-Frame-Options: SAMEORIGINcurl -X GET \
http://159.122.186.33:30800/api/cogs/and you might expect such response:
HTTP/1.1 200 OK

Allow: GET,POST,HEAD,OPTIONS
Connection: close
Content-Length: 1161
Content-Type: application/json
Date: Fri, 28 Sep 2018 14:11:07 GMT
Server: gunicorn/19.7.1
Vary: Accept, Cookie, Origin
X-Frame-Options: SAMEORIGIN

[
    {
        "id": "6ef0612f-4075-4567-beb0-7cacafe1f1c5",
        "name": "Floods-subset-human-out-with-ovr.tif",
        "bucket_name": "cog",
        "resource_uri": "http://159.122.186.33:30900/cog/Floods-subset-human-out-with-ovr.tif",
        "created_at": "2018-09-27T09:48:39.657471",
        "updated_at": "2018-09-27T09:48:39.657500"
    },
    {
        "id": "486db87e-0758-4e1e-9d60-acb25e8402f4",
        "name": "Vietnam-out-with-ovr.tif",
        "bucket_name": "cog",
        "resource_uri": "http://159.122.186.33:30900/cog/Vietnam-out-with-ovr.tif",
        "created_at": "2018-09-27T09:53:57.497591",
        "updated_at": "2018-09-27T09:53:57.497617"
    },
    {
        "id": "ffccd8a3-fba5-4250-bdab-e182d15042f8",
        "name": "subset_0_of_FINAL_S1A_IW2_SLC__1SDV_20180806T110540_20180818T110641-with-ovr.tif",
        "bucket_name": "cog",
        "resource_uri": "http://159.122.186.33:30900/cog/subset_0_of_FINAL_S1A_IW2_SLC__1SDV_20180806T110540_20180818T110641-with-ovr.tif",
        "created_at": "2018-09-27T10:05:19.316314",
        "updated_at": "2018-09-27T10:05:19.316340"
    },
    {
        "id": "0395f50e-28db-423d-a56c-ede0d1c4fb59",
        "name": "my-awesome-image.tif",
        "bucket_name": "cog",
        "resource_uri": "http://159.122.186.33:30900/cog/my-awesome-image.tif",
        "created_at": "2018-09-28T14:11:07.030245",
        "updated_at": "2018-09-28T14:11:07.030271"
    }
]curl -X GET \
http://159.122.186.33:30800/api/cogs/486db87e-0758-4e1e-9d60-acb25e8402f4and you might expect such response:
HTTP/1.1 200 OK

Allow: GET,POST,HEAD,OPTIONS
Connection: close
Content-Length: 257
Content-Type: application/json
Date: Fri, 28 Sep 2018 14:11:07 GMT
Server: gunicorn/19.7.1
Vary: Accept, Cookie, Origin
X-Frame-Options: SAMEORIGIN

{
    "id": "486db87e-0758-4e1e-9d60-acb25e8402f4",
    "name": "Vietnam-out-with-ovr.tif",
    "bucket_name": "cog",
    "resource_uri": "http://159.122.186.33:30900/cog/Vietnam-out-with-ovr.tif",
    "created_at": "2018-09-27T09:53:57.497591",
    "updated_at": "2018-09-27T09:53:57.497617"
}curl -X DELETE \
http://159.122.186.33:30800/api/cogs/486db87e-0758-4e1e-9d60-acb25e8402f4/and you might expect such response:
HTTP/1.1 204 No Content

Allow: GET,POST,HEAD,OPTIONS
Connection: close
Date: Fri, 28 Sep 2018 14:11:07 GMT
Server: gunicorn/19.7.1
Vary: Accept, Cookie, Origin
X-Frame-Options: SAMEORIGIN- Open the browser at the following location
/explorerof your server (i.e. http://159.122.186.33:30800/explorer) - Copy and paste the
resource_uriof one returned GeoTIFF - Click the button
Load URL or sample
All the components can be deployed into a Kubernetes cluster either Minikube or IBM Cloud instance simply running few kubectl commands once your cluster is up and running.
Move into the deployment scripts for Minikube:
cd chart/deploy/kubernetes/minikubeAssuming your Minikube settings configure the public ip address (i.e. 192.168.99.100) and port of your Minio server into the file django/deployment.yaml
- name: MINIO_STORAGE_ENDPOINT
  value: "192.168.99.100:30900"

- name: MINIO_STORAGE_COG_URL
  value: "http://192.168.99.100:30900"
Launch the deployment:
kubectl apply -f minio
kubectl apply -f postgres
kubectl apply -f djangoMove into the deployment scripts for Minikube:
cd chart/deploy/kubernetes/ibmcloudAssuming your IBMCloud k8s cluster settings configure the public ip address (i.e. 159.122.186.33) and port of your Minio server into the file django/deployment.yaml
- name: MINIO_STORAGE_ENDPOINT
  value: "159.122.186.33:30900"

- name: MINIO_STORAGE_COG_URL
  value: "http://159.122.186.33:30900"
Launch the deployment:
kubectl apply -f minio
kubectl apply -f postgres
kubectl apply -f django- If you don't already have it, install Python
- Install IBM Cloud Developer Tools on your machine
- Install the plugin with:
bx plugin install dev -r bluemix
IBM Cloud DevOps services provides toolchains as a set of tool integrations that support development, deployment, and operations tasks inside IBM Cloud. The "Create Toolchain" button creates a DevOps toolchain and acts as a single-click deploy to IBM Cloud including provisioning all required services.
*Note you must publish your project to Github for this to work.
The project contains IBM Cloud specific files that are used to deploy the application as part of an IBM Cloud DevOps flow. The .bluemix directory contains files used to define the IBM Cloud toolchain and pipeline for your application. The manifest.yml file specifies the name of your application in IBM Cloud, the timeout value during deployment, and which services to bind to.
Credentials are either taken from the VCAP_SERVICES environment variable if in IBM Cloud, or from a config file if running locally.
The IBM Cloud development plugin makes it easy to compile and run your application if you do not have all of the tools installed on your computer yet. Your application will be compiled with Docker containers. To compile and run your app, run:
bx dev build
bx dev runYour application is running at: http://localhost:3000/ in your browser.
- Health endpoint:
/health
To build and debug your app, run:
bx dev build --debug
bx dev debugTo debug a django project run python manage.py runserver with DEBUG set to True in settings.py to start a native django development server. This comes with the Django's stack-trace debugger, which will present runtime failure stack-traces. For more information, see Django's documentation.


