Alexa lights control will let you set lighting environments or just control luminosity using your voice!!.
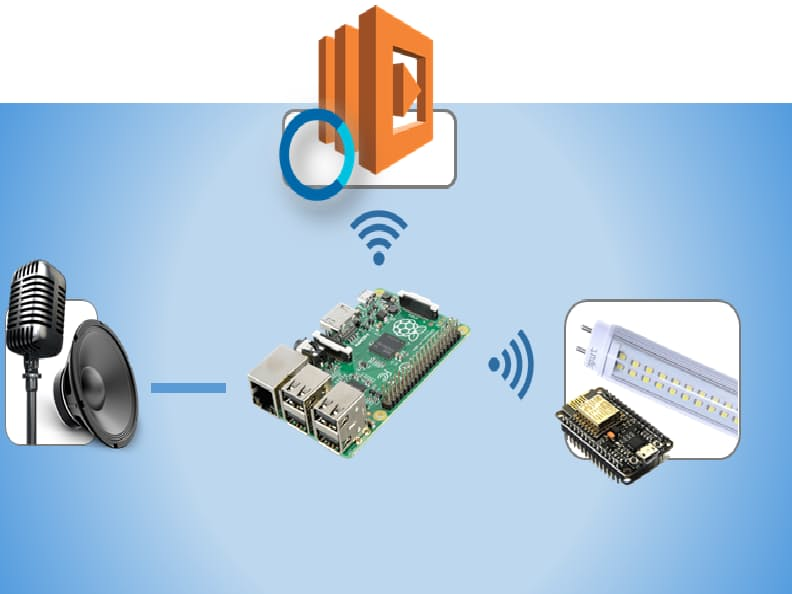
This Project uses Amazon Alexa Service to process voice commands, Raspberry Pi as master module and an Esp8266 (feel free to add more modules to scale the project) to control lights.
This prototype is dived in 4 steps (one file for each step) which are listed below.
- AlexaSkill
- AlexaPi
- Esp8266
- Schematics
In this step the Alexa Voice Service is translated and instructions are sended to Esp8266.
Contains the required files to keep communicate the Raspberry and Alexa Voice Service.
Here is located the Esp8266 code. This program is in charge to communicate the Raspberry and control the lights.
Electronics circuit schematics and functionality flowchart.
Let’s begin with funcionality. See flowchart in next image.

Figure 1. Flowchart.
- Keep pressed push button and meanwhile say “Alexa Light Control”
- Raspberry sends voice command to Alexa Voice Service.
- Alexa Voice Service translates the audio and sends an answer to the Raspberry.
- Raspberry translates the answer and make a request to user asking for ilumination mode.
- User indicates de ilumination mode talking with Alexa (remember to keep push button pressed):
- Turn ligths {State}.
- Could you turn ligths {State}.
- Set ligths {State}.
- {State}.
- {State} mode.
{State} Should be replaced for one of the following modes: on, off, romantic, crazy, party, read. For example if you want to turn lights on you can say, “Turn lights on” or “Set Lights on”. 6. Raspberry sends the command to Alexa Voice Service 7. Alexa Voice Service translate the audio and sends back a response to the Raspberry 8. Raspberry translates the response and send instructions to Esp8266 9. Esp8266 translates instructions and executes them.
We are going to split on 3 steps this section
- Hardware, connections and electronic circuit.
- Raspberry Pi y Alexa Skills.
- Esp8266.
These are the needed components to replicate the project.
- Raspberry 2 (The raspberry model is optional, in this case we use Raspberry 2).
- Esp8266
- Audio USB card
- Microphone
- Speakers
- Mosfet IRF640
- Opsoisolator 4N26
- Push Button
- 220 ohm resistance
- 110 ohm resistance
- 10 Kohm resistance
- Led Lamp
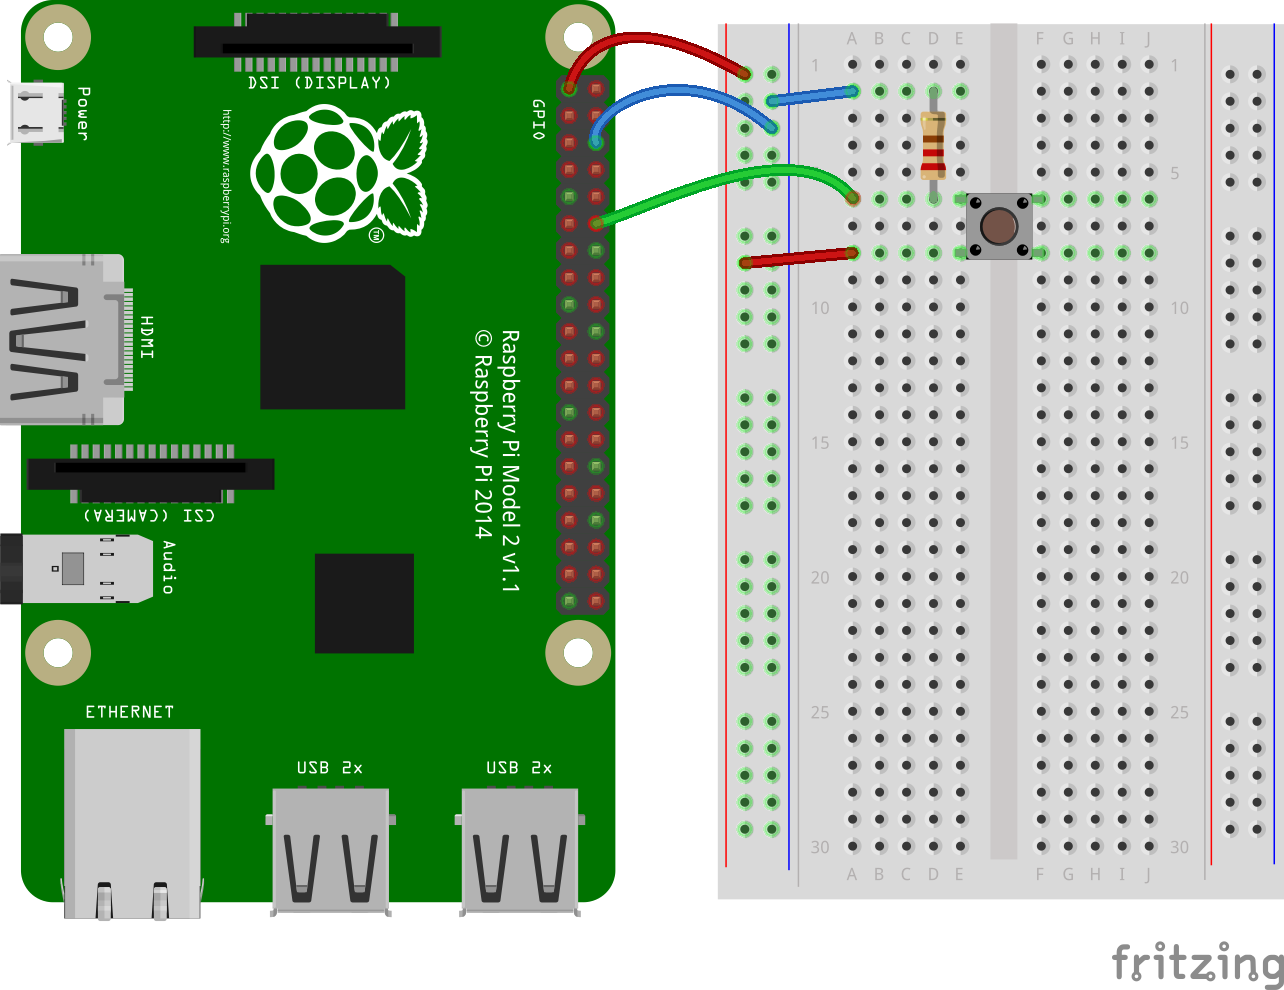
Plug USB Audio card to Raspberry an then the microphone to the USB Audio Card. Next connect the push button as the following image shows.
Figure 2. Push to talk button
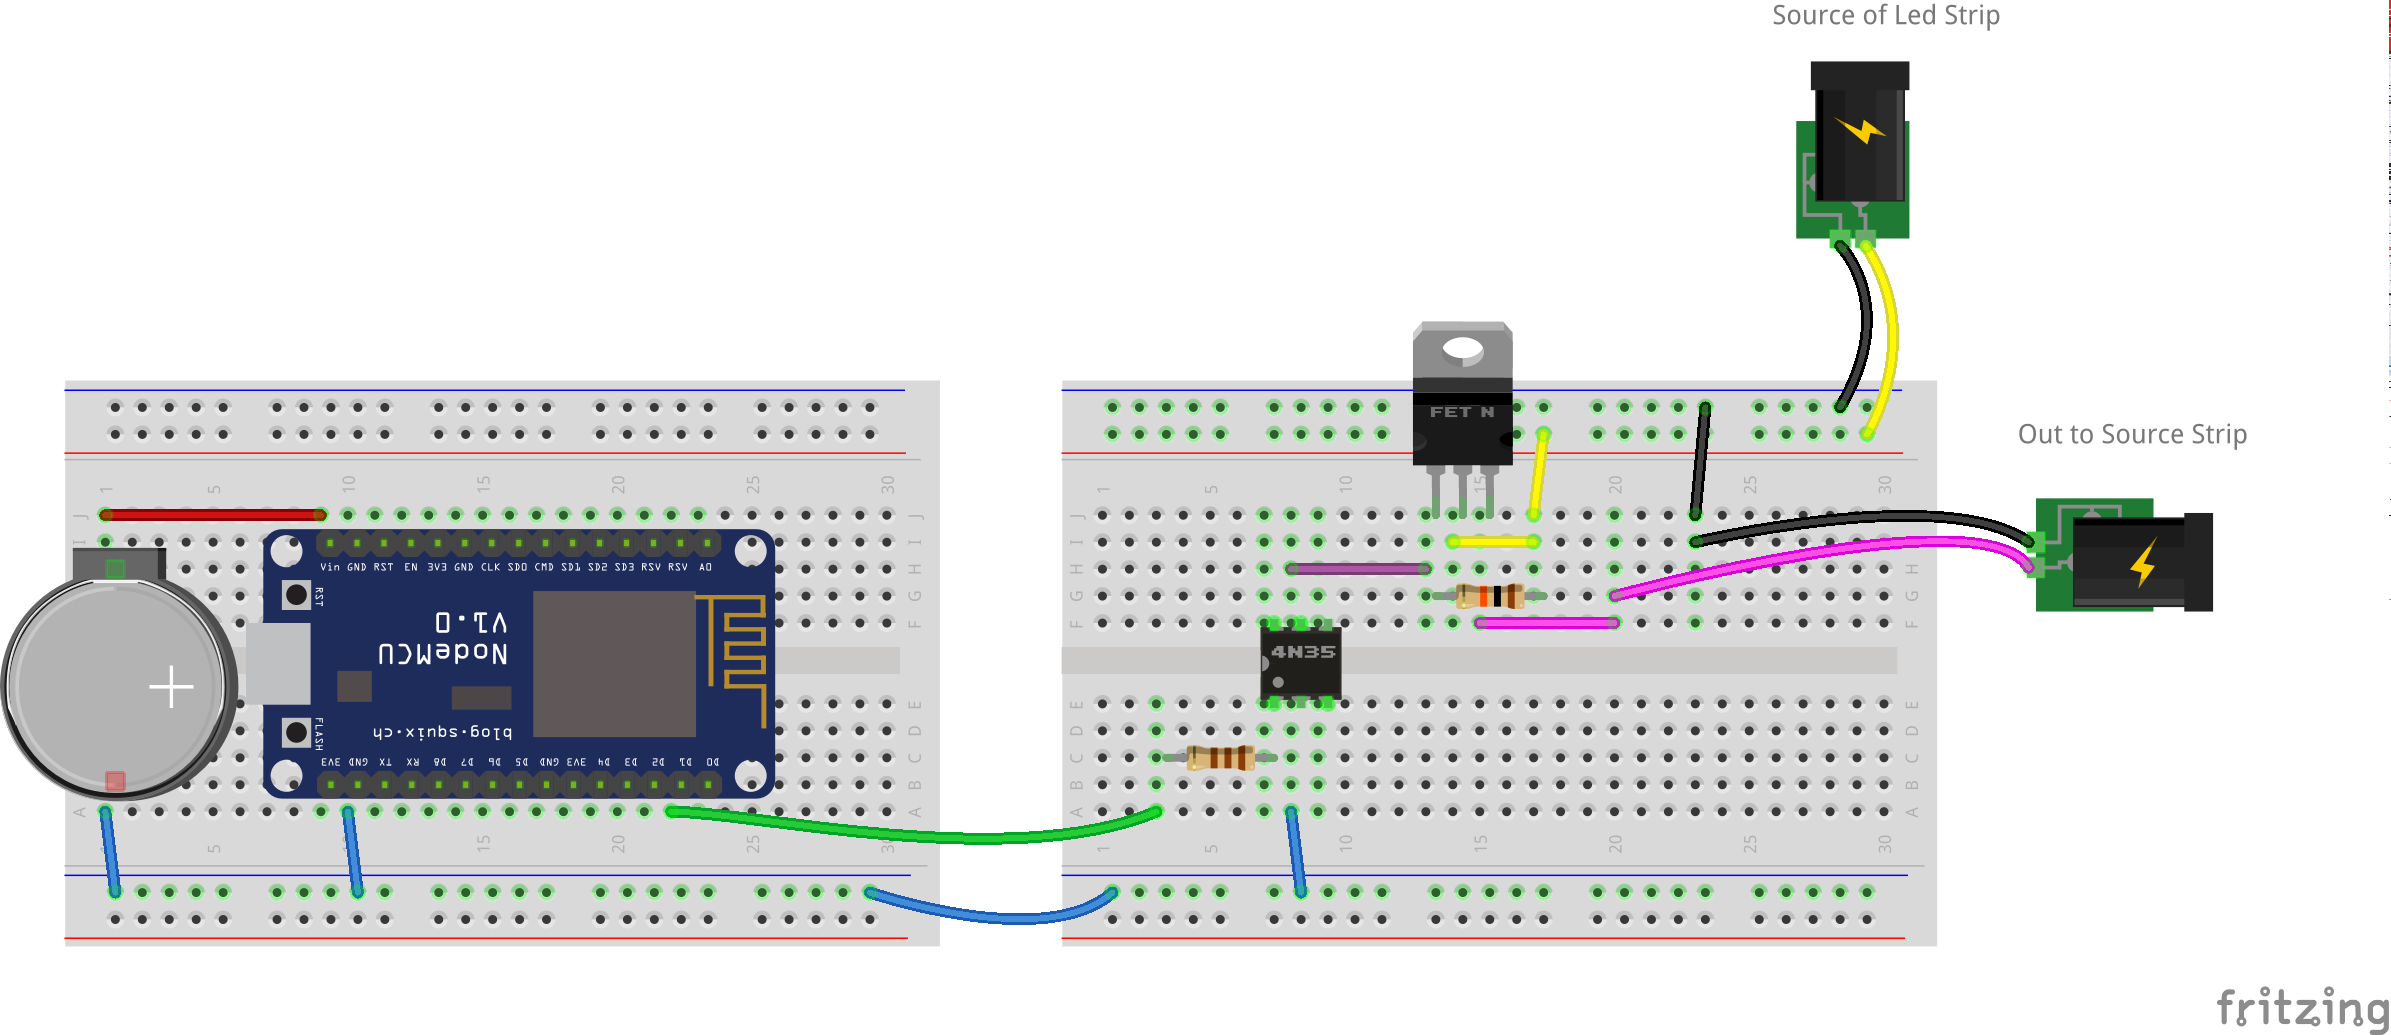
Now connect Esp8266 and the Led Lamp Strip, notice that GND’s are isolated. See Figure 3.

Figure 3. Esp8266 and Led Lamp Strip connection
First you need to create an account on Amazon developer.
Then an Alexa Skill must be created as is shown here, only Step 1. Setting up Your Alexa Skill in the Developer Portal should be done.
Now the Raspberry should be set it up as an Alexa Voice Service device see tutorial.
Install flask-ask
pip install flask-ask
Clone this repository on your RaspberryPi
mkdir MyAlexa
cd MyAlexa
git clone https://github.com/NeedleCode/Alexa_Lights_Control.git ./
Execute in your terminal the script AlexaPi/Alexa_client.py
cd AlexaPi
python alexa_client.py
In other terminal execute the script AlexaSkill/skill-server.py
cd My/AlexaPi
python alexa_client.py
Program the Esp8266 with the firmware Esp8266/lightControl.ino
Especial thanks to @sammachin for AlexaPi and @johnwheeler for Flask-ask
