This is a template repository for getting the main peripherals working on a STM32F4Discovery board.
To get all dependencies and be ready to flash the STM32F4 Board, install the following packages on Debian-based distributions:
apt install cmake libusb-dev libusb-1.0-0-dev build-essential autoconf \
cutecom git binutils-arm-none-eabi gcc-arm-none-eabi

apt install rpm pkg-config debhelper # for flash-tool build process
On arch you can prepare your system with those packages:
pacman -S arm-none-eabi-gcc arm-none-eabi-binutils arm-none-eabi-newlib \
cmake autoconf git stlinkThe newest Flash-Tool for the STM-Boards can be found at STLINK. Clone it and make a debian package, which then can be installed via dpkg:
git clone https://github.com/texane/stlink
cd stlink
make clean
 make package
sudo dpkg -i build/Release/stlink-*-amd64.deb
sudo ldconfig # refresh library list for st-linkclone the Repo (or only the Vagrantfile) and copy it to where u want to install it
git clone https://github.com/mborko/stm32f4-template
cd stm32f4-template
cp Vagrantfile /installation/directory/
cd /installation/directory/
Create a VM with the Vagrantfile and stop it again
vagrant up
vagrant halt
Notice: vagrant also creates a shared directory in the current directory called workspace
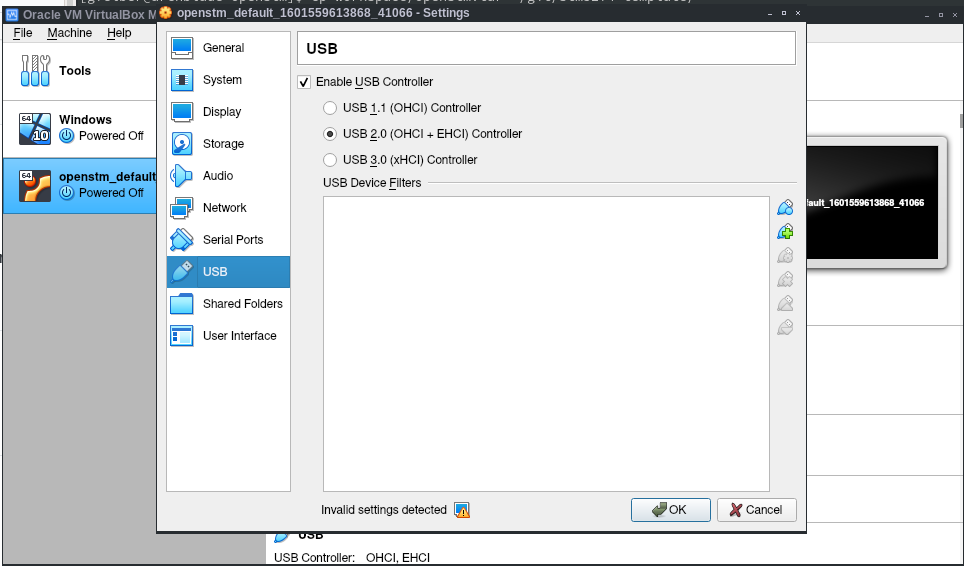
Add a USB Controller through Virtualbox (VM needs to be Powered Off) and add the Microcontroller (may need to be repeated for each device)
Start the VM again (same directory as Vagrantfile)
vagrant upConnect to the VM (same directory as Vagrantfile)
vagrant sshchange into the stm32f4-template directory and make the project
cd stm32f4-template
make clean
makeFirst create a Directory in Workspace
mkdir ~/workspace/my-projectCopy the template into your project
cp -R src/template/* ~/workspace/my-projectNow you can edit the main.c (example uses vim editor)
vim ~/workspace/my-project/Src/main.cNotice: you can also change the code through your host by accessing the Shared director workspace
in order to flash the device use the following Command
make flashIf you want to use your the non default directory src/template use the following command
make flash PROJ=/path/to/your/project For the example in Change Code:
make flash PROJ=~/workspace/my-projectIncase the flash fails just unplug and plug your device again.
Clone the STM32Cube-F4 Library to the ~/opt Folder or any other destination.
Check the STM32_PATH Definition in the Makefile and change it aproperly.
Further Documentation and the Manuals can be found here:
- Getting started with STM32CubeF4 firmware
- Discovery kit for STM32F407/417
- STM32F4xx HAL drivers
- STM32F3 and STM32F4 Series Cortex®-M4 programming manual
- STM32F405xx/07xx, STM32F415xx/17xx, STM32F42xxx and STM32F43xxx advanced ARM®-based 32-bit MCUs
Thanks to Fabian Greif for his minimal example repository for the STM32F3-Discovery board.
I wish also to thank Matthew Blythe and 'mohammedari' for theier good startpoints:
Basic Template
Test Makefile
STM32CubeF4 Makefile Template Project

