Repository of scripts for spinning up a personal instance of ElasticSearch and Kibana on HPC infrastructure (i.e., on Slurm)
- Download ElasticSearch and Kibana and decompress and create simlinks to support upgrades
- Run
bash download.sh
- Run
- Update
run-es.sbatchto correct path - Run
run-es.sbatchto start ElasticSearch and Kibana.- See slurm.log for port forwarding
- Create your index with mappings for tweet metadata
python createIndex.py http://localhost:<ESPORT> <index_name>
- Push tweet data to ElasticSearch
python postTwitter.py http://localhost:<ESPORT> <index_name> <tweet_path.json
- Access Kibana and set up your index pattern
- Create SSH tunnel to HPC, and visit
http://localhost:<KPORT>, go to Management, and follow steps to point Kibana at the indexindex_nameyou created
- Create SSH tunnel to HPC, and visit
- Happy searching
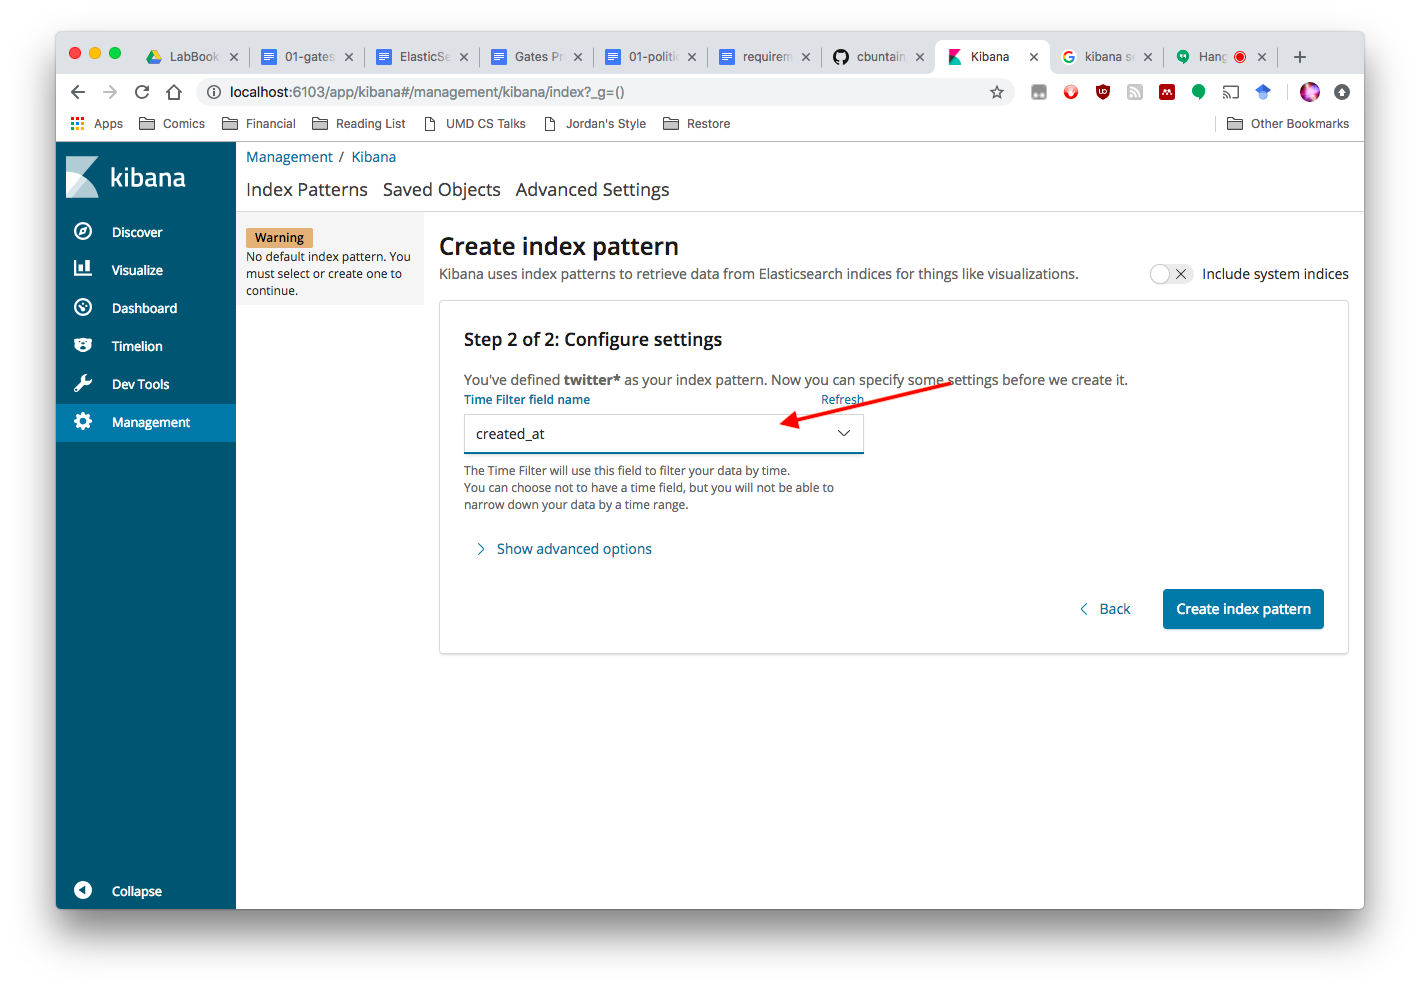
The second to last step above says to go to the Management tab and set up your index. This process tells Kibana what dataset it needs to search and how it can interpret the time data in the create_at field in Twitter data (or whatever field in your data has date information).
Screenshots of the process follow:
- Point your browser to Kibana. You'll first see
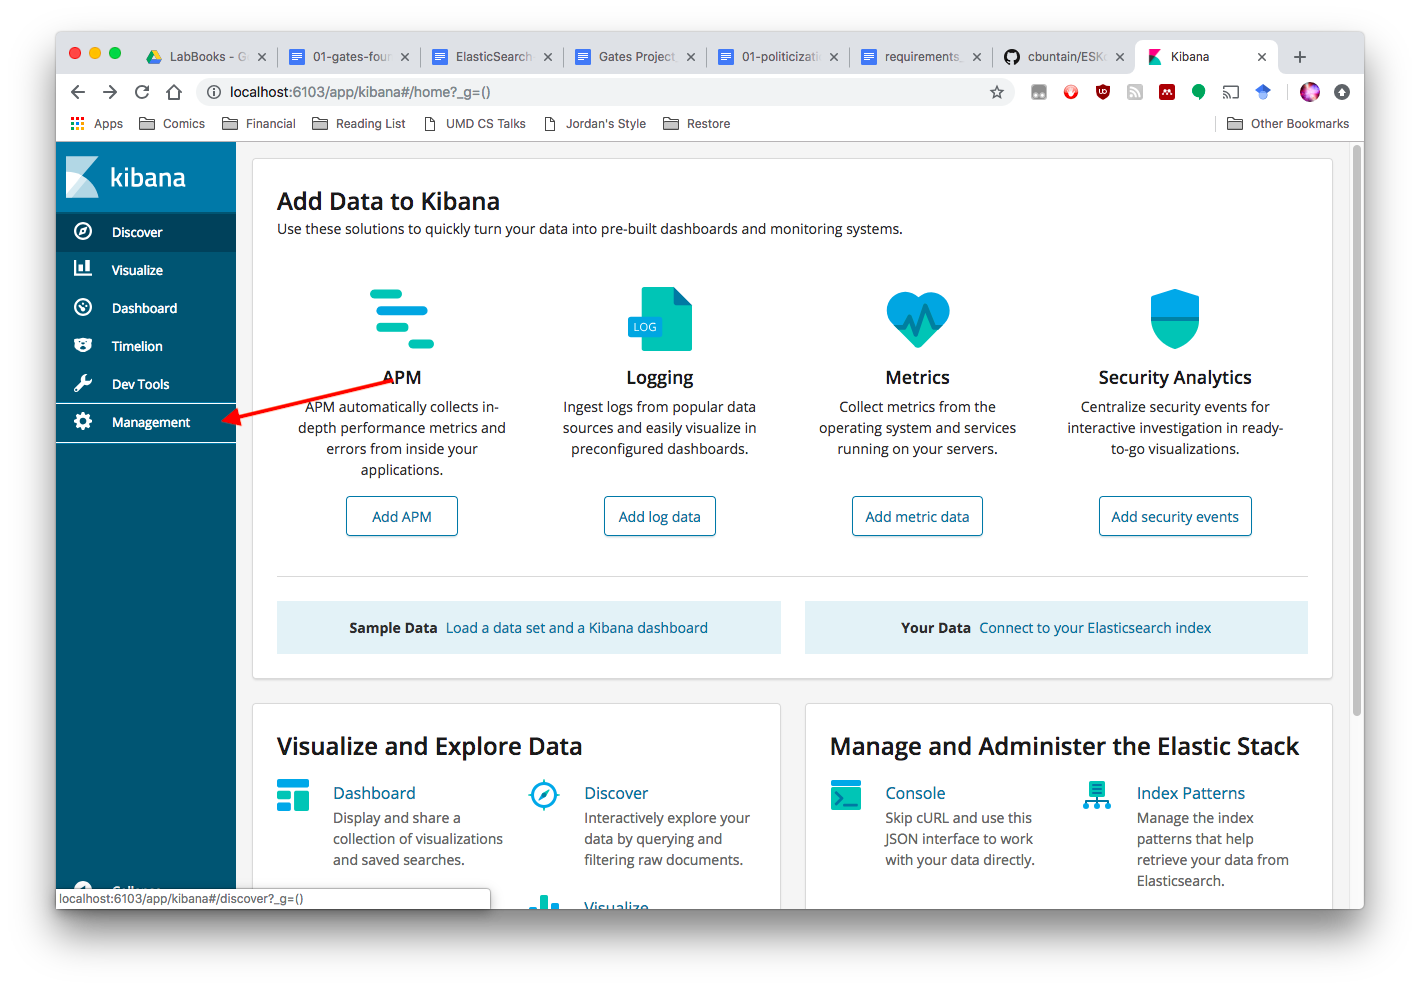
- Click Management and go to Index Patterns.
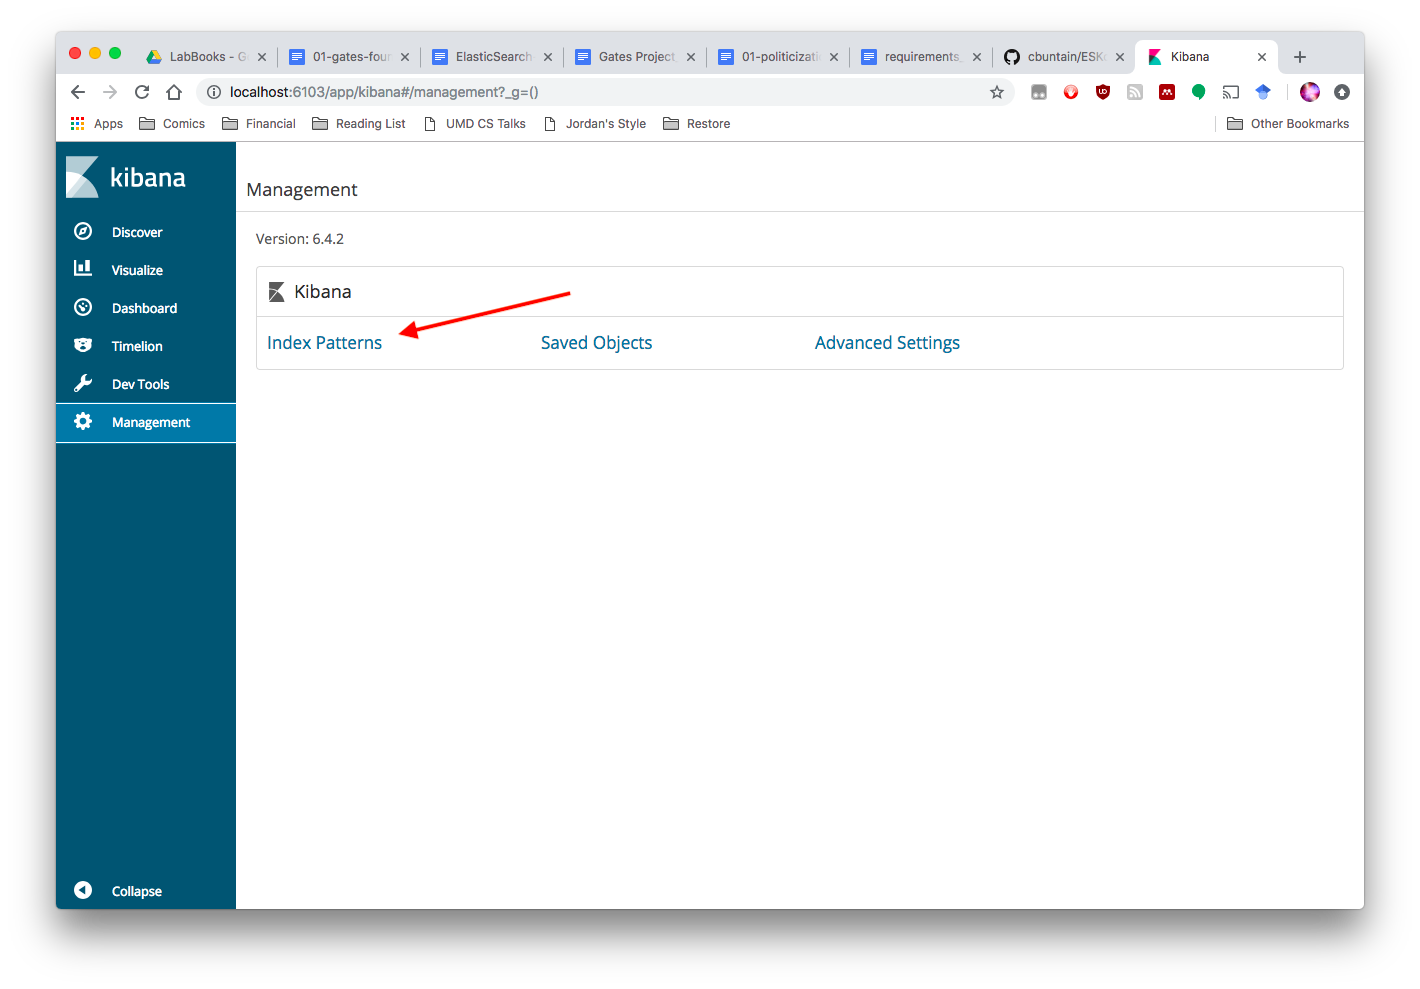
- You'll now be asked to create an index patten for whatever indices you have in your ElasticSearch setup. Use the index name you created during setup and type it in to the text box.
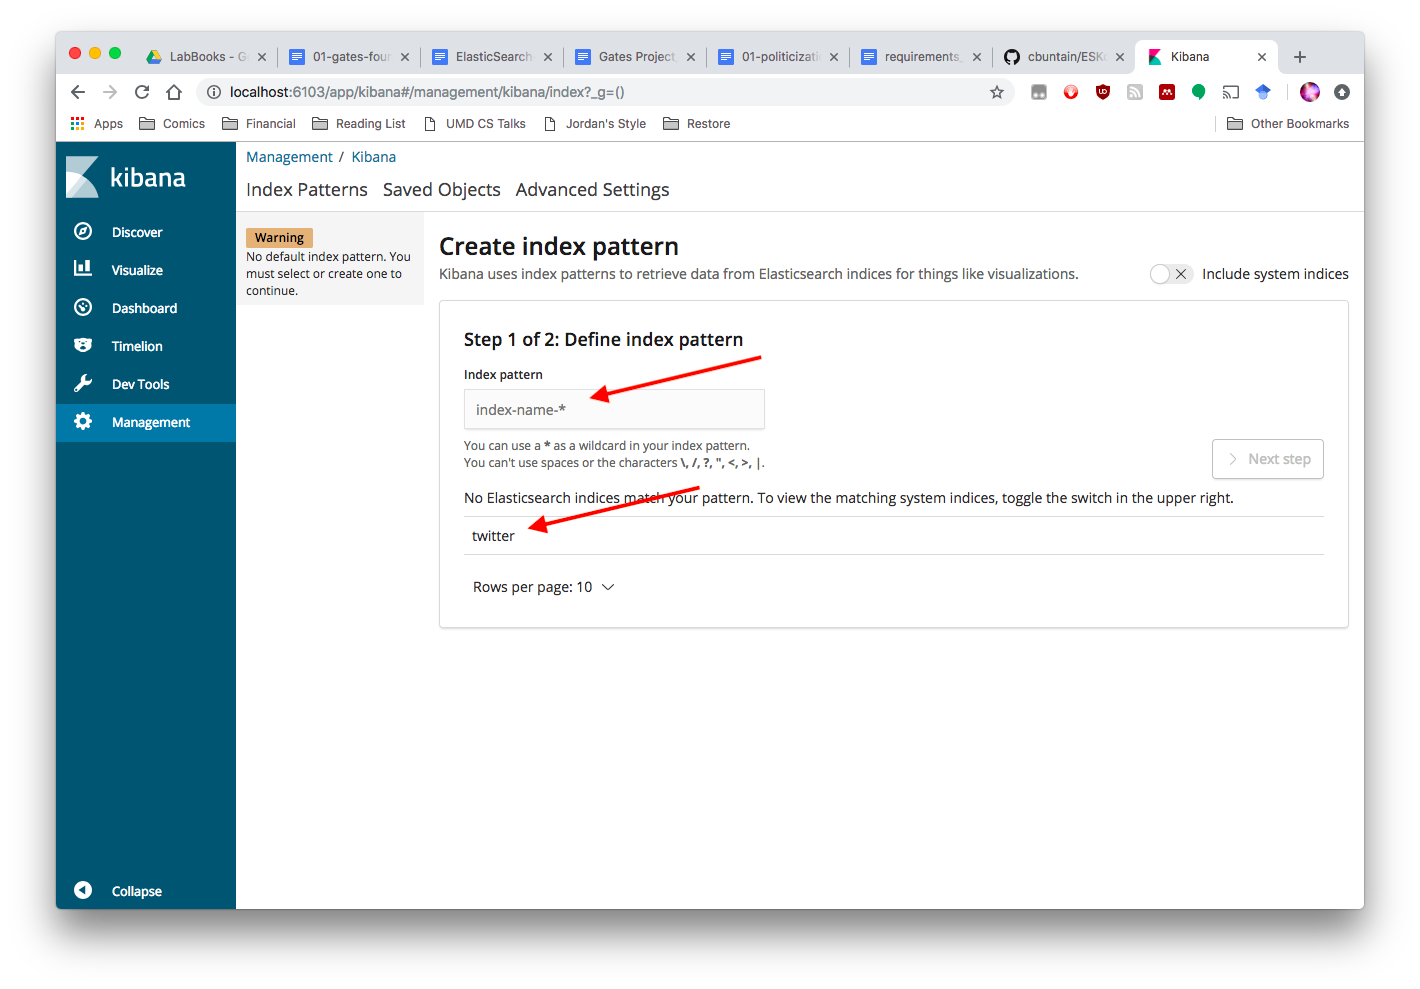
- The pattern supports wild cards and the like, so you can have one Kibana pattern for multiple indices (useful when you break down indices by day or month).
- One of Kibana's real powers comes in handling time series. To enable this, you need to tell Kibana what field has your time data. If you're using Twitter data, select created_at from the dropdown box.
Now that you've set up Kibana, you can search your data. Some helpful screenshots for this follow:
- You mainly search via the Discover section. When you first go here though, Kibana may say there's no data. This lack of data is a result of Kibana's default timeframe filter (
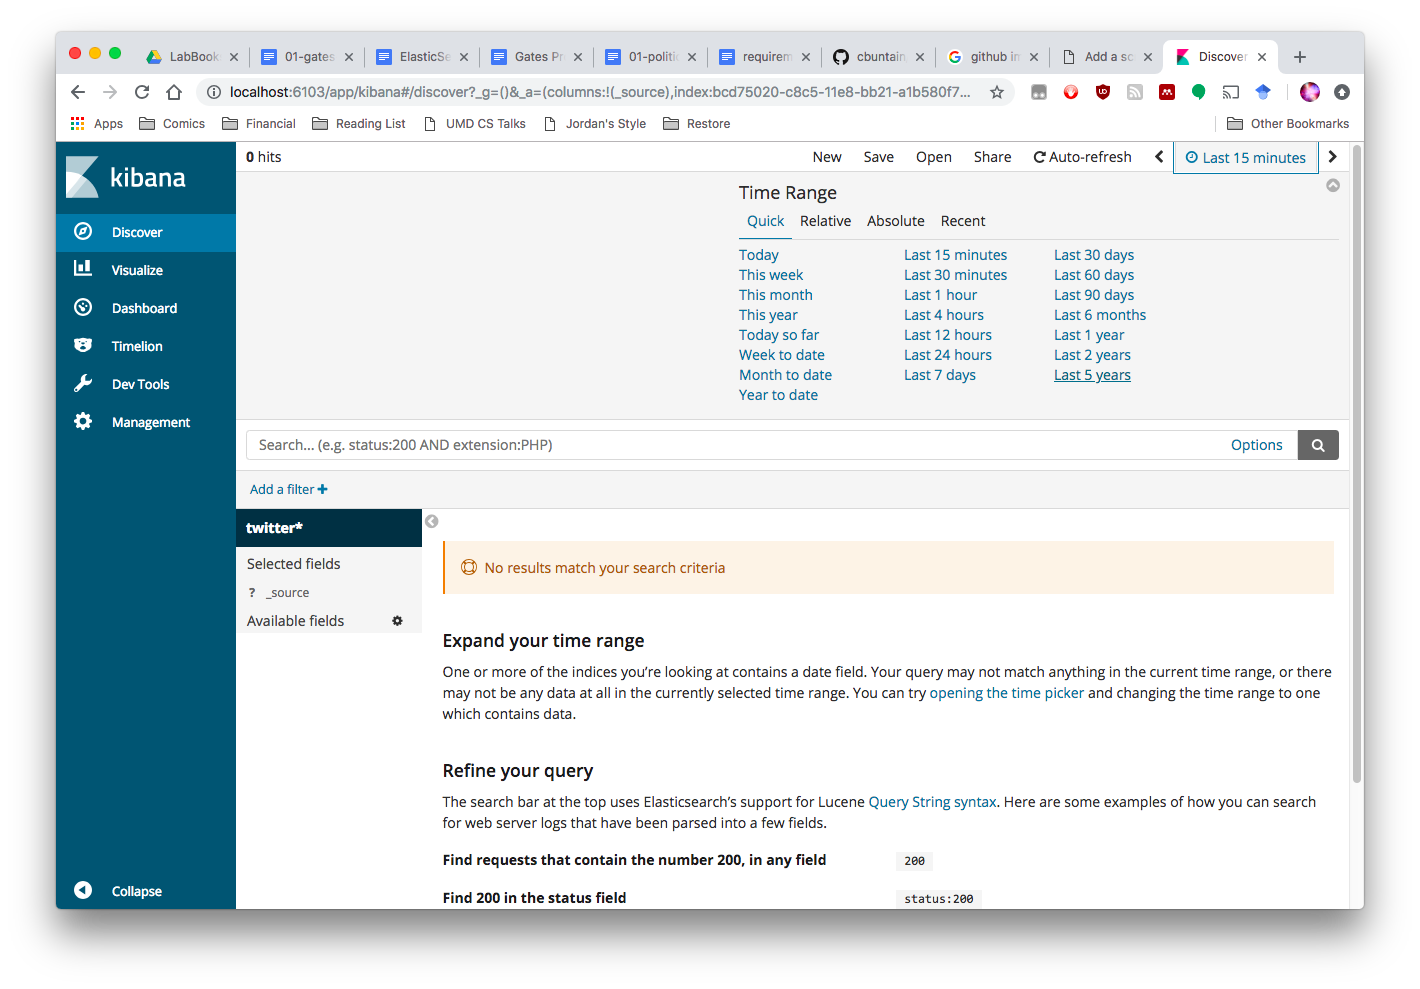
Last 15 Minutes). You'll want to change that to cover whatever date range your date covers.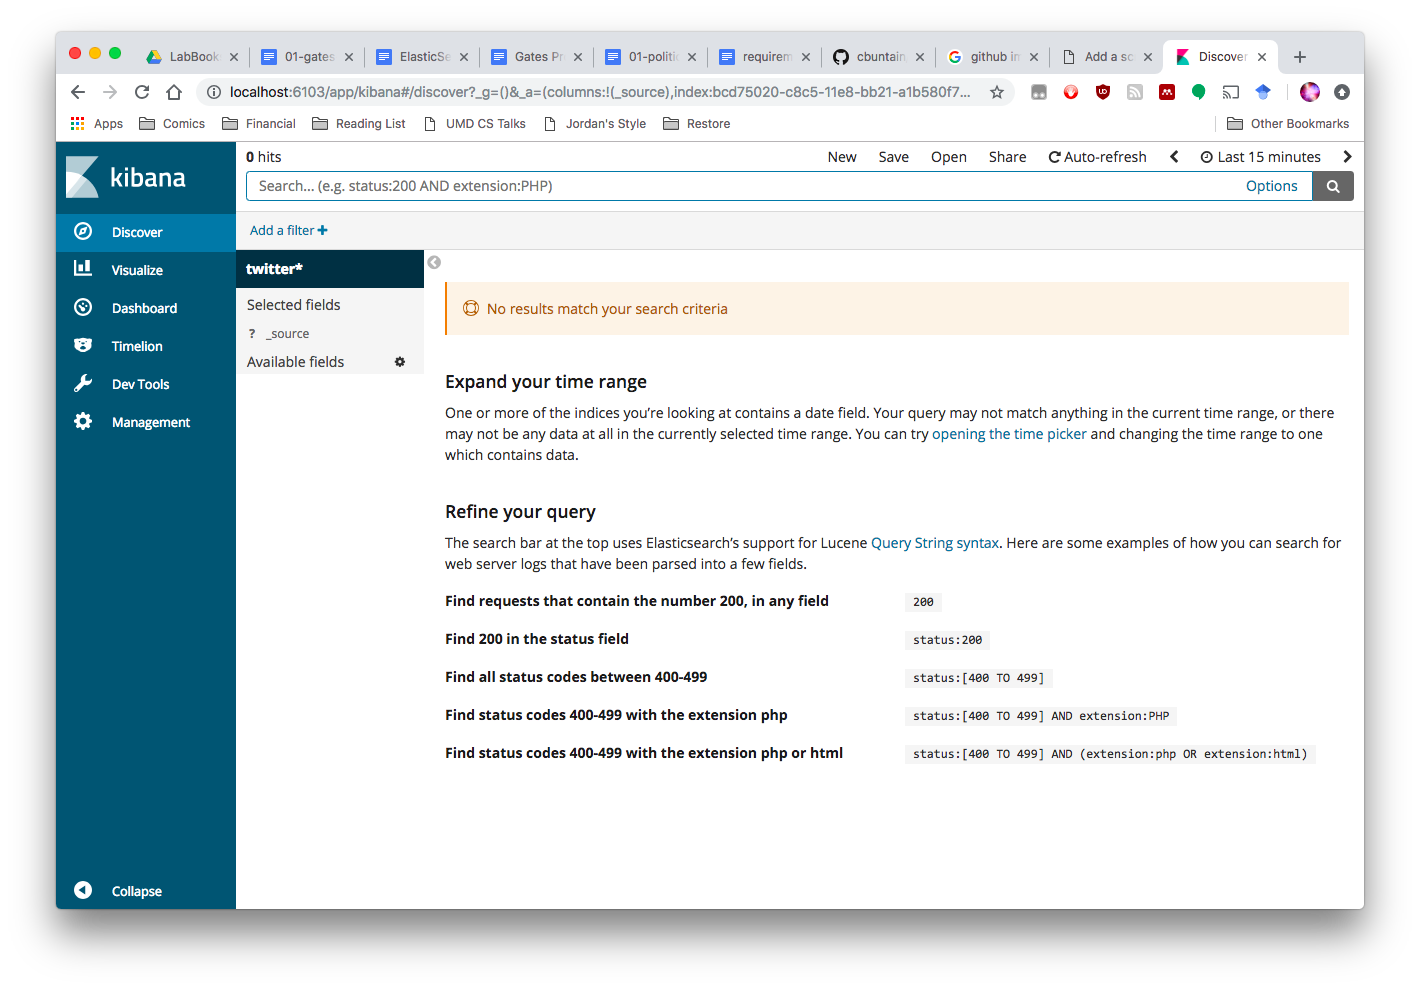
- You can select from several pre-configured options or use your own range. I often use Last 5 Years
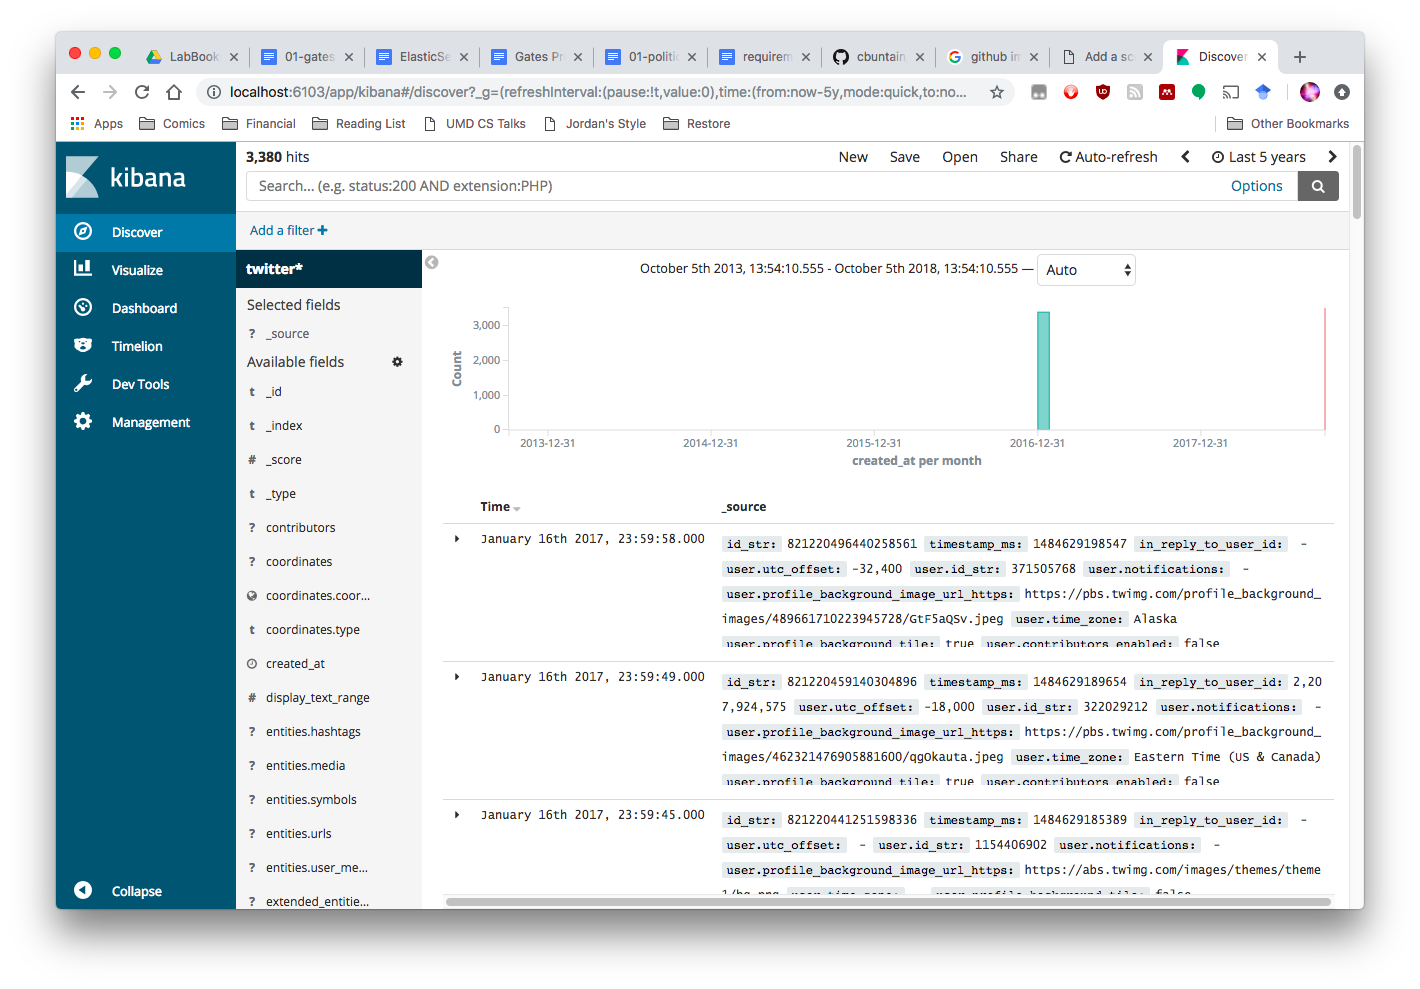
- Your data should appear now!
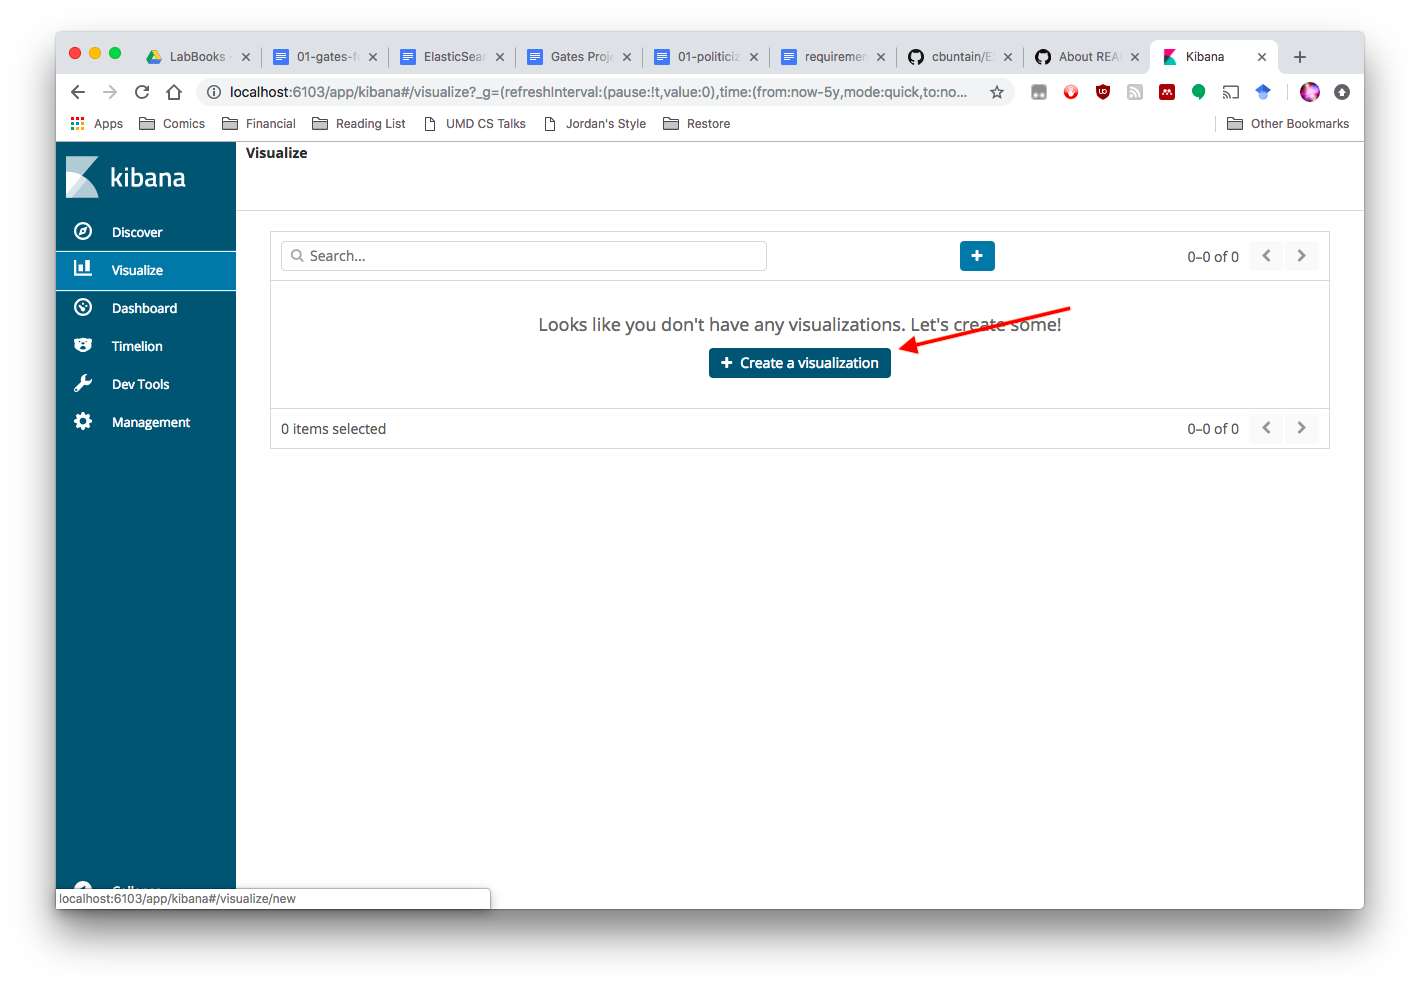
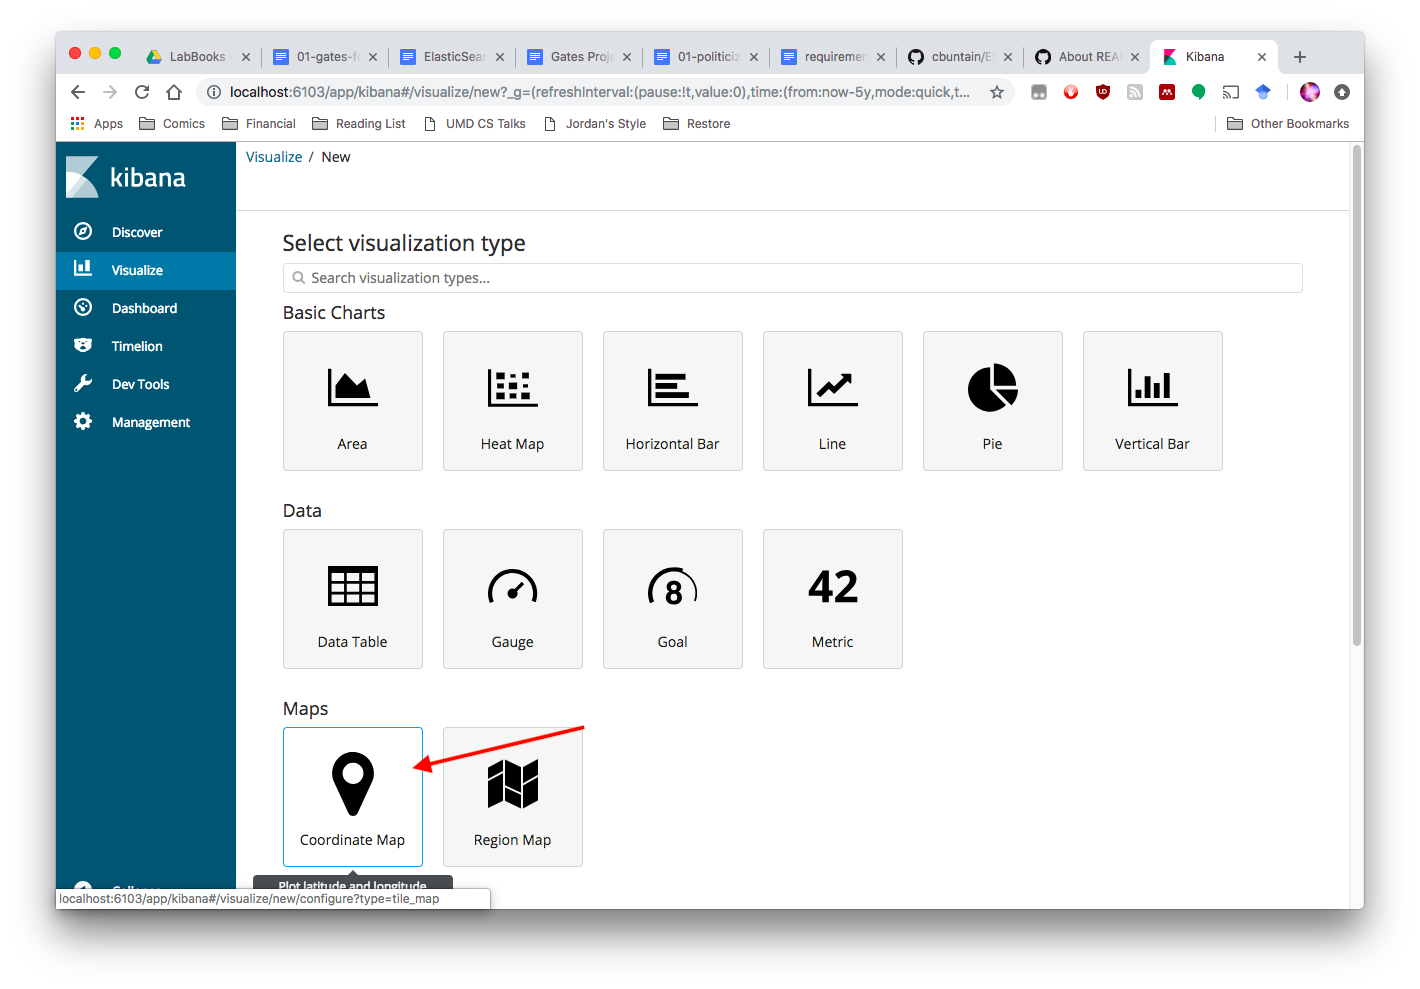
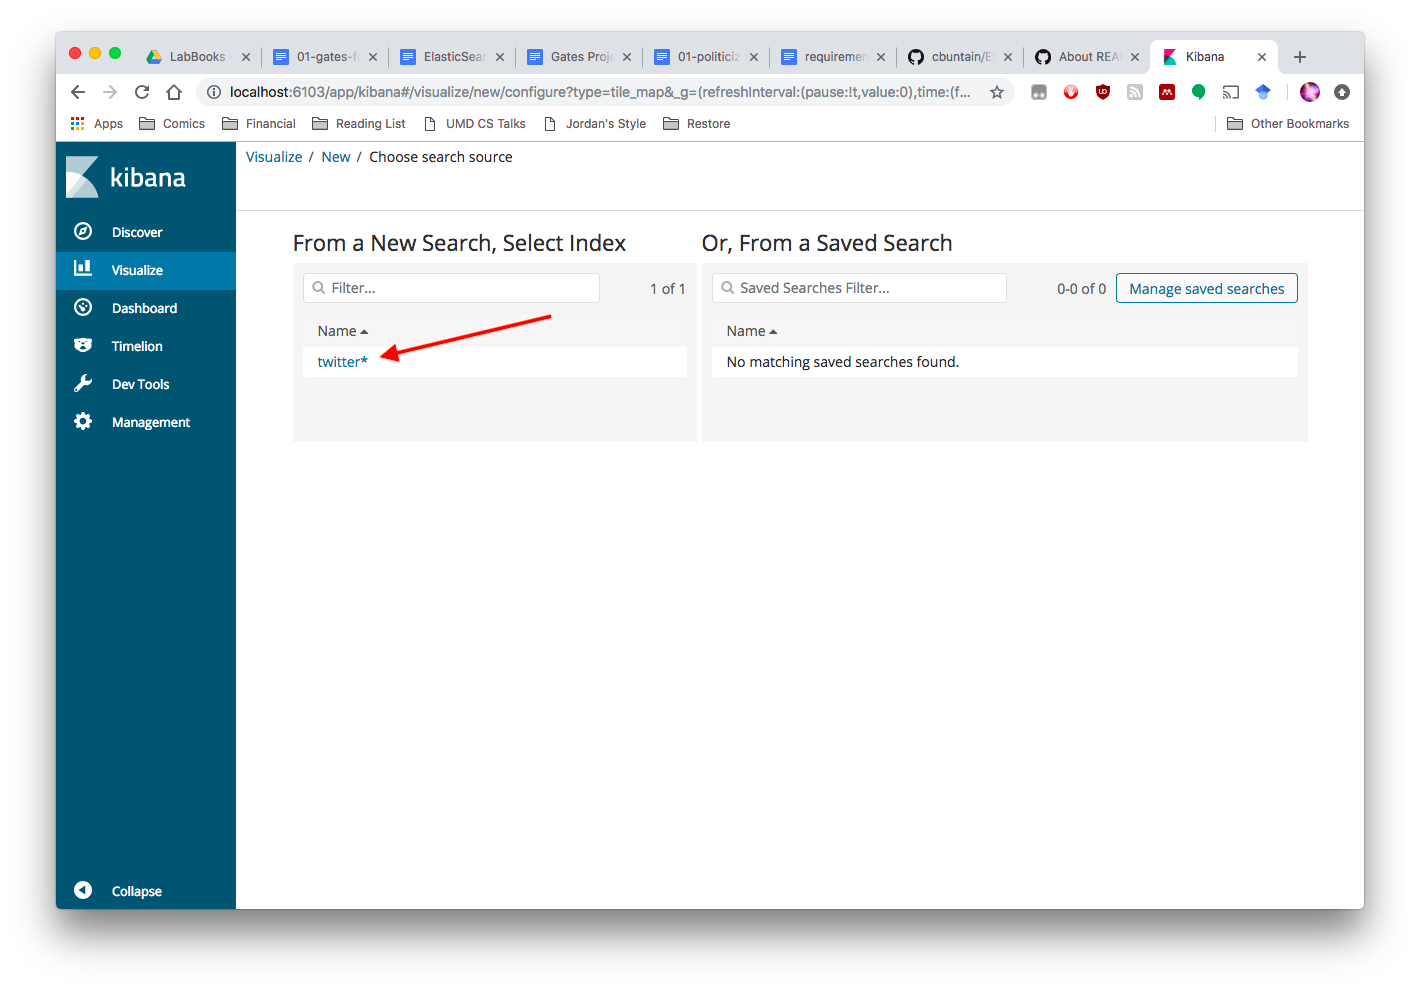
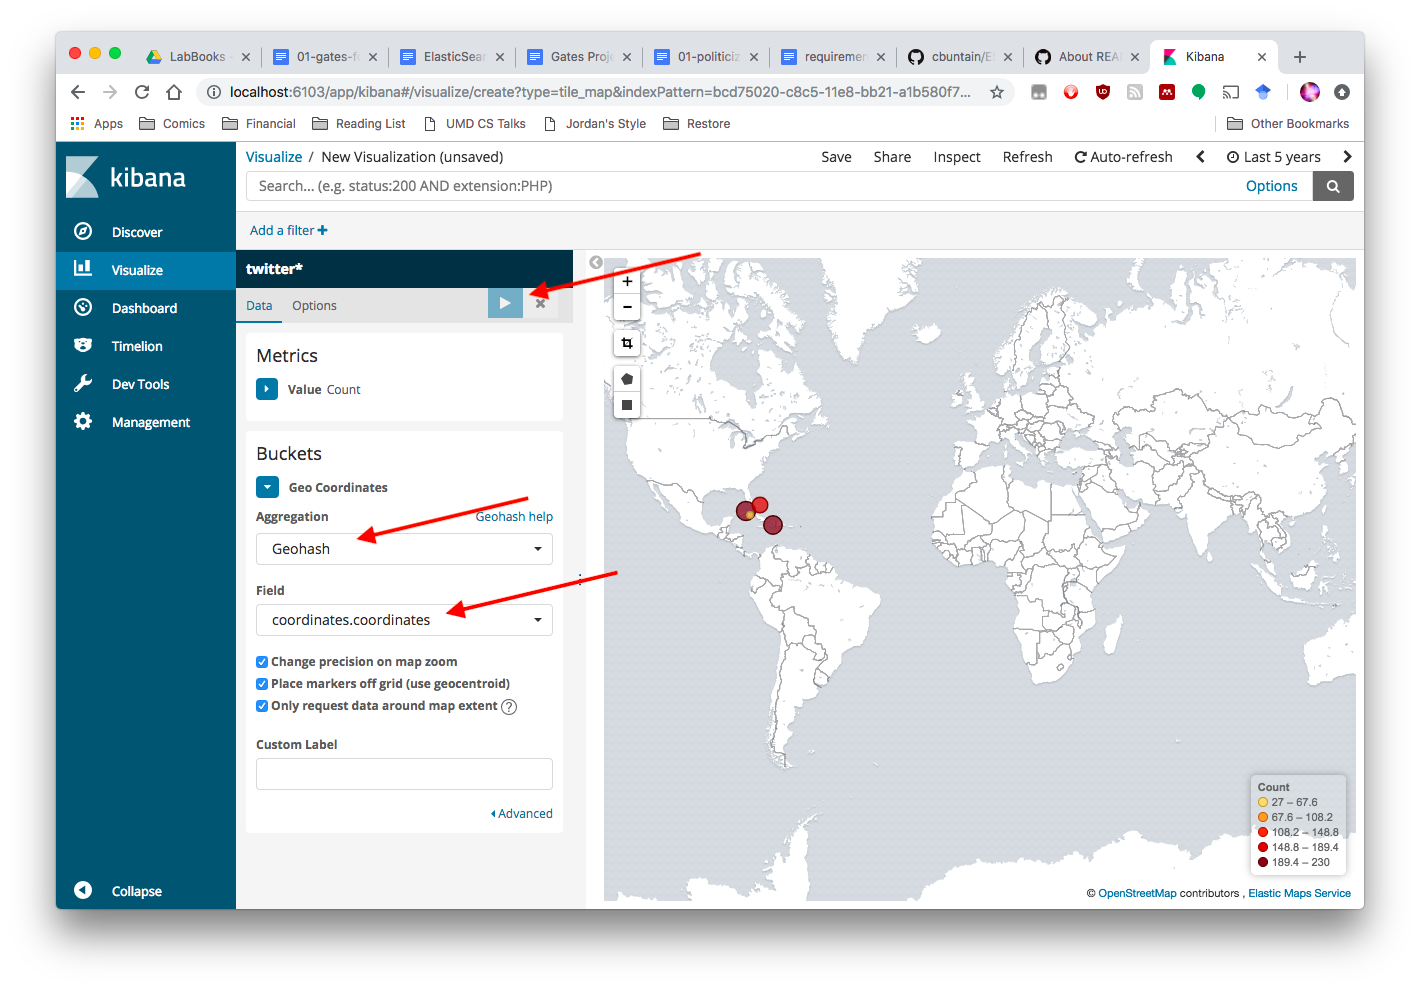
Kibana has a lot of visualization capability built into it. One really nice one is its mapping feature if your data already has geolocation (i.e., GPS) data available.
To build a map, follow these steps:
