This repository contains code examples, written in node.js, depicting common use cases for how to utilize Gladly REST API and Webhooks.
This repository should be used as a tool for learning and not as production code!
Please follow these instructions to create an API token.
To run the apps in this tutorial, you'll need to set up a few other things in Gladly:
- Create a Gladly Sidekick, setting the hours to 24/7 and enabling messaging automation. Click on View Preview to get a link to preview and interact with your Sidekick.
- In the Settings > Entry Points page, route chat messages to an inbox where your Agents are staffed in
- Create a messaging webhook URL for a Slack channel of your choice and save this to a safe space
Reply to Message
- Create a Gladly Email Address.
- In the Settings > Entry Points page, route email messages to an inbox where your Agents are staffed in
- Assign your API User to that inbox
Now, you can set up your environment variables. To do so, copy the .env-sample file found in the root folder of this repository into a new file called .env (also to be created at the root folder of this repository).
Set the following:
GLADLY_HOST: Set this to your Gladly URL (e.g.: https://sandbox.gladly.qa), making sure to not have an ending/at the end and including thehttps://protocol at the beginningGLADLY_USERNAME: Your Gladly developer email address (e.g.: gladlyadmin@gladly.com)GLADLY_API_TOKEN: The API token that you generated in Step 1CSAT_SLACK_WEBHOOK: The Slack webhook URL you copied in Step 2.8GLADLY_APP_BOT_AGENT_ID: The Gladly API User Agent ID
Save the file
Make sure you are in the root directory of this repository on Terminal, then run this command:
yarn install
This repository uses ngrok to make the Lookup Adapter endpoint publicly accessible
- Create an account on ngrok if you don't already have one
- Go here and follow the instructions in Step 1 & 2 to install
ngrok - Download the ngrok binary to your local machine - you will likely need grant permission to use it in your
System Preferences > Security and Privacysettings
In a nutshell, this application allows you to embed Gladly Sidekick on your front-end website or mobile app, but respond to messages using a back-end bot. When the bot determines it needs to pass off the interaction to a real human, the bot hands the conversation off to the Sidekick inbox configured in the Entry Points page on Gladly.
- Open up Terminal. In the root directory of this repository, type in
node backend-chatbot - In a new tab on Terminal, type in
ngrok http 8000and copy the HTTPS link - Go to
More Settings > Webhooksin Gladly and create a webhook forAUTOMATION/MESSAGE_RECEIVEDusing the HTTPS link you just copied. Leave all other fields blank - you can name this webhook whatever you'd like.
- In a new tab, go to the Sidekick preview link you generated in Step 2.3 and start a chat session:

- You will then receive an automated response with the following text:
Random message: MESSAGE. Type agent if you want to be handed off to an agent.. This is a message sent by the backend chatbot! Since this is handled by a bot, it won't appear in Gladly for you or an Agent to view yet. - Type in
agent - Log in to Gladly as an administrator and then view the inbox you configured to receive Sidekick contacts. You'll see that the bot has created a new chat session that an Agent can reply to - and has "handed off" the interaction to you!
- NOTE: If you do not respond for > 5 minutes, the bot will automatically close the chat session and will not route it to an agent.

- The app listens to the
AUTOMATION/MESSAGE_RECEIVEDorPINGwebhookPOSTrequests made by Gladly - If it receives any other type of webhook, it stops processing the request and sends back a
500HTTP status code - If it is a
PINGwebhook, it will respond back with HTTP 200. This is Gladly's way of checking if the webhook is alive. Gladly will not allow you to save the webhook in the Gladly UI if your app does not send back a HTTP 200 OK status code on thePINGevent - Otherwise, upon
AUTOMATION/MESSAGE_RECEIVED, the app will get the body of the message usingcontent.message.content.body - If the body does not contain the word
agentin it, it will send a random message to the chatter using thePOSTSend Outbound Automation MessageAPI. - Otherwise, the app will retrieve all previous messages sent back and forth in this interaction using the
GETGet Automation MessagesAPI and then use the response to compile a transcript of the bot and human interaction. - The app will then call
POSTAgent Handoffand populatedescriptionwith the description compiled in step #6. At this point, the chat will be available for routing in an inbox to an Agent. - Otherwise, the app will retrieve the conversation item details using the webhook's
content.conversationItemIdfield and the Get Conversation Item API.
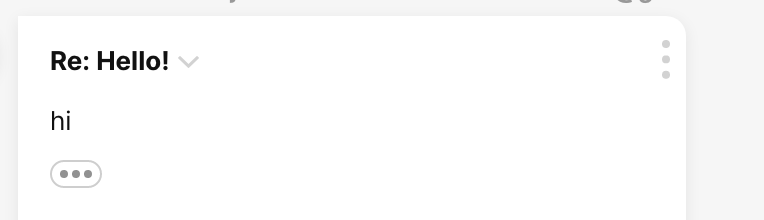
Reply to Message
In a nutshell, this application allows you to respond to written messages from other chanenls (e.g.: Email, Twitter, Facebook, WhatsApp) using a back-end bot. When the bot determines it needs to pass off the interaction to a real human, the bot hands the conversation off to an Agent in its current inbox.
- Open up Terminal. In the root directory of this repository, type in
node reply-to-message - In a new tab on Terminal, type in
ngrok http 8000and copy the HTTPS link - Go to
More Settings > Webhooksin Gladly and create a webhook forCONTACT/MESSAGE_RECEIVEDusing the HTTPS link you just copied. Leave all other fields blank - you can name this webhook whatever you'd like.
- Email the email address you set up above.
- You will then receive an automated response with the following text:
Thank you for your message!. This is a message sent by the backend chatbot! If you check in Gladly, the Conversation will be assigned to the Gladly API User Agent you set up above. - Send back the word
Agent. You will then receive a message:Handing you off!. - You will see the Conversation is now assigned to the inbox as opposed to the backend chatbot.
- The app listens to the
CONTACT/MESSAGE_RECEIVEDorPINGwebhookPOSTrequests made by Gladly - If it receives any other type of webhook, it stops processing the request and sends back a
500HTTP status code - If it is a
PINGwebhook, it will respond back with HTTP 200. This is Gladly's way of checking if the webhook is alive. Gladly will not allow you to save the webhook in the Gladly UI if your app does not send back a HTTP 200 OK status code on thePINGevent - Otherwise, upon
CONTACT/MESSAGE_RECEIVED, the app will check for the value incontent.context.assignee.agentId. If it is blank, the App will reassign it to the API User Agent ID using Update Conversation API. Then, it will proceed with the below. Note: if it is currently assigned to the API User Agent ID, it will also proceed with the below logic - but if it is currently assign to anyone other than the API User Agent ID, it will do nothing. - The App will then retrieve the message sent using the Get Item API.
- If the body does not contain the word
Agent, it will send a static messageThank you for your message!to the customer using the Reply to Message API. - Otherwise, the app will send
Handing you off!to the customer via the Reply to Message API and assign the Conversation back to the inbox using Update Conversation API.
In a nutshell, this application will send a message to a channel on Slack when a conversation is closed suggesting to send out a CSAT survey. In the real world, you'll likely want to replace the call to Slack with a real CSAT survey provider.
It is very important to handle customer information with utmost care. Please check with the appropriate representatives and personnel at your company to ensure you are abiding by security standards. This tutorial logs information to Slack as a learning mechanism only and should never be used in a production environment.
- Open up Terminal. In the root directory of this repository, type in
node csat-survey - In a new tab on Terminal, type in
ngrok http 9000and copy the HTTPS link - Go to
More Settings > Webhooksin Gladly and create a webhook forCONVERSATION/CLOSEDusing the HTTPS link you just copied. Leave all other fields blank - you can name this webhook whatever you'd like.

- Login to Gladly as an Administrator
- Create a new customer profile, adding the email address (e.g.: your own email address) into the profile and a phone number (if you'd like)

- Click on the
+button at the bottom of the profile to create a new conversation, and then click onEmailto initiate an outbound email - Respond to the email. In a few minutes, your response should appear in the customer profile you created, like this:
- Add a topic to the conversation in Gladly:

- Close the conversation by clicking on the down arrow and then clicking on
Close
- You'll now see a message on the Slack channel you associated with this app in Step 2.8 that looks like the following:


- The app listens to the
CONVERSATION/CLOSEDorPINGwebhookPOSTrequests made by Gladly - If it receives any other type of webhook, it stops processing the request and sends back a
500HTTP status code - If it is a
PINGwebhook, it will respond back with HTTP 200. This is Gladly's way of checking if the webhook is alive. Gladly will not allow you to save the webhook in the Gladly UI if your app does not send back a HTTP 200 OK status code on thePINGevent - Otherwise, upon
CONVERSATION/CLOSED, the app will get the conversation details using the webhook'scontent.conversationIdfield and the Get Conversation, Get Conversation Items APIs. - The app will also retrieve the customer profile in Gladly using the webhook's
content.customerIdfield and the GET Customer API - Finally, the app will retrieve a list of agents on Gladly using the List Agents API
- The app will then post a Slack message using the Slack webhook configured in step 2.8 using the following information format:
Conversation ${thisConversationId} was closed on ${conversation.closedAt}. Please send a CSAT survey request. Details below:\n\nAgent Email: ${(currentAgent && currentAgent.length) ? currentAgent[0].emailAddress : 'N/A'}\nCurrent Inbox ID: ${currentInboxId}\nTopic IDs: ${topicIds}\nCustomer Emails: ${customerEmails}\nCustomer Phones: ${customerPhones}
thisConversationIdis set to the conversation ID in the webhook payload (content.conversationId)conversation.closedAtis set to the conversation'sclosedAtvalue that was retrieved in Step 4 of this sectioncurrentAgentis set to the agent's email address. The agent's email address is retrieved from the list of agents you grabbed in Step 6 of this section: theidof the agent in this list is matched to theagentIdin the conversation information you retrieved in Step 4 of this section.currentInboxIdis set to the conversation'sinboxIdvalue that was retrieved in Step 4 of this sectioncustomerEmailsis set to the list of customer email addresses retrieved in theemailsarray via the customer information retrieved in Step 6 of this sectioncustomerPhonesis set to the list of customer email addresses retrieved in theemailsarray via the customer information retrieved in Step 6 of this section