The guide provides instructions on how to setup TeamCity 2018.1 server running on Windows XXX server and configure build jobs for a VueJS application (with TypeScript) and a .NET Core 2 Web API.
Note: Linux (Ubuntu LTS 18.04) Installation is much, much simpler than Windows: https://github.com/glebpopoff/TeamCity-2018.1-Setup-Guide/blob/master/README-Linux-Ubuntu-Setup.md
From my experience, both TeamCity and Node run much faster on the Linux server so do consider using Linux instead.
Requirements:
- Windows Server 2016 (lower versions will probably work fine). Suggested configuration: 4 vcpus, 16GB RAM (node.js and java will take lots of RAM)
- TeamCity 2018.1
- Full admin access to the server (including an ability to create new local-admin users)
We're trying to accomplish the following:
- DotNet core project build & publish (e.g. dotnet publish)
- TypeScript build (e.g tsc)
- VueJS distribution build (e.g. npm run build)
- Git-based deployment (e.g. git remote add & git push )
It's probably best for TeamCity to run as a separate user vs a system user. The reason for that has to do with TeamCity process running various build commands, such as npm or git that will be required during the build phase.
The system user may not be able to run these commands (at least I wasn't able to get it to work). Skip this step if you're feeling adventurous and would like to tackle this on your own.
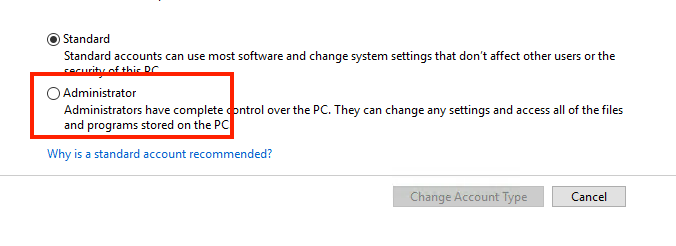
If you're creating a new user, make sure the user is a) Local Admin and b) Allowed RDC connections (you'll connect to the server as that user to install various tools (e.g. npm, npm packages, git). Lets assume you created a local admin user (teamcity) with admin rights.
Using the Windows Server User Control panel, you can make the user an admin by changing the profile's user type, e.g. :
If it's a fresh server environment (e.g. Windows Server 2016), go ahead and install Chrome and NotePad++ to make your life easier troubleshooting things.
Chrome: https://www.google.com/chrome/browser/desktop/index.html NotePad++: https://notepad-plus-plus.org/download/v7.5.8.html
If you using the server, make Chrome your default browser so that you don't have to deal with IE 11 nonsense.
Download the installer from this URL: https://www.jetbrains.com/teamcity/download
The installer for the current version (2018.1) is quite large ~ about 1GB in size.
TeamCity will need a database engine to persist its data and configuration. Skip this step if you have access to a RDBMS (MySQL, SQL Server, Postgres) - double check what's supported.
I'm going to use MySQL Community Server 8.0.12 for the setup. Download link: https://dev.mysql.com/downloads/windows/installer/8.0.html Make sure to choose the Installer Option (vs ZIP Archive). You can skip the login (the link is at the bottom) and just proceed to the Download screen. The file should be about 273MB.
Run the installer. Choose the "windows service" option for both agent and server selections along with the default port and other options.
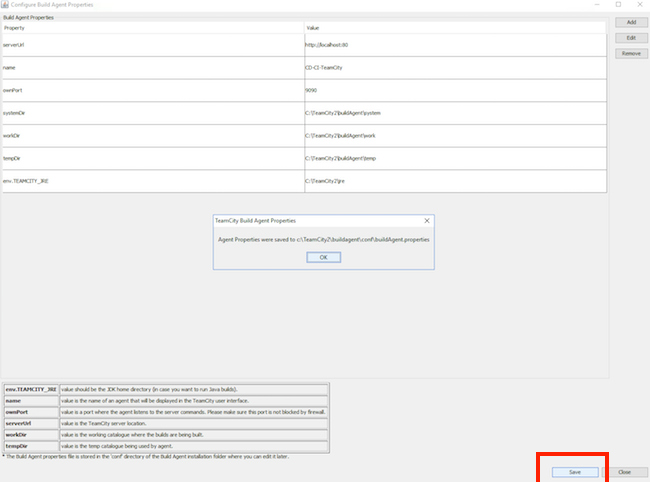
When prompted to save user configuration, go ahead and click the "Save" button - you should see a confirmation
When the installer prompts you to select Service Account for the server select SYSTEM account for time being (we can switch later to the user created above). For some reason the installer didn't recognize the newly created user from the above step.
Once the installer finishes, the browser should open the following page: http://localhost/mnt to start the configuration wizard:
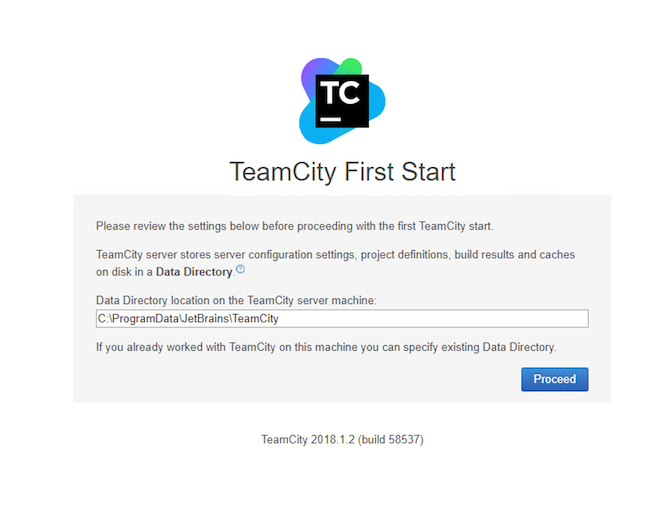
If for some reason the installer fails or the page doesn't open, try re-installing teamcity from the beginning. If you can't get to the TeamCity First Start page (http://localhost/mnt), something went wrong.
Using the TeamCity Web First Start page (http://localhost/mnt) go through the steps until you need to setup Database connection. You will be presented with the following screen:
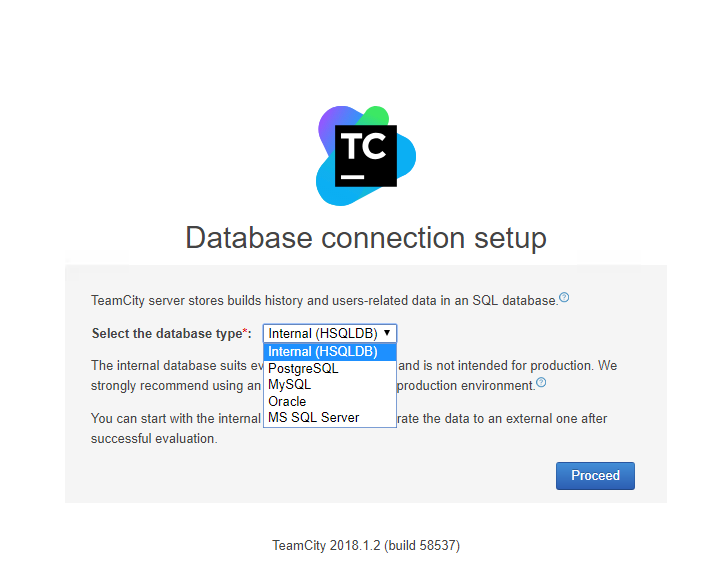
You can use Internal storage (HSQLDB) for like dev purposes but I'm going to select the MySQL option (assuming no other database service is available to us). I installed and used TeamCity with MySQL and didn't see any issues - that's the recommendation I'm going to make to you guys.
Select MySQL. Click on the 'Download JDBC Driver' button. We're not ready to setup MySQL. Keep the window open while starting the MySQL installer.
Run the MySQL Community Server installer and choose "Server" - this will install just the server. In my opinion, it's also good install the client software (Workbench or command line) so you can manage the server and maintain databases/users/privileges.
If the installer needs Microsoft Visual C++ 2015 Redistributable Package, download it from here: https://www.microsoft.com/en-us/download/confirmation.aspx?id=53587 , install it, restart the MySQL installer.
Choose the default options during the server setup, including the standard MySQL port (3306). Setup a strong MySQL root password. Setup a 'teamcity' user (DB admin). Make sure the server installs successfully.
We now need to install MySQL client tools and create the database for TeamCity (not sure why installer cannot create the database on our behalf). Go ahead and run the MySQL installer then select "Client" and install the client tools (e.g. MySQL Workbench under Applications).
Start MySQL Workbench and connect to the server as root then run the following SQL command:
create database teamcityci
This will create 'teamcityci' database on your local instance of MySQL server.
Go back to the TeamCity installer and enter 'teamcityci' as the name of your database along with teamcity user & password you created above.
The TeamCity installer should now be in the "TeamCity is Starting" mode - this make take a little bit of time to setup.
Go ahead and accept the license agreement. FYI - as of 09/12/18 you're installing the software under the JetBrains TeamCity Professional license as such you're entitled to the following:
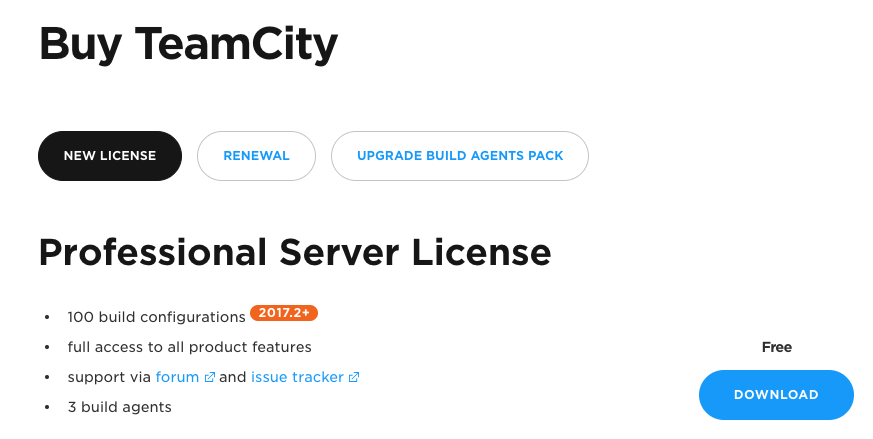
Finish the installer and create TeamCity admin user.
Tip: if you forget your admin password, you can retrieve it using the following steps:
- Go to your TeamCity installation log folder (log file path where TeamCity installed in C: drive: C:\TeamCity\logs)
- Open teamcity-server.log file
- Search for key word: “Super user authentication” then copy the token .
- This token is reset every time Teamcity is restarted, so Look for the latest one from the Log.
- Go to Super User redirect page: http://servername:port/login.html?super=1
- Enter the token. You should be redirected to the admin screen
Source: https://vnextcoder.wordpress.com/2015/09/15/teamcity-reset-admin-password/
Before we proceed with the project and build setup, lets go ahead and setup email settings for project build notifications. Skip this step if you're not interested in build notifications.
Go to the Email Notifier page: http://localhost/admin/admin.html?item=email and enter the SMTP server information. If you're using SendGrid (which is awesome), your settings should be as following:
- Host: smtp.sendgrid.net
- Port: 587
- From: <your from address, e.g. noreply@foo.com>
- Login: apikey
- Password:
- Secure connection: None
SendGrid offers free trial and also gives you basically a free account through their Azure service (25,000 emails per month through Azure as of 09/12/18).
Go to the Services screen and change the TeamCity processes to run as the local admin user we created (e.g. teamcity). Make sure to update both services (TeamCity Build Agent and TeamCity server) to run as a local admin user. Again, this is required because the system account may not be able to run some of not all of the tools that we'll setup in the next steps.
On my server, I have the processes run as 'teamcity897', which is a local admin user:

We'll need to setup the following tools on the server as a local admin user (teamcity):
- DotNet (.NET Core 2)
- NPM
- NPM packages
- Git
Go ahead and log out of the server and login as the local admin user (e.g. teamcity). FYI - all further TeamCity related troubleshooting should be performed using this account.
Login to the build server as the local admin user (teamcity) and download the .NET Core installer: https://www.microsoft.com/net/download
I'm using .NET Core on my project but you may other requirements. So install what's necessary for your project.
Login to the build server as the local admin user (teamcity) and download Node.JS and NPM installer: https://www.npmjs.com/get-npm
NPM is required to compile TypeScript as well as package (build) VueJS application.
Login to the build server as the local admin user (teamcity) and open the command prompt. Then lets install the following packages:
- TypeScript Type the following command in the command prompt:
npm install -g typescript
Make sure the compiler works after installing: run tsc More info: https://www.npmjs.com/package/typescript
- Vue CLI Type the following command in the command prompt:
npm install -g @vue/cli
More inf: https://www.npmjs.com/package/vue-cli
Download and install Git from here: https://git-scm.com/downloads Use default settings, make sure to check "Use Git from Windows Command Prompt" option (default selection).
Make sure to install git as a local admin user (teamcity).
Open command prompt and setup Git settings:
git config --global user.email "you@example.com"
git config --global user.name "Your Name"
Restart the server to make sure all proper $PATH environment variables have been set or try to restart just the TeamCity services and see whether that's enough.
We're now ready to setup a project in TeamCity. The prerequisites here are:
- Publicly accessible Git repo
- Git authentication means (either private SSH key or login credentials)
Login to TeamCity web interface and click on Projects then click Create Project then pick from a repository URL. Enter your repository URL along with any required credentials . If it's an SSH repo, click on the "Manually" tab and proceed from there.
I'm assuming you're setting up an SSH-based repo. Go ahead and click on the "Manually" tab then enter the project name (e.g. MyProject - Dev) and click Create.
Click on the project name to go into Project configuration then expand the General Settings tab.
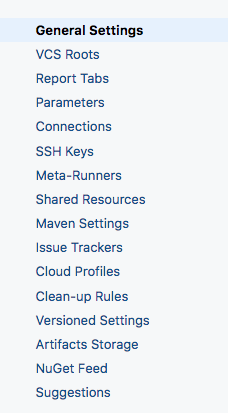
I'm going to assume you have the private key ready for your SSH repo. It's required for the setup of SSH-based Git repo. Go ahead and click on the "SSH Keys" link and upload your key.
Then go ahead and click on VCS Roots from the menu then new VCS root select 'Git' from the Type of VCS menu then enter the URL of your SSH repo (e.g. ssh://git@bitbucket.XXX.com/projects/myproject.git)
Enter VCS Root information (name), Fetch URL (URL of the repo). Then change the default branch if needed (e.g. from refs/heads/master to refs/heads/develop if you're working off Develop). The build job will run whenever there's a merge into Master or Develop (whatever your settings are).
Change the Authentication Method to 'Uploaded Key' then select the key you have uploaded earlier. Click on 'Test Connection' to make sure connection can be established.
Go ahead and click on 'Create a new Build' then follow the setup. You should get to a screen that lets you select your build steps (after scanning your repo). Select '.NET CLI (dotnet)' as a build step and 'build <your solution name.sln' as parameter. We're telling the build job to use 'dotnet' to build your solution.
Next click on Triggers and add a new trigger: VCS Trigger (basically anytime someone merges the code into our branch the build will run)
Click on Build then Run (to the right) then click on the build job and go into the Build log to see the progress of your build.

So far, we have setup a single build step to build the .NET services project for our app; now we're going to add the remaining steps to build the VueJS application. In my case the app is written using TypeScript; so, I'll need to add typescript compiler to the mix (tsc). We're using multiple steps vs a single large step with lots of scripts so that it's easier to troubleshoot any issues with a specific step.
- Install NPM Packages
- Build TypeScript
- Build Vue App
- Publish .NET Api
Go ahead and click on Build Steps under your build then add a new one. Select 'Command Line' and enter the following to add a build script that will install NPM packages that are required by the app:
- Step Name: 'Install NPM Packages'
- Run: 'Custom script'
- Custom script:
cd <your UI or VueJS root folder>
npm i -f
So if my top level directories in the repo look as following:
- ui (Vue App)
- api (.NET services)
Then the script should be as following:
cd ui
npm i -f
Go ahead and click on Build Steps under your build then add a new one. Select 'Command Line' and enter the following to add a build script that will compile your typescrip files that are required by the app:
- Step Name: 'Build TypeScript'
- Run: 'Custom script'
- Custom script:
cd <your UI or VueJS root folder>
tsc
So if my top level directories in the repo look as following:
- ui (Vue App)
- api (.NET services)
Then the script should be as following:
cd ui
tsc
I have the following script running to update the application build time (search & replace in one of the TS files):
cd ui
cd src
sed -i "s/<app-build-time>/$(date)/g" config.env.ts
Go ahead and click on Build Steps under your build then add a new one. Select 'Command Line' and enter the following to add a build script that will build the app for distribution:
- Step Name: 'Build Vue App'
- Run: 'Custom script'
- Custom script:
cd <your UI or VueJS root folder>
npm run build
So if my top level directories in the repo look as following:
- ui (Vue App)
- api (.NET services)
Then the script should be as following:
cd ui
npm run build
Go ahead and click on Build Steps under your build then add a new one. Select 'Command Line' and enter the following to add a build script that will publish your .NET core app that you can then deploy to a server.
- Step Name: 'Publish .NET API'
- Run: 'Custom script'
- Custom script:
cd <your api root folder or where the solution file resides>
dotnet publish <your file name>
So if my top level directories in the repo look as following:
- ui (Vue App)
- api (.NET services)
 - MyAwesomeProject.sln
Then the script should be as following:
cd api
dotnet publish MyAwesomeProject.sln
We're now ready to deploy the application to Azure or perhaps another remote server using Git. Assuming we're deploying the "ui" folder (where the Vue app resides), create a new deployment step using Command Line and enter the following text (adjust it to your needs). The script deploys the "dist" folder (generated by Vue Cli Build Cmd) to Azure Git repo (master).
cd ui
rmdir repoclone /s /q
git clone https://<azure git user>:<azure git password>@<app service name>.scm.azurewebsites.net:443/<app service name>.git repoclone
xcopy dist repoclone /s /e /y
cd repoclone
git add -A
git commit -m 'teamcity'
git push
Linux equivalent:
cd ui
rm -rf repoclone
git clone https://<azure git user>:<azure git password>@<app service name>.scm.azurewebsites.net:443/<app service name>.git repoclone
cp -R dist/* repoclone/
cd repoclone
date >> deployment.log
git add -A
git commit -m 'teamcity'
git push
If using Azure, you should be able to configure your Git settings in the Deployment Credentials and Deployment Center configuration panels.
Login to TeamCity go to your account, select Notification Rules: http:///profile.html?item=userNotifications Click Add New Rule then select '' and required notification conditions (e.g. When Build Fails)