The tags behind the advanced search in Glyphish Gallery.
To edit the default metadata that is packaged with Glyphish Gallery, first fork and clone the project.
Then, open whichever of the .gmetadata* files you would like to edit. From there, the process is very similar to creating your own personal metadata (below), excpet you're not starting from scratch.
- Open the
.gmetadatafile you want to edit. - Copy the contents of the file to JSONLint to deminify the JSON.**
- Add or edit the tags for whichever icon.
- Copy the contents of the file to JSONLint, this time to make sure your edited JSON is valid.
- Minify your valid JSON here.
- Save the JSON file, and follow the contributing guidelines.
NB: The .gmetadata file extension is just a JSON file with a different extension, used to differentiate the packaged metadata.
** Not necessary, we just find it is easier to browse and edit the tags when the JSON looks pretty.
To create your own personal metadata, follow these simple steps:
- Create a new JSON file, such as
custom.json. - Open the JSON file in your favorite editor.
- Create an associative array, and use the icon name(s) as the key(s) (without the extension).
{
  "01-refresh":[
  ],
  "02-redo":[
  ],
  // etc.
}
4. Add the tags (in quotes) in the value (array) part of the JSON.
{
  "01-refresh":[
    "again",
    "reload",
    "circular arrow",
    // etc.
  ],
  "02-redo":[
    "try again",
    "refresh",
    "circular arrow",
    // etc.
  ],
  // etc.
}
5. Go to JSONLint and make sure that your metadata is valid JSON (or else Glyphish Gallery will NOT be able to process it!).
6. If it passes inspection, save the file and import the metadata.
To import your own metadata .JSON file, you must first make sure that you have the correct [metadata format](#creating metadata).
After you have inserted all of your metadata, and saved the .JSON file in an easily accessible location, navigate to "Metadata" and then "Import".
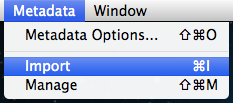
Or use the shortcut ⌘I.
You'll then see this window:
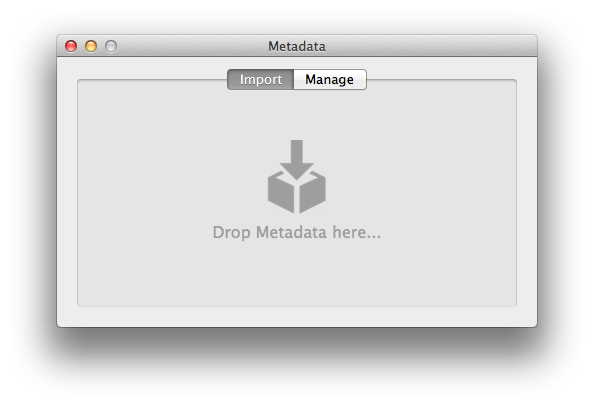
From here, drag and drop your .JSON file onto the dropzone. The file will then be added!
To import your imported metadata, navigate to "Metadata" and then "Manage"
Or use the shortcut ⇧⌘M.
You'll then see this window:
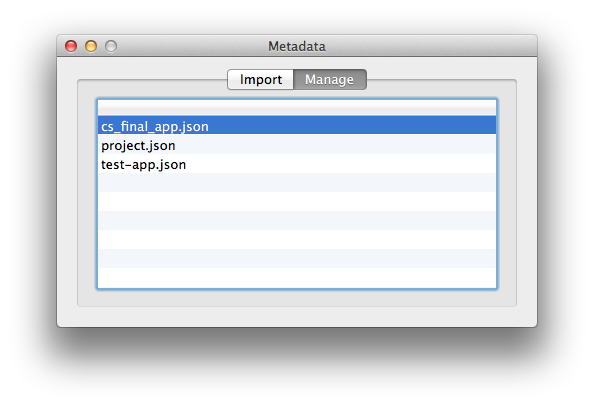
Select a JSON file, and press your delete key to remove it.
Because these files are stored locally, you will need to import them onto different computers, if you use Glyphish on different machines. In the future, it is possible that they're will be an option to choose a folder for your Glyphish metadata files, and you could create a folder in Dropbox, and keep them synced.
1. Fork metadata to `username/metadata`.
2. Clone the project:
$ git clone https://github.com/{username}/metadata
3. Create your feature branch:
$ git checkout -b new-tags
```

<p>4. Add or edit tags. <br/>
5. Make sure your JSON is valid! (We will close any pull request with invalid JSON).  Commit your changes:</p>

```
$ git commit -am 'Changed or added some tags'
```

<p>6. Push to the branch:</p>

```
$ git push origin new-tags
```

<p>7. Create a new Pull Request to the `review` branch.</p>

If everything checks out, and we like your pull request, we'll merge it to `review`.  After merging some other branches to review (besides yours), we'll merge all of the new features to master, where they'll be part of the new release!

## Questions?

- [Open an issue](https://github.com/glyphish/metadata/issues).

## Connect
- Follow [@Glyphish on Twitter](https://twitter.com/glyphish).
- Signup for [Glyphish news](https://confirmsubscription.com/h/r/7C4D8263FEF6DC79).
- Directly [contact Glyphish](https://helloglyphish.wufoo.com/forms/send-a-message-about-glyphish-icons/).
- Browse [available icon sets](http://www.glyphish.com).