In this module, you will learn how to install and configure the AMQ Streams and Open Data Hub Operators on Openshift 4.x.
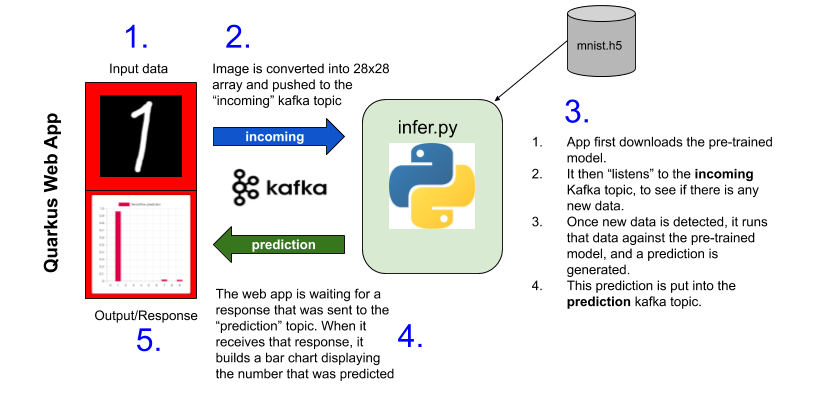
This workshop consists of a Quarkus web application, that provides the input (a handrwitten digit), a simple Python application that takes the input, performs a prediction and returns that prediction to the web application. Kafka topics will be used to pass the input data to the python application, and another topic to return the inference (prediction) to the web application.

- Red Hat Openshift 4.2+ environment
- Basic knowledge of Openshift Operators
- Openshift 4 CLI
ocfor your local environment from https://mirror.openshift.com/pub/openshift-v4/clients/ocp/latest/.
Log into your Openshift console with cluster-admin privileges.
Under Home, select Projects. Click Create Project.
Name: mnist-demo
Display Name: MNIST Demo
Description: Quarkus web application, using Kafka, to predict handwritten digits
IMPORTANT: Project name MUST be mnist-demo for the application to work correctly.
Next, go to Operators > OperatorHub
Find the AMQ Streams operator and clike Install.
On the Create Operator Subscription page, under Installation Mode, select ' A specific namespace on the cluster'. Ensure that mnist-demo is selected. Leave all other settings and click Subscribe
You should see the AMQ Streams operator. Click on AMQ Streams.
On the Overview page of the operator, find Kafka under the Proved APIs and click Create instance. Leave all settings as is and click Create.
This will take a couple of minutes to spin up the necessary Kafka and Zookeeper pods
From the menu directly below AMQ Streams, select Kafka Topic. Click Create KafkaTopic. In the YAML file shown, under the metadata section change name from my-topic to incoming. It should look like this:
apiVersion: kafka.strimzi.io/v1beta1
kind: KafkaTopic
metadata:
name: incoming
labels:
strimzi.io/cluster: my-cluster
namespace: mnist-demo
spec:
partitions: 10
replicas: 3
config:
retention.ms: 604800000
segment.bytes: 1073741824
Click Create to create the Kafka topic.
Repeat these steps to create another KafkaTopic called prediction.
apiVersion: kafka.strimzi.io/v1beta1
kind: KafkaTopic
metadata:
name: prediction
labels:
strimzi.io/cluster: my-cluster
namespace: mnist-demo
spec:
partitions: 10
replicas: 3
config:
retention.ms: 604800000
segment.bytes: 1073741824
Once created, you should see two KafkaTopics (KT) listed: incoming and prediction.
Go back to Operators > OperatorHub. Type Open Data Hub in the Filter by keyword... search bar. Select the Open Data Hub Operator and click Install. Ensure that the mnist-demo project is selected as the specific namespace. Click Subscribe.
On the Installed Operators page, click on the Open Data Hub Operator.
Click on Create Instance under Provided APIs, then click Create.
This will take a couple of minutes to spin up the necessary pods.
On your local machine, open up a terminal session and login to the Openshift environment, using oc and your cluster admin credentials. It should look similar to the command below, substituting your Openshift URL and cluser administrator login user.
oc login https://api.cluster-mnist-xxxx.mnist-xxxx.example.opentlc.com:6443 -u cluster-admin
Once you have logged in, ensure you are using the newly created mnist-demo project.
oc project mnist-demo
Create a new app, using the specified Github repository for the web application.
oc new-app registry.access.redhat.com/redhat-openjdk-18/openjdk18-openshift~https://github.com/gmccarth/mnist-openshift --name=mnist-demo-app
This will create the web app called mnist-demo-app, under the mnist-demo project.
This will take several minutes to run, as it needs to download the necessary libraries for the app.
In the Openshift web console, go to Workloads > Pods to see the list of pods. If you see a pod called something similar to mnist-demo-app-1-xyz12, then the web app has deployed successfully.
We need to expose the service in order to make it accessible on the web. To do this, type oc expose svc/mnist-demo-app from the terminal on your local machine.
Now, go to the Openshift web console to Networking -> Routes. You should see a new route for mnist-demo-app. Before we go to this URL for the web app, we need to configure our Python environment, so it can run the Prediction app.
In the Networking > Routes section of the Openshift web console, get the location for jupyterhub and navigate to that URL in another tab of the web browser.
You may be asked to sign in with Openshift. If so, use the same cluster-admin user id and password that you used for Openshift.
If you get an Authorize Access page, ensure that user:info is checked and click Allow selected permissions.
You will be taken to the Jupyter Spawner Options page. Leave all the defaults and click Spawn
This will take a couple of minutes to set up the jupyter notebook for you. When it is ready you'll see the notebook showing the
lost+founddirectory.
In the jupyter notebook, click on New and Terminal as highlighted in the image below:
 In the Notebook terminal run the following commands:
pip install keras
pip install tensorflow
pip install kafka
Ignore any warnings at this time. Next we need to pull down the Python application that we use to predict the numbers. Run the following in the terminal.
wget https://raw.github.com/gmccarth/mnist-openshift/master/src/main/resources/assets/infer.py
To check that it downloaded correctly, type ls -l in the terminal, and you should see infer.py listed, along with the lost+found directory.
In the terminal, type python infer.py and hit reurn. The app should initialize and you should see Ready on the terminal.
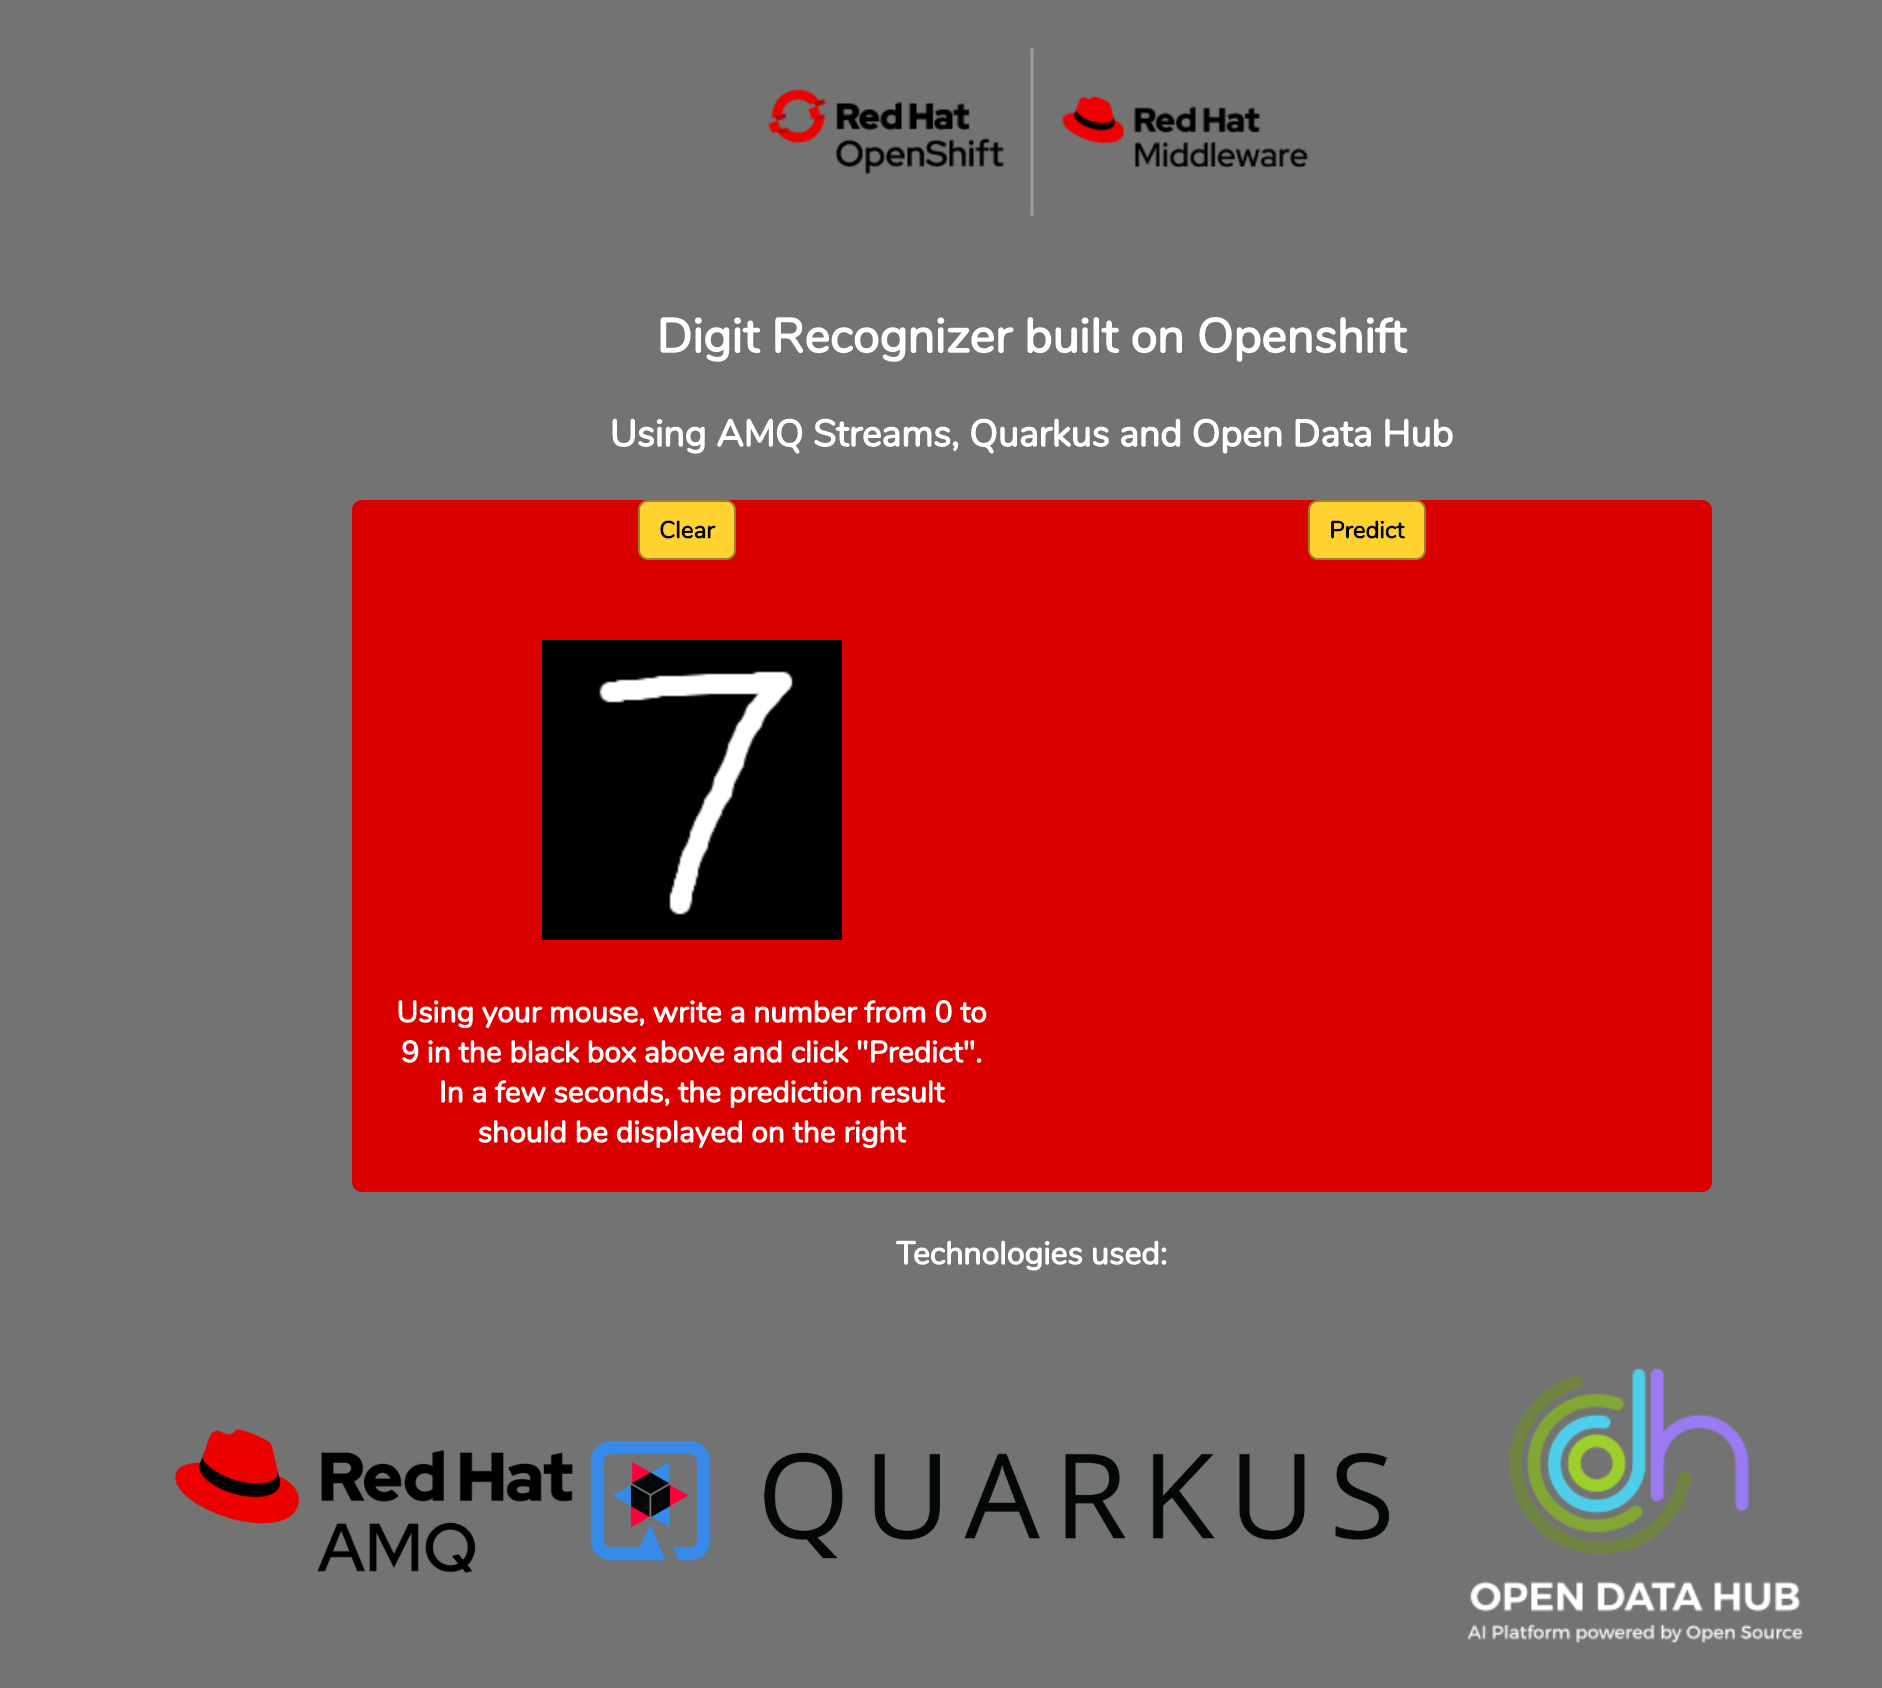
In the Openshift web console, go to Networking > Routes and copy the location of the mnist-demo-app URL. Open that URL in a new browser tab. Using your mouse, draw a single digit between 0 and 9 in the black square as shown below:
 Click on Predict and wait a few seconds for the result. To see the prediction directly on the Python application, go back to your
 jupyter notebook and the prediction is written to the terminal each time a new number is submitted.