Cross Post
This is my version of cross-post_which uses a different html to markdown module to parse the given url. I was having problems with code blocks that there were showing up with missing wrappers thus not being formatted to an actual code block in dev.to or hasnode.
Another change is to remove a custom div which contains my copy to clipboard button on the code blocks. I am removing it since other platforms don't need that. If you are using gatsby-remark-prismjs-title plugin you are going to need that anyway.

Easily cross post your article on dev.to, Hashnode and Medium from your terminal.
Installation
In your terminal:
npm i -g cross-post-blogInstallation of MacOS with M1 chip
There are two ways to install this package on a MacOS with M1 chip:
Method 1: Rosetta Terminal
- If you don't have a Rosetta Terminal, go to Finder, then in the menu bar go to Go > Utilities. Duplicate "Terminal" and rename it to "Rosetta Terminal" or anything you want. Then click on the duplicate you create it and press "command + I" and choose "Open using Rosetta".
- Open the Rosetta Terminal you created, uninstall and then install Node again.
- Install this package again.
Method 2
- In the terminal run: arch -arm64 brew install pkg-config cairo pango libpng jpeg giflib librsvg
- Try installing this package again.
Usage
Set Configuration
For the simplicity of the CLI, and considering most of the APIs of each of the platforms do not allow or provide endpoints for user authentication, you will need to get your access tokens, api keys or integration tokens from your own profile before using cross post. This will just need to be done the first time or if you want to change the tokens.
The tokens are all stored on your local machine.
Here's a guide on how to do this for each of the platforms:
dev.to
-
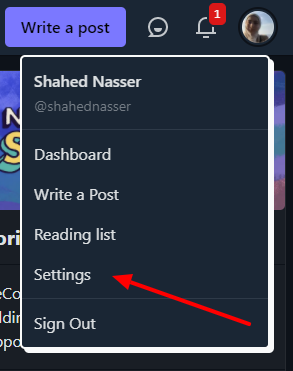
After logging into your account on dev.to, click on your profile image and then click on Settings
-
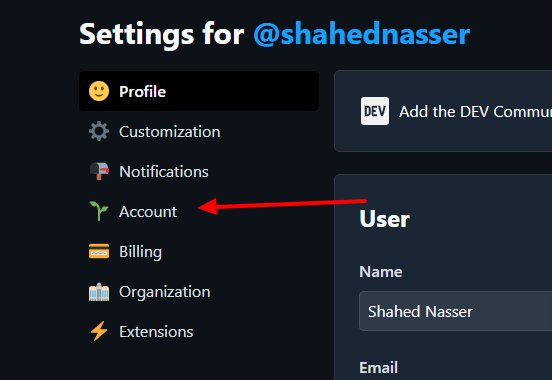
Then, click on the Accounts tab in the sidebar
-
Scroll down to the "DEV Community API Keys" section. You need to generate a new key. Enter "Cross Post" in the description text box or any name you want then click "Generate API key"
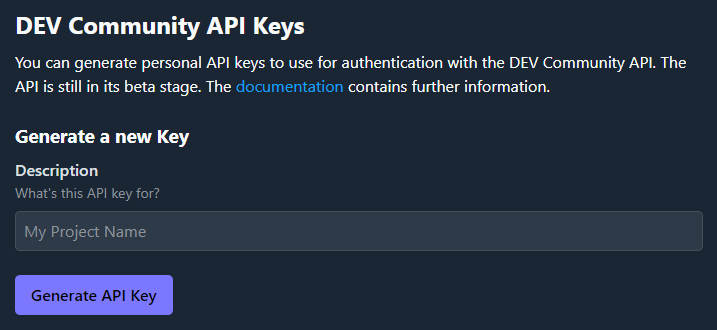
Copy the generated API key, then in your terminal:
cross-post config devYou'll be prompted to enter the API key. Paste the API key you copied earlier and hit enter. The API key will be saved.


Hashnode
-
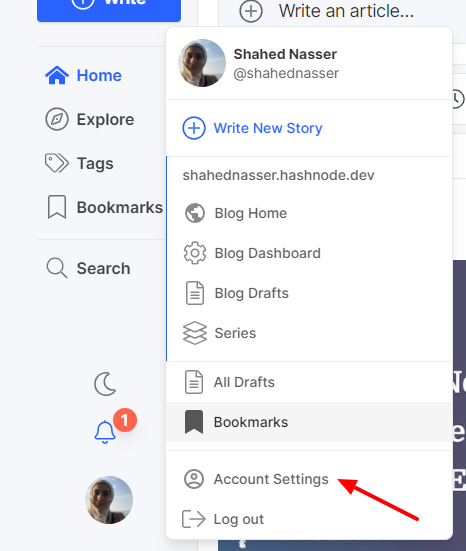
After logging into your account on Hashnode, click on your profile image and then click on "Account Settings"
-
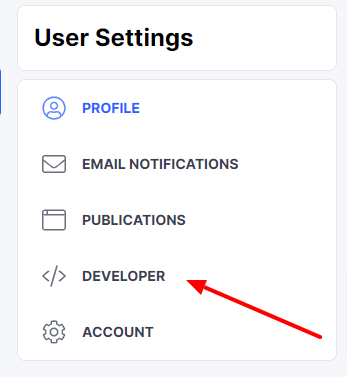
In the sidebar click on "Developer"
-
Click the "Generate" button and then copy the generated access token.

-
Run the following in your terminal:
cross-post config hashnodeFirst you'll be prompted to enter your access token. Then, you need to enter your Hashnode username. The reason behind that is that when later posting on hashnode your publication id is required, so your username will be used here to retreive the publication id. Once you do and everything goes well, the configuration will be saved successfully.


Medium
-
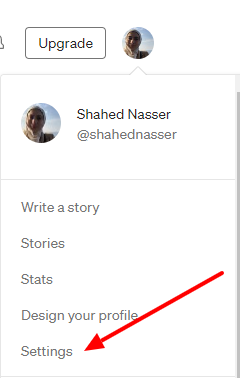
After logging into Medium, click on your profile image and then click on "Settings"
-
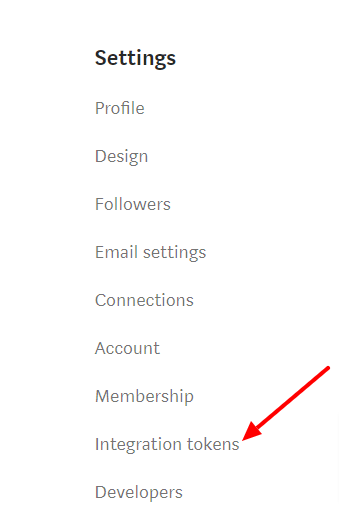
Then click on "Integration Tokens" in the sidebar
-
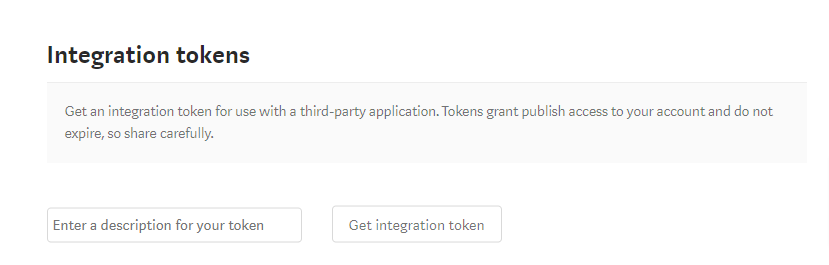
You have to enter description of the token then click "Get integration token" and copy the generated token.
-
In your terminal run:
cross-post config mediumThen enter the integration token you copied. A request will also be sent to Medium to get your authorId as it will be used later to post your article on Medium. Once that is done successfully, your configuration will be saved.


Cross Posting Your Articles
To cross post your articles, you will use the following command:
cross-post run <url> [options]
Where url is the URL of your article that you want to cross post. options can be:
-p, --platforms [platforms...]The platform(s) you want to post the article on. By default if this option is not included, it will be posted on all the platforms. An example of its usage:
cross-post run <url> -p dev hashnode
-t, --title [title]The title by default will be taken from the URL you supplied, however, if you want to use a different title you can supply it in this option.-s, --selector [selector]by default, thearticleselector will be used to find your article in the URL you pass as an argument. However, if you need a different selector to be used to find the article, you can pass it here.-pu, --publicby default, the article will be posted as a draft (or hidden for hashnode due to the limitations of the Hashnode API). You can pass this option to post it publicly.-i, --ignore-imagethis will ignore uploading an image with the article. This helps avoid errors when an image cannot be fetched.-is, --image-selector [imageSelector]this will select the image from the page on the selector you provide, instead of the first image inside the article. This option overrides the default image selector in the configurations.-iu, --image-url [imageUrl]this will use the image URL you provide as a value of the option and will not look for any image inside the article.
This command will find the HTML element in the URL page you pass as an argument and if found, it will extract the title (if no title is passed in the arguments) and cover image.
Selector Configuration
If you need this tool to always use the same selector for the article, you can set the default selector in the configuration using the following command:
cross-post config selectorThen, you'll be prompted to enter the selector you want. After you set the default selector, all subsequent run commands will use the same selector unless you override it using the option --selector.
Image Selector Configuration
If you need this tool to always use the same selector for the image, you can set the default image selector in the configuration using the following command:
cross-post config image-selectorThen, you'll be prompted to enter the image selector you want. After you set the default image selector, all subsequent run commands will use the same selector unless you override it using the option --image-selector.
Uploading Data URI Article Images
If your website's main article image is a Data URL image, uploading it as it is would lead to an error on most platforms. There are 3 ways to avoid that:
Using a Cloudinary account
In this method, you'll need to create or use an already created Cloudinary account and the tool will use the account to upload the image and get a URL.
Follow the steps below:
- Create a Cloudinary account.
- Get the
cloud_name,api_key, andapi_secretfrom your account. - Run
cross-post config cloudinaryand enter the information as prompted. Remember that all keys are stored on your local machine.
That's it. Next time you run the cross-post run command, if the image is a Data URL image, it will be uploaded to Cloudinary to get a URL for it. You can delete the image once the article has been published publicly on the platforms.
Pass Image URL
You can pass an image URL as an option to cross-post run using --image-url.
Post Article Without Image
You can pass the option --ignore-image to cross-post run and the article will be published without an image.
License
MIT