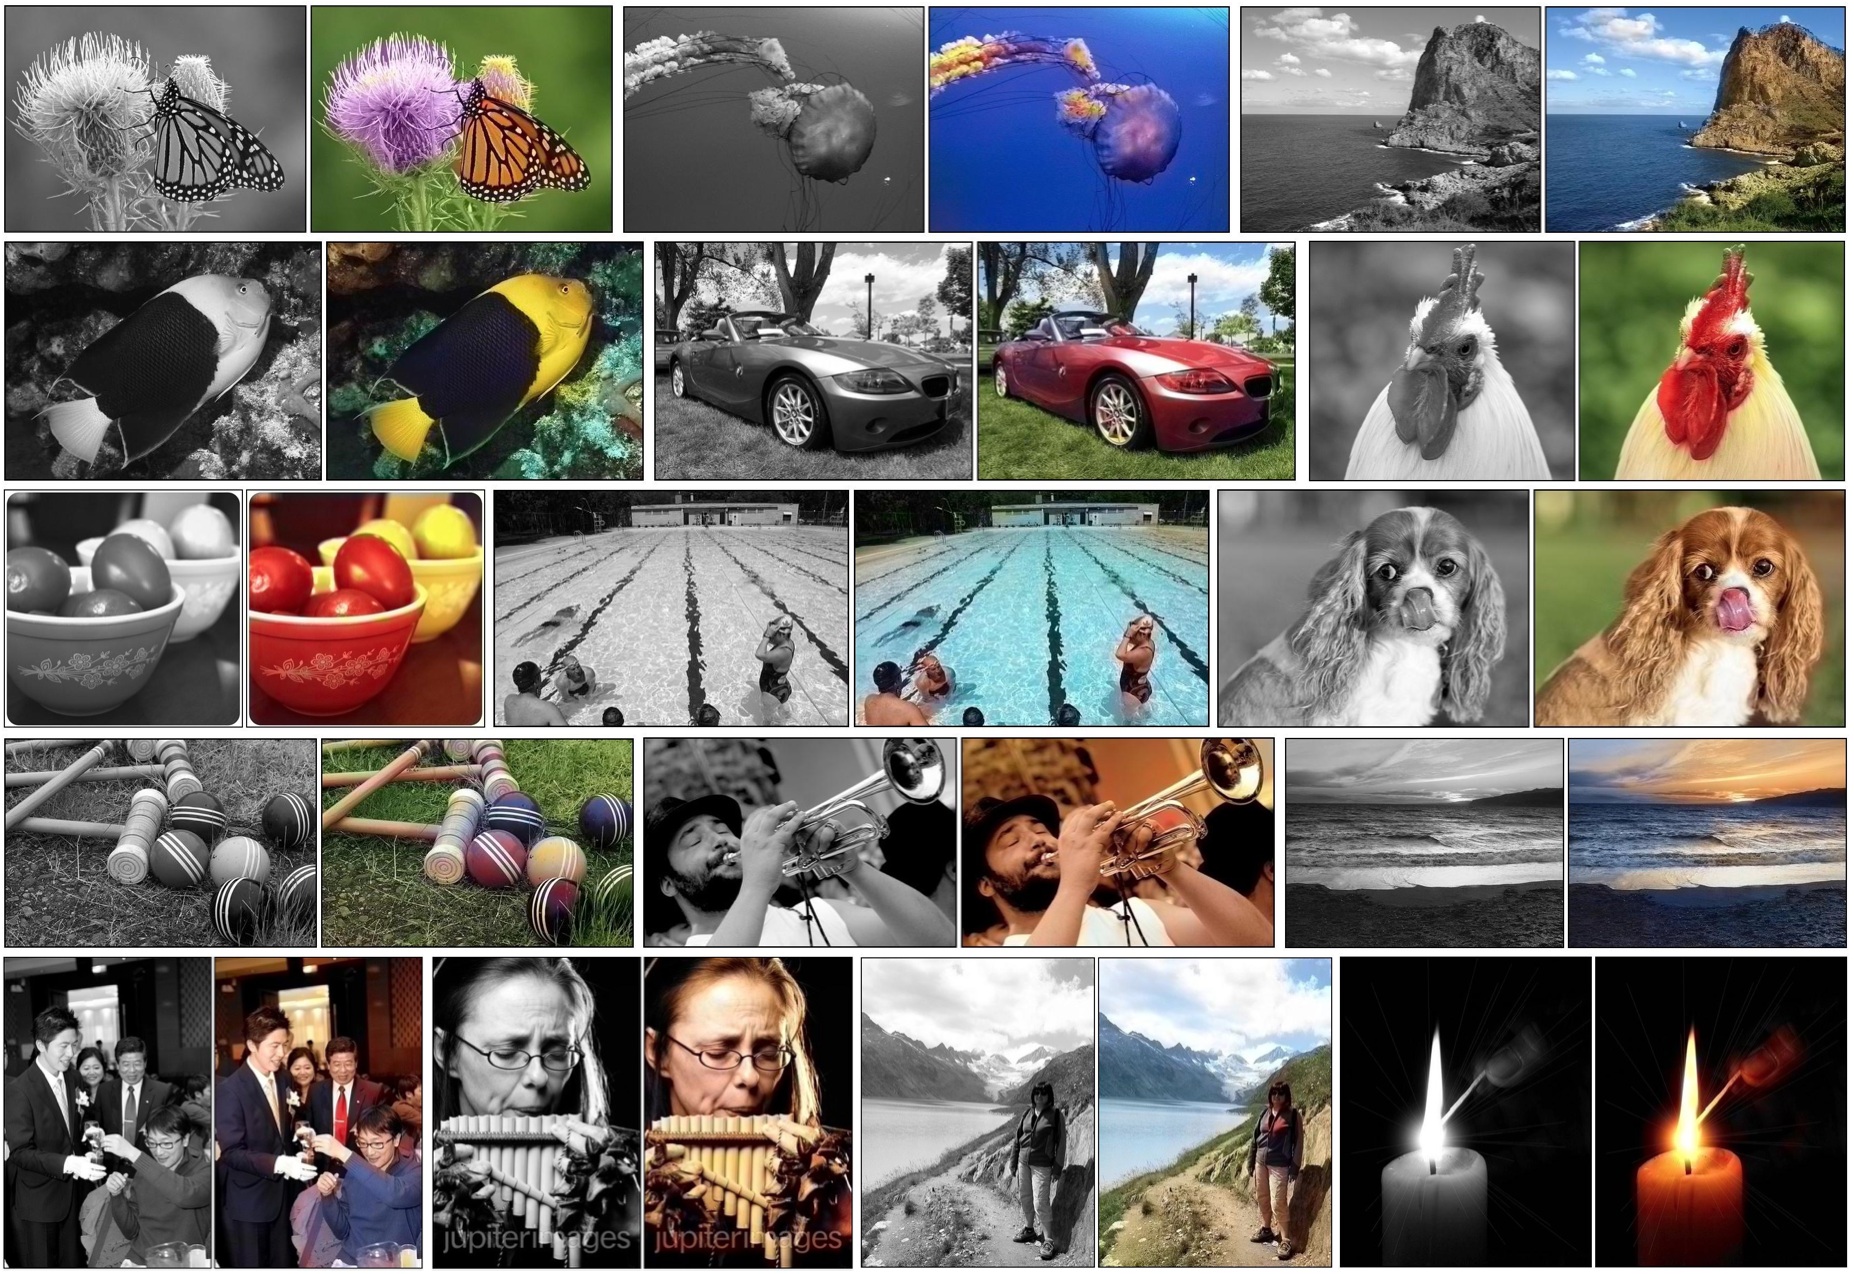
Colorful Image Colorization [Project Page]
Richard Zhang, Phillip Isola, Alexei A. Efros. In ECCV, 2016.
This repository contains:
- (1) a test time demonstration using a pre-trained colorization network (in IPython notebook)
- (2) code for training a colorization network
- (3) pre-trained AlexNet, used for representation learning tests
Clone the master branch of the respository using git clone -b master --single-branch https://github.com/richzhang/colorization.git
This code requires a working installation of Caffe and basic Python libraries (numpy, pyplot, skimage, scipy). For guidelines and help with installation of Caffe, consult the installation guide and Caffe users group.
We include demo usage as an iPython notebook, under ./demo/colorization_demo_v2.ipynb. This IPython Notebook demonstrates how to use our colorization network to colorize a grayscale image. To run this, after cloning the directory, cd into the demo directory, run ipython notebook and open colorization_demo_v2.ipynb in your web browser.
The following contains instructions for training a colorization network from scratch. After cloning the repository, from the root directory:
(1) Run ./train/fetch_init_model.sh. This will load model ./models/init_v2.caffemodel. This model was obtained using the k-means initialization implemented in Kraehenbuehl et al, ICLR 2016.
(2) Run ./train/fetch_caffe.sh. This will load a modified Caffe into directory ./caffe-colorization. For guidelines and help with installation of Caffe, consult the installation guide and Caffe users group.
- Note that this is the same as vanilla-Caffe, with a
SoftmaxCrossEntropyLayerlayer added. You likely can add the layer to your current build of Caffe by adding the following files (found in the./resourcesdirectory) and re-compiling:./src/caffe/layers/softmax_cross_entropy_loss_layer.cpp./src/caffe/layers/softmax_cross_entropy_loss_layer.cu./include/caffe/layers/softmax_cross_entropy_loss_layer.hppIf you do this, link your modified Caffe build as./caffe-colorizationin the root directory and proceed.
(3) Add the ./resources/ directory (as an absolute path) to your system environment variable $PYTHONPATH. This directory contains custom Python layers.
(4) Modify paths in data layers ./models/colorization_train_val_v2.prototxt to locate where ImageNet LMDB files are on your machine. These should be BGR images, non-mean centered, in [0,255].
(5) Run ./train/train_model.sh [GPU_ID], where [GPU_ID] is the gpu you choose to specify. Notes about training:
(a) Training completes around 450k iterations. Training is done on mirrored and randomly cropped 176x176 resolution images, with mini-batch size 40.
(b) Snapshots every 1000 iterations will be saved in ./train/models/colornet_iter_[ITERNUMBER].caffemodel and ./train/models/colornet_iter_[ITERNUMBER].snapshot.
(c) If training is interupted, resume training by running ./train/train_resume.sh ./train/models/colornet_iter_[ITERNUMBER].snapshot [GPU_ID], where [ITERNUMBER] is the last snapshotted model.
(d) Check validation loss by running ./val_model.sh ./train/models/colornet_iter_[ITERNUMBER].caffemodel [GPU_ID] 1000, where [ITERNUMBER] is the model you would like to validate. This runs the first 10k imagenet validation images at full 256x256 resolution through the model. Validation loss on colorization_release_v2.caffemodel is 7715.
(e) Check model outputs by running the IPython notebook demo. Replace the release model with your snapshotted model.
(f) To download reference pre-trained model, run ./models/fetch_release_models.sh. This will load reference model ./models/colorization_release_v2.caffemodel. This model used to generate results in the ECCV 2016 camera ready.
For completeness, this will also load model ./models/colorization_release_v2_norebal.caffemodel, which is was trained without class rebalancing. This model will provide duller but "safer" colorizations. This will also load model ./models/colorization_release_v1.caffemodel, which was used to generate the results in the arXiv v1 paper.
(1) Run ./models/fetch_alexnet_model.sh. load model ./models/alexnet_release_450000_nobn_fc_rs.caffemodel. This model was used for the representation learning tests.
(2) You have two choices.
(i) If you do the color conversion into Lab space outside of the network, use prototxt ./models/alexnet_deploy_lab.prototxt. The input blob will be an image in Lab color space
(ii) If you wish to do the color conversion inside of the network, use prototxt ./models/alexnet_deploy.prototxt. The input should be BGR images, non-mean centered, in [0,255]. You will have to follow Caffe installation (described in step (2) in the previous section).
If you find this model useful for your resesarch, please use this bibtex to cite.
Should you wish to share your colorizations with us, please email Richard Zhang with subject "MyColorization" at rich.zhang@eecs.berkeley.edu. Also contact Richard for any questions or comments.
