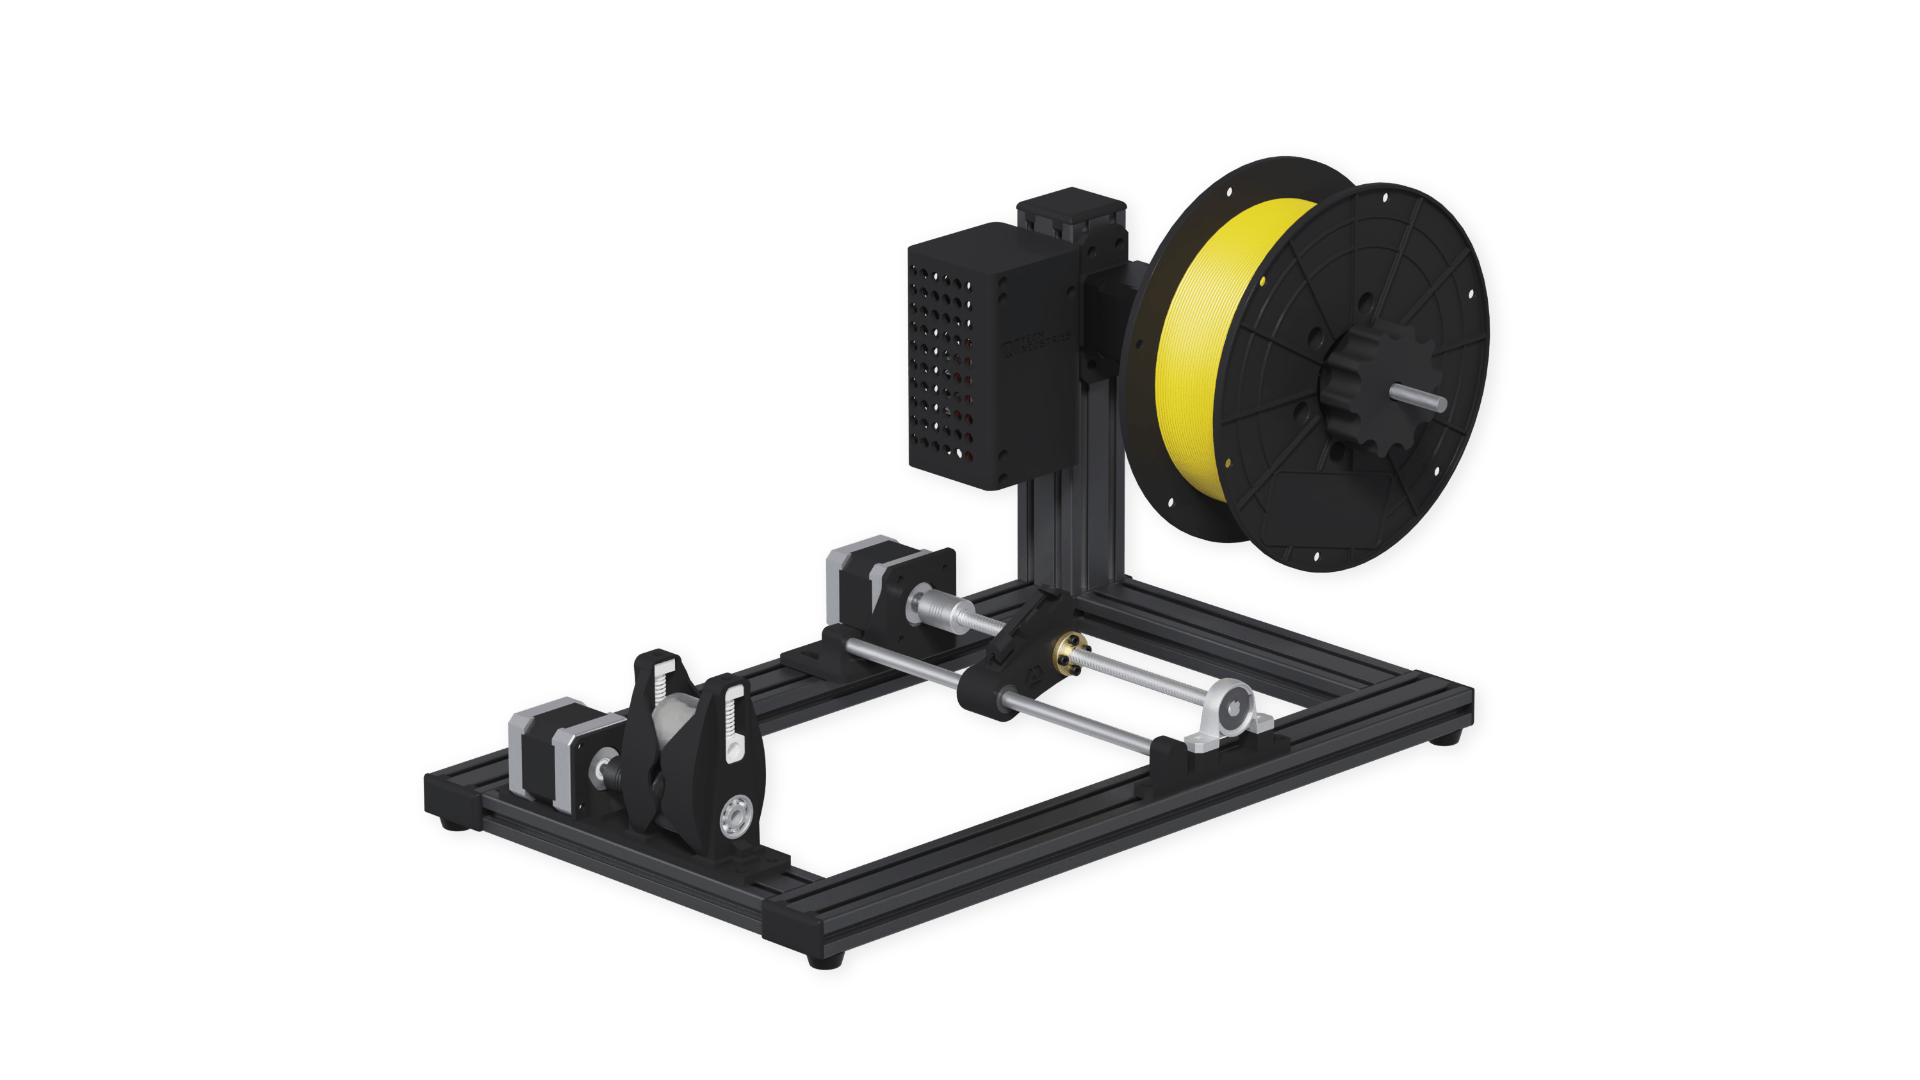
Control Code of the Jarvis Winder running on an ESP32
Explore the docs »
Report Bug
·
Request Feature
·
Related Projects
Table of Contents
This project covers the code for the Jarvis Winder, which is a machine for winding filaments used for 3D-printing. The winder is used to wind freshly extruded filament on spools and rewind filament from one spool to another. The machine can be controlled via Webinterface, which can be accessed with mobile devices, too. The winder can either log into an existing wifi or create its own on the fly.
Currently the following libraries are in use:
| Library | Info | License |
|---|---|---|
| ArduinoJson | https://arduinojson.org/ | MIT |
| Timer | https://github.com/brunocalou/Timer | MIT |
| ESPAsyncWebServer | https://github.com/me-no-dev/ESPAsyncWebServer | GNU-2.1 |
| LittleFS | https://github.com/lorol/LittleFS.git | GPL-2.0 |
| HardwareControl | https://github.com/QiTech-Industries/HardwareControl | GPL-3.0 |
And the following main hardware components:
- Nema 17 (17HS19-2004S1)
- Nema 17 Planetary 1:5.18 (17HS19-1684S-PG5)
- TMC2130
- ESPduino (ESP32WROOM32)
- CNC Shield
Installation is easiest via our own updater tool: https://update.qitech.de. You can just install the software to your ESP via the Browser.
Alternativly you can flash a copy of the firmware-full.bin file also via any local ESP flashing utility. You might use the Espressif online flashing tool as well:
- Download the latest firmware-full.bin file from the releases section.
- Use the ESP Web flashing tool: https://espressif.github.io/esptool-js/ (recent Chrome or Edge Version)
- install correct drivers so the ESP is recognized by the PC
- select baude 115200 and click connect
- grant access to the serial port your esp is connected to
- set "flash address" to 0x0 and upload firmware-full.bin
- click the program button
- once finished press the reset button on the esp once and you should be all set ready to go 🏎️
These steps are only required if you want to develop the library. In case you just want to use it in one of your projects refer to Usage
- Install the PlatformIO extension in VsCode
platformio.platformio-ide - Install the C++ extension in VsCode
ms-vscode.cpptools - Install ESP32 drivers (depending on the USB-UART Chip)
- Clone the repo
git clone --recurse-submodules https://github.com/QiTech-Industries/Winder.git
- Install the project dependencies
When using Windows you need to add
cd Winder && pio pkg install
pioto your path first or use the full pathC:\Users\<username>\.platformio\penv\Scripts\platformio.exe - Upload the code and open Serial Monitor
Alternatively you can use
pio run --target upload --target monitor --environment src
PlatformIO->src->Upload and Monitorin the left Sidebar
- Imported files are not recognized (Intellisense Index build fails)
- delete .pio folder
- delete launch.json and s_cpp_properties.json in .vscode folder
STRG + SHIFT + PRebuild Intellisense Index
This project should slowly adapt to the new Winder versions. This means apart from the WS interface there will also be a Serial interface implemented and an option for DC Motor control as well as the possibility of multiple hardware versions.
For the coming releases a new code structure is planned to make the code more modular and object oriented. Some refactored classes and a glimpse of the new code organization can be found in the big-refactoring branch that will slowly get merged into main.
Apart from that all upcoming features are created and discussed as issues first. See open issues for a full list. This is the most up to date roadmap you can get. Feel free to report new issues or fix existing ones.
Contributions are what make the open source community such an amazing place to learn, inspire, and create. Any contributions you make are greatly appreciated.
If you have a suggestion that would make this better, please open a issue with the tag "enhancement" to discuss whether your idea is in line with our Roadmap and we can find the best way of implementing it.
Than:
- Fork the Project
- Create your Feature Branch (
git checkout -b feature/AmazingFeature) - Commit your Changes (
git commit -m 'Add some AmazingFeature') - Push to the Branch (
git push origin feature/AmazingFeature) - Check whether your code complies with the coding guidelines
- Open a Pull Request
All the documentation for the hardware of the JARVIS WINDER including CAD models and a part list can be found in this repository: https://github.com/QiTech-Industries/winder-parts
Please have in mind that we don't have the resources to provide support for custom builds. We just published our interal documentation as-is.
Distributed under the GPL-3.0 License. See LICENSE for more information.
QiTech Industries - https://qitech.de/industries - contact@qitech.de
Project Link: https://github.com/QiTech-Industries/Winder


