This tutorial demonstrates a platform engineering approach to DataPower development and deployment. It demonstrates continuous integration, continuous deployment, GitOps, Infrastructure as Code and DevOps using containers, Kubernetes and a set of popular cloud native tools such as ArgoCD and Tekton.
In this tutorial, you will:
- Create a Kubernetes cluster and image registry, if required.
- Create an operational repository to store DataPower resources that are deployed to the Kubernetes cluster.
- Install ArgoCD to manage the continuous deployment of DataPower-related resources to the cluster.
- Create a source Git repository that holds the DataPower development artifacts for a virtual DataPower appliance.
- Install Tekton to provide continuous integration of the source DataPower artifacts. These pipeline ensures that all changes to these artifacts are successful built, packaged, versioned and tested before they are delivered into the operational repository, read for deployment.
- Gain experience with the IBM-supplied DataPower operator and container.
By the end of the tutorial, you will have practical experience and knowledge of platform engineering with DataPower in a Kubernetes environment.
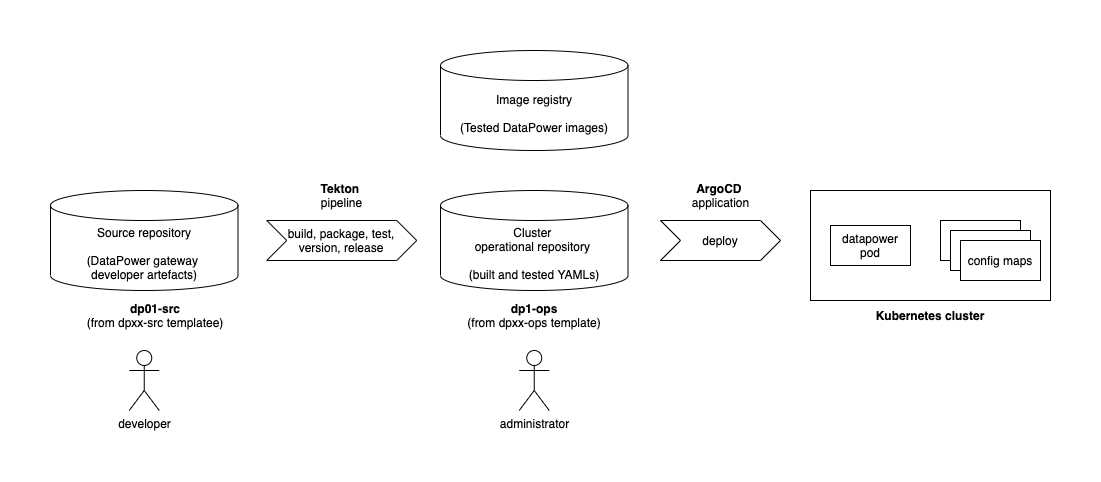
The following diagram shows a CICD pipeline for DataPower:
Notice:
- The git repository
dp01-srcholds the source development artifacts for a virtual DataPower appliancedp01. - A Tekton pipeline uses the
dp01-srcrepository to build, package, test, version and deliver resources that define thedp01DataPower appliance. - If the pipeline is successful, then the YAMLs that define
dp01are stored in the operational repositorydp01-opsand the container image fordp01is stored in an image registry. - Shortly after the changes are committed to the git repository, an ArgoCD
application detects the updated YAMLs. It applies them to the cluster to create or
update a running
dp01DataPower virtual appliance.
This tutorial will walk you through the process of setting up this configuration:
- Step 1: Follow the instructions in this README to set up your cluster, ArgoCD,
the
dp01-opsrepository, and Tekton. Continue to step 2. - Step 2: Move to these
instructions to create the
dp01-srcrepository, run a Tekton pipeline to populate thedp01-opsrepository, and interact with the new or updated DataPower appliancedp01.
At the moment, this Tutorial requires OpenShift. It will be updated to support Minikube.
To interact with your cluster from your local machine, you will need to use the
kubectl or oc command line interface.
Add instructions to install kubectl or oc CLI.
From the your OpenShift web console console, select Copy login command, and
copy the login command.
Login to cluster using this command, for example:
oc login --token=sha256~noTAVal1dSHA --server=https://example.cloud.com:31428which should return a response like this:
Logged into "https://example.cloud.com:31428" as "odowda@example.com" using the token provided.

You have access to 67 projects, the list has been suppressed. You can list all projects with 'oc projects'

Using project "default".
indicating that you are now logged into the Kubernetes cluster.
This tutorial requires you to create the dp01-src and dp01-ops repositories.
It's a good idea to create them in a separate organization because it makes it
easy to collaborate with your colleagues later on.
Click on the following URL: https://github.com/settings/organizations to create a new organization:
You will see a list of your existing GitHub organizations:
You're going to create a new organization for this tutorial.
Click on New organization:
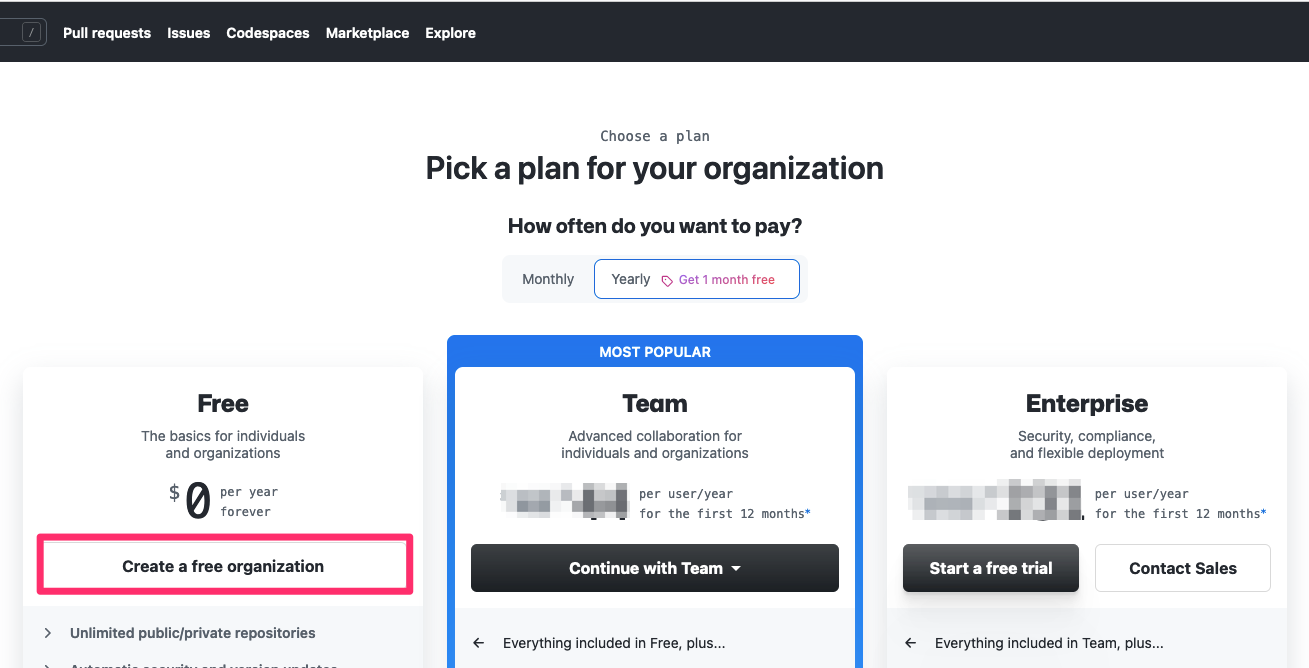
This shows you the list of available plans:
The Free plan is sufficient for this tutorial.
Click on Create a free organization:
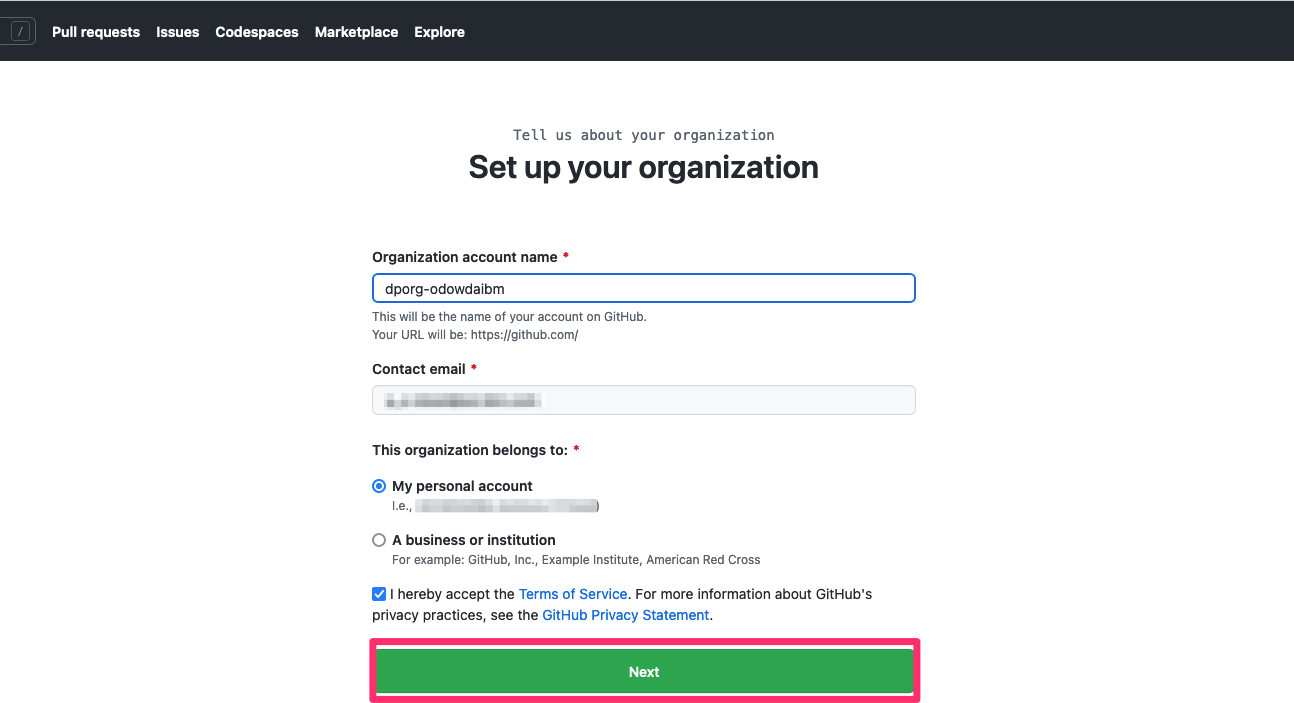
This shows you the properties for the new organization.
Complete the details for your new organization.
- Specify
Organization account nameof the formdporg-xxxxxwherexxxxxis your GitHub user name. - Specify
Contact maile.g.odowda@example.com - Select
My personal account.
Once you've complete this page, click Next:
Your new organization dporg-xxxxx has now been created:
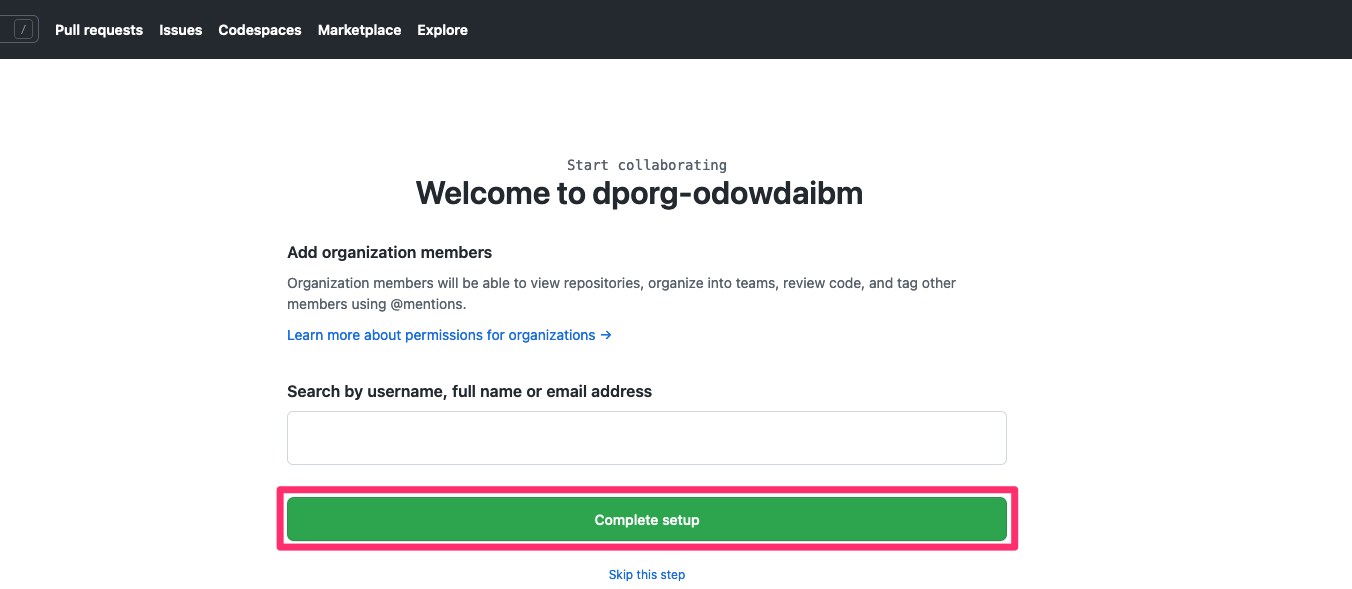
You can add colleagues to this organization each with a particular role. For now, we can use the organization as-is.
Click on Complete setup to complete the organization creation process.
Although you may see a few more screens, such as a usage survey, your
organization has been now been created. We will use it to host the dp01-src
and dp01-ops repositories in this tutorial.
We now define some environment variables that are used by the commands in this tutorial to make them easy to use.
Define your GitHub user name in the GITUSER variable using the name you
supplied above, e.g. odowdaibm. Your GitHub user name will be used to
Open a new Terminal window and type:
export GITUSER=odowdaibm
export GITORG=dporg-$GITUSER
Let's use this environment variable to examine your new organization in GitHub.
Enter the following command:
echo https://github.com/orgs/$GITORG/repositorieswhich will respond with a URL of this form:
https://github.com/orgs/dporg-odowdaibm/repositoriesNavigate to this URL in your browser:
You can see that your new organization doesn't yet have any repositories in it.
Let's start by adding the dp01-ops repository to it.
We use a template repository to
create dp01-ops in our new organization. Forking a template creates a
repository with a clean git history, allowing us to track the history of changes
to our cluster every time we update dp01-ops.
Click on this URL to fork from
the dpxx-ops template repository:
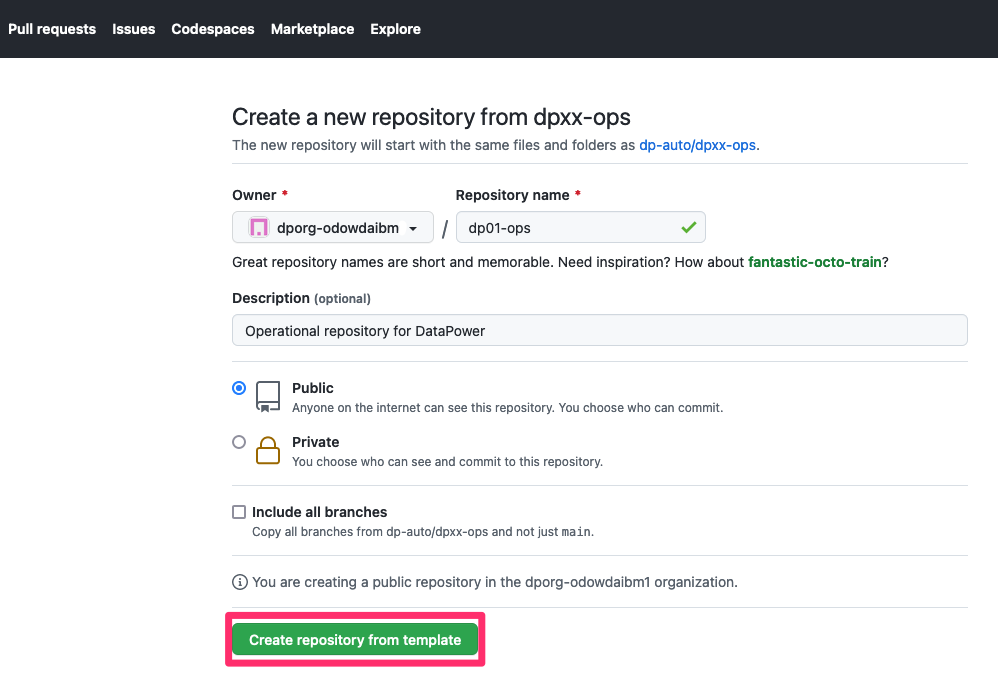
This screen allows you to define the properties for your copy of the dp01-ops
repository.
Specifically:
- In the
Ownerdropdown, select your newly created organization, e.g.dporg-xxxxx - In the
Repository namefield, specifydp01-ops. - In the
Descriptionfield, specifyOperational repository for DataPower. - Select
Publicfor the repository visibility.
Click on Create repository from template:
This repository will be cloned to the specified GitHub account:
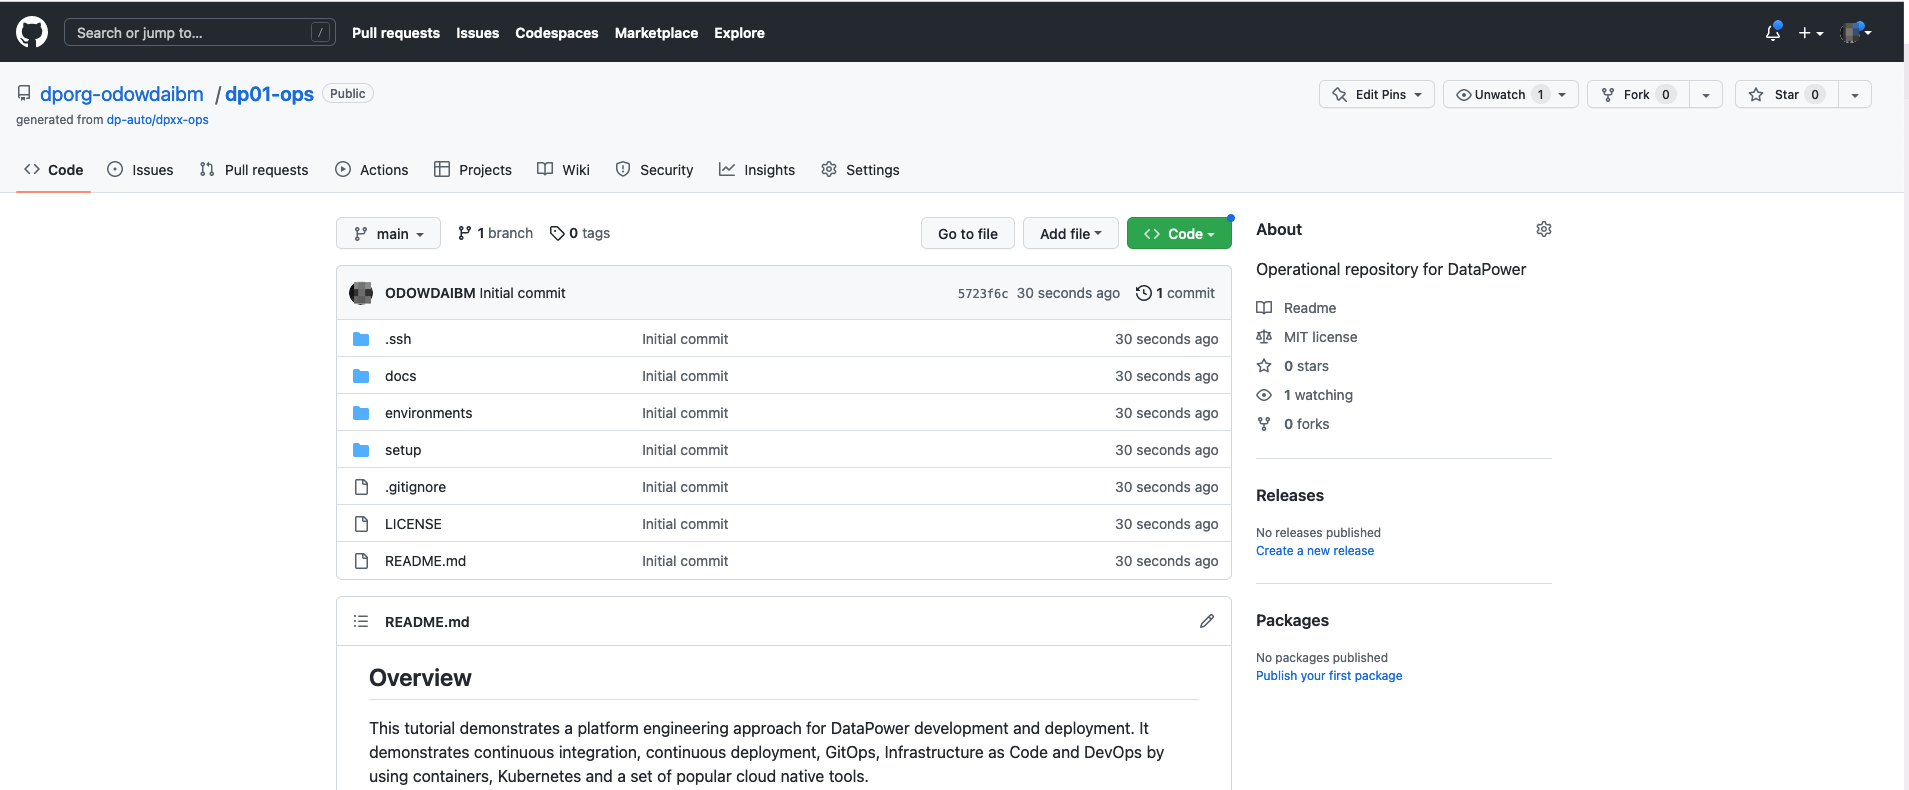
You have successfully created a copy of the dp01-ops repository in your
organization.
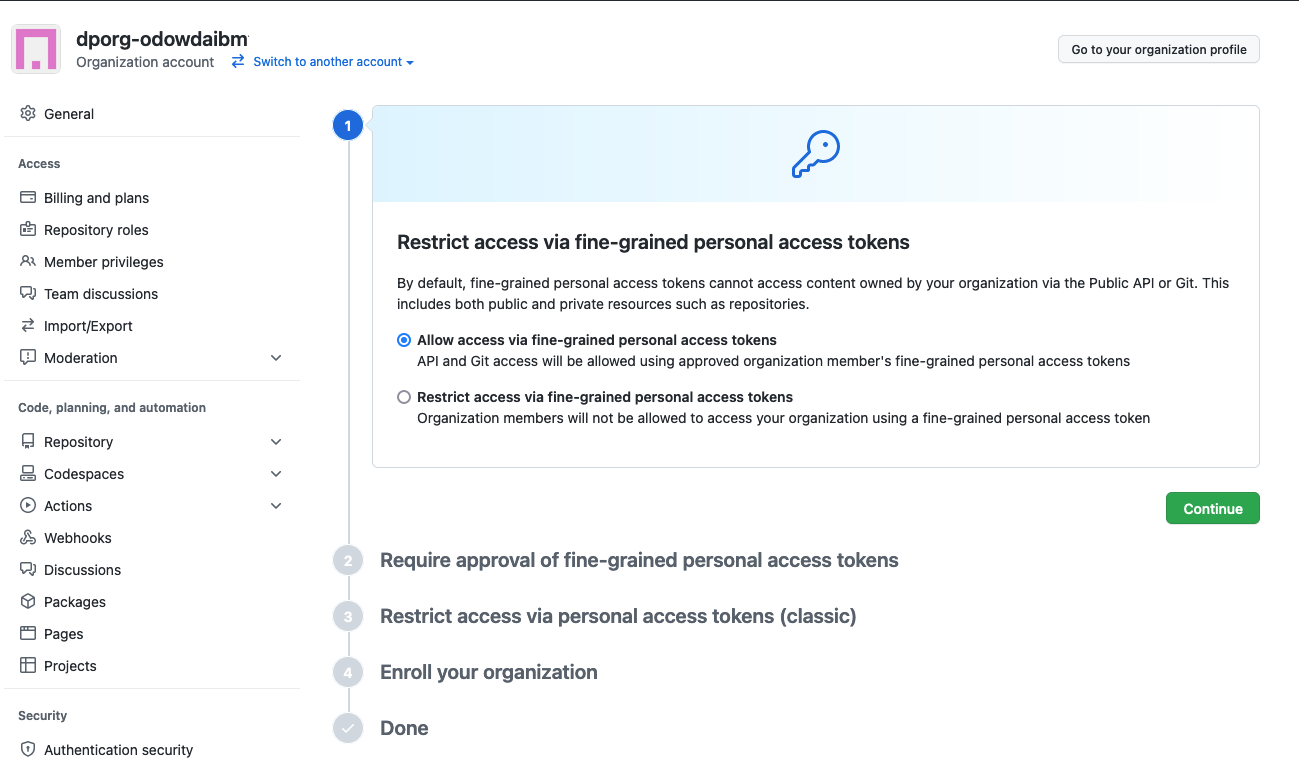
To allow sufficient, but limited, access the repositories in our new Git organization, we use a Personal Access Token (PAT). First, we must enable this feature using the GitHub web.
Issue the following command:
echo https://github.com/organizations/$GITORG/settings/personal-access-tokens-onboardingNavigate to this URL in your browser and complete the workflow:
Select the following options via their radio buttons:
- Select
Allow access via fine-grained personal access tokensand hitContinue - Select
Do not require administrator approvaland hitContinue - Select
Allow access via personal access tokens (classic)and hitContinue - Complete the process and hit
Enrollto enable PATs for your organization
Personal Access Tokens are now enabled for your GitHub organization.
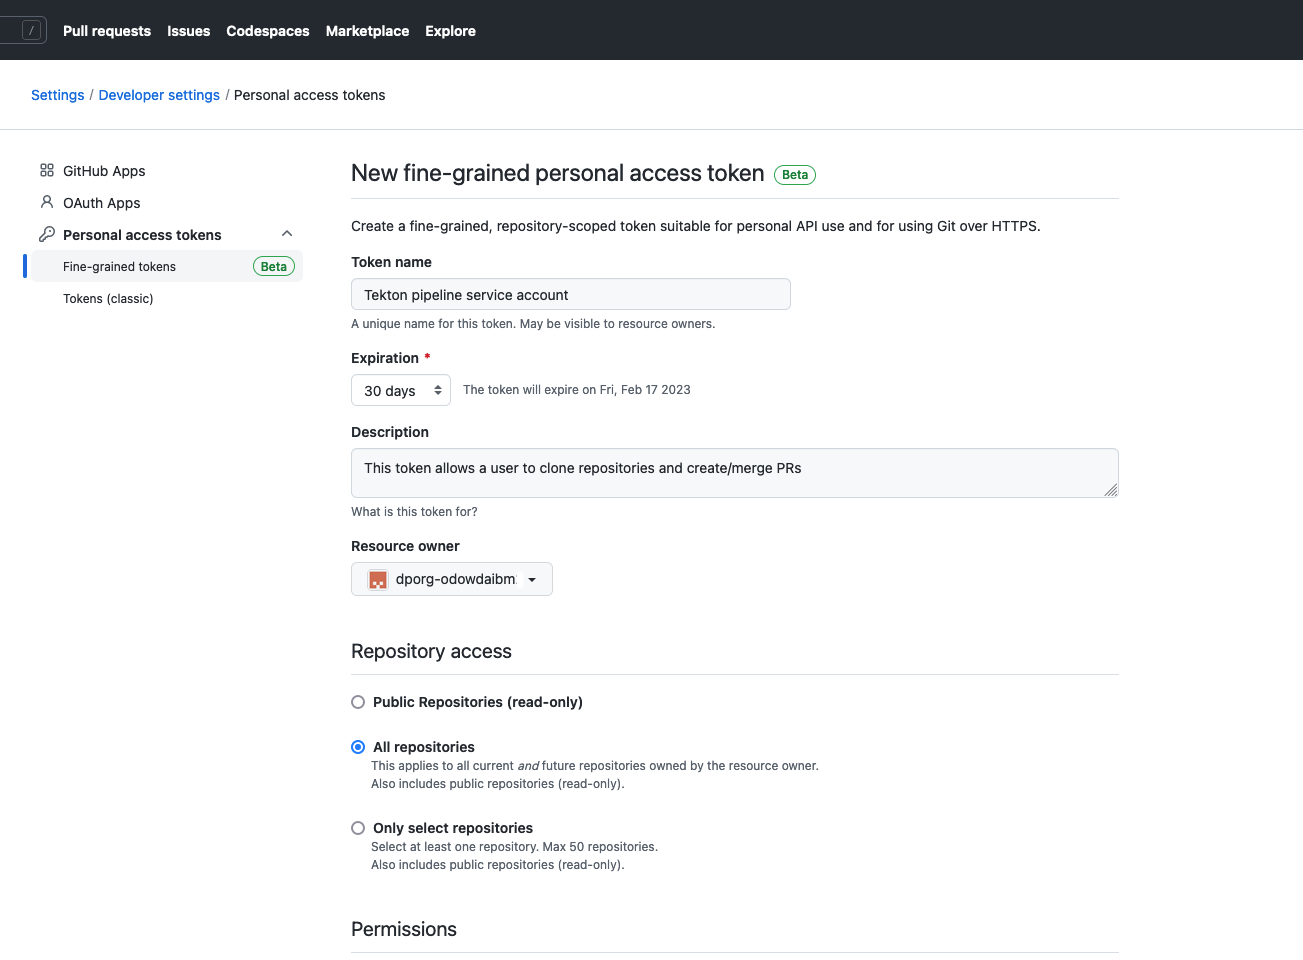
We now create a PAT to limit access to only repositories in the new GitHub organization. This token will be used by the tutorial CLI and Tekton service account, thereby limiting exposure of your other GitHub resources; this is a nice example of Zero Trust security, limiting access to only what's required.
Navigate to https://github.com/settings/tokens?type=beta in your Browser:
Complete the page as follows:
Token Name:DataPower tutorial accessDescription:This token allows a user to clone repositories and create/merge PRsResource Ownerdrop-down: Select your organization e.g.dporg-odowdaibm- Select the
All repositoriesradio button - Under
Repository permissionsselect:Contents:Read and writePull requests:Read and write
- (No changes under
Organization permissions)
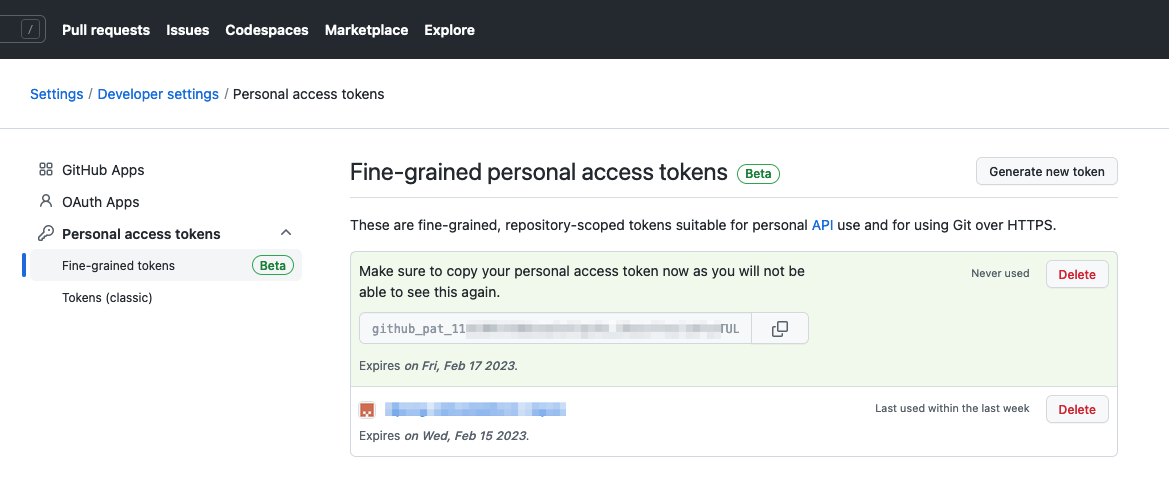
Click on Generate token to create a PAT which has the above access encoded within it.
Copy the PAT token and store in a file on your local machine; we'll use it later.
In the meantime, we're going to store in an environment variable.
export GITTOKEN=<PAT copied from GitHub>Let's now use this token to create our own copies of the dp01-src and dp01-ops
repositories.
We're going to use the contents of this repository to configure our cluster. To do this we need to clone this repository to our local machine.
It's best practice to store cloned git repositories under a folder called git,
with subfolders that correspond to your projects.
Issue the following commands to create this folder structure and clone the
dp01-ops repository from GitHub to your local machine.
mkdir -p $HOME/git/$GITORG-tutorial
cd $HOME/git/$GITORG-tutorial
git clone https://$GITTOKEN@github.com/$GITORG/dp01-ops.git
cd dp01-opsLet's use some YAML in dp01-ops to define two namespaces in our cluster:
Issue the following command:
oc apply -f setup/namespaces.yamlwhich will confirm the following namespaces are created in the cluster:
namespace/dp01-ci created
namespace/dp01-dev created
As the tutorial proceeds, we'll see how the YAMLs in dp01-ops fully define
the DataPower related resources deployed to the cluster. In fact, we're going to
set up the cluster such that it is automatically updated whenever the dp01-ops
repository is updated. This concept is called continuous deployment and we'll
use ArgoCD to achieve it.
If you'd like to understand a little bit more about how the namespaces were
created, you can explore the contents of the dp01-ops repository.
Issue the following command:
cat setup/namespaces.yamlwhich shows the following namespace definitions:
kind: Namespace
apiVersion: v1
metadata:
  name: dp01-ci
  labels:
    name: dp01-ci
---
kind: Namespace
apiVersion: v1
metadata:
  name: dp01-dev
  labels:
    name: dp01-dev
Issue the following command to show these namespaces in the cluster
oc get namespace dp01-ci
oc get namespace dp01-dev
which will shows these namespaces and their age, for example:
NAME      STATUS   AGE
dp01-ci   Active   18s
NAME       STATUS   AGE
dp01-dev   Active   18s
During this tutorial, we'll see how:
- the
dp01-cinamespace is used to store specific Kubernetes resources to build, package, version and testdp01. - the
dp01-devnamespace is used to store specific Kubernetes resources relating to a running DataPower virtual appliance,dp01.
Let's install ArgoCD to enable continuous deployment.
Use the following command to create a subscription for ArgoCD:
oc apply -f setup/argocd-operator-sub.yamlwhich will create a subscription for ArgoCD:
subscription.operators.coreos.com/openshift-gitops-operator createdExplore the subscription using the following command:
cat setup/argocd-operator-sub.yamlwhich details the subscription:
apiVersion: operators.coreos.com/v1alpha1
kind: Subscription
metadata:
  name: openshift-gitops-operator
  namespace: openshift-operators
spec:
  channel: stable
  installPlanApproval: Manual
  name: openshift-gitops-operator
  source: redhat-operators
  sourceNamespace: openshift-marketplace
See if you can understand each YAML node, referring to subscriptions if you need to learn more.
This subscription enables the cluster to keep up-to-date with new releases of ArgoCD. Each release has an install plan that is used to maintain it. Our install plan requires manual approval; we'll see why a little later.
Let's find our install plan and approve it.
Issue the following command:
oc get installplan -n openshift-operators | grep "openshift-gitops-operator" | awk '{print $1}' | \
xargs oc patch installplan \
 --namespace openshift-operators \
 --type merge \
 --patch '{"spec":{"approved":true}}'
which will approve the install plan install-xxxxx for ArgoCD.
installplan.operators.coreos.com/install-xxxxx patchedArgoCD will now install; this may take a few minutes.
A ClusterServiceVersion (CSV) is created for each release of the ArgoCD operator installed in the cluster. This tells Operator Lifecycle Manager how to deploy and run the operator.
We can verify that the installation has completed successfully by examining the CSV for ArgoCD.
Issue the following command:
oc get clusterserviceversion openshift-gitops-operator.v1.5.10 -n openshift-gitopsNAME DISPLAY VERSION REPLACES PHASE
openshift-gitops-operator.v1.5.10 Red Hat OpenShift GitOps 1.5.10 openshift-gitops-operator.v1.5.6-0.1664915551.p SucceededSee how the operator has been successfully installed at version 1.5.10.
Feel free to explore this CSV:
oc describe csv openshift-gitops-operator.v1.5.10 -n openshift-operatorsThe output provides an extensive amount of information not listed here; feel free to examine it.
ArgoCD will deploy dp01 and its related resources to the cluster. These
resources are labelled by ArgoCD with a specific applicationInstanceLabelKey
so that they can be tracked for configuration drift. The default label used by ArgoCD collides with DataPower operator, so we need to change it.
Issue the following command to change the applicationInstanceLabelKeyused by
ArgoCD:
oc patch argocd openshift-gitops  \
 --namespace openshift-gitops \
 --type merge \
 --patch '{"spec":{"applicationInstanceLabelKey":"argocd.argoproj.io/instance"}}'
which should respond with:
argocd.argoproj.io/openshift-gitops patchedwhich confirms that the ArgoCD operator has been patched and will now add this label to every resource it deploys to the cluster.
ArgoCD requires permission to create resources in the dp01-dev namespace. We
use a role to define the resources required to deploy a DataPower virtual
appliance, and a role binding to associate this role with the serviceaccount
associated with ArgoCD.
Issue the following command to create this role:
oc apply -f setup/dp-role.yamlwhich confirms that the dp-deployer role has been created:
role.rbac.authorization.k8s.io/dp-deployer createdIssue the following command to create the corresponding rolebinding:
oc apply -f setup/dp-rolebinding.yamlwhich confirms that the dp-deployer role binding has been created:
rolebinding.rbac.authorization.k8s.io/dp-deployerWe can see which resources ArgoCD can create in the cluster by examining the
dp-deployer role:
oc describe role dp-deployer -n dp01-devwhich returns:
Name:         dp-deployer
Labels:       <none>
Annotations:  <none>
PolicyRule:
  Resources                            Non-Resource URLs  Resource Names  Verbs
  ---------                            -----------------  --------------  -----
  secrets                              []                 []              [*]
  services                             []                 []              [*]
  datapowerservices.datapower.ibm.com  []                 []              [*]
  ingresses.networking.k8s.io          []                 []              [*]
See how ArgoCD can now control secrets, services, datapowerservices and
ingresses with all operations such as create, read, update and delete (i.e.
Verbs[*]).
Like ArgoCD, there is a dedicated operator that manages DataPower virtual appliances in the cluster. Unlike ArgoCD, its definition is held in the IBM catalog source, so we need to add this catalog source to the cluster before we can install it.
Issue the following command:
oc apply -f setup/catalog-sources.yamlwhich will add the catalog sources defined in this YAML to the cluster:
catalogsource.operators.coreos.com/opencloud-operators created
catalogsource.operators.coreos.com/ibm-operator-catalog created
Notice, that there actually two new catalog sources added; feel free to examine the catalog source YAML:
cat setup/catalog-sources.yamlwhich shows you the detailed YAML for these catalog sources:
apiVersion: operators.coreos.com/v1alpha1
kind: CatalogSource
metadata:
  name: opencloud-operators
  namespace: openshift-marketplace
spec:
  displayName: IBMCS Operators
  publisher: IBM
  sourceType: grpc
  image: docker.io/ibmcom/ibm-common-service-catalog:latest
  updateStrategy:
    registryPoll:
      interval: 45m
---
apiVersion: operators.coreos.com/v1alpha1
kind: CatalogSource
metadata:
  name: ibm-operator-catalog
  namespace: openshift-marketplace
spec:
  displayName: IBM Operator Catalog
  image: 'icr.io/cpopen/ibm-operator-catalog:latest'
  publisher: IBM
  sourceType: grpc
  updateStrategy:
    registryPoll:
      interval: 45m
Examine these YAMLs to see if you can understand how they work.
We can now install the DataPower operator; using the same process as we used with ArgoCD.
Issue the following command:
oc apply -f setup/dp-operator-sub.yamlwhich will create the DataPower operator subscription:
subscription.operators.coreos.com/datapower-operator createdExplore the subscription using the following command:
cat setup/dp-operator-sub.yamlwhich details the subscription:
apiVersion: operators.coreos.com/v1alpha1
kind: Subscription
metadata:
  labels:
    operators.coreos.com/datapower-operator.dp01-ns: ''
  name: datapower-operator
  namespace: openshift-operators
spec:
  channel: v1.6
  installPlanApproval: Manual
  name: datapower-operator
  source: ibm-operator-catalog
  sourceNamespace: openshift-marketplace
  startingCSV: datapower-operator.v1.6.8
Notice how this operator is installed in the openshift-operators namespace.
Note also the use of channel and startingCSV to be precise about the exact
version of the DataPower operator to be installed.
Let's find our DataPower install plan and approve it.
oc get installplan -n openshift-operators | grep "datapower-operator" | awk '{print $1}' | \
xargs oc patch installplan \
 --namespace openshift-operators \
 --type merge \
 --patch '{"spec":{"approved":true}}'
which will approve the install plan:
installplan.operators.coreos.com/install-xxxxx patchedwhere install-xxxxx is the name of the DataPower install plan.
Again, feel free to verify the DataPower installation with the following commands:
oc get clusterserviceversion datapower-operator.v1.6.8 -n openshift-operatorsNAME DISPLAY VERSION REPLACES PHASE
datapower-operator.v1.6.8 IBM DataPower Gateway 1.6.8 Succeededwhich shows that the 1.6.8 version of the operator has been successfully installed.
oc describe csv datapower-operator.v1.6.8 -n openshift-operatorsThe output provides an extensive amount of information not listed here; feel free to examine it.
Our final task is to install Tekton. With it, we can create pipelines that
populate the operational repository dp01-ops using the DataPower configuration
and development artifacts stored in dp01-src. Once populated by Tekton, ArgoCD
will then synchronize these artifacts with the cluster to ensure the cluster is
running the most up-to-date version of dp01.
Issue the following command to create a subscription for Tekton:
oc apply -f setup/tekton-operator-sub.yamlwhich will create a subscription:
subscription.operators.coreos.com/openshift-pipelines-operator createdAgain, this subscription enables the cluster to keep up-to-date with new version of Tekton.
Explore the subscription using the following command:
cat setup/tekton-operator-sub.yamlwhich details the subscription:
apiVersion: operators.coreos.com/v1alpha1
kind: Subscription
metadata:
  name: openshift-pipelines-operator
  namespace: openshift-operators
spec:
  channel:  stable
  installPlanApproval: Manual
  name: openshift-pipelines-operator-rh
  source: redhat-operators
  sourceNamespace: openshift-marketplace
Manual Tekton install:
kubectl apply -f https://storage.googleapis.com/tekton-releases/pipeline/previous/v0.16.3/release.yaml)Let's find our install plan and approve it.
oc get installplan -n openshift-operators | grep "openshift-pipelines-operator" | awk '{print $1}' | \
xargs oc patch installplan \
 --namespace openshift-operators \
 --type merge \
 --patch '{"spec":{"approved":true}}'
which will approve the install plan
installplan.operators.coreos.com/install-xxxxx patchedwhere install-xxxxx is the name of the Tekton install plan.
Again, feel free to verify the Tekton installation with the following commands:
oc get clusterserviceversion -n openshift-operators(replacing x.y.z with the installed version of Tekton)
oc describe csv openshift-pipelines-operator-rh.vx.y.z -n openshift-operatorsThe PAT we created earlier is now stored as a secret in the dp01-ci namespace and used by the pipeline whenever it needs to access the dp01-src and dp01-ops repositories.
Issue the following command to create a secret containing the PAT:
export GITCONFIG=$(printf "[credential \"https://github.com\"]\n  helper = store")
oc create secret generic dp01-git-credentials -n dp01-ci \
  --from-literal=.gitconfig="$GITCONFIG" \
  --from-literal=.git-credentials="https://$GITUSER:$GITTOKEN@github.com" \
  --type=Opaque \
  --dry-run=client -o yaml > .ssh/dp01-git-credentials.yaml
Issue the following command to create this secret in the cluster:
oc apply -f .ssh/dp01-git-credentials.yamlFinally, add this secret to the pipeline service account to allow it to use
dp-1-ssh-credentials secret to access GitHub.
oc patch serviceaccount pipeline \
    --namespace dp01-ci \
    --type merge \
--patch '{"secrets":[{"name":"dp01-git-credentials"}]}'Allow Tekton to write to image registry
// oc adm policy  add-cluster-role-to-user edit system:serviceaccount:dp01-ci:pipeline // not sure we need this?
oc policy add-role-to-user system:image-puller system:serviceaccount:dp01-dev:dp01-datapower-pod-service-account --namespace=dp01-ciFinally, we're going to create an ArgoCD application to manage the virtual
appliance dp01. The YAMLs for dp01 will be created by its Tekton pipeline in
dp01-ops. Every time this repository is updated, our ArgoCD application will
ensure that the latest version of dp01 is deployed to the cluster.
Let's have a quick look at our ArgoCD application.
Issue the following command:
cat environments/dev/argocd/dp01.yamlwhich will show its YAML:
apiVersion: argoproj.io/v1alpha1
kind: Application
metadata:
  name: dp01-argo
  namespace: openshift-gitops
  annotations:
    argocd.argoproj.io/sync-wave: "100"
  finalizers:
    - resources-finalizer.argocd.argoproj.io
spec:
  destination:
    namespace: dp01-dev
    server: https://kubernetes.default.svc
  project: default
  source:
    path: environments/dev/dp01/
    repoURL: https://github.com/$GITORG/dp01-ops.git
    targetRevision: main
  syncPolicy:
    automated:
      prune: true
      selfHeal: true
    syncOptions:
      - Replace=true
Notice how the Argo application monitors a specific GitHub location for resources to deploy to the cluster:
  source:
    path: environments/dev/dp01/
    repoURL: https://github.com/$GITORG/dp01-ops.git
    targetRevision: main
See how:
repoURL: https://github.com/$GITORG/dp01-ops.gitidentifies the repository where the YAMLs are located ($GITORG will be replaced with your GitHub organisation)targetRevision: mainidentifies the branch within the repositorypath: environments/dev/dp01/identifies the folder within the repository
Let's deploy this ArgoCD application to the cluster. We use the envsubst
command to replace $GITORG with your GitHub organisation.
Issue the following command:
envsubst < environments/dev/argocd/dp01.yaml > environments/dev/argocd/dp01.yaml
oc apply -f environments/dev/argocd/dp01.yaml
which will complete with:
application.argoproj.io/dp01-argo createdWe now have an ArgoCD application monitoring our repository.
We can use the ArgoCD UI to look at the dp01-argo application and the
resources it is managing:
Issue the following command to identify the URL for the ArgoCD login page:
oc get route openshift-gitops-server -n openshift-gitops -o jsonpath='{"https://"}{.spec.host}{"\n"}'which will return a URL similar to this:
https://openshift-gitops-server-openshift-gitops.apps.sno-ajo-1.snoajo1.comWe will use this URL to log into the ArgoCD admin console to view our deployments.
Issue the following command to determine the ArgoCD password for the admin
user:
oc extract secret/openshift-gitops-cluster -n openshift-gitops --keys="admin.password" --to=-Login to ArgoCD with admin and password.
Note
If DNS name resolution has not been set up for your cluster hostname, you will need to add the URL hostname to your local machine
/etc/hostsfile to identify the IP address of the ArgoCD server, e.g.:
141.125.162.227 openshift-gitops-server-openshift-gitops.apps.sno-ajo-1.snoajo1.com
Upon successful login, you will see the following screen:
Notice how the ArgoCD application dp01-argo is monitoring the
https://github.com/dporg-odowdaibm/dp01-ops repository for YAMLs in the
environments/dev/dp01 folder.
In the next step we will run the Tekton pipeline that populates this repository
folder with the YAMLs for the dp01 virtual appliance.
You've configured your cluster for DataPower. Let's run a pipeline to populate
the dp01-ops repository. This pipeline is held in the source repository
dp01-src; it also holds the configuration for the dp01 virtual DataPower
appliance.
Continue here to fork
your copy of the dp01-src repository.
