Humix is an open source robot connectivity and design framework that make it easy to
bridge cloud API with hardware sensors and devices. Combining with Watson APIs,
the framework help everyone to build their own cloud-brained robot with a few minimal steps.
The goal of Humix ( HUmanity & blueMIX) is taking the best part of IBM cloud offerings to provide a software skeleton for building a robot.It leverages NodeRed as the flow-editor for designing how the robot behaves. On top of NodeRed, a few new nodes are added to support Humix’s module programming model, as well as to make it easier to connect with the commonly used messaging channel ( Facebook Node ).
#Architecture
Essentially, Humix consists of two major components - Humix Think and Humix Sense.
Humix Think is the cloud-side component that embeds a NodeRed flow editor for design robot behaviour.
Humix Sense, on the other hand, is located on the device that acting as a robot.
Humix Sense use NATS as local messaging framework for all registered Humix Modules
to send sensor events and receive the commands. Humix Sense would monitor the local messaging bus
and deliver the messages to cloud for further processing.
With Humix Sense, each module could focus on its own logic without worrying about how messages
are routed to Humix Think. This micro service architecture make Humix an extensible
module systems that could be enhanced incrementally.
Currently the core Humix module that comes with Humix framework is ‘humix-dialog-module’. This module use speech-recognition and text-to-speech engines to support basic interaction with robot. Find more information about humix-dialog-module here.
Here are use RaspberryPi as reference development board, but any device that can run Node.js 4.2.x+ would do.
1. Raspberry Pi/Pi2/Pi3
2. Micro SD (16G+)
3. USB Sound Card
4. Microphone
5. Speaker
6. PL2303HXD USB To TTL Serial Cable (Optional. This is for login raspberry pi.)
If you don't have bluemix account, you can follow the steps in this link to create one.
Once login, set your region to US South:

You can run Humix Think either on bluemix or run it locally. First, clone the repository to your local machine
git clone https://github.com/project-humix/humix-ng.git
The first step is to pick a name for your application. So enter the think directory and modify the manifest.xml
cd humix-ng/think
vim manifest.yml

update the name and host properties. Make sure the name is unique, otherwise the process will fail when trying to deploy on bluemix.
example manifest.yml :
applications:
- path: .
      memory: 512M
      instances: 1
      domain: mybluemix.net
      name: humix-pi2
      host: humix-pi2
      disk_quota: 1024M
      services:
      - Humix-Cloudant-Service
      - Humix-Dialog-Service
      - Humix-NLC-Service
      - Humix-Speech-Service
      command: node --max-old-space-size=384 app.js --settings ./bluemix-settings.js -v
** Note : You can remove "Humix-Dialog-Service" and "Humix-NLC-Service" if you don't want to use these services for designing the conversation. These are optional.
You will need cf client to push the application into bluemix. If you don't cf-client install, you can get it here
Next, we will deploy the humix think to blueimx. We will execute a script that automatically create associated services needed and bind them to humix think. The script will also deploy the humix think on bluemix.
 cd humix-ng/think
 ./deployThink.sh
    API endpoint: https://api.ng.bluemix.net
    Email> liuch@tw.ibm.com
    Password>

    Authenticating...
    OK
    Targeted org liuch@tw.ibm.com
    Select a space (or press enter to skip):
    1. dev
    2. demo
    3. personal

    Space> 1

    Targeted space dev

    API endpoint:   https://api.ng.bluemix.net (API version: 2.40.0)
    User:           liuch@tw.ibm.com
    Org:            liuch@tw.ibm.com
    Space:          dev
    Creating service instance Humix-Cloudant-Service in org liuch@tw.ibm.com / space dev as liuch@tw.ibm.com...
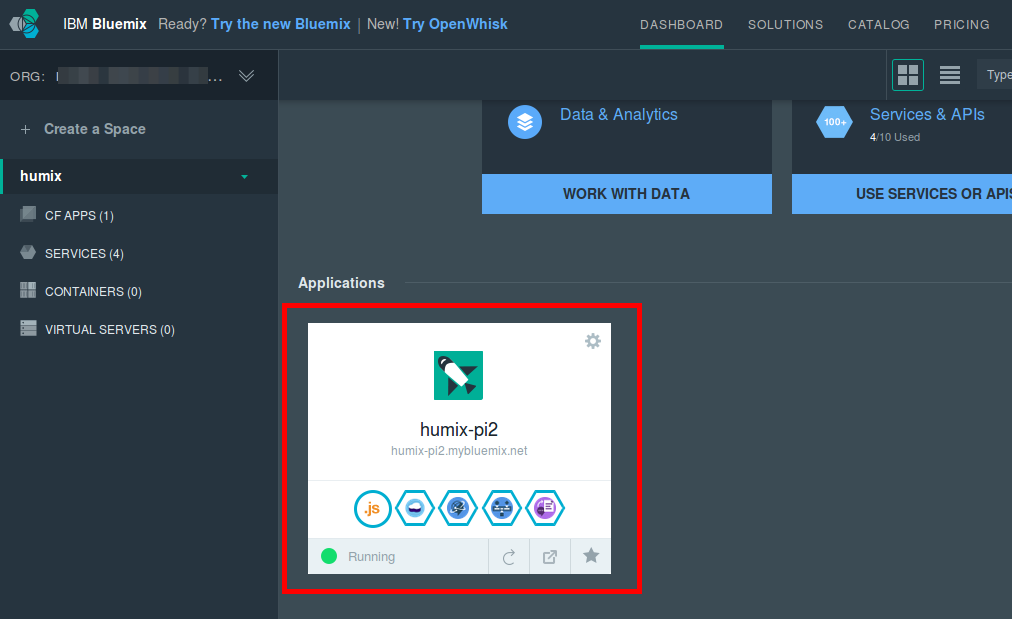
if everything works well, you can find your application in the following link (change your application name)
http://< your_app_name >.mybluemix.net
Alternatively, you can run humix think locally.
cd humix-ng/think
npm install
npm start
Then you can visit your local humix think via http://localhost:3000
TODO: Add steps to use local fs as persistent storage
We have simplified the steps required to setup Humix Sense by providing a base image. You can download the image here
Image location :humix-sense.img
To save disk space, the image is compressed. So to copy the image into your SD card ( at least 16G ), run ( you need to replace the path and your sd disk number)
gzip -dc /path/to/image.gz | dd of=/dev/sdx
Configure network setting of raspberry pi as you normally do. I'll skip the steps here.
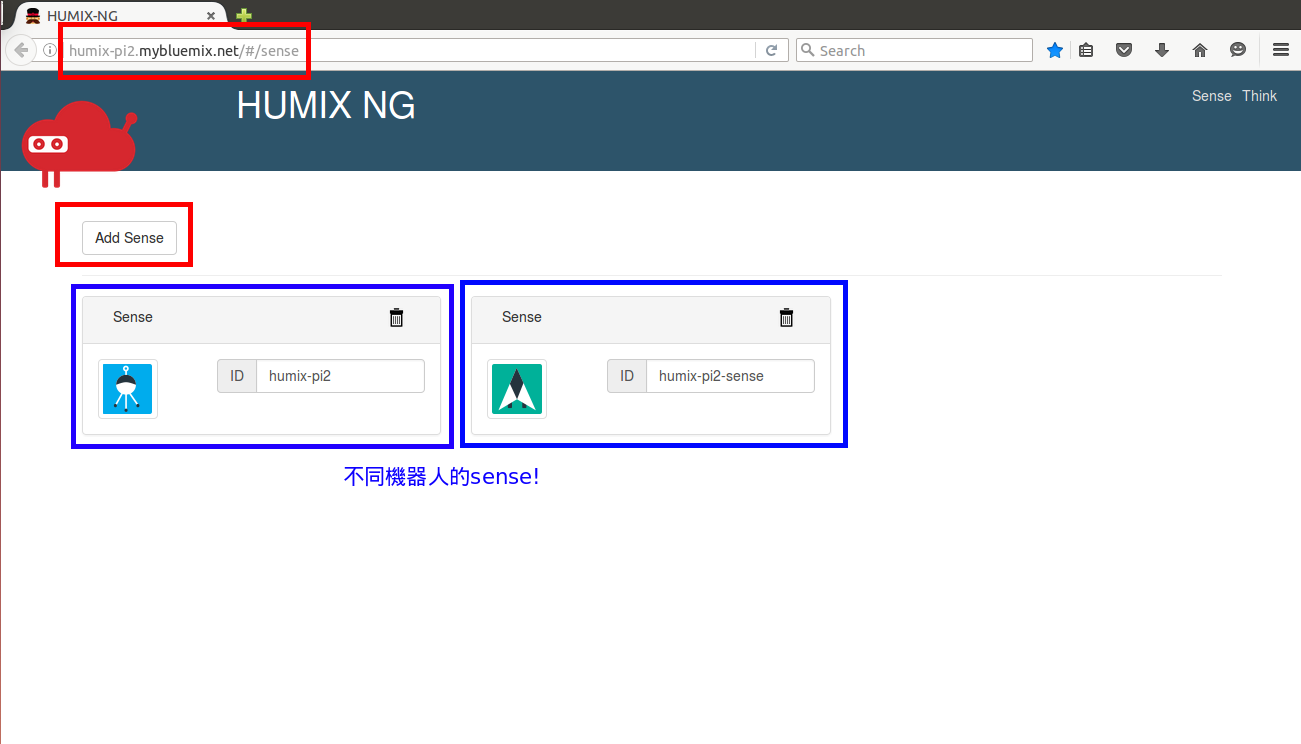
The next step is to tell humix sense where the humix think located. Assuming you have deployed humix think at http:/humix-pi2.mybluemix.net
cd ~/humix-ng/sense
vi config.js
example:
    module.exports = {
        thinkURL : 'http://humix-pi2.mybluemix.net/',
        senseId  : 'humix-pi2'
    }
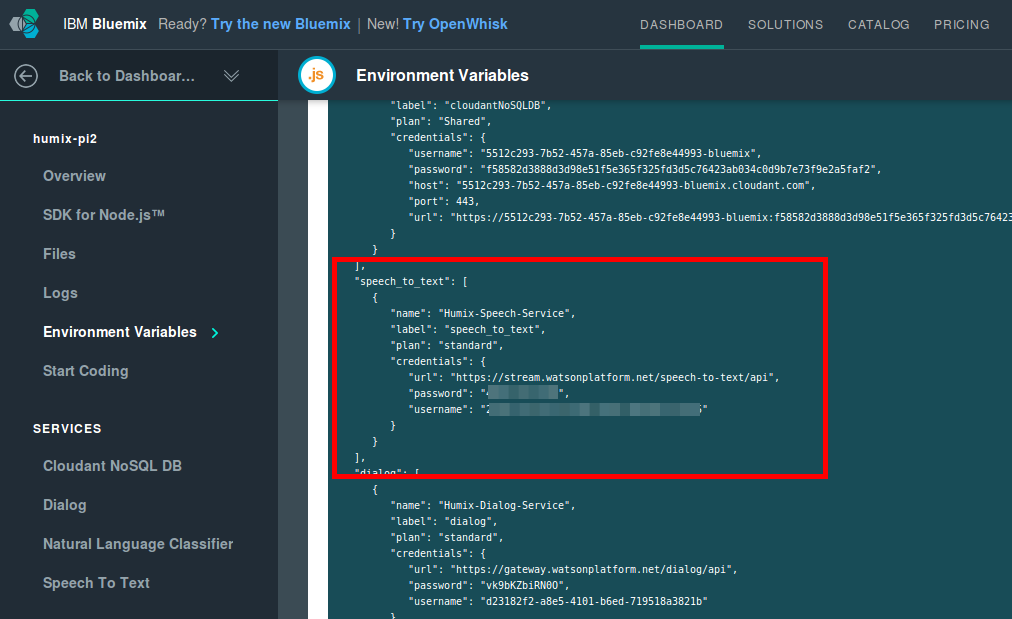
Next, you need to provide the credential of the Speech-Recognition and Text-To-Speech ( You should have created these two services in previous steps)
cd ~/humix-ng/sense/modules/core/humix-dialog-module/lib/
vi config.js

**< Note > get the credential of Watson STT on bluemix


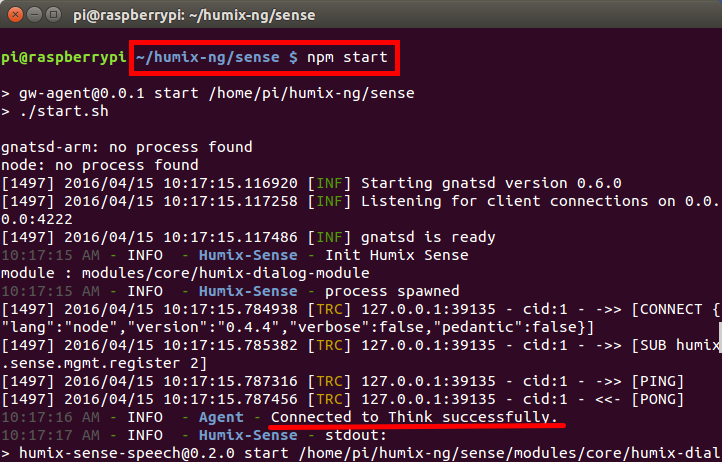
To run humix sense, simply run
cd humix-ng/sense
npm start
When you see the follow result, then your humix sense has been successfully connected to humix think
You can now config the basic flow on humix think
Copyright 2016 IBM Corp. Under the Apache 2.0 license.