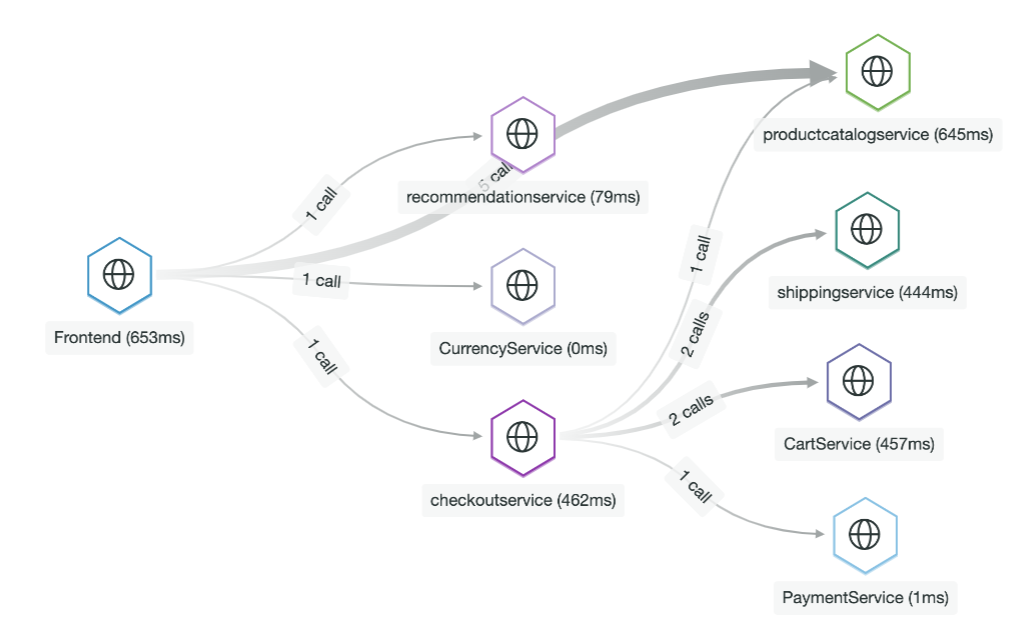
The goal of this workshop is to see first hand the power of OpenTelemetry for cloud native applications
From a terminal with administrator access (but not as root), run
minikube start --memory 8192 --cpus 6This application is resource heavy so get ready for some 💨
Check that your cluster is up and running by running
kubectl get nodesClone the repo for the sample application
git clone https://github.com/newrelic-experimental/otel-workshop.gitExport env variables
export OTEL_EXPORTER_OTLP_ENDPOINT=https://otlp.nr-data.net:4317
export OTEL_EXPORTER_OTLP_METRICS_ENDPOINT=https://otlp.nr-data.net:4317
export OTEL_EXPORTER_OTLP_TRACES_ENDPOINT=https://otlp.nr-data.net:4317
export OTEL_EXPORTER_OTLP_HEADERS=api-key=$NEW_RELIC_LICENSE_KEY
export NEW_RELIC_API_KEY=$NEW_RELIC_LICENSE_KEY
export NEW_RELIC_LICENSE_KEY=$NEW_RELIC_LICENSE_KEY
export NEW_RELIC_HOST=collector.newrelic.com
Run Skaffold
Note that this step will take ~15-20 minutes the first time you run this command because Docker has to build and push each of the microservices
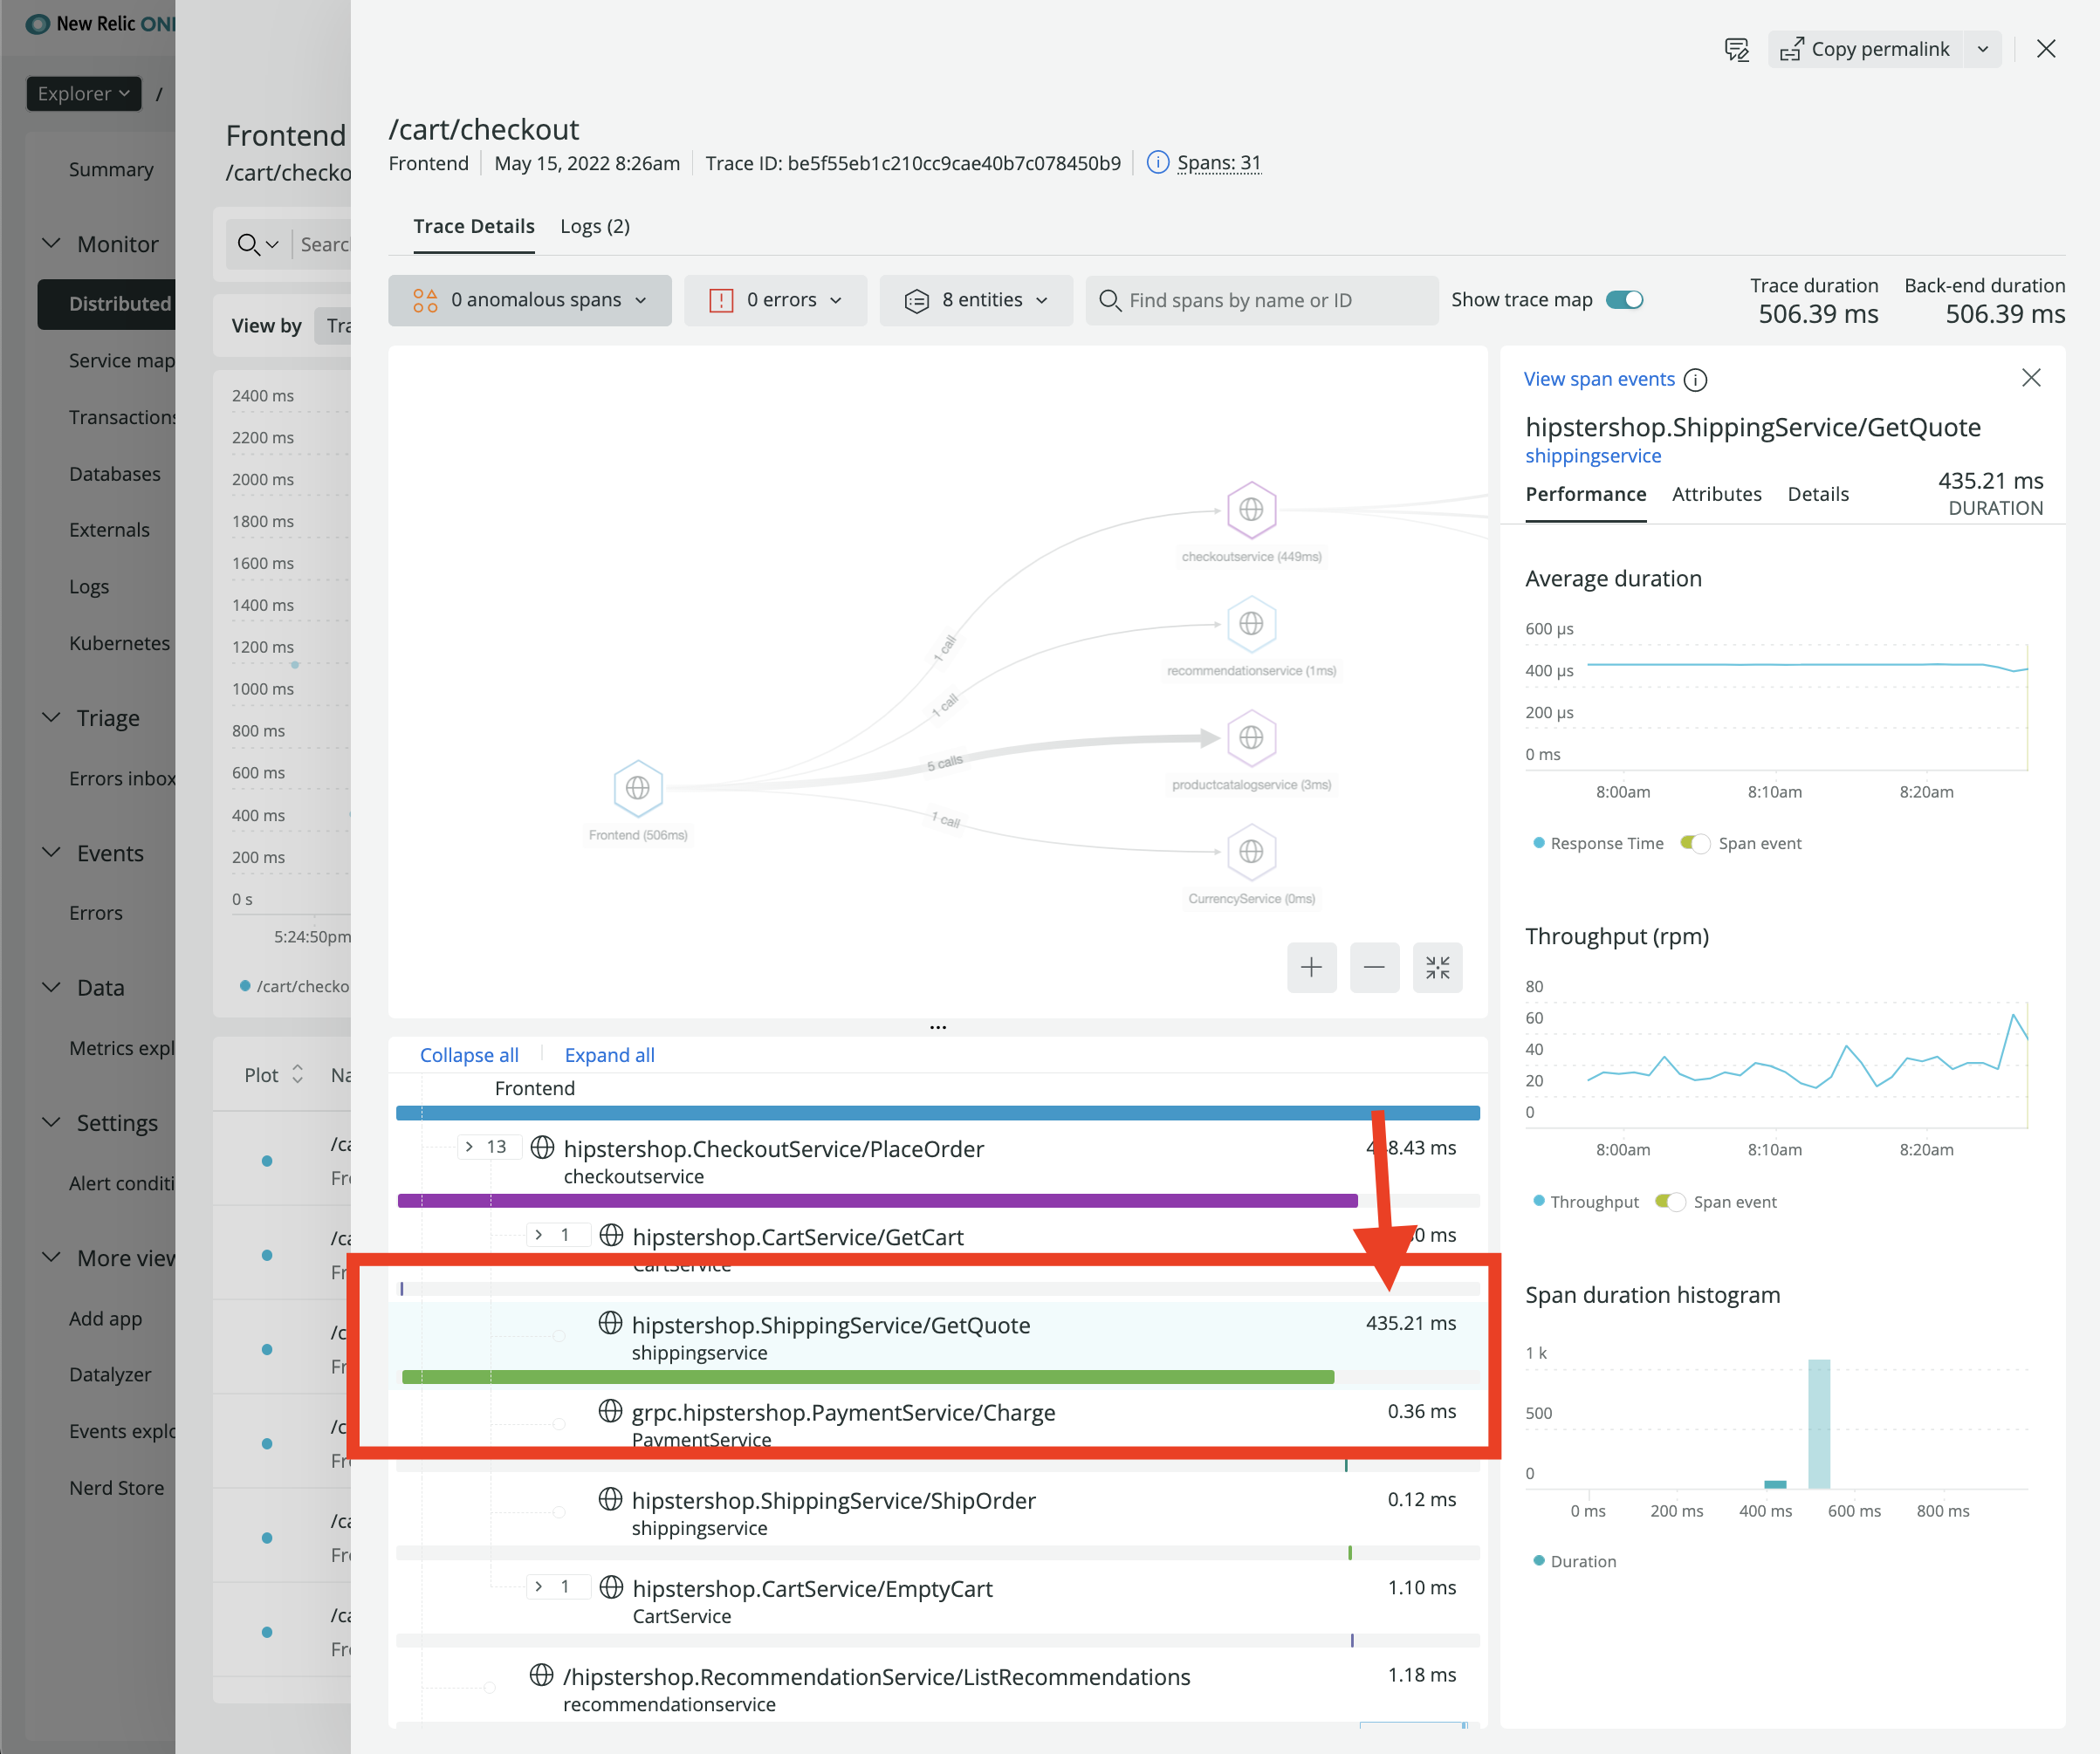
skaffold devYour first mission is to add an artificial delay in one of the functions to see the full power of OpenTelemetry and distributed tracing. Let’s say we want to know what exactly causes a delay in the frontend? Distributed tracing makes it easy for you to follow the journey of a request as it travels throughout your system.
📜 **In `main.go`, add a 0.1sec delay for the `createQuoteFromCount` and a 0.33 sec delay for `CreateQuoteFromFloat`functions.**When you head into New Relic distributed tracing you should see something like this for your Distributed trace with your artificial delay clearly visible.
-
🙈 Solution
func CreateQuoteFromCount(value float64) Quote {
	...
	time.Sleep(time.Second / 10)
	...
}
func CreateQuoteFromFloat(value float64) Quote {
	...
	time.Sleep(time.Second / 3)
	...
}
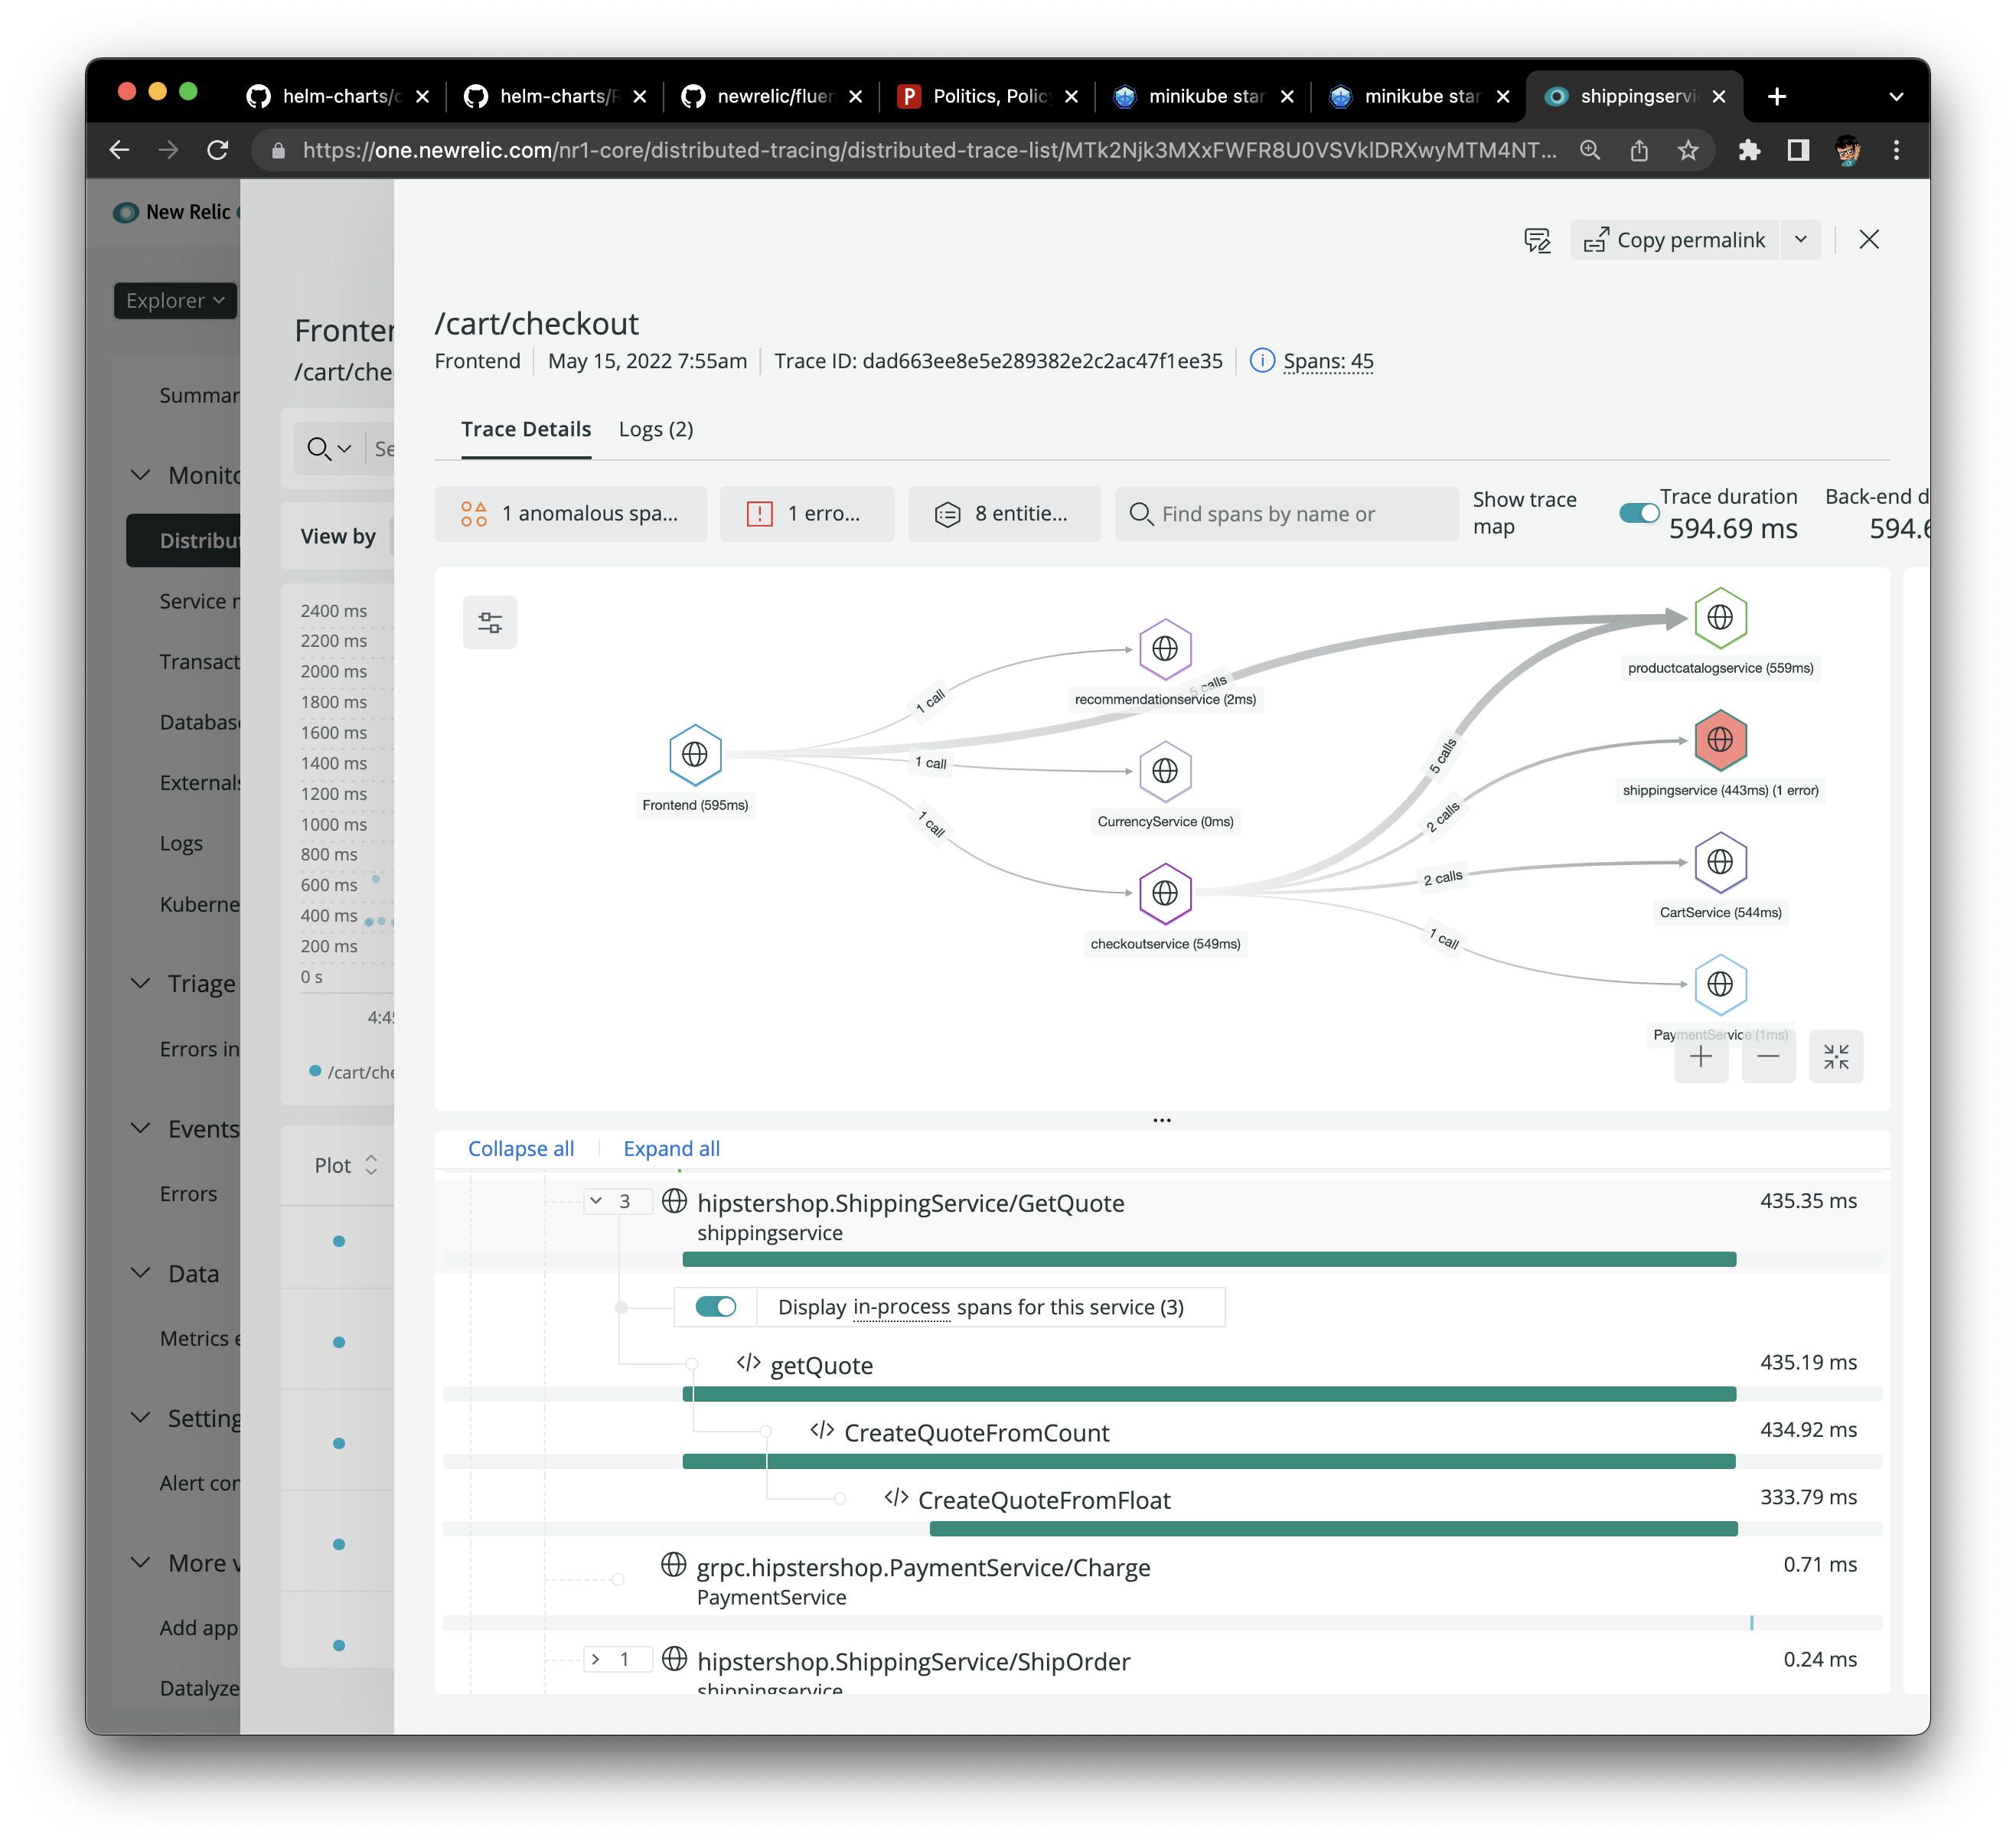
However, let’s say we want to get one level deeper and want to see what caused the spike in the application. You are able to add custom spans to
📜 **In the `GetQuote`function in `main.go`, build individual spans for the `createQuoteFromCount` and `CreateQuoteFromFloat`functions**-
🙈 Solution
func CreateQuoteFromCount(value float64 , ctx context.Context) Quote {
	ctx, childSpan := tracer.Start(ctx, "CreateQuoteFromCount")
	defer childSpan.End()
	...
}
func CreateQuoteFromFloat(value float64 , ctx context.Context) Quote {
	ctx, childSpan := tracer.Start(ctx, "CreateQuoteFromFloat")
	defer childSpan.End()
	...
}
func (s *server) GetQuote(ctx context.Context, in *pb.GetQuoteRequest) (*pb.GetQuoteResponse, error) {
		// 1. Generate a quote based on the total number of items to be shipped.
	quote := CreateQuoteFromCount(0, ctx)
}
Let’s say that you wanted to add more context into the traces so you can get more business insights out of your data.
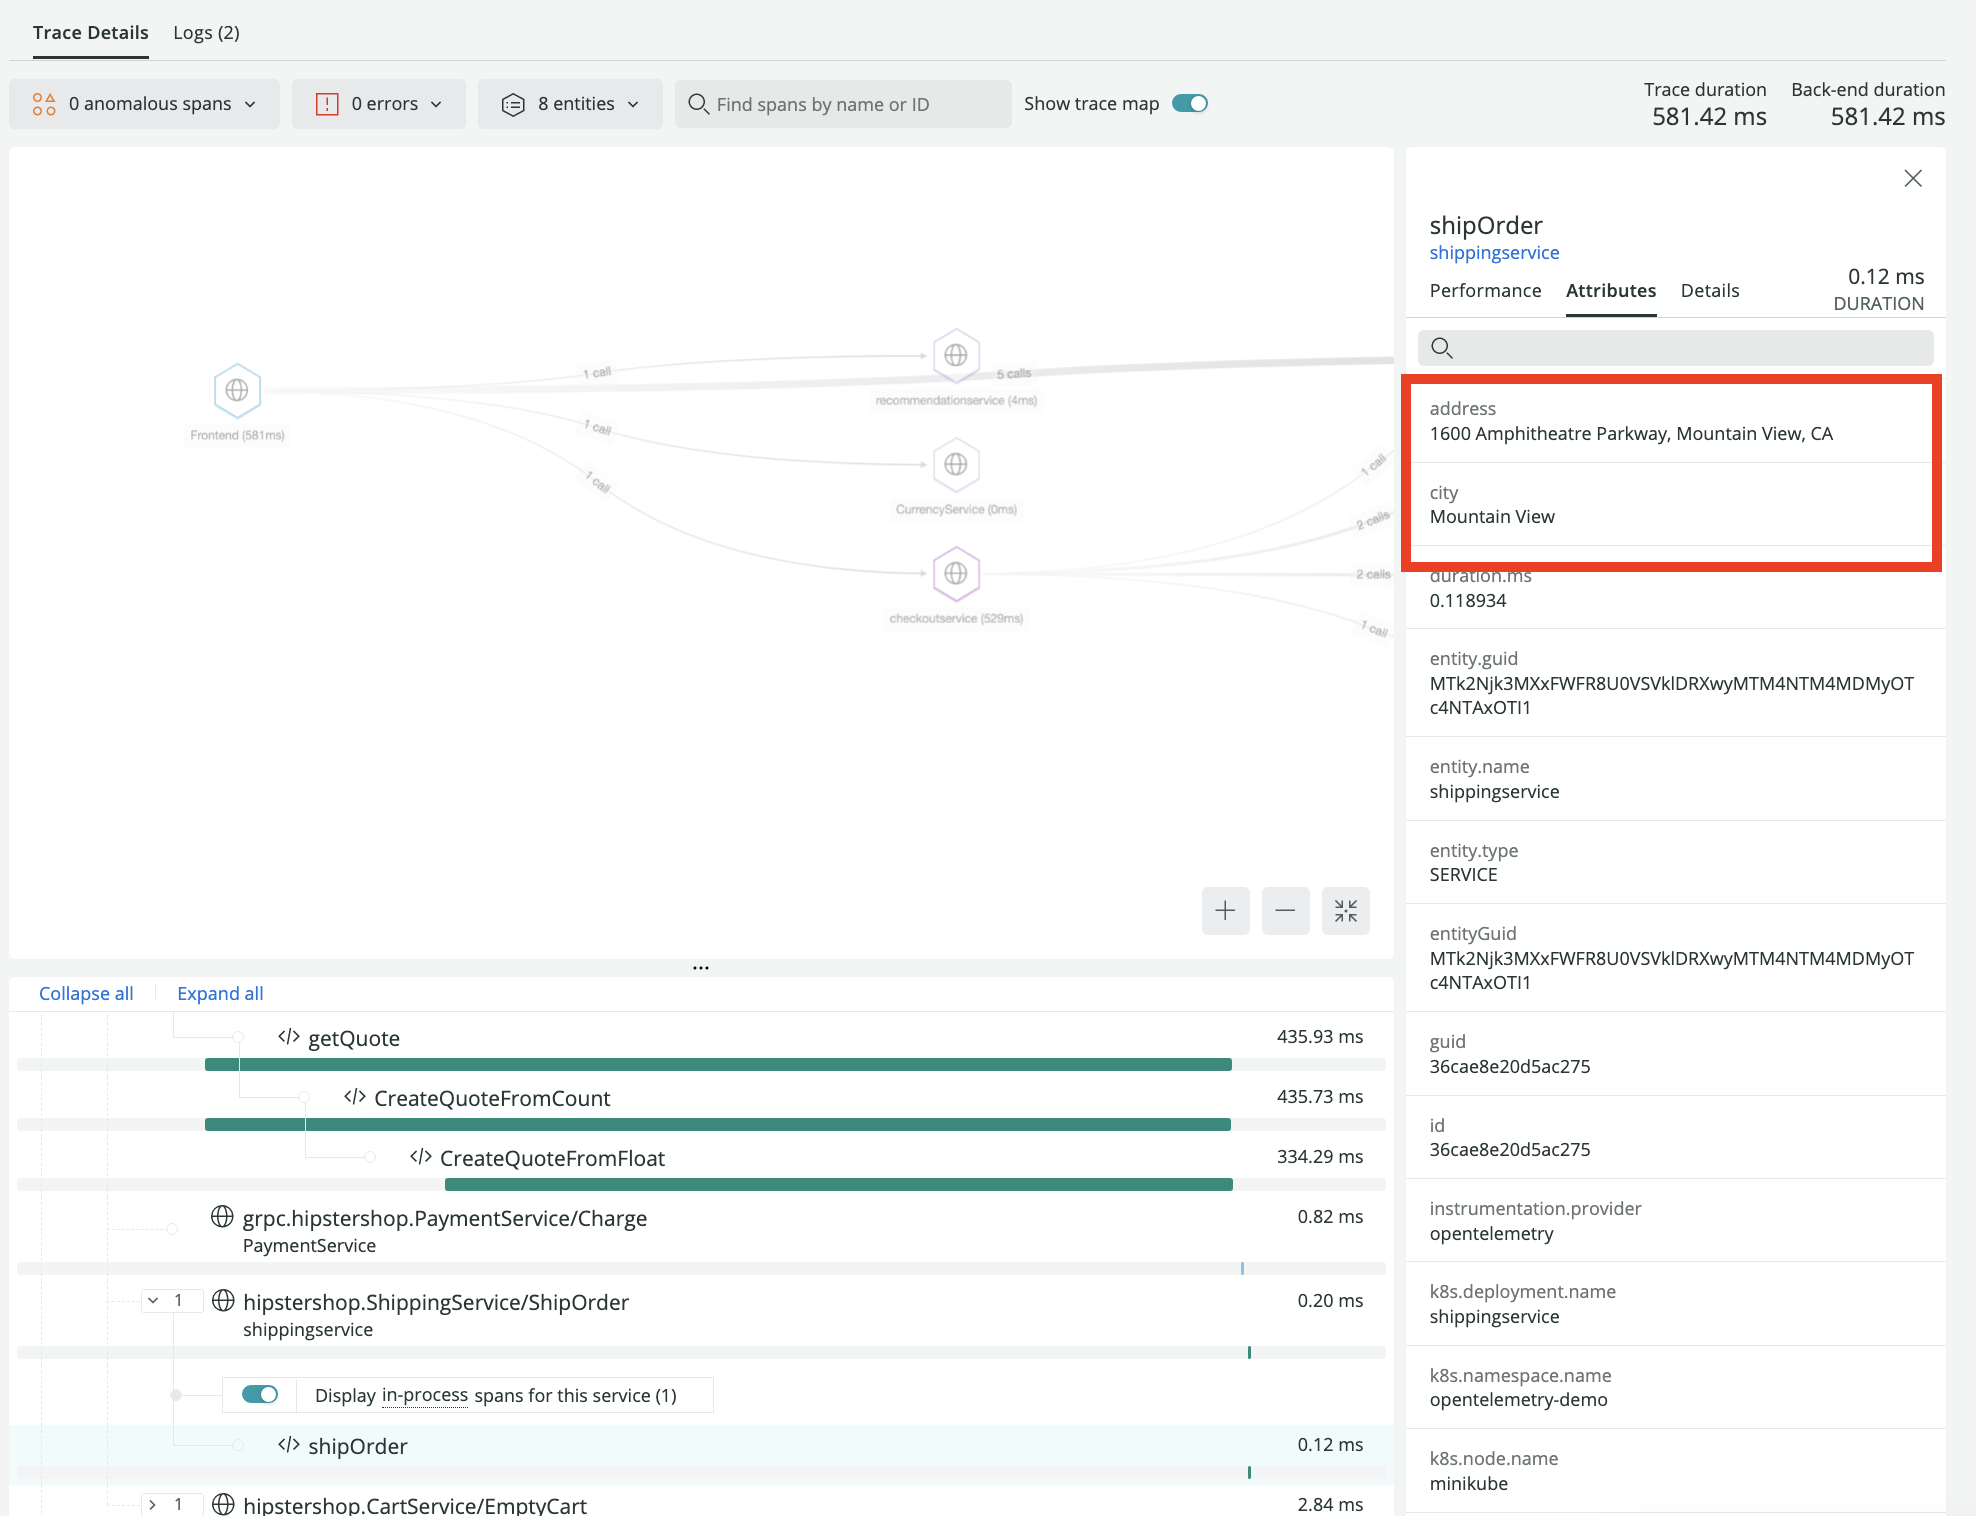
Attributes are keys and values that are applied as metadata to your spans and are useful for aggregating, filtering, and grouping traces. Attributes can be added at span creation, or at any other time during the lifecycle of a span before it has completed.
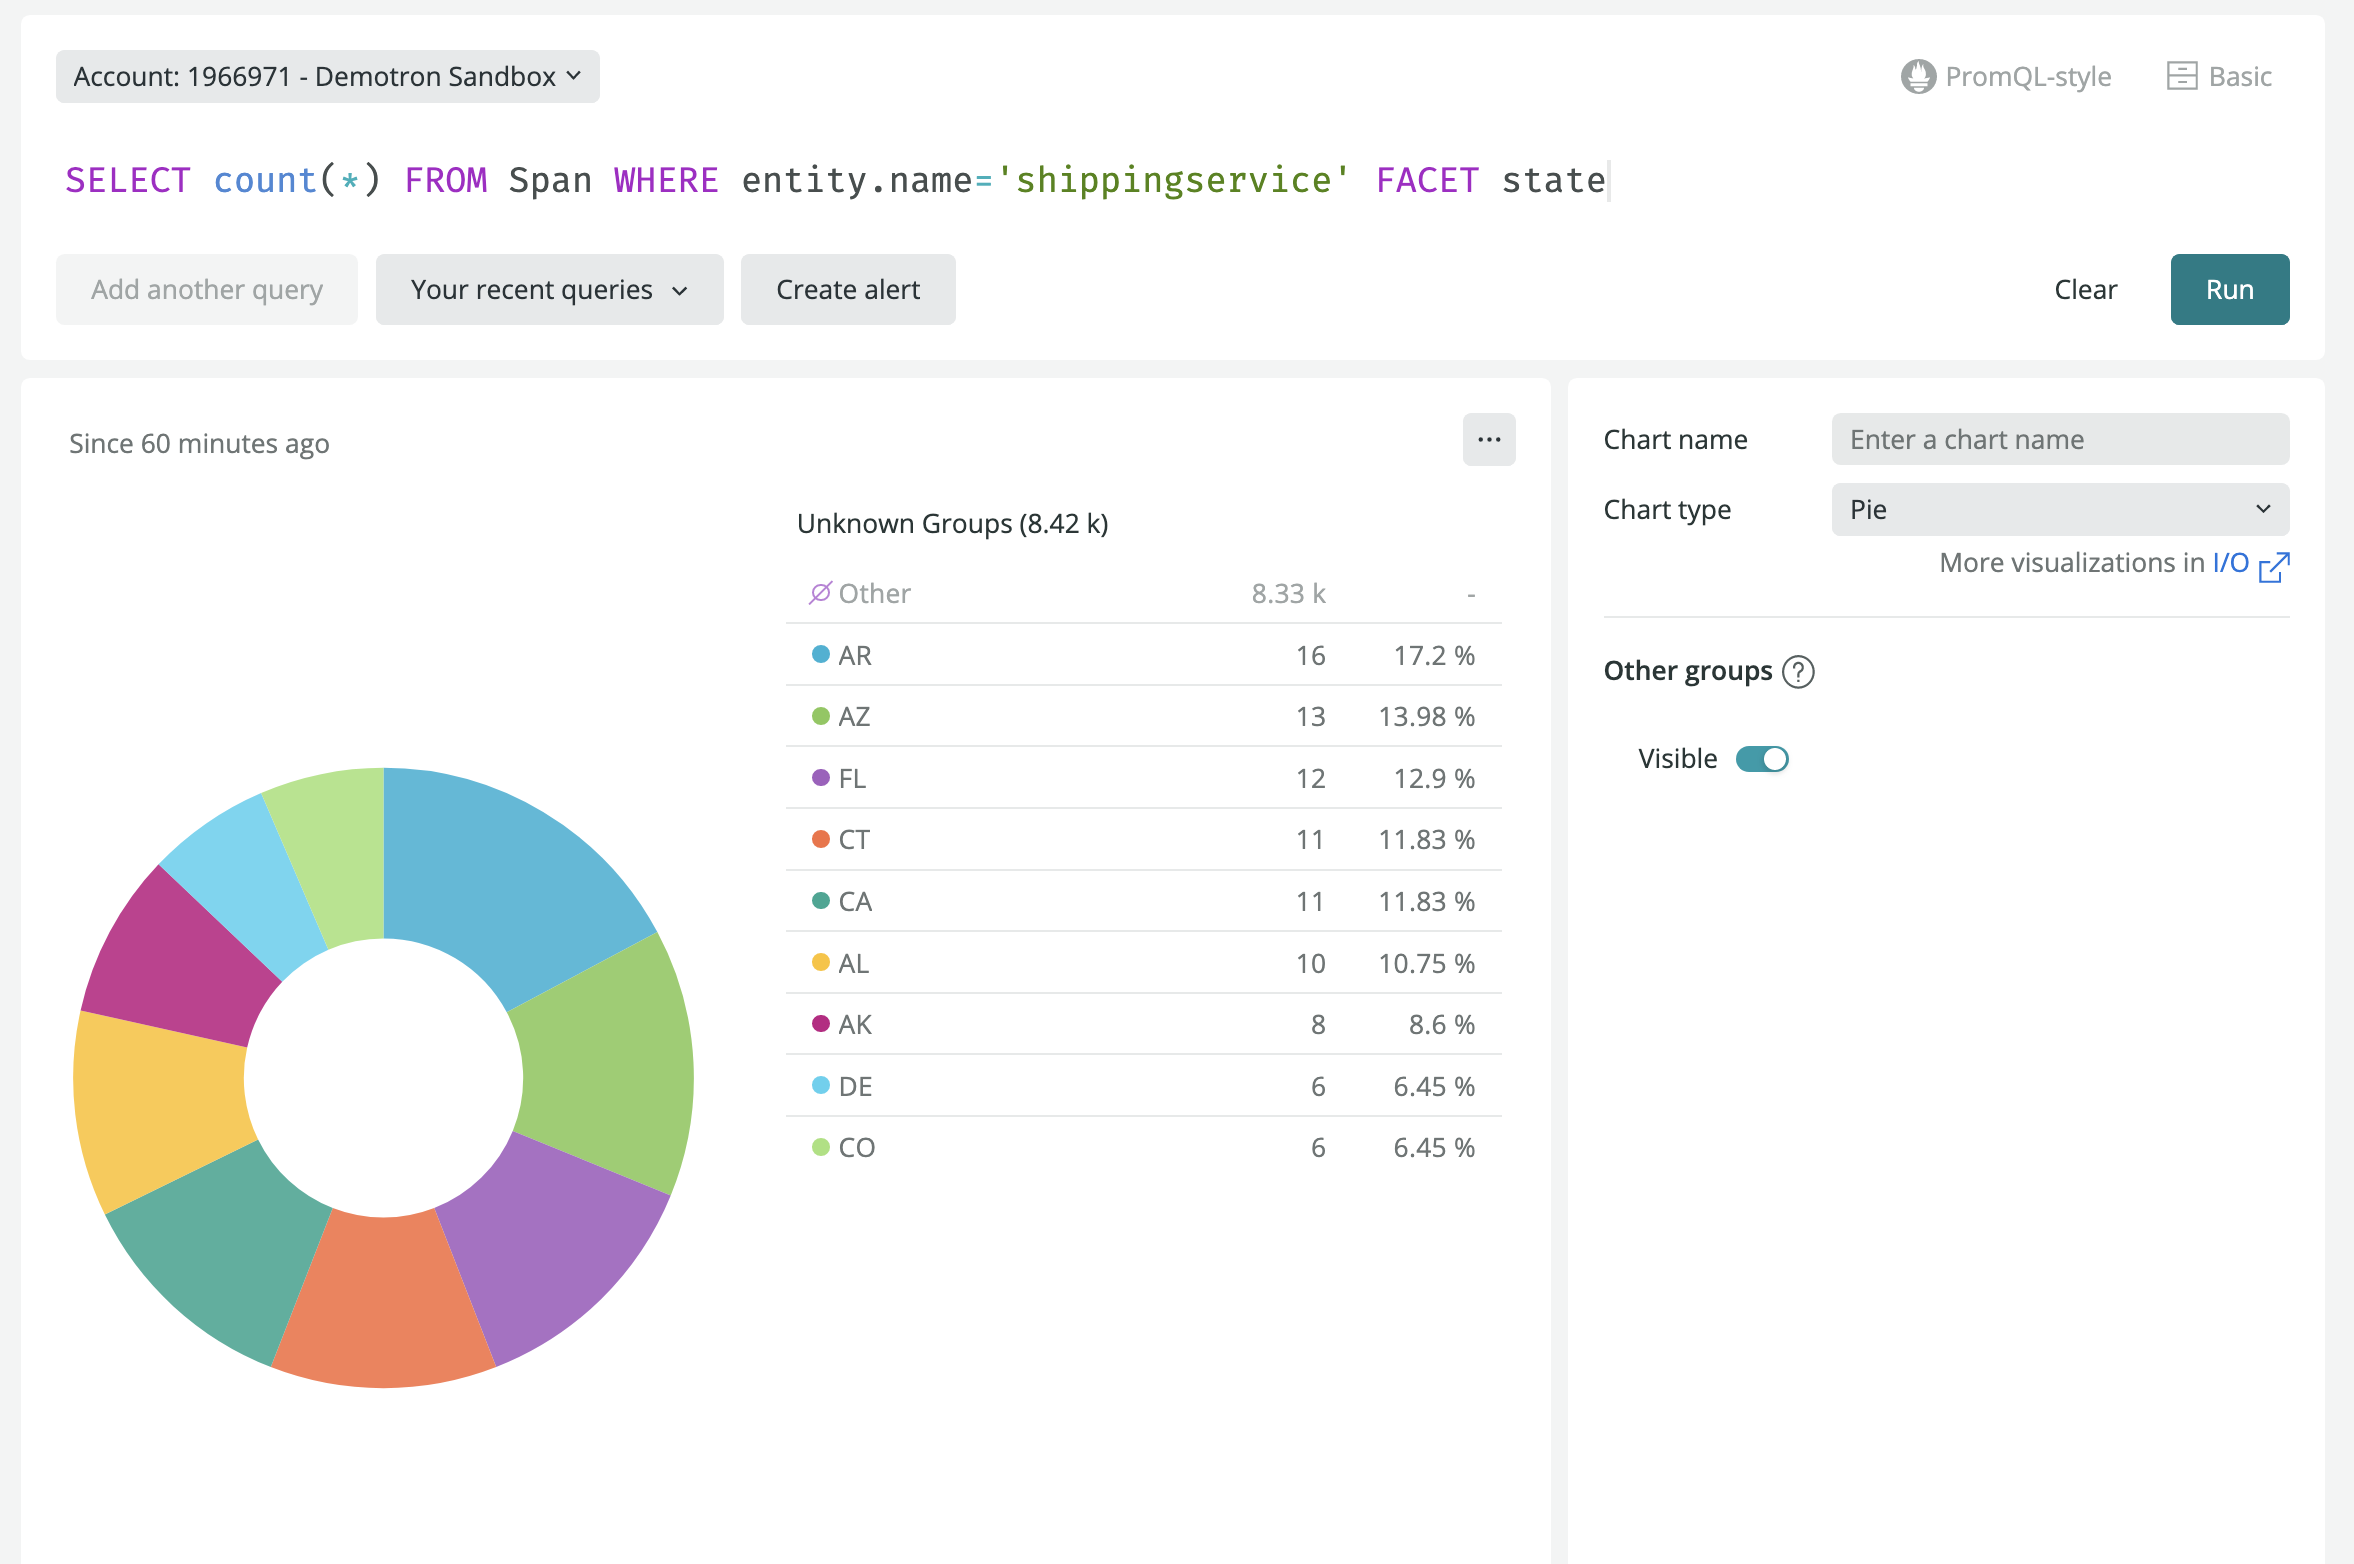
📜 **In the `ShipOrder`function in `main.go`, add code to attach the `state`, `zipcode` , and `city` attributes to each `shipOrder` span you created in the previous step!**When you are finished you should be able to see the attributes you added when you click on the shipOrder span → attributes tab on the right panel.
You should be able to run the
NRQLquerySELECT count(*) FROM Span WHERE entity.name='shippingservice' FACET stateto get the breakdown of all orders processed by state
-
🙈 Solution
import (
    ...
    "go.opentelemetry.io/otel/attribute"
}
func (s *server) ShipOrder(ctx context.Context, in *pb.ShipOrderRequest) (*pb.ShipOrderResponse, error) {
...
	parentSpan.SetAttributes(
		attribute.String("address", baseAddress),
		attribute.String("city", in.Address.City),
		attribute.String("state", in.Address.State))
****}
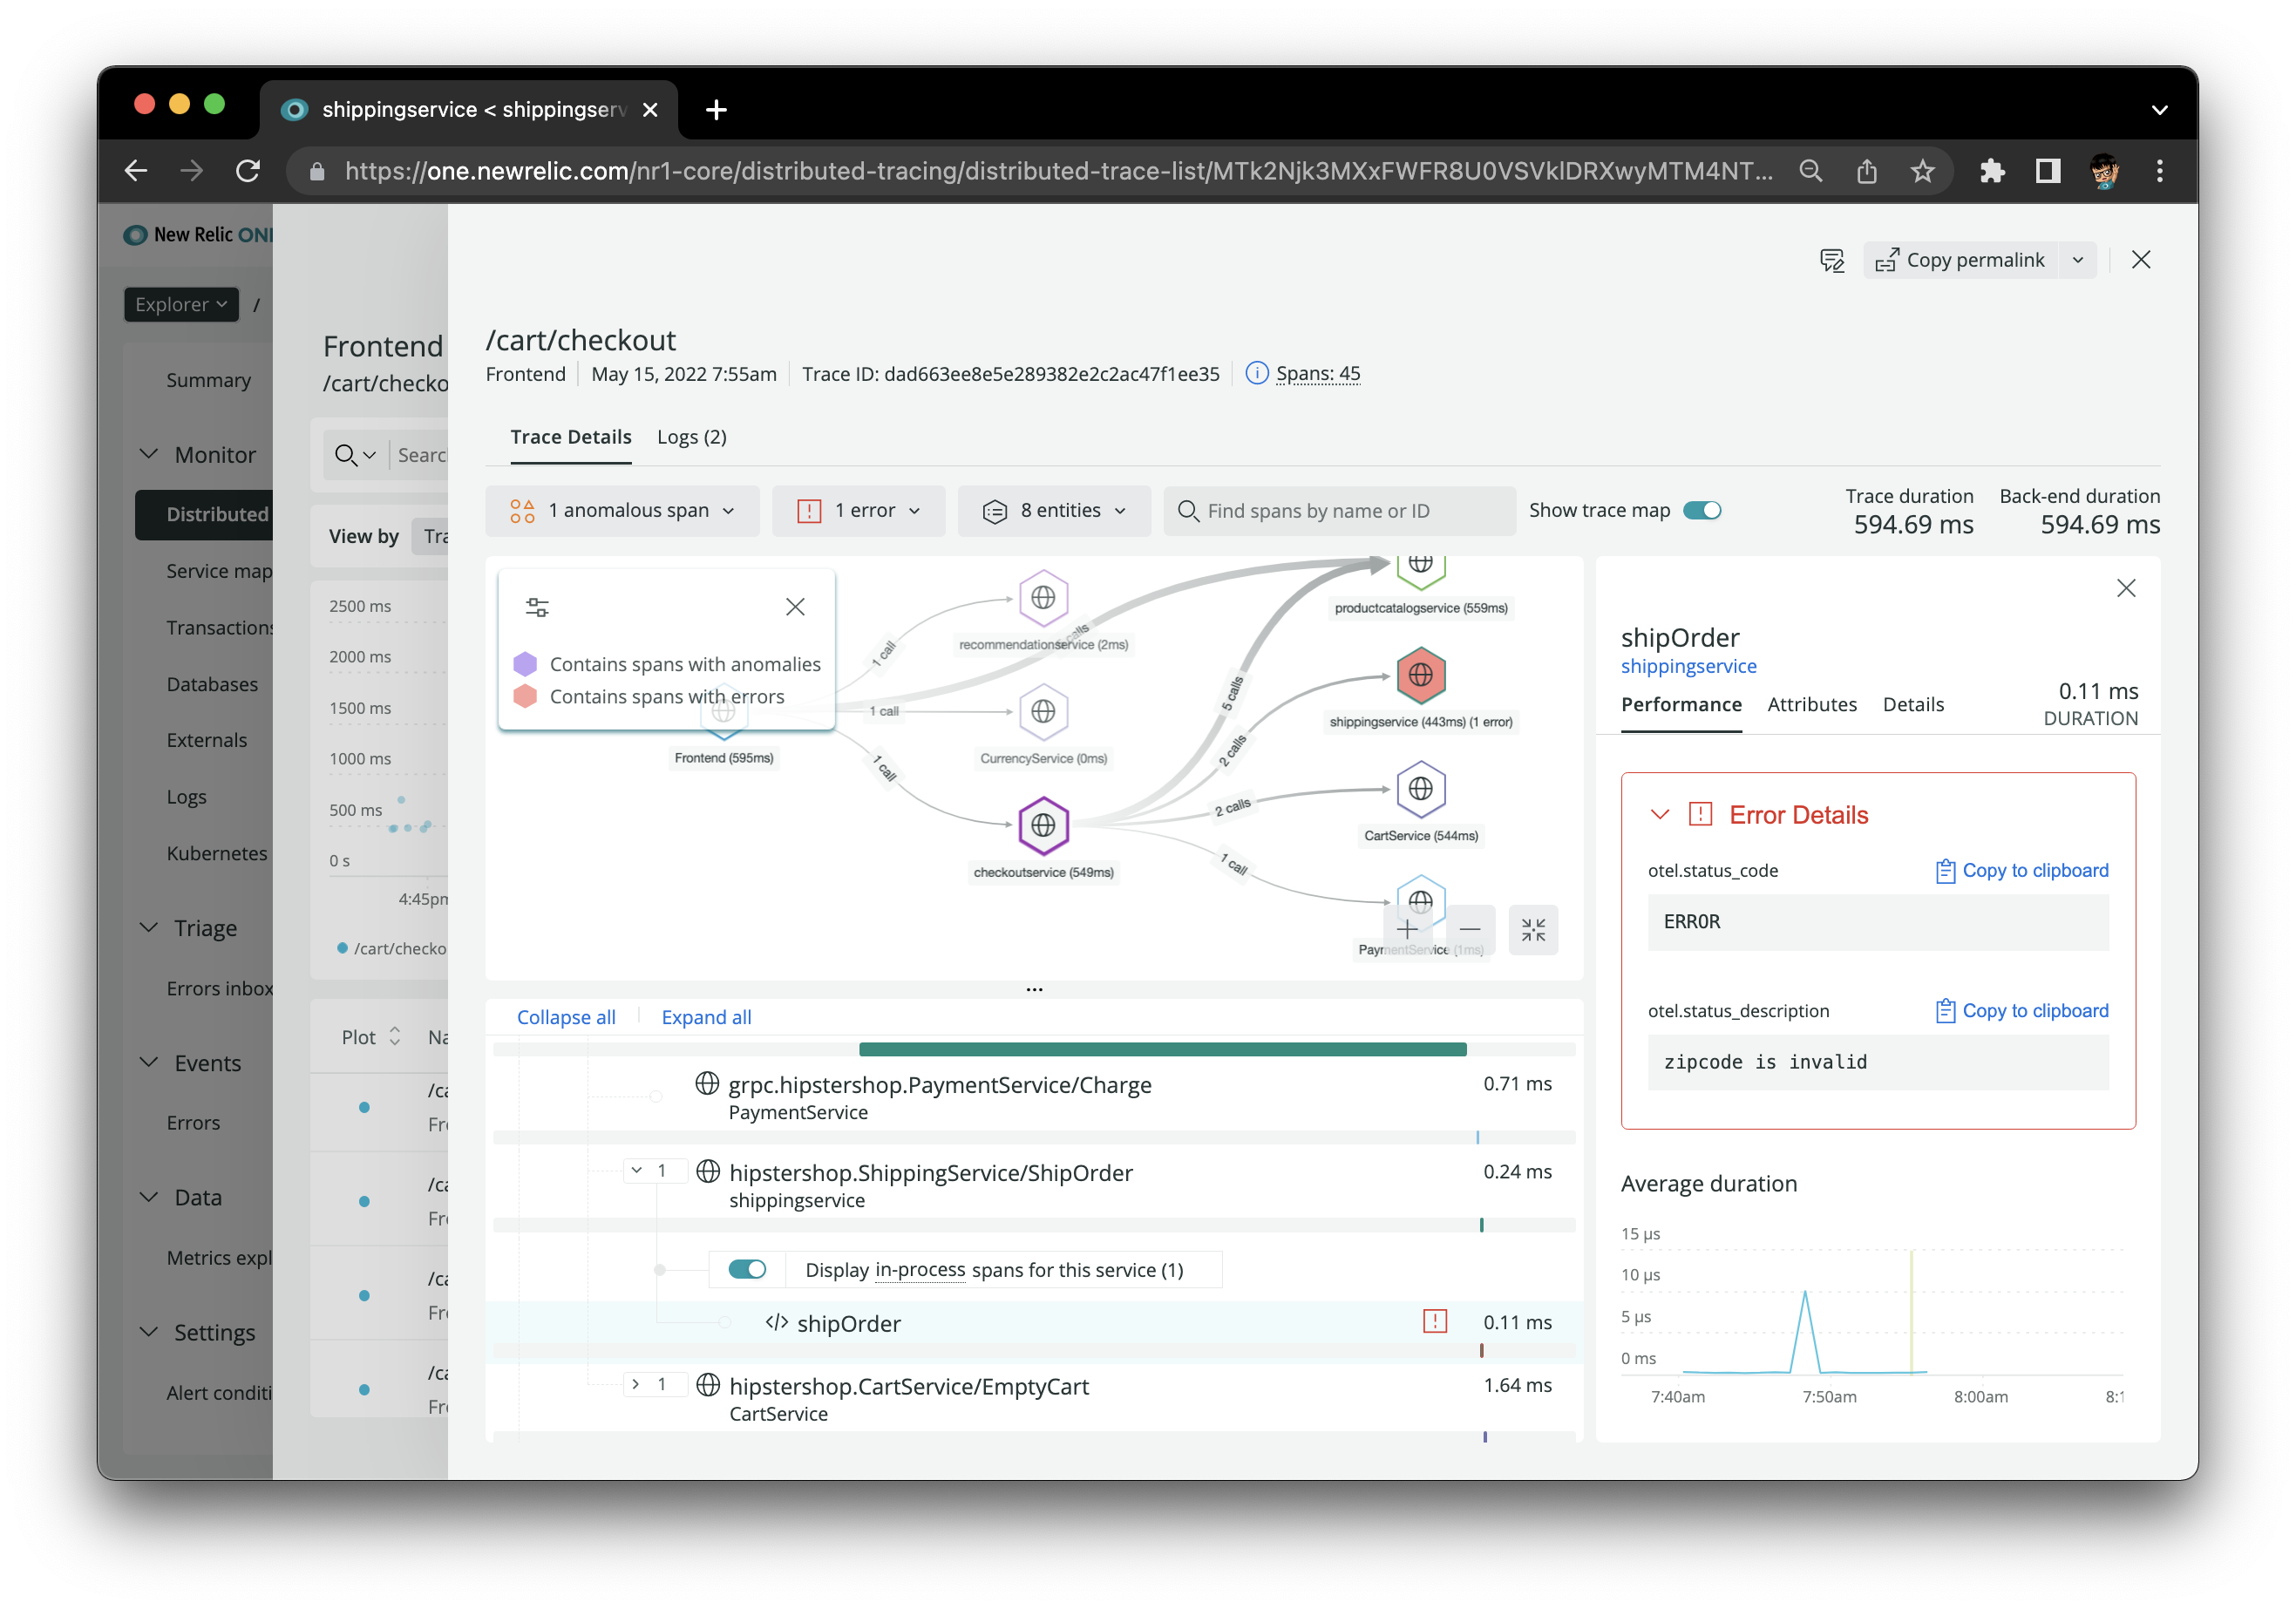
Unlike system exceptions, application exceptions allow you to bubble up application-level activity that might cause errors, for example, invalid input argument values to a business method.
📜 **In the `ShipOrder`function in `main.go`, add some logic to throw an error when a zip code is not a 5 digit number. It should show up like the screenshot below in NR1.**-
🙈 Solution
func (s *server) ShipOrder(ctx context.Context, in *pb.ShipOrderRequest) (*pb.ShipOrderResponse, error) {
...
**if(in.Address.ZipCode < 10000 || in.Address.ZipCode > 99999){
       parentSpan.SetStatus(1, "zipcode is invalid")
   }**
}
Following the OTel specification for the Tracing API , SetStatus sets the status of the Span in the form of a code and a description, overriding previous values set.
The optional Description field provides a descriptive message of the Status.
Description MUST only be used with the Error StatusCode value. An empty Description is equivalent with a not present one.
SetStatus(code codes.Code, description string)**StatusCode is one of the following values:**
Unset (code = 0 or unset) The default status.
Ok (code = 2) The operation has been validated by an Application developer or Operator to have completed successfully.
Error (code = 1) The operation contains an error.
