This is a complete example project for UE5 that shows how to use a custom APS Luxor avatars with live-link full body tracking and facial capture on characters in Unreal Engine. This plugin can be used in live production environments or to simply record a animation directly in Unreal Editor.
The binaries for this plugin were compile using UE5 on Windows 10 64bit but the plugin should also be compatible with UE4.
This project requires APS Luxor (https://www.patreon.com/prepstudio) v3.6.7 or above and Unreal Engiene 5 editor.
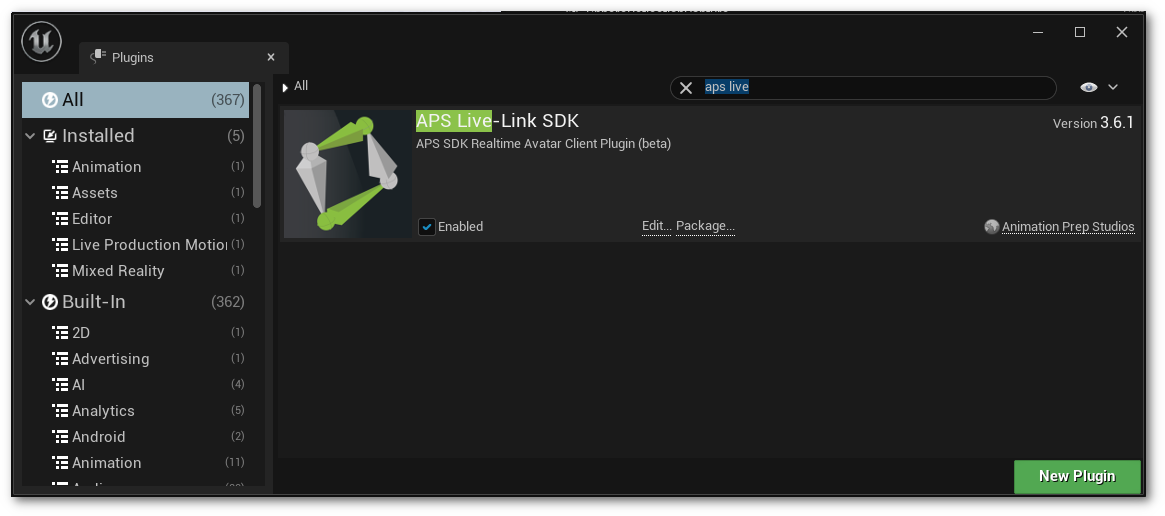
Download the latest APS Live-Link plugin (v5.0.7) for UE4 and UE5 here: https://www.mocapfusion.com/live-link
![]()
To get started first you will need to download and install these two programs:
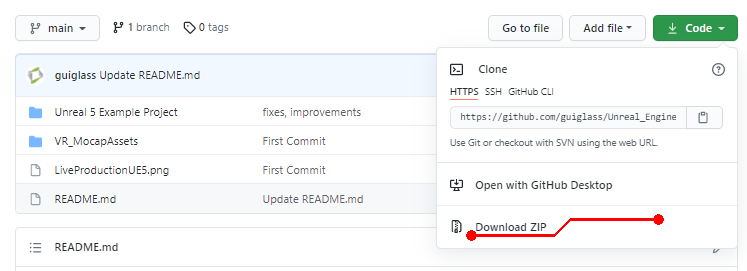
Download the Unreal_Engine_5_Live_Production_Example project from this Github repo.
After downloading the .zip you can unzip the contents to a folder on your hard drive
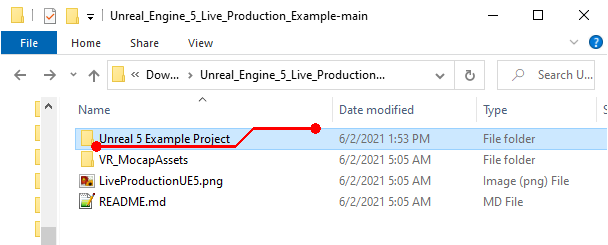
Inside of the zip there are two folders, the UE5 project folder and a folder containing the custom avatar for APS.
📂 Unreal 5 Example Project.
This folder contains the UE5 project files.📂 VR_MocapAssets.
This folder contains a custom avatar for APS.
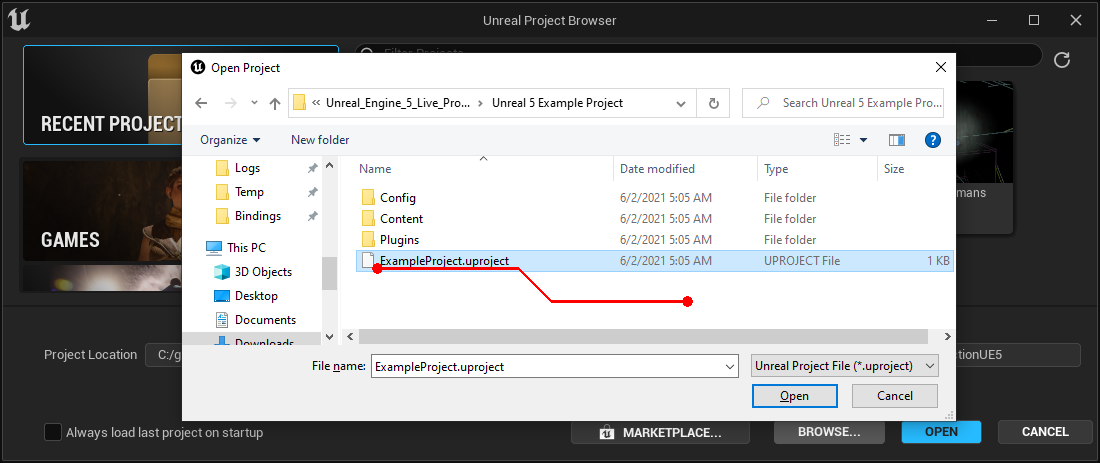
The .uproject file is located in the 📂 Unreal 5 Example Project folder.
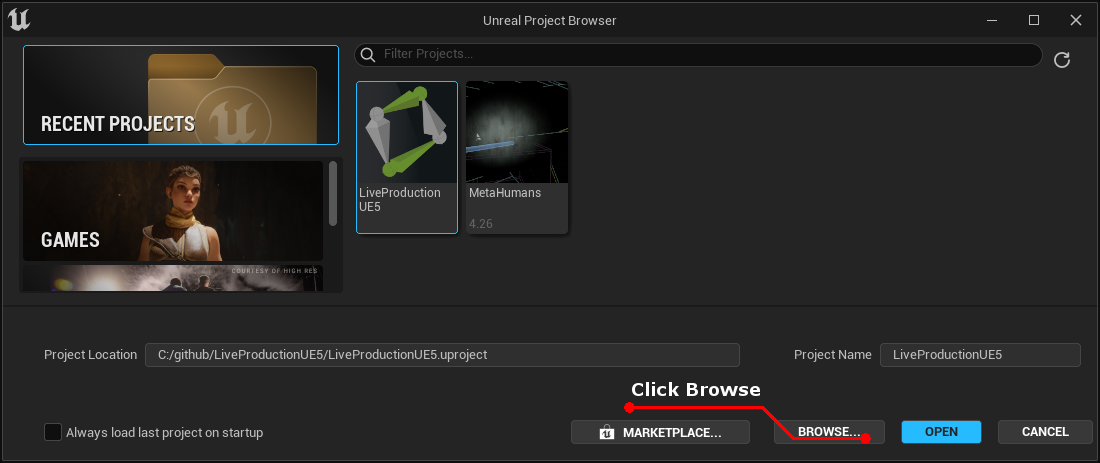
Click on browse and select the .uproject from the Unreal_Engine_5_Live_Production_Example folder.
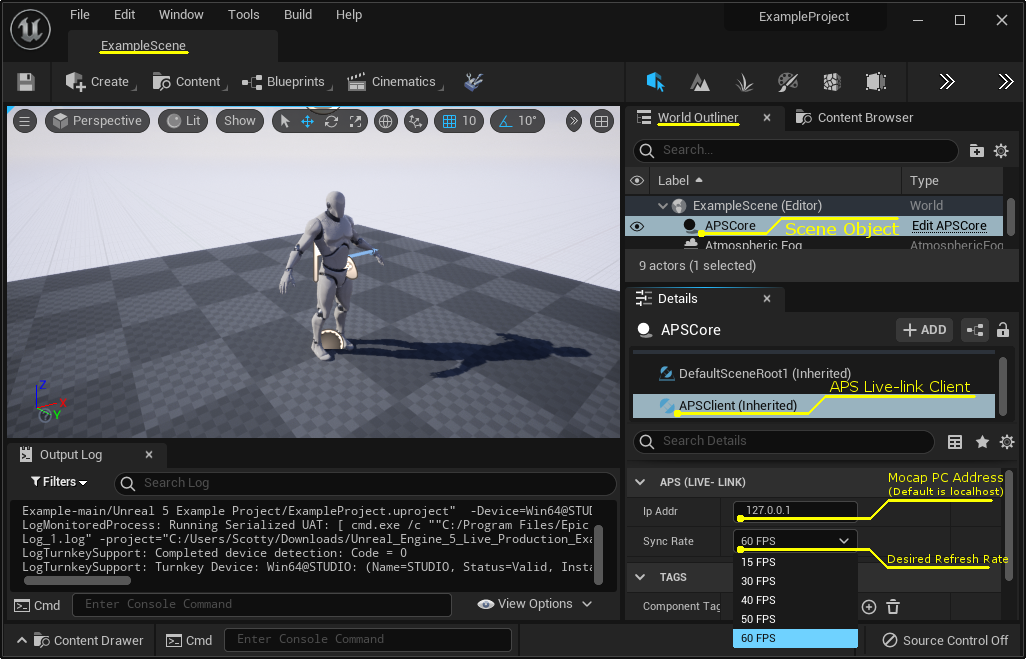
Locate the APSCore scene object and select it to set the IP address to the PC running the APS mocap server.
If running APS on the same PC as Unreal then leave the IP as default loopback.
![]()
Back in the folder we unzipped earlier now locate the mocap avatar data folder.
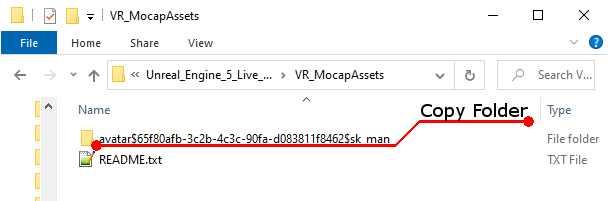
Copy the avatar data folder.
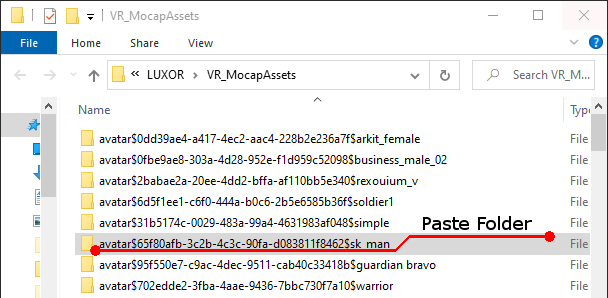
Paste the avatar data folder into the folder: %USERPROFILE%\AppData\LocalLow\Animation Prep Studios\LUXOR\VR_MocapAssets\.
![]()
Start APS and open the Avatar tab and the SK_Man avatar should now be available.
![]()
The avatar is now waiting to be calibrated to the player.
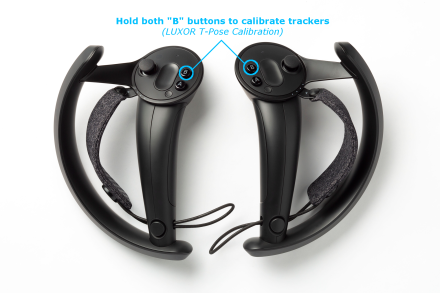
While standing in a TPose press the two menu buttons simultaneously for three seconds.
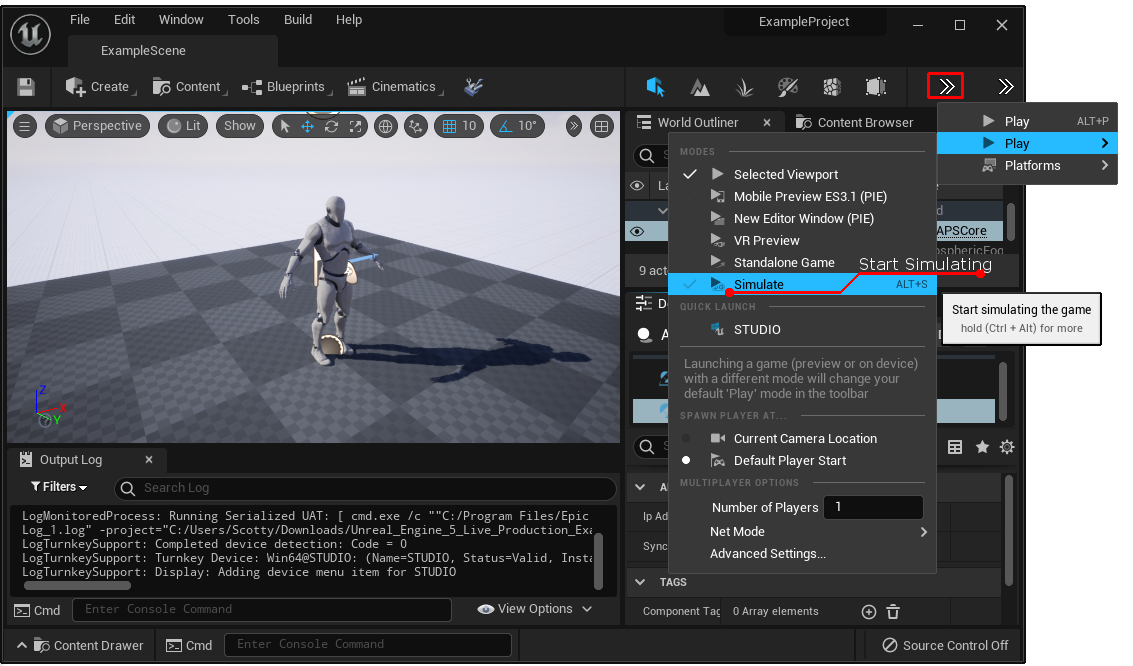
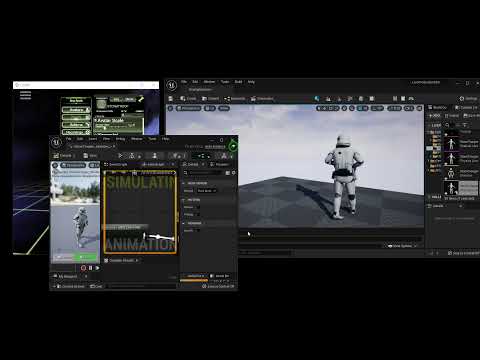
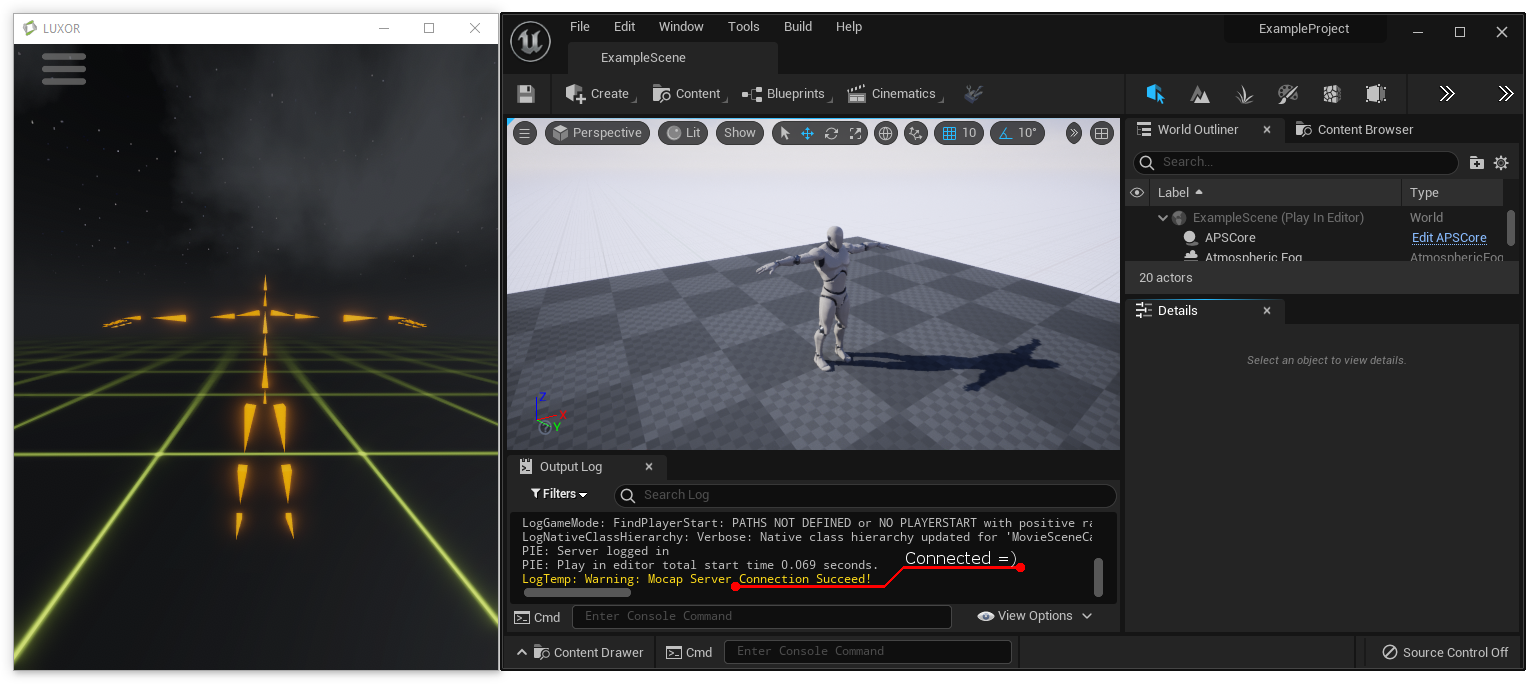
Press "Play" and start simulating to start live-link connection and sync the Mannequin avatar with APS.
If the connection was successful you should see the mannequin in Unreal moves exactly as the avatar in APS !!!

You should see a new Animation Blueprint. Simply double click on it to open the AnimGraph. Once in the AnimGraph add the Avatar Pose Receiver node and connect it to the Output Pose node, save and compile.

This animation node should be connected directly to the Output Pose in the animation blueprint.
Note that the AvatarPoseReceiver node also includes a real-time re-targeting feature located in the Details tab. This can be helpful if the mocap avatar in APS and Unreal game character's skeleton are slightly different from each other and can correct offsets after tpose calibration. You may enable and override rotation or translation offsets by using the checkboxes for any of the bone groups: Neck, Spine, Shoulders, Legs, Arms, Hands and Fingers. The Rotation Weight and Location Weight input fields are for setting the amount of retargeting.
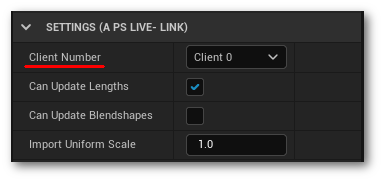
Parameters:
- Client Number - Allows specifying which client connection to use as the source for motion capture data. The client number corresponds to the "client" designations of the APSCore scene object (Default = Client_0).
- Can Update Lengths - Apply bone translations for bones that can be stretched. Some bones can translate as well as rotate, but translation is optional and may not be desired.
- Can Update Blendshapes - Apply blendshapes from APS avatar to the UE avatar mesh. For use with .fbx avatars that include blendshapes. "Import Morph Targets" checkbox must be enabled !!
- Blendshape Names Truncated Substring - Optional!! UE sometimes removes common substrings from the blendshape names, eg. "Genesis8_1Female_" Note: You may leave this field blank for most avatars.
- Apply Root Scale - If the root scale of the armature is not 1,1,1 it can sometimes cause avatar size in scene to appear incorrect. If avatar scaling appears wrong please try enabling this toggle.
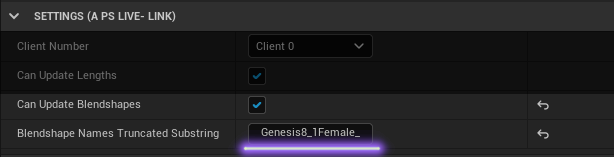
For some avatars Unreal Editor will omit parts of the morph target names, for example in the image below you can see that Unreal editor (left) has removed "Genesis8_1Female_" from all of the morph target names, however looking at the same model in Blender (right) reveals the full name of each blendshape:

Retargeting can be enabled to fix offsets when using the SK_Man avatar with MetaHumans. Because not all proportions are exactly the same for all MetaHumans it may be possible to compensate for difference between rigs by enabling the retargeting checkboxes for certain parts of the avatar. Note that retargeting is not needed if using a .fbx in UE that exactlty matches the .fbx used to create the avatar in APS since they would share exactly the same skeleton and rest pose.
Parameters:
- Rotation - Use Retargeting to correct Neck, Spine, Clavicle, Leg, Arm, Hand and Finger bone rotation offsets.
- Location - Use Retargeting to correct Neck, Spine, Clavicle, Leg, Arm, Hand and Finger bone location (stretch) offsets.
- Rotation Weight - Retargeting rotation offset blend weight. Amount to blend the rotation retargeting.
- Location Weight - Retargeting location offset blend weight. Amount to blend the location (stretch) retargeting.
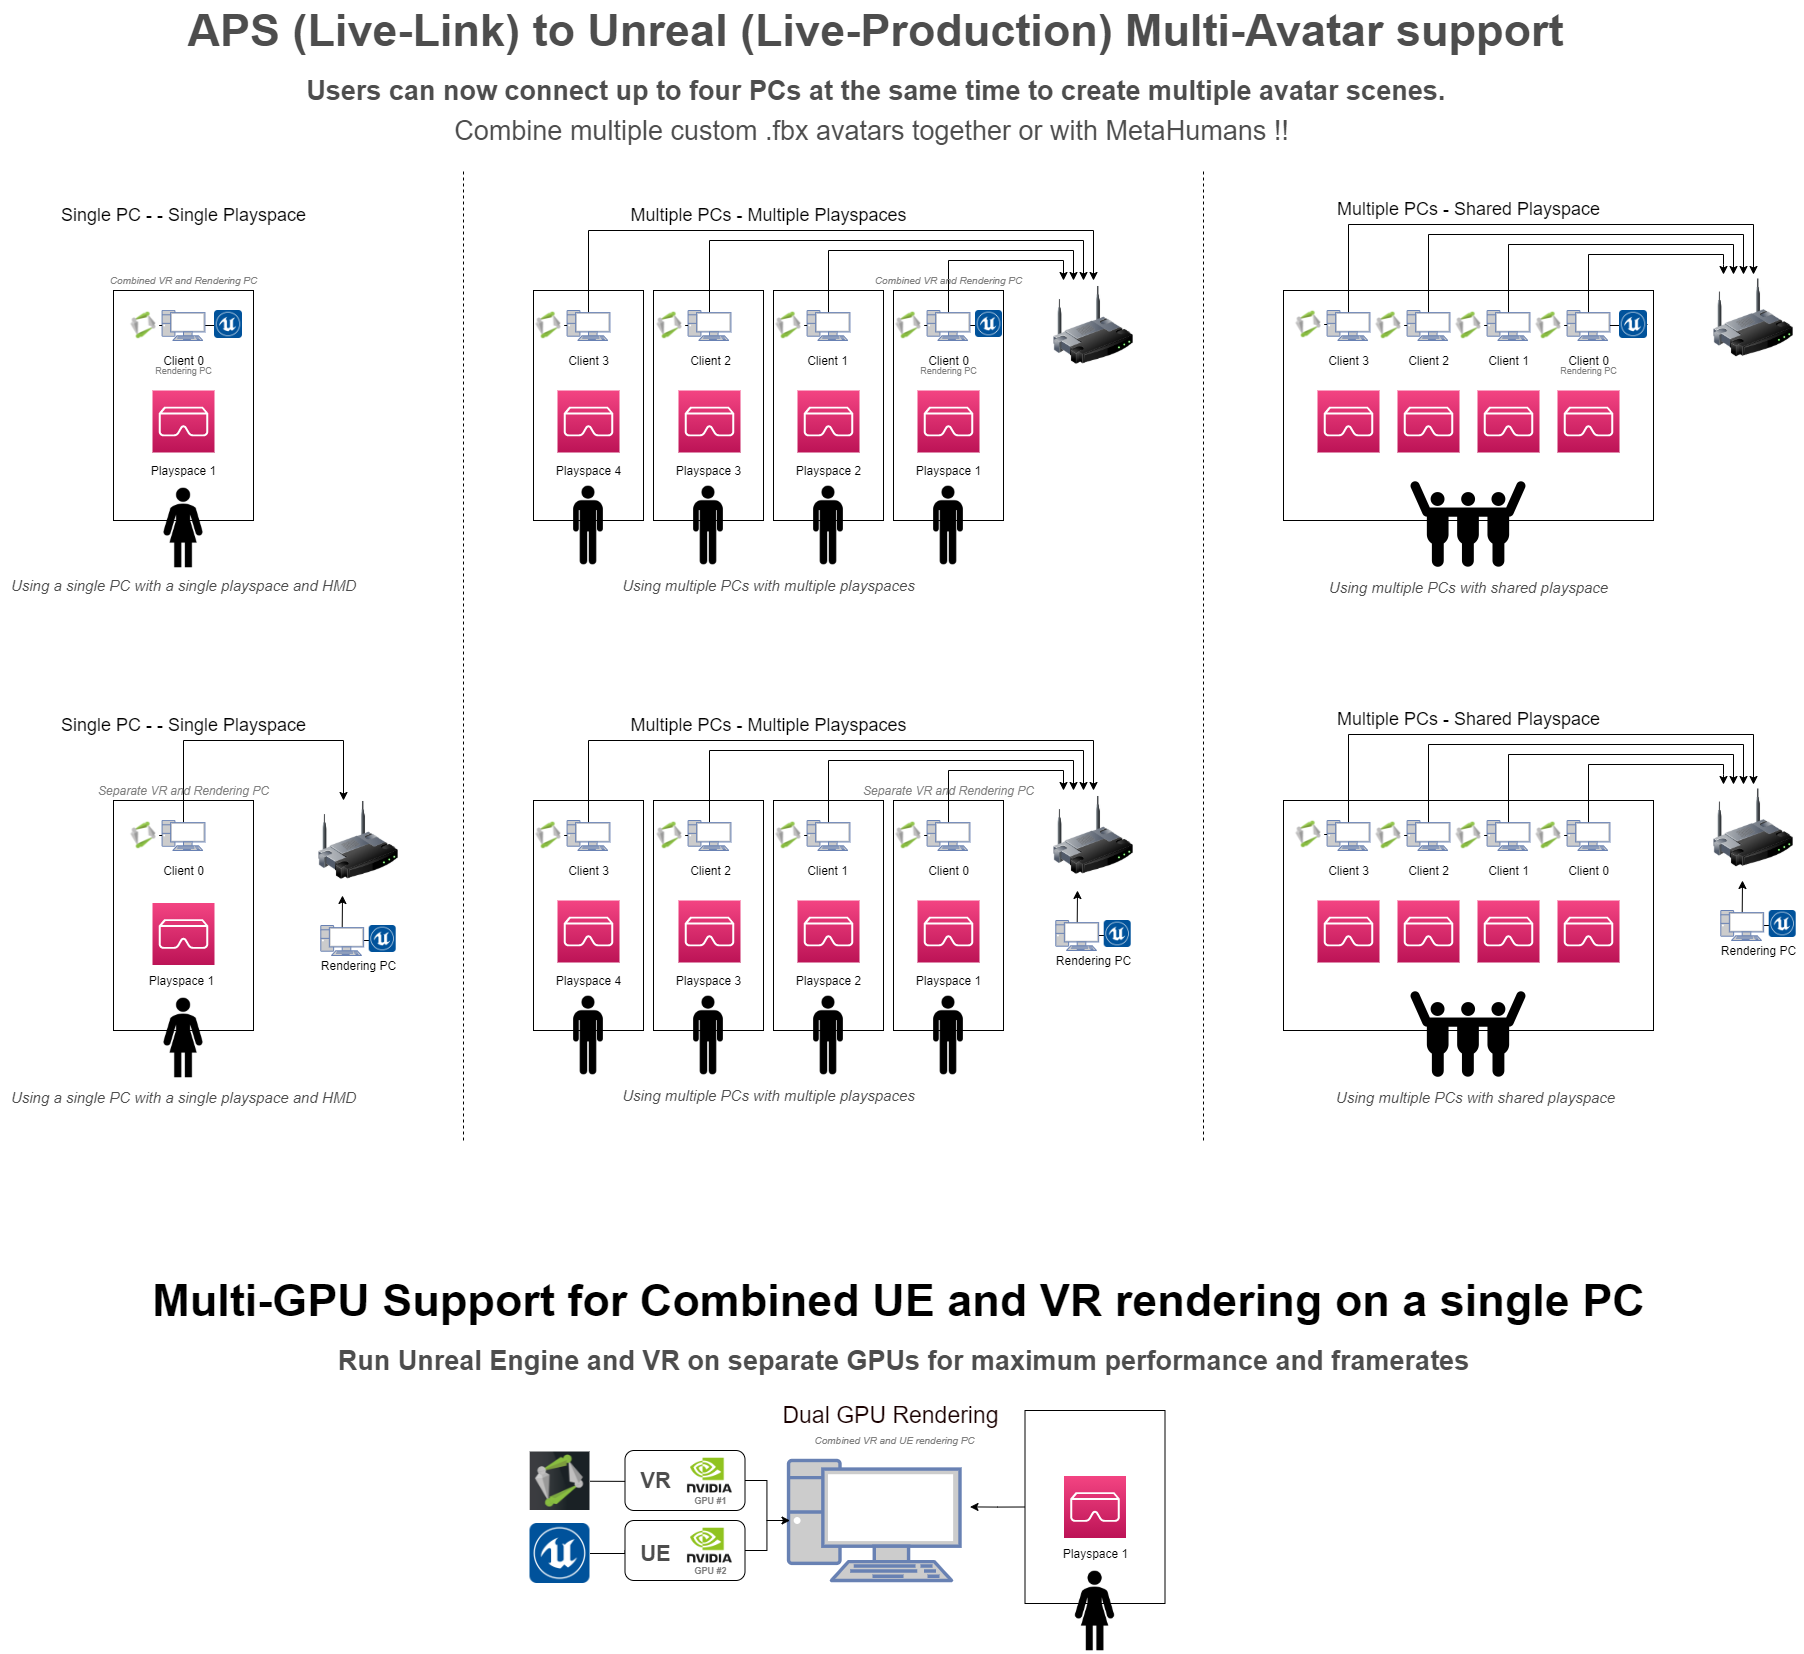
The APSCore allows connecting up to four simultaneous clients for creating multi-avatar live productions.
Note that by setting any of the Ip Port parameters to -1 will disable that client.
The Client Number parameters of the AvatarPoseReceiver allows specifying which client connection to use as the source for motion capture data. The client number corresponds to the "client" designations of the APSCore scene object.
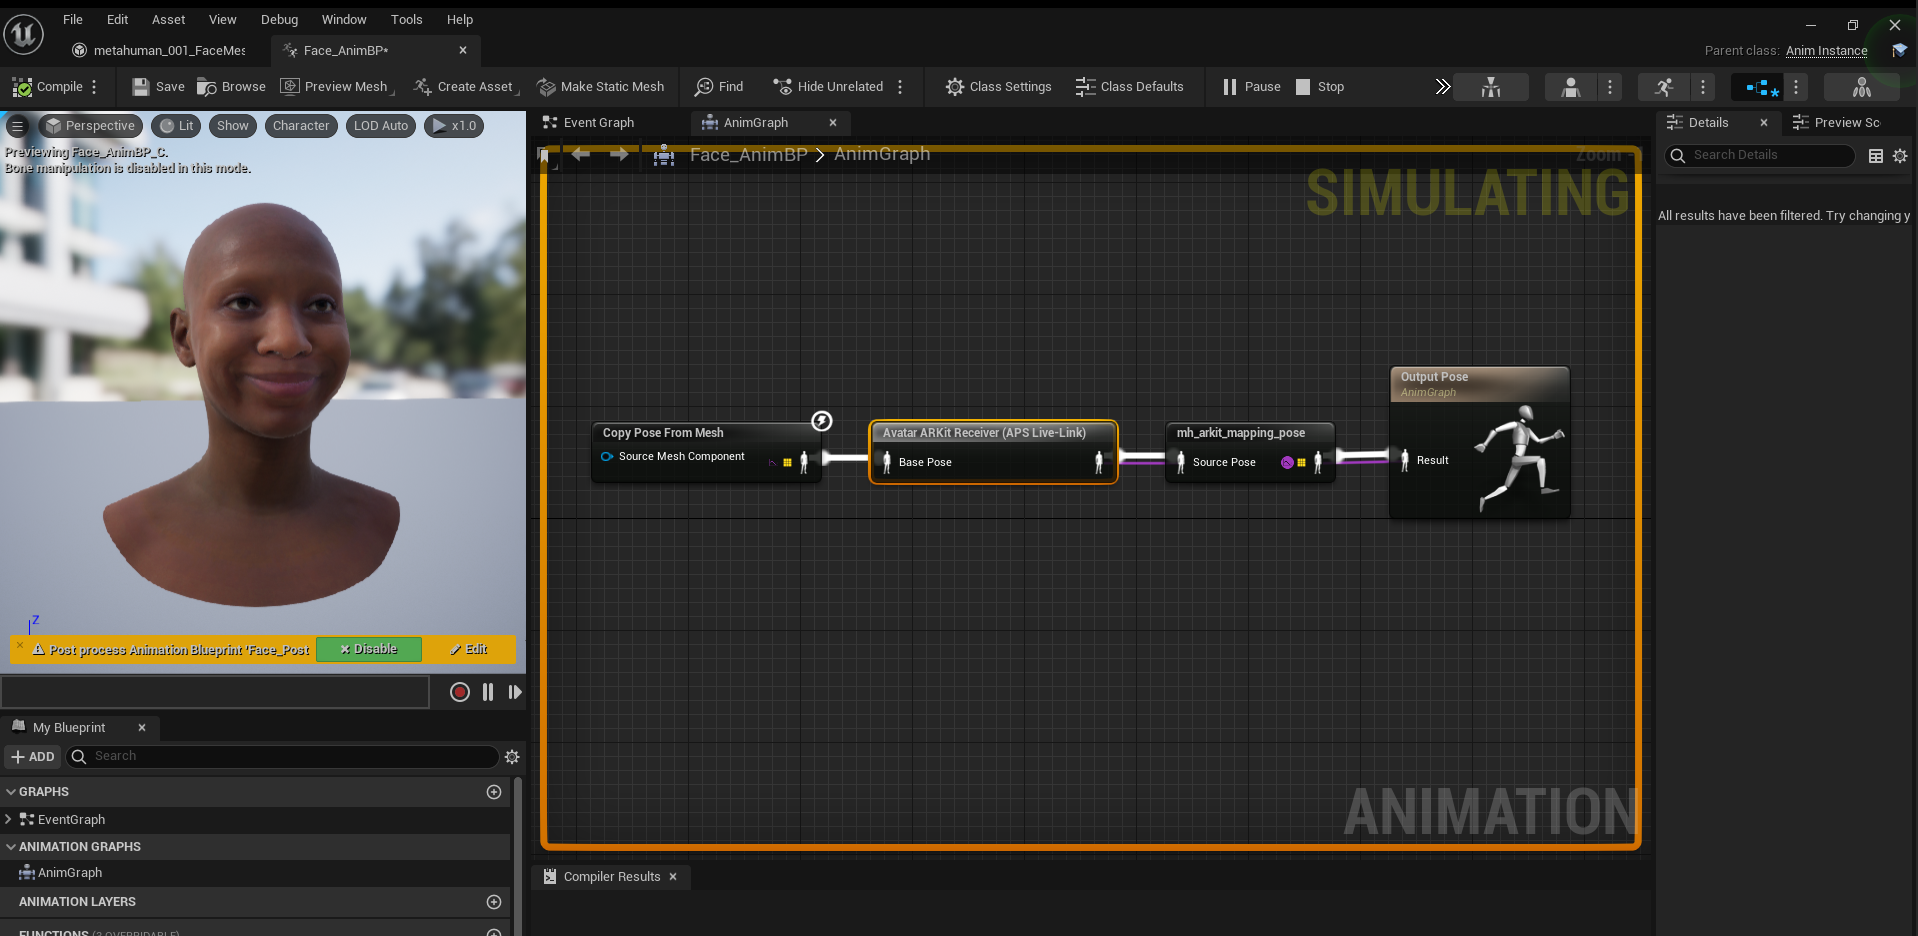
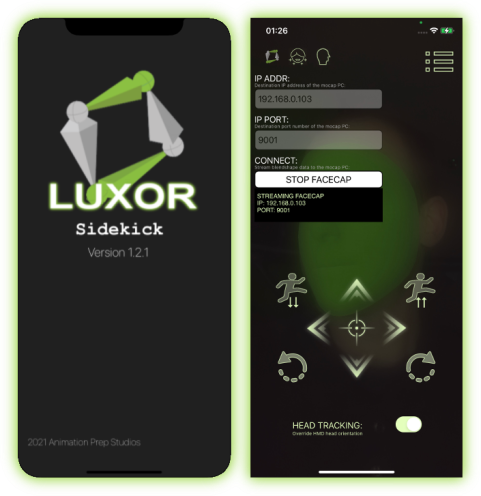
The Sidekick facecap app can be used to add facial capture to any .fbx or metahuman that includes facial blendshapes. Avatars that were built using the APS_SDK and having the FacecapLinker added in APS may be used to stream facecap data to a corresponding live production avatar in UE. The default SK_Man avatar does include all 52 ARKit shapekeys making it possible to stream facecap data to metahumans (shown in the node setup above).
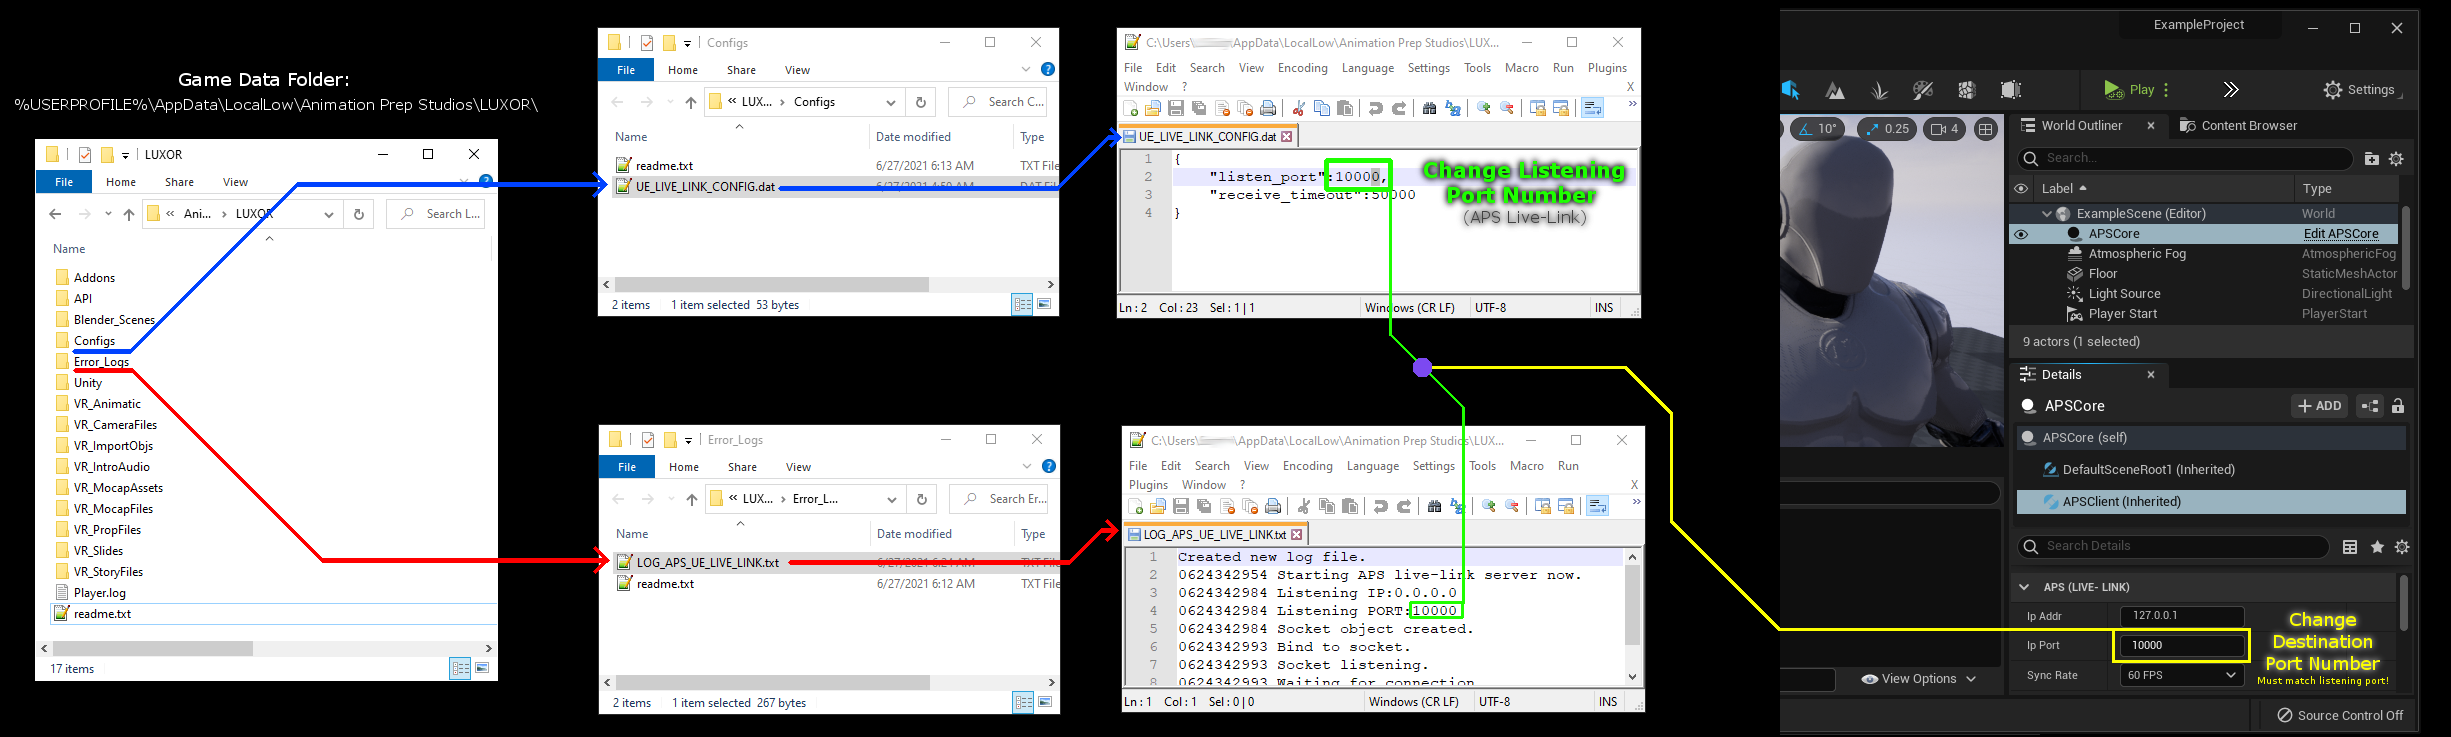
You can find the log file located in the folder: %USERPROFILE%\AppData\LocalLow\Animation Prep Studios\LUXOR\Error_Logs\
In some cases it may be desireable to change the listening port from the default 10000. In this case you may locate the \Configs folder located in the APS LUXOR game data folder where the (UE_LIVE_LINK_CONFIG.dat) .JSON file lives which allows users to change some of the (low level) game parameters such as the live-link port number. Changing the port number may resolve connection issues in some cases.
You can find the config file located in the folder: %USERPROFILE%\AppData\LocalLow\Animation Prep Studios\LUXOR\Configs\

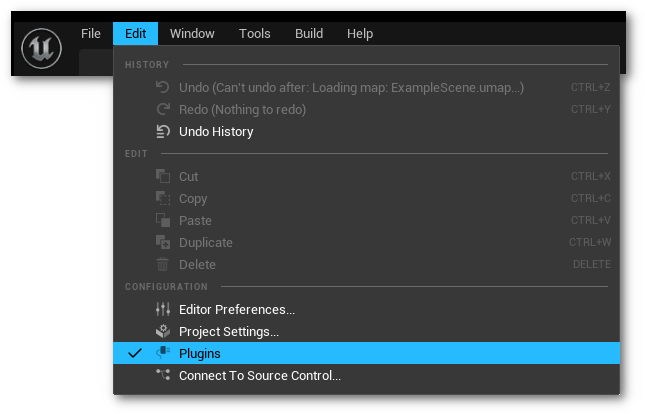
The APS live-link plugin is a standard plugin for UE. The plugin folder can be copied directly from this example project's Plugins folder and placed into a new or existing project. This will copy the APSCore and all blueprint nodes for use in other projects.
This repo and the documentation are updated often. Check back soon for more features and improvements!
You're invited to join the APS Discord for tech support, showcases, and chatting with a community of artists and developers.
Please visit the Youtube Channel for examples and tutorials.
Disclaimer: By using the resources in this example you agree the author is not liable for losses, damages, injury resulting from the use of this example. This project is distributed as is and without any warranty or guarantees.
Copyright 2021 Animation Prep Studios - Grant Olsen (AnimationPrepStudios@gmail.com)