source init.sh
-
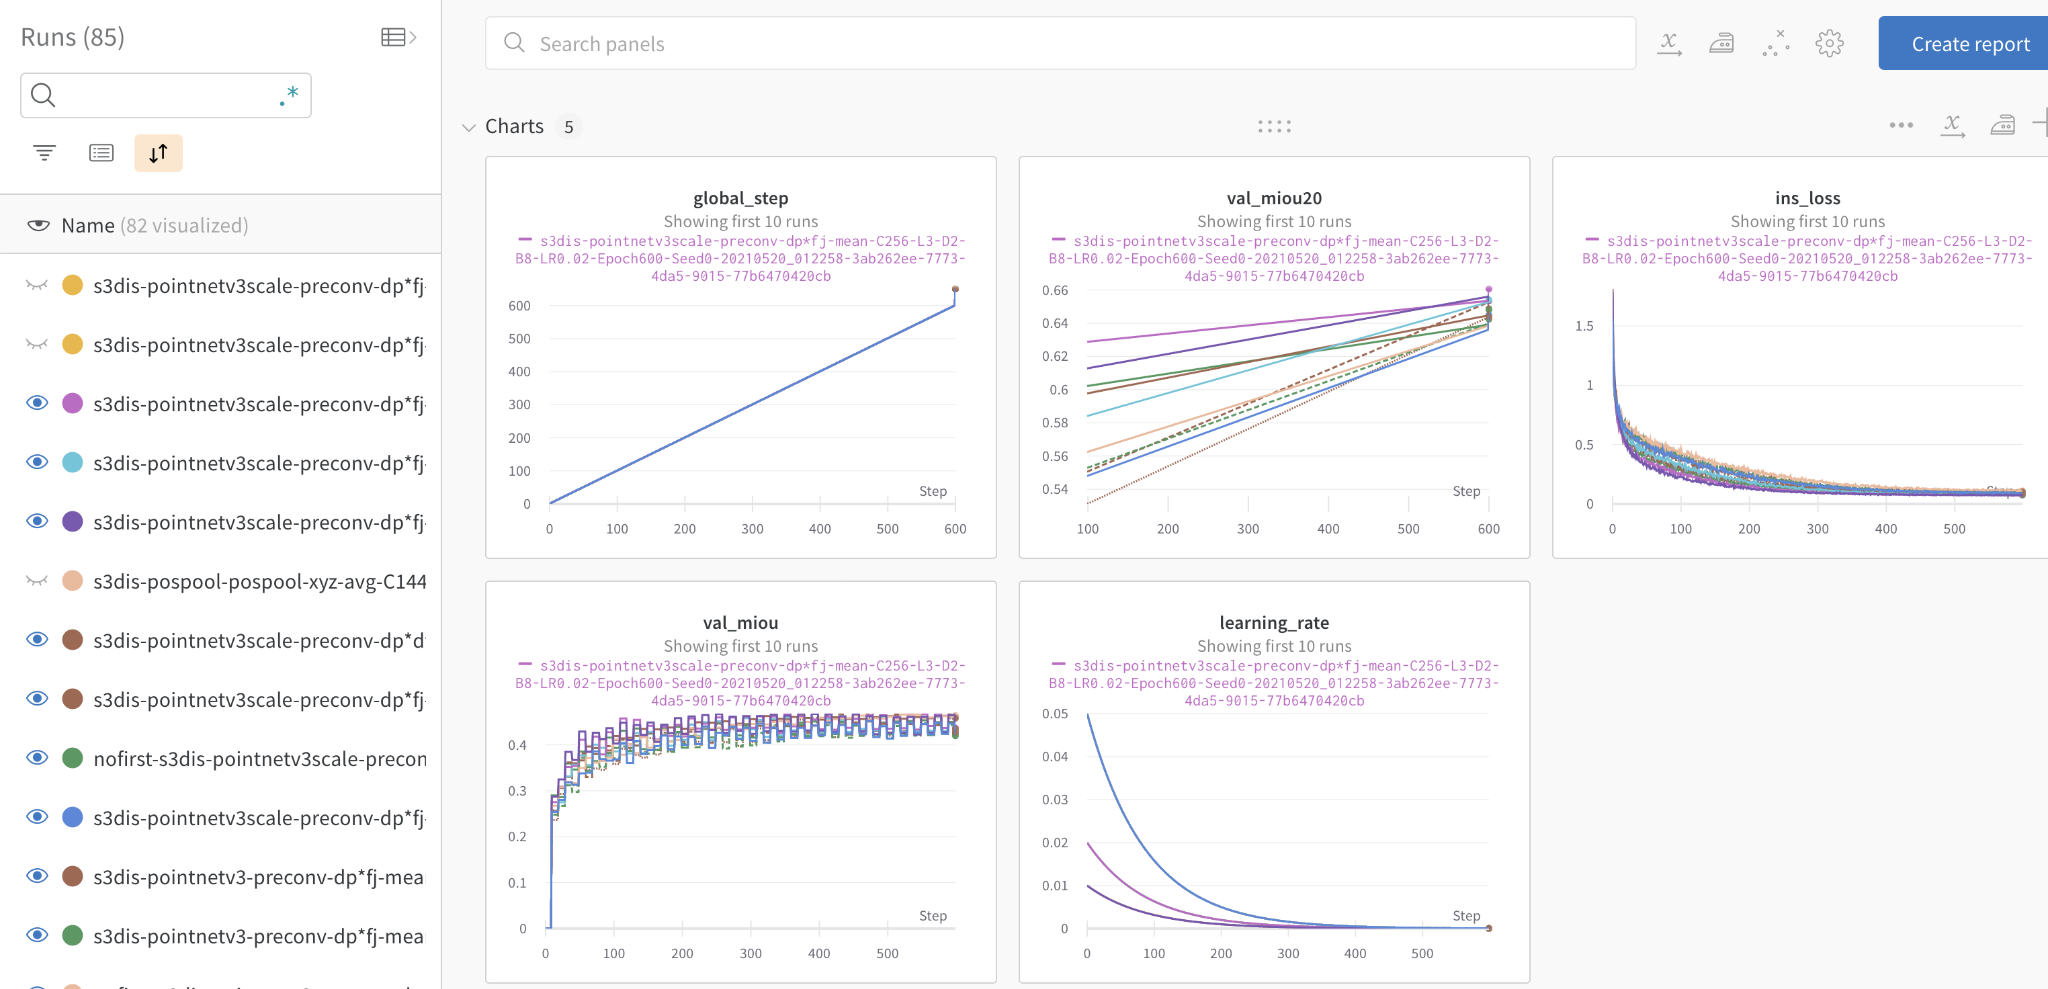
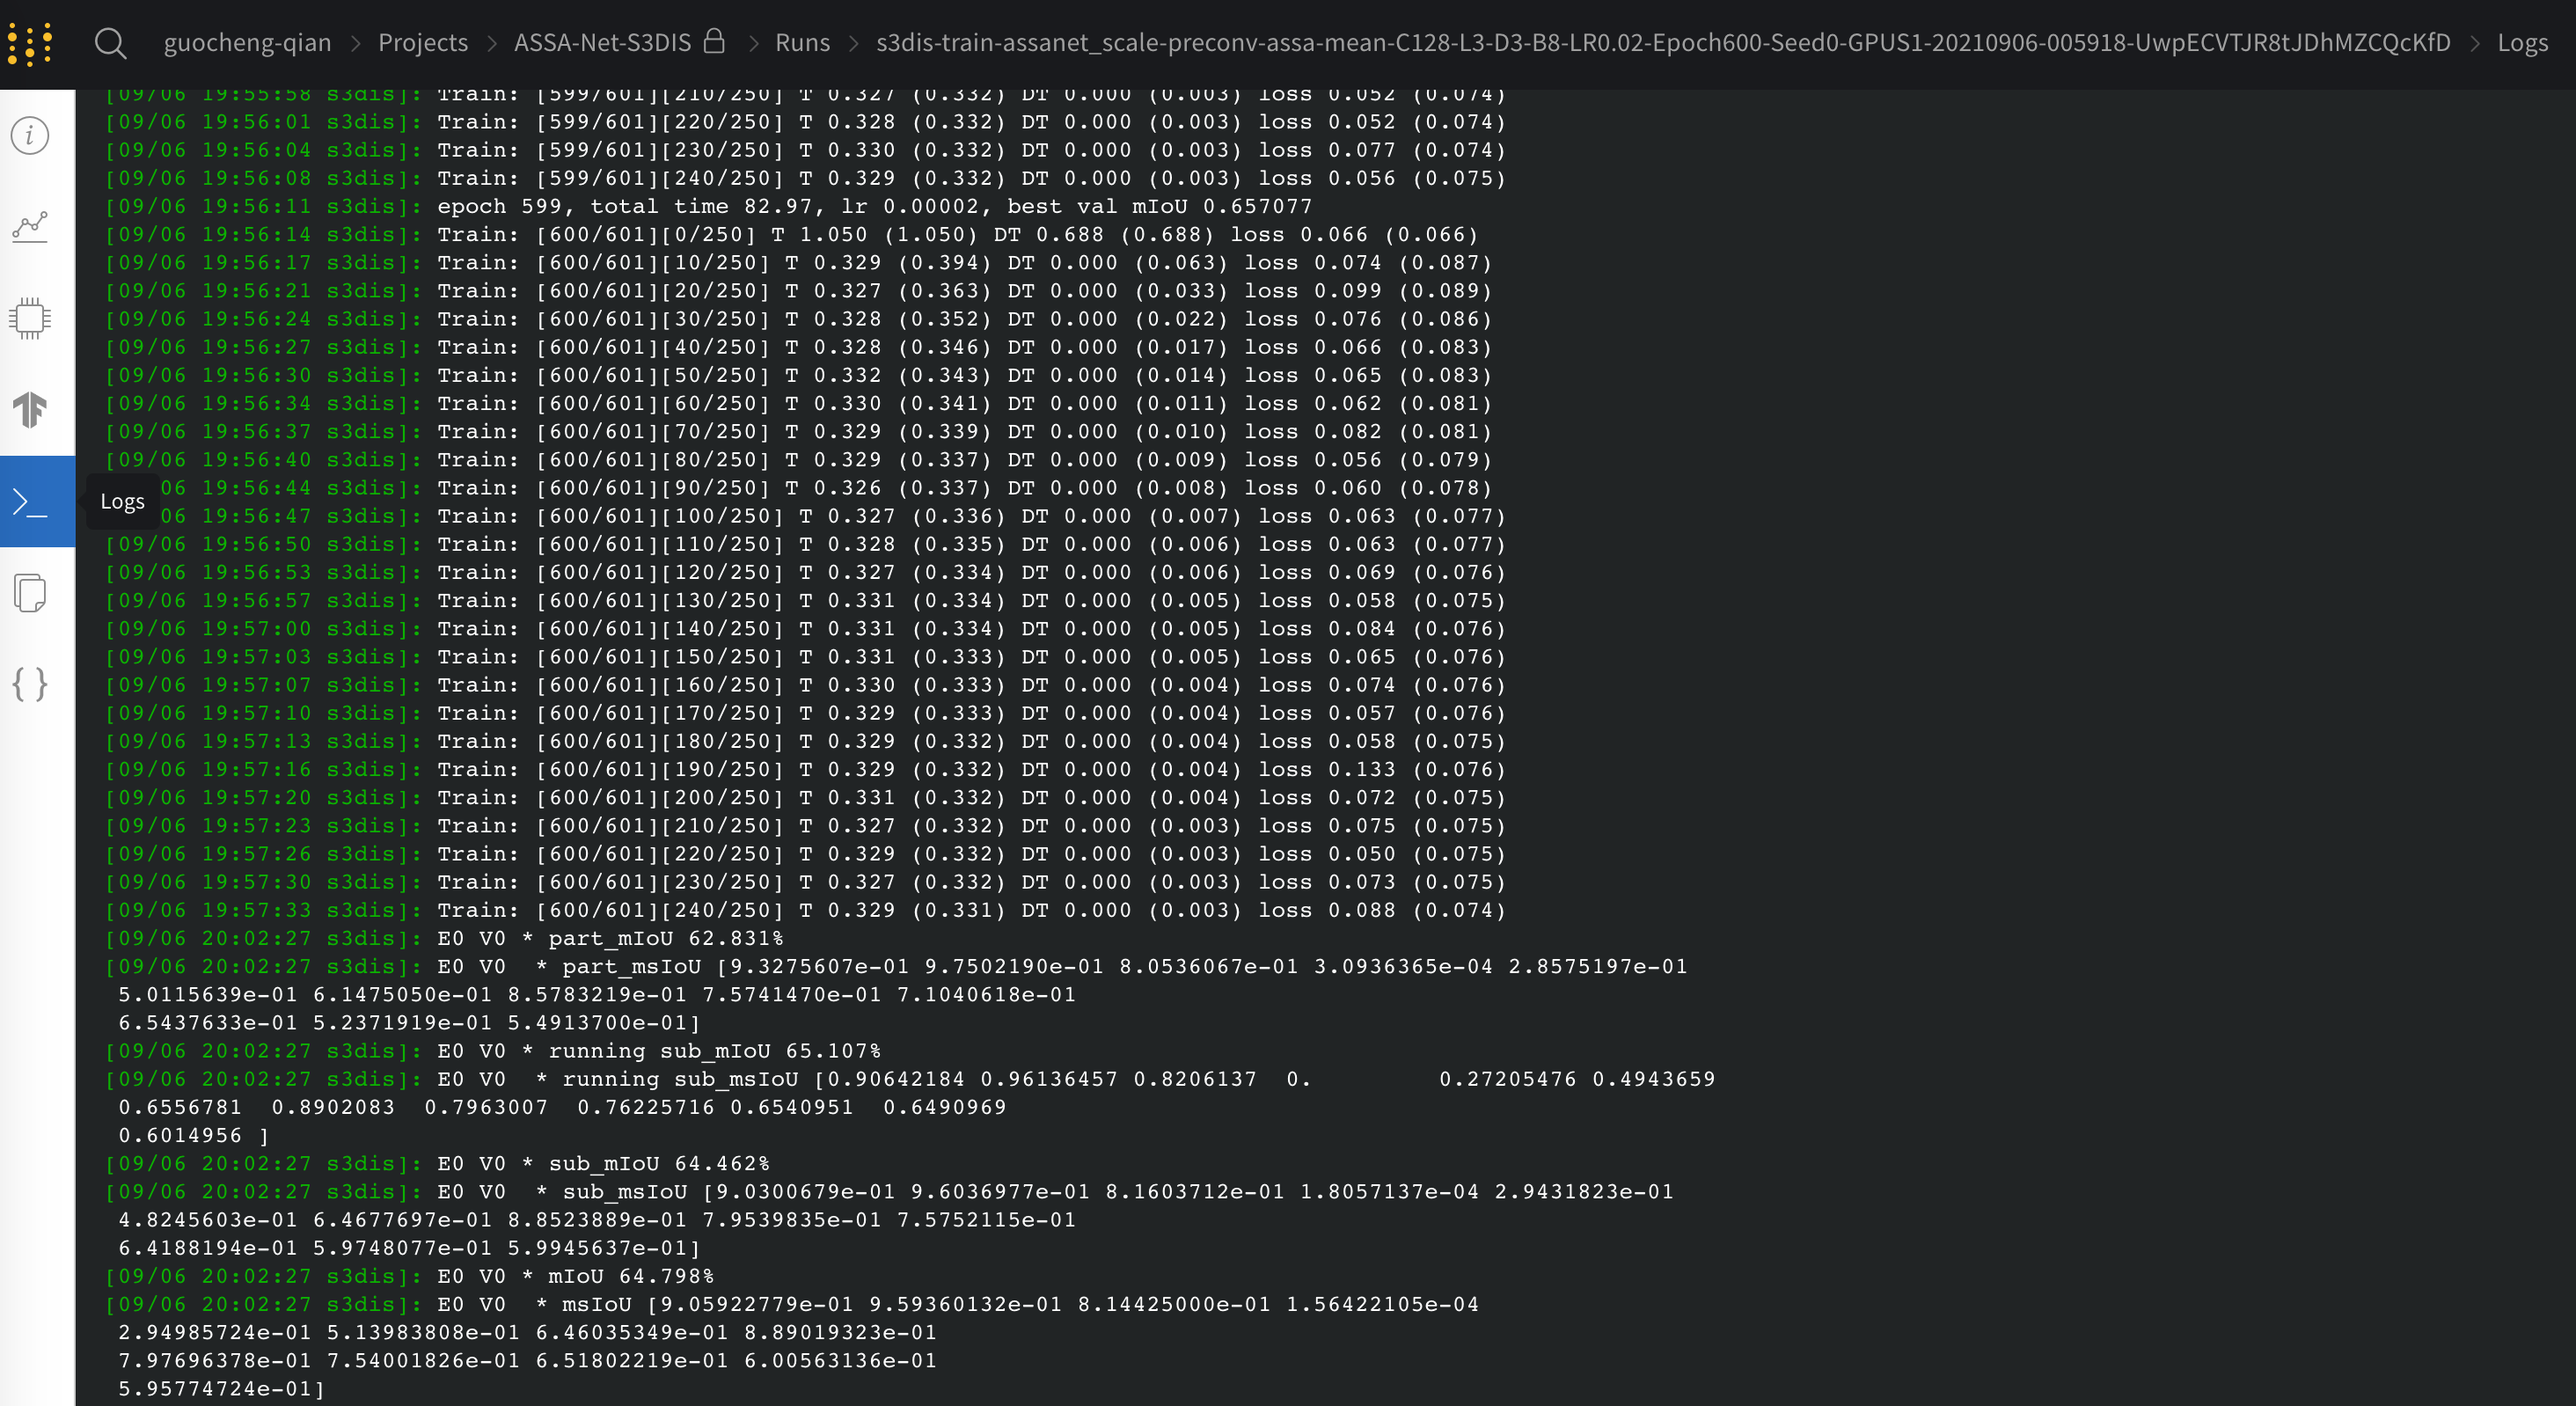
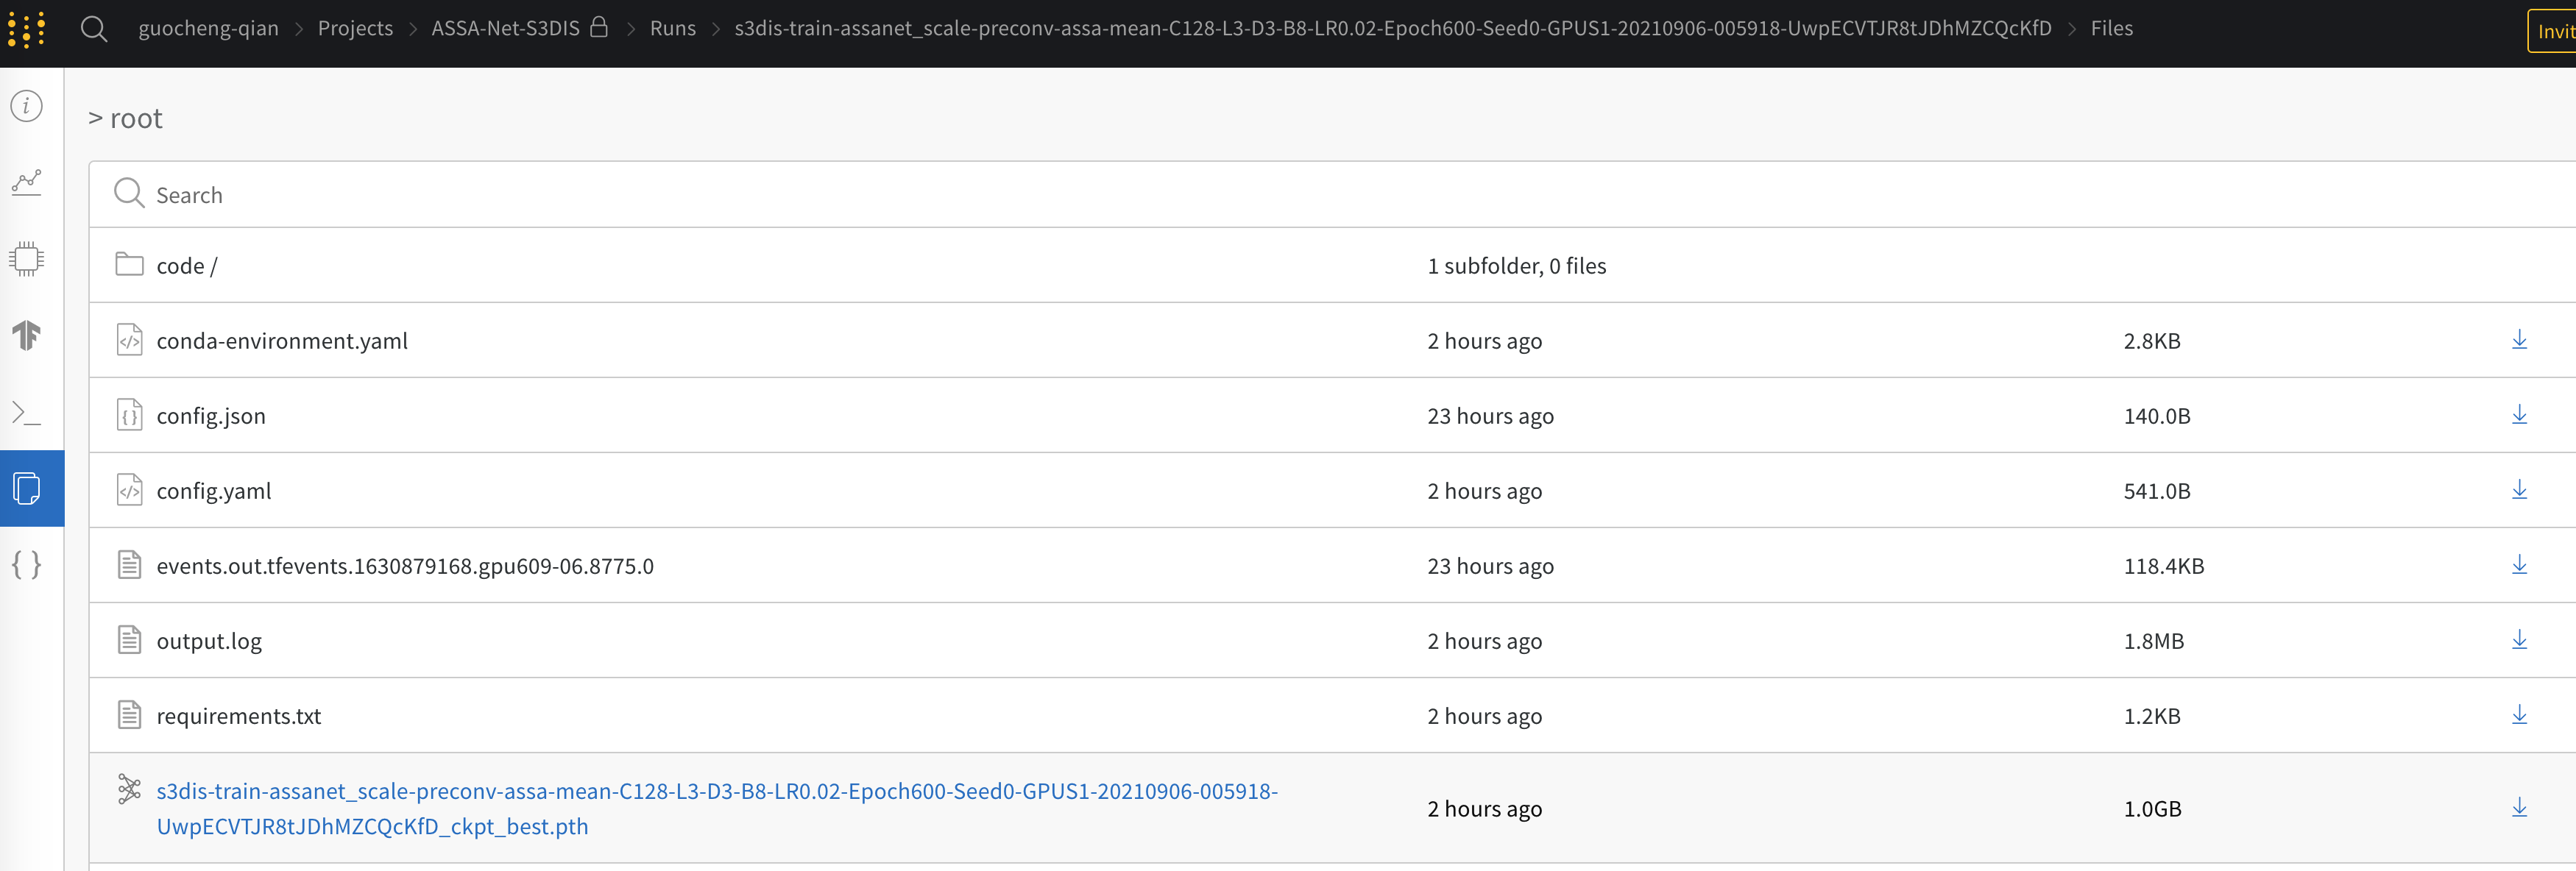
online Tensorboard, check your results in running on different machines anytime anywhere through a single website
-
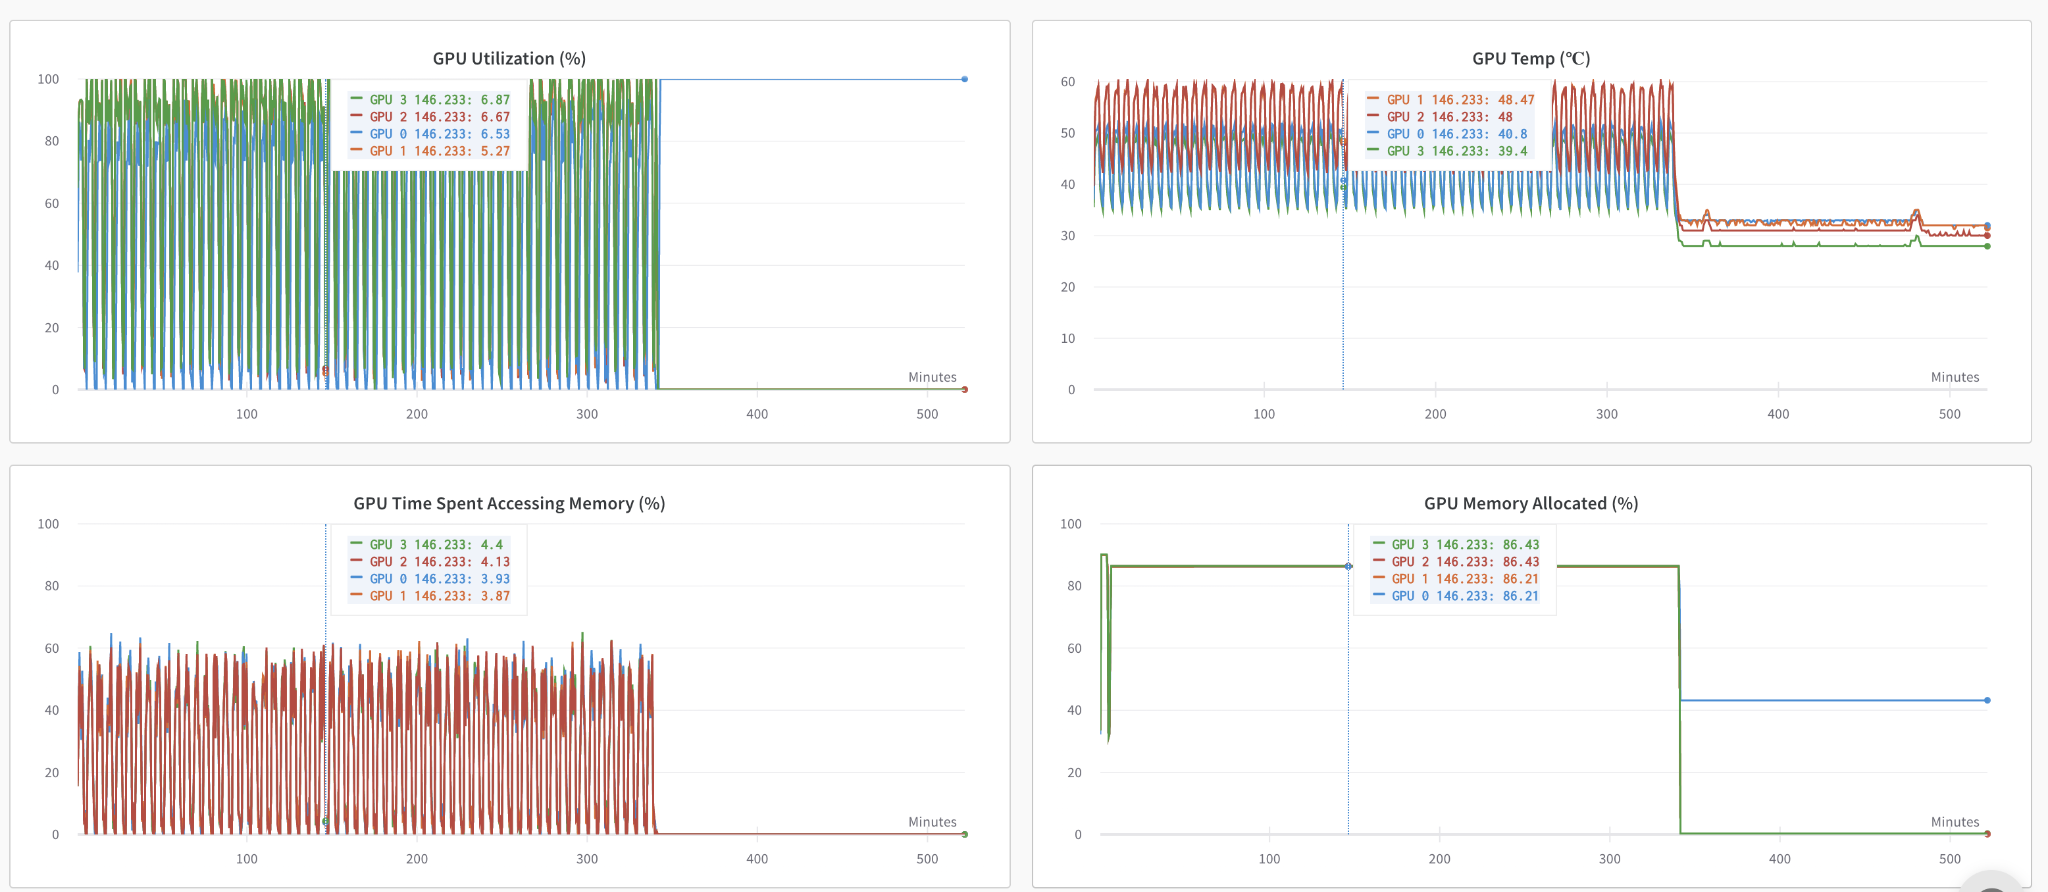
Monitor the resourse usage easily. Such thing is automatically supported by wandb.
-
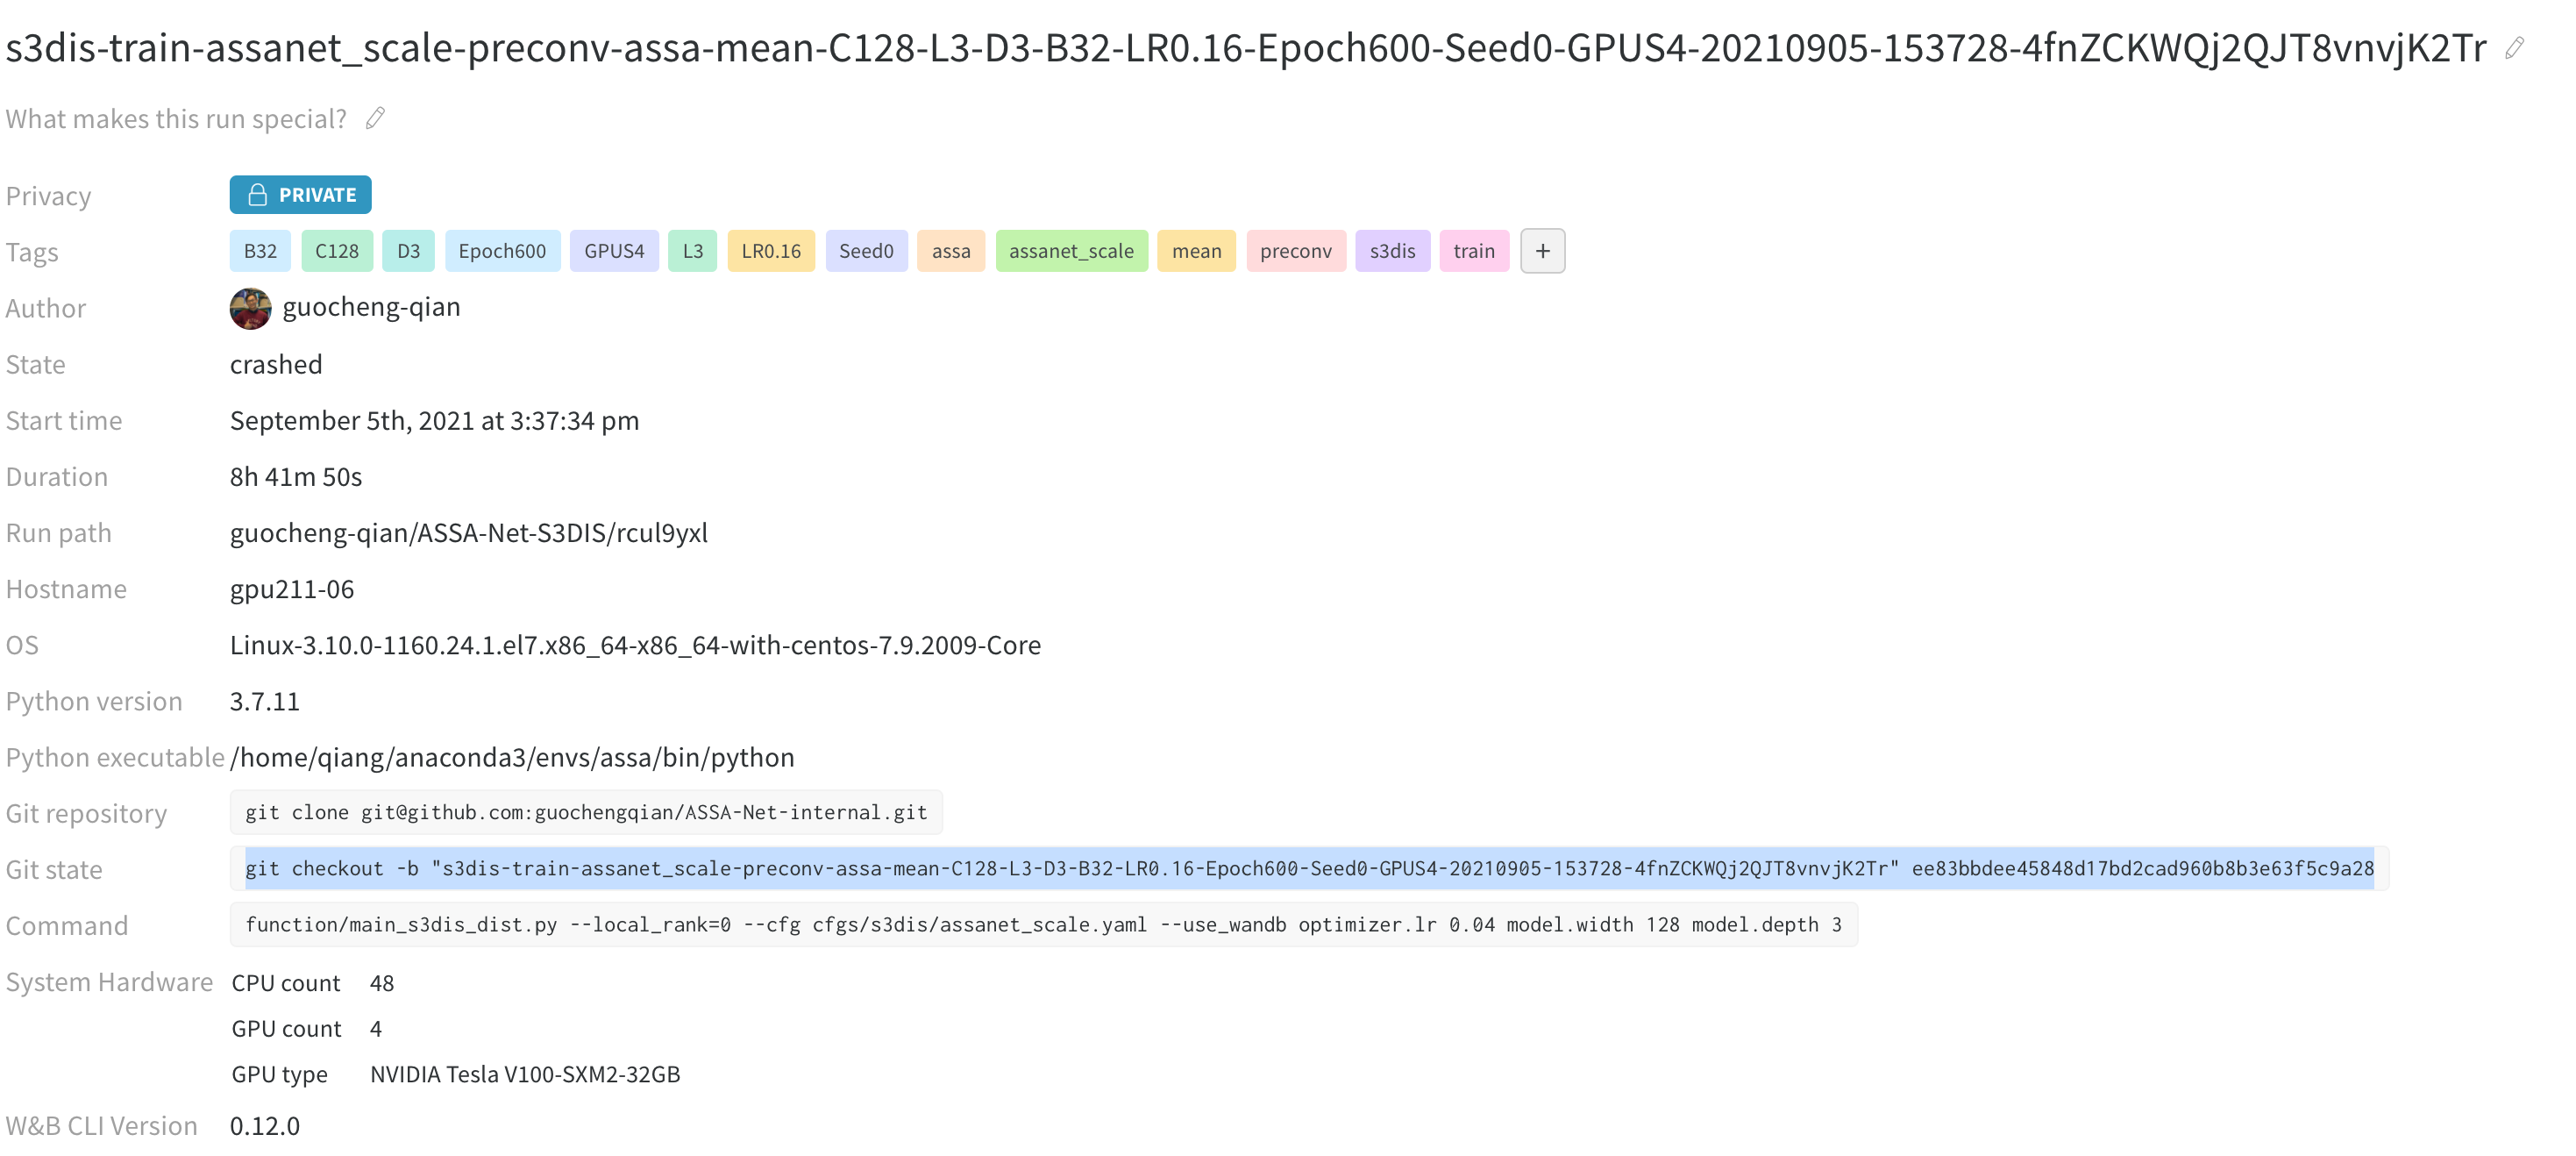
retrieve the code easily (git checkout)
-
download the checkpoint file or anyfile you saved before online


-
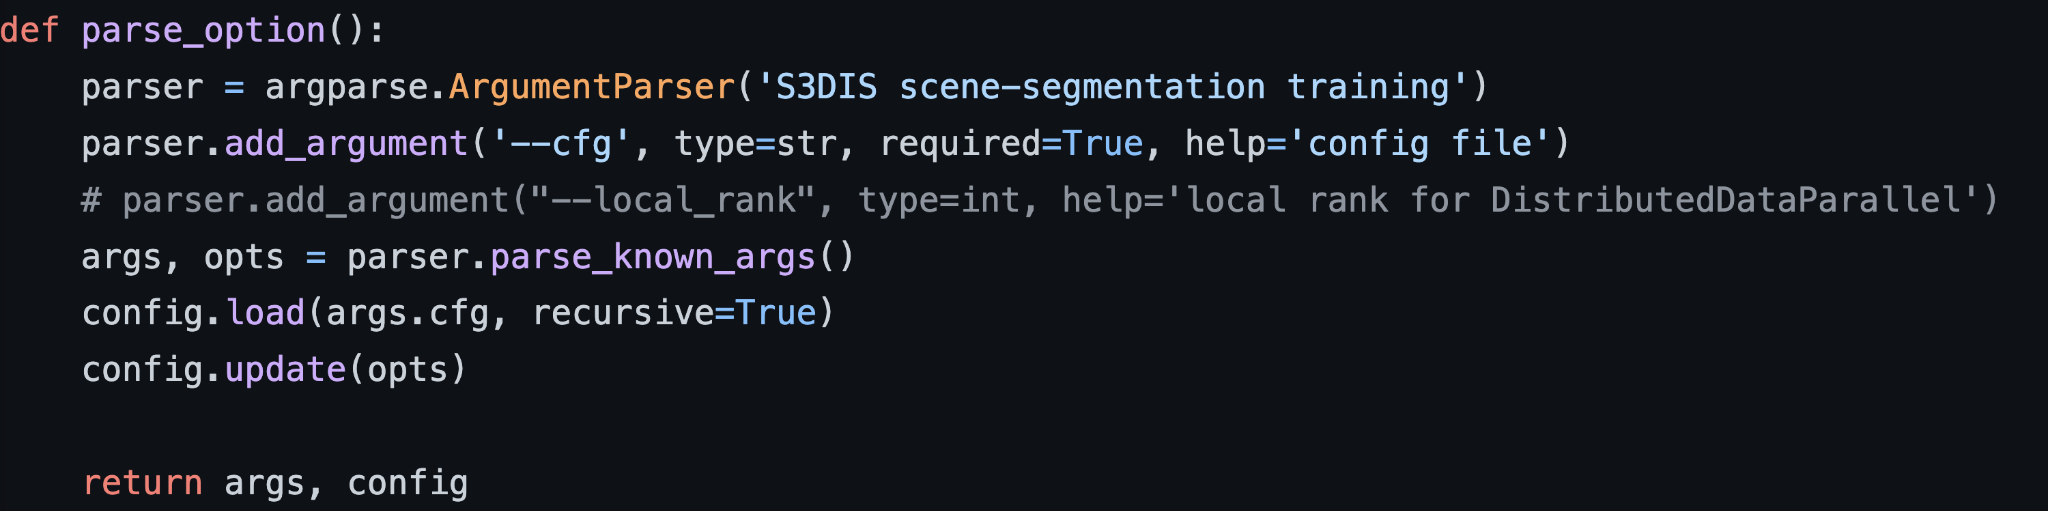
clean the arguments (just need one line of argument! )
-
Easy hyper-parameters configuration (a hierachical organization)
-
human readable, and automatically supports desired data types
model:  # an object called model.
  name: assanet # ASSA-Net. THIS IS HOW YOU COMMENT BY #
  width: 0
  depth: 2  # you can access this value by: model.depth
  in_channel: 4
  activation:
    type: &type ReLU  # you can use ampersand to anchor one variable
  sa_config:
    # *YAML will take care of the data type by itself*
    npoints: [4096, 1152, 304, 88]  # a list of int
    radius: [[0.1, 0.2], [0.2, 0.4], [0.4, 0.8], [0.8, 1.6]]  # a list of float list.
    nsample: [[16, 32], [16, 32], [16, 32], [16, 32]] # a list of int list
    sample_method: fps
    mlps: [[[16, 16, 32], [32, 32, 64]],
           [[64, 64, 128], [64, 96, 128]],
           [[128, 196, 256], [128, 196, 256]],
           [[256, 256, 512], [256, 384, 512]]]
    local_aggregation:
      feature_type: assa  # this is a string
      reduction: "mean" # this is also a string
      type: 'preconv' # this is also a string
      pre_res: True # residual connetion in PreConv layer. this is a Bool type
      post_res: True  # residual connetion in PostConv layer
      layers: 3   # layers = layers of PreConv (before aggregation) + layers of PostConv (after aggregation)
      post_layers: 1  # number of PostConv layers
      grouper:
        method: ball_query
        normalize_xyz: True
      conv:
        method: conv1d
        use_bn: True
        activation:
           type: *type # in this way, you can make the value of this variable to be the same as the anchor value
-
Easily change the default parameters, e.g.:
python function/main_s3dis_dist.py --cfg cfgs/s3dis/assanet.yaml optimizer.lr 0.02 model.width 128 model.depth 3


-
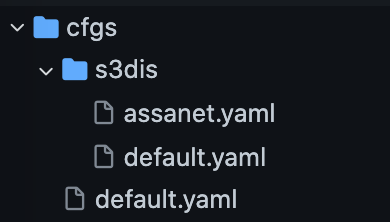
Write the general default.yaml for all the experiments
local_rank: 0

load_path: null # none
rng_seed: 0
mode: train # or test

logname: null # none
expname: null
expid: null

wandb:
  use_wandb: False
  project: ASSA-Net  # name of the wandb project
  entity: null
-
write a
default.yamlfor experiments for the given dataset# ---------------------------------------------------------------------------- # # data augmentation # ---------------------------------------------------------------------------- # data: datasets: 's3dis' data_root: './data' input_features_dim: 4 num_classes: 13 num_points: 15000 in_radius: 2.0 x_angle_range: 0.0 y_angle_range: 0.0 z_angle_range: 3.1415926 scale_low: 0.7 scale_high: 1.3 noise_std: 0.001 noise_clip: 0.05 translate_range: 0.0 color_drop: 0.2 augment_symmetries: - 1 - 0 - 0 sampleDl: 0.04 num_steps: 2000 # number of spheres for one training epoch. # ---------------------------------------------------------------------------- # # Training options # ---------------------------------------------------------------------------- # batch_size: 8 # batch size Per GPU num_workers: 6 print_freq: 10 save_freq: 100 val_freq: 10 epochs: 600 start_epoch: 1 warmup_epoch: -1 lr_scheduler: name: 'step' # step,cosine decay_steps: 1 decay_rate: 0.9885531 on_epoch: True optimizer: name: 'sgd' weight_decay: 0.001 momentum: 0.98 lr: 0.01 # for 1 GPU and batch size 8. have to manually change when increase the number of GPUs or Batch size. # ---------------------------------------------------------------------------- # # logging # ---------------------------------------------------------------------------- # log_dir: './log/s3dis' wandb: project: tutorial-yaml-wandb # name of the wandb project entity: guocheng-qian # *will automatically merge with the parent yaml*
-
write the specific configuration file for a mode/experiment, e.g.,
cfgs/s3dis/assanet.yaml
Please check yaml_wandb_example.py for details, basically you do the following:
-
first, create an account in wandb, and install the environment
-
add three lines in main file (eg. yaml_wandb_example.py):
from utils.wandb Wandb Wandb.launch(config, config.wandb.use_wandb) summary_writer = SummaryWriter(log_dir=config.log_dir) -
the main part in
utils.wandb.pyfile (which you do not have to change normally) is just one line of code.wandb.init(**wandb_args, sync_tensorboard=True) # this is the core command to init wandb. It sync everything of tensorboard and logging output to wandb -
save any file you want simply by:
Wandb.savefile(path/to/your/file) -
run the main file by:
python yaml_wandb_example.py --cfg cfgs/s3dis/assanet.yaml wandb.entity xxxxx wandb.use_wandb Truexxxx is your wandb account
-
now, go to your project page in wandb, you should be able to see this run of your experiment
python yaml_wandb_example.py wandb.entity xxxxx wandb.use_wandb True
-
The official documents