The following sample will walk you through building an IoT application to post a tweet to Twitter.
If you have any questions or issues feel free to create them on this repo following the provided templates.
The following walkthrough will guide you in building an application that can process IoT messages and have them take an action like sending a tweet.
The sample assumes the following are already installed and prepared:
- Visual Studio 2017 (any edition) with the Cloud workload included
- An Azure Subscription (free trial works great)
The following are optional:
- An IoT button that can send an event to IoT Hub (the teXXmo Azure Certified button works great)
The first step we need to do is create the IoT Hub. Azure IoT Hub allows you to manage, configure, and monitor IoT devices.
- Open the Azure Portal and sign-in with an account
- Click the + or Create a resource button in the top left, select Internet of Things and then IoT Hub
- Provide a globally unique name for your hub, and optionally select the pricing tier (Basic tier if fine)
- Create/Select a resource group
- Select the option to pin to dashboard
- Click the create button
- Click the IoT Devices section of the settings pane
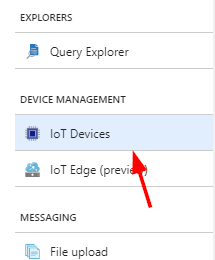
- Click Add and create a device ID for this device. Click Save
- Select and open the newly created device. You will need this info to connect the device to the cloud.

If you do not have a teXXmo button, you are welcome to use the community managed simulator which will send a "device to cloud" to your IoT hub. To use visit this link and simulate a button press by pressing the "Submit" button after adding the device connection string from the previous section (Device details page).
NOTE: This site is community managed. Only use for simple tests with non-production IoT Hubs
If using the teXXmo button to connect with Azure IoT Hub, follow the instructions to connect to the button access point (hold down button for a few seconds until blinking yellow, then connect to the broadcast access point). Go to the device configuration page in a web browser (http://192.168.4.1) and configure the IoT Hub with your Device Id, Key, and Hub hostname. The IoT Hub Hostname can be found on the Overview section of IoT Hub.
If you do not have a button and don't want to use the community button simulator, I recommend using the SDK directly in your own Visual Studio project. Instructions can be found here
Now that you have an IoT Hub and a connected device, we need to write a simple Azure Function to process the data the devices are generating.
- Open Visual Studio 2017
- Tool -> Extensions and Updates to check your Azure Functions and Web Jobs Tools version. Make sure you have at least version 15.0.40502.0. If not, update your tools.
- File -> New Project and under Visual C# -> Cloud select Azure Functions, then select OK.
- Select the Azure Functions v2 Preview runtime in the dropdown and start with an empty project. Leave the defaults as-is, then select OK.
- Right-click the project created in the Solution Explorer on the right-hand side and select Add -> New Item
- Select Azure Function from the list of Visual C# Items and select Add
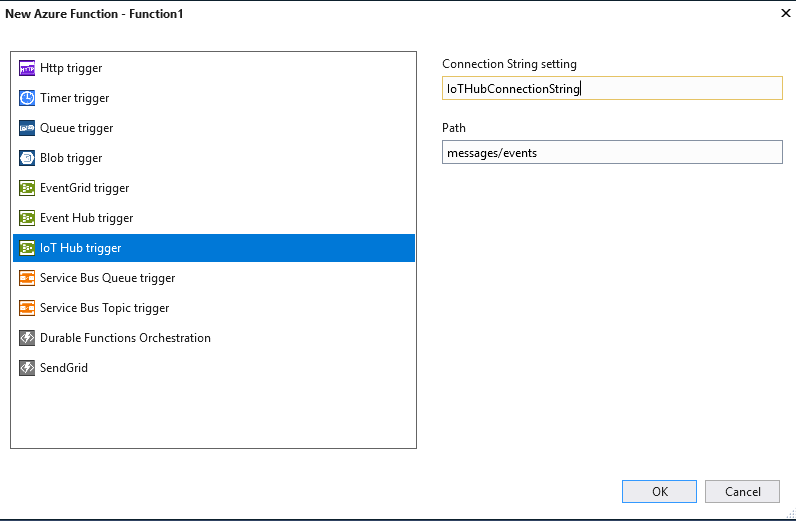
- Choose the IoT Hub trigger template. If you don't see this template, update your tools.
- The IoT Hub Connection String setting is the name of the environment variable that contains the connection string. We will set this up later, but for now enter
IoTHubConnectionStringas the name of the environment variable. - Leave Path as
messages/eventsand click OK

IoT Hub communicates with Azure Functions triggers via the events endpoint. First we need to get the events endpoint connection string.
- Open up your previously created IoT Hub in the Azure Portal
- On the left-hand navigation select Endpoints
- Click the Events endpoint
- Copy the Event Hub-compatible endpoint and also the Event Hub-compatible name
- To generate a valid Connection String you need to append the name to the endpoint with the following template: {endpoint};EntityPath={name}
- For example: if my compatible endpoint was
Endpoint=sb://myendpoint.net/;SharedAccessKeyName=123=and my compatible name wasmyiothubmy Connection String would beEndpoint=sb://myendpoint.net/;SharedAccessKeyName=123=;EntityPath=myiothub
- For example: if my compatible endpoint was
If you recall from the project creation of the Azure Function, you set an environment variable called IoTHubConnectionString as the connection string setting. In order to set this environment variable in your local development, the easiest method is to set it as a value in the local.settings.json file. This can store and create environment variables for local development.
- Open the Azure Function project in Visual Studio 2017
- Open the local.settings.json file
- Add an additional
Valuesfor theIoTHubConnectionString. For example (NOTE: don't use this connection string, use yours){ "IsEncrypted": false, "Values": { "AzureWebJobsStorage": "UseDevelopmentStorage=true", "AzureWebJobsDashboard": "UseDevelopmentStorage=true", "IoTHubConnectionString": "Endpoint=sb://myendpoint.net/;SharedAccessKeyName=123=;EntityPath=myiothub" } } - Save the local.settings.json file
Now let's test to make sure everything is wired up correctly.
- Click the Run button in Visual Studio (Or in the menu under Debug -> Start Debugging)
- The Azure Functions runtime should start running on your local machine. If you have previous unprocessed events you should see those running and showing the device message. You can continue to simulate or send more messages using the tools outlined in the Connecting a Device section above.
- After doing some tests, go ahead and close the Azure Functions runtime and stop the debug session.
Finally, we will add some simple logic to call an Azure Logic App and post a tweet.
- Open the Azure Portal
- Select the + or Create a resource button and under Enterprise Integration choose Logic App
- Give it a Name, Resource Group, and Region (any will do) and click Create
- After the logic app is created, open it
- The designer should automatically load - if not click the Edit button
- Select the When an HTTP request is received trigger
- Click New Step to add a step to the workflow and Add an action
- Search for or select the Twitter connector
NOTE: You are more than welcome to use any action you want to perform on an IoT event
- Select the Post a tweet action and authenticate this logic app against a valid Twitter account.
- Provide some text to be posted. For example:
I just built something awesome with Azure IoT! Try it yourself here: http://aka.ms/azureiotdemo - Click the Save button to save this serverless workflow
- Click the When a HTTP request is received card to open and reveal the URL generated after saving. Copy that URL.
Now that we have the workflow created, we simply need to call it from our Azure Function.
- Open the Azure Function in Visual Studio
- Open the
.csfile (default namedFunction1.cs) to edit the code for your function. - Add the following lines after the
log.Info($"..")line:await client.PostAsync("https://prod-07..yourLogicAppURL..", null);
NOTE: replace the URL with the unique URL of your workflow
- Select the light-bulb prompt to make the method
asyncwhich should change the method signature to:public static async System.Threading.Tasks.Task RunAsync([IoTHubTrigger("messages/events", Connection = "IoTHubConnectionString")]EventData message, TraceWriter log)
- Click save and test out the function. You should notice that whenever an IoT message is sent the Logic App is called
Feel free to continue to add logic to the function or logic app as desired.
Run the function again and test out with the button. It should call the logic app and post a tweet!
When everything is working as expected, right-click the Azure Function project and select Publish. You can then set this project to run in your Azure Subscription. Since this entire solution is serverless, you won't pay for the function or logic app unless they are actually executed.
Be sure to edit the application settings of the function after publishing to make sure the environment in Azure is correct. This includes saying Yes to the prompt to upgrade the runtime version to beta (the v2 setting we specified for our Function on create), and adding an IoTConnectionString Application Setting and pasting in the connection string you have in the local.settings.json file.
- On the Publish Profile screen after publishing, select the Manage Application Settings
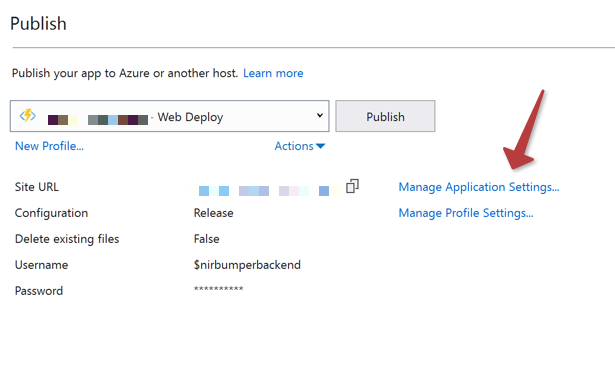
- Click Add and add a cloud environment variable for
IoTHubConnectionStringand paste in the value from yourlocal.settings.jsonconnection string. - Click OK to save the changes - the function show now be listening to the IoT Hub you used locally in the cloud.

This is just a simple IoT backend leveraging IoT Hub and Azure serverless. You could continue to build more features to this solution as needed.