Deploy Flask Machine Learning Application on Azure App Services
- Build the container using Docker commands in the
Makefile - Rebuild the model using a later version of sklearn and update requirements.txt with your version of sklearn
- Create virtual environment and source
python3 -m venv ~/.flask-ml-azure
source ~/.flask-ml-azure/bin/activate-
Run
make install -
Run
python app.py -
In a separate shell run:
./make_prediction.sh
-
Launch Azure Shell
- Create Github Repo with Azure Pipelines Enabled (Could be a fork of this repo)
- Clone the repo into Azure Cloud Shell
Note: You make need to follow this YouTube video guide on how to setup SSH keys and configure cloudshell environment
- Create virtual environment and source
python3 -m venv ~/.flask-ml-azure
source ~/.flask-ml-azure/bin/activate-
Run
make install -
Create an app service and initially deploy your app in Cloud Shell
az webapp up -n <your-appservice>
- Verify deployed application works by browsing to deployed url:
https://<your-appservice>.azurewebsites.net/
You will see this output:
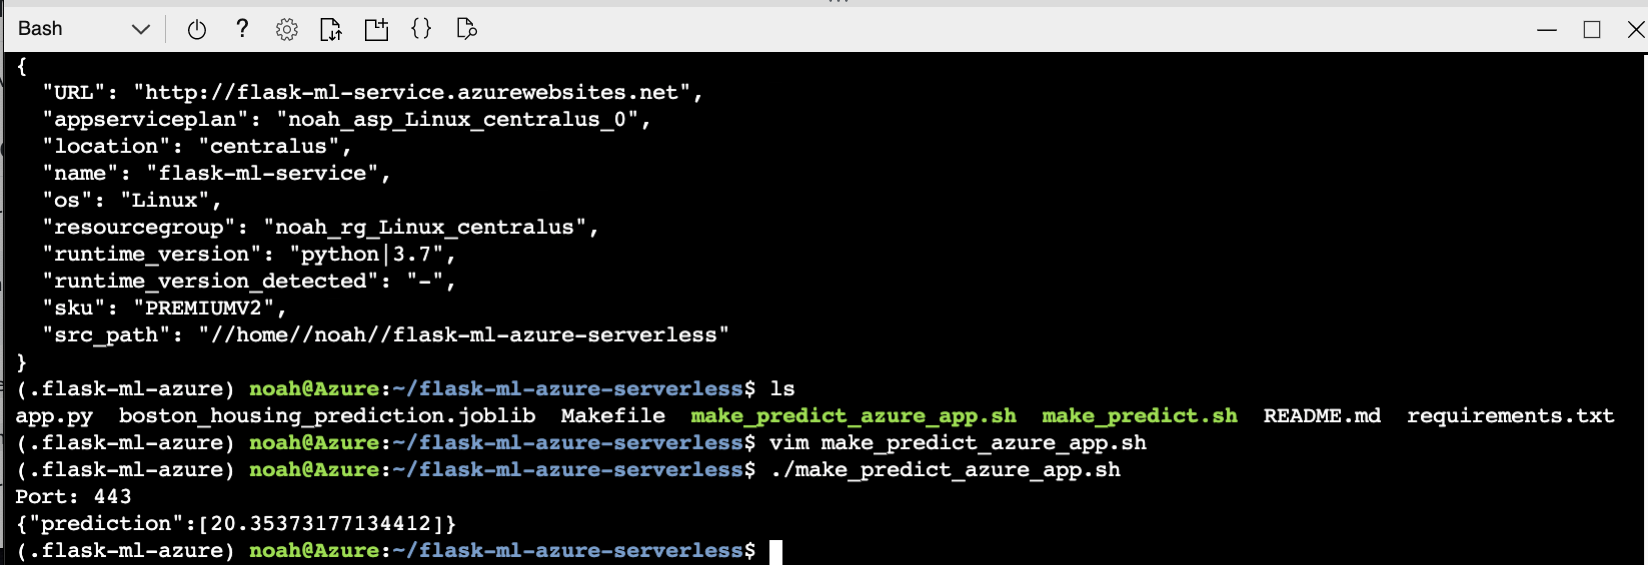
- Verify Machine Learning predictions work
Change the line in make_predict_azure_app.sh to match the deployed prediction
-X POST https://<yourappname>.azurewebsites.net:$PORT/predict
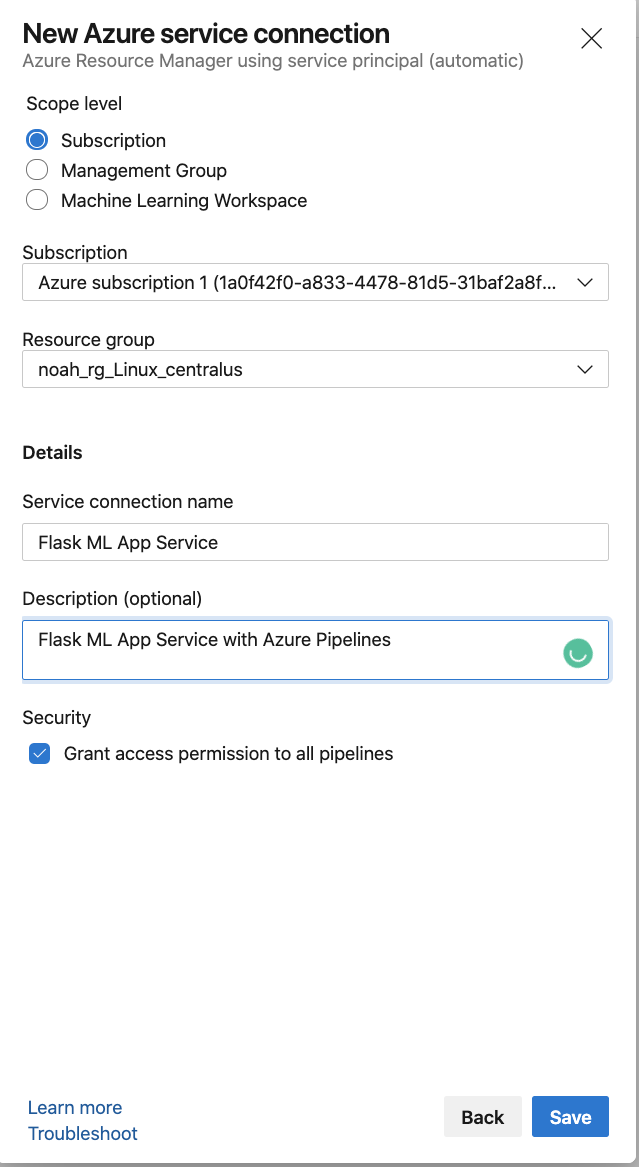
- Connect to Azure Resource Manager
- Configure connection to previously deployed resource group
- Create new Python Pipeline with Github Integration
This process will create a YAML file that looks roughly like the YAML output shown below. Refer to the official Azure Pipeline YAML documentation for more information about it.
# Python to Linux Web App on Azure
# Build your Python project and deploy it to Azure as a Linux Web App.
# Change python version to one thats appropriate for your application.
# https://docs.microsoft.com/azure/devops/pipelines/languages/python

trigger:
- master

variables:
  # Azure Resource Manager connection created during pipeline creation
  azureServiceConnectionId: '<youridhere>'

  # Web app name
  webAppName: 'flask-ml-service'

  # Agent VM image name
  vmImageName: 'ubuntu-latest'

  # Environment name
  environmentName: 'flask-ml-service'

  # Project root folder. Point to the folder containing manage.py file.
  projectRoot: $(System.DefaultWorkingDirectory)

  # Python version: 3.7
  pythonVersion: '3.7'

stages:
- stage: Build
  displayName: Build stage
  jobs:
  - job: BuildJob
    pool:
      vmImage: $(vmImageName)
    steps:
    - task: UsePythonVersion@0
      inputs:
        versionSpec: '$(pythonVersion)'
      displayName: 'Use Python $(pythonVersion)'

    - script: |
        python -m venv antenv
        source antenv/bin/activate
        python -m pip install --upgrade pip
        pip install setup
        pip install -r requirements.txt
      workingDirectory: $(projectRoot)
      displayName: "Install requirements"

    - task: ArchiveFiles@2
      displayName: 'Archive files'
      inputs:
        rootFolderOrFile: '$(projectRoot)'
        includeRootFolder: false
        archiveType: zip
        archiveFile: $(Build.ArtifactStagingDirectory)/$(Build.BuildId).zip
        replaceExistingArchive: true

    - upload: $(Build.ArtifactStagingDirectory)/$(Build.BuildId).zip
      displayName: 'Upload package'
      artifact: drop

- stage: Deploy
  displayName: 'Deploy Web App'
  dependsOn: Build
  condition: succeeded()
  jobs:
  - deployment: DeploymentJob
    pool:
      vmImage: $(vmImageName)
    environment: $(environmentName)
    strategy:
      runOnce:
        deploy:
          steps:

          - task: UsePythonVersion@0
            inputs:
              versionSpec: '$(pythonVersion)'
            displayName: 'Use Python version'

          - task: AzureWebApp@1
            displayName: 'Deploy Azure Web App : flask-ml-service'
            inputs:
              azureSubscription: $(azureServiceConnectionId)
              appName: $(webAppName)
              package: $(Pipeline.Workspace)/drop/$(Build.BuildId).zip
- Verify Continuous Delivery of Azure Pipelines by changing
app.py
You can watch this YouTube Walkthrough of this process
- Add a lint step (this gates your code against syntax failure)
    - script: |
        python -m venv antenv
        source antenv/bin/activate
        make install
        make lint
      workingDirectory: $(projectRoot)
      displayName: 'Run lint tests'
You can watch this YouTube Walkthrough of this process
This book is being written "just in time", with a weekly release schedule.


