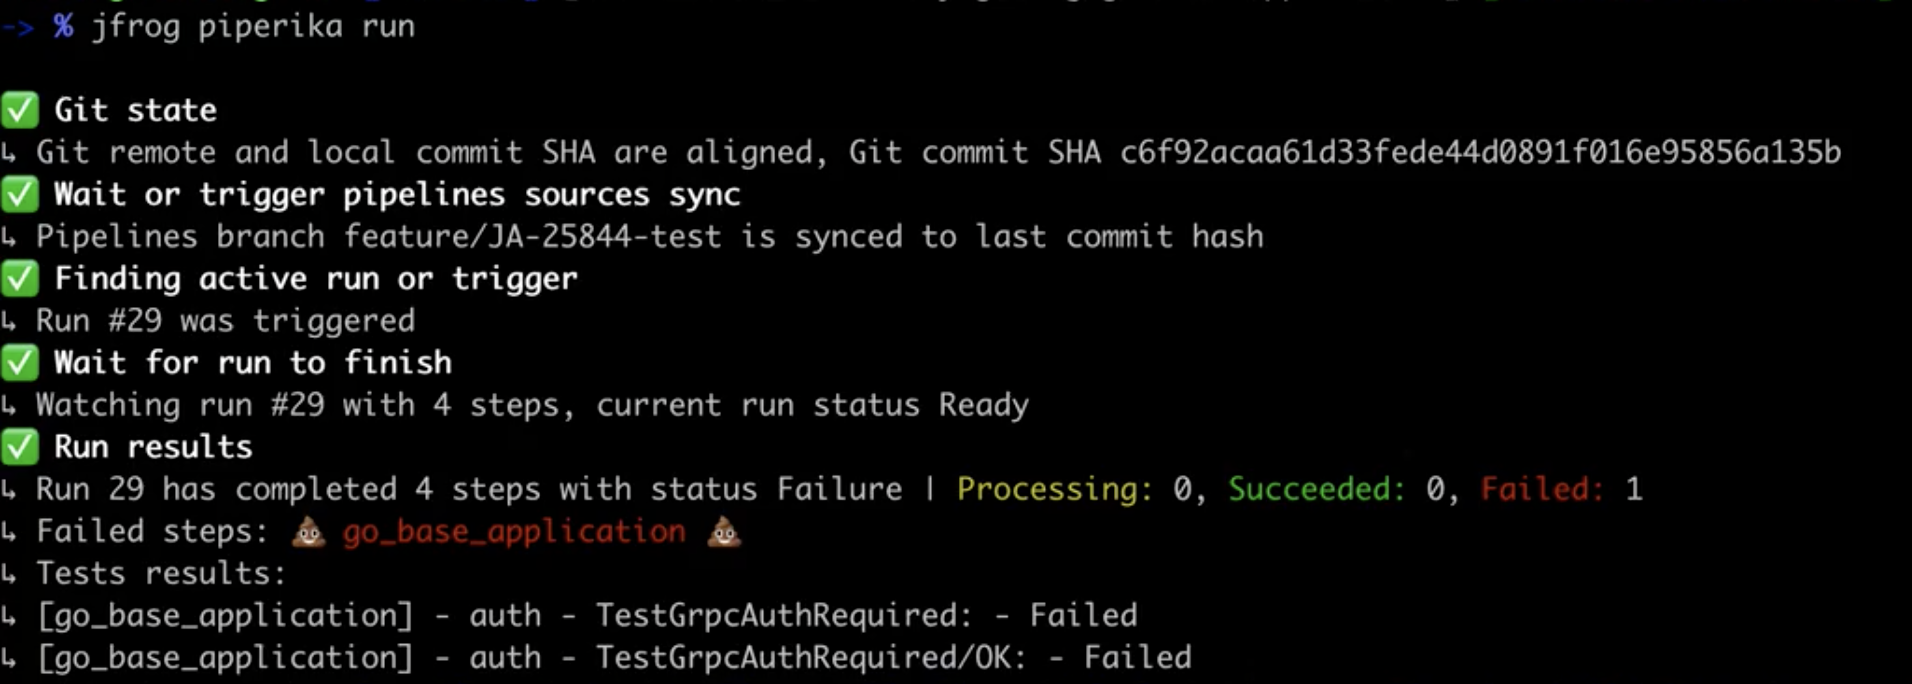
This is a JFrog Pipelines CLI utility with an emphasis on the consumer experience.
As a consumer of CI/CD system, you don't always want to understand the complexity but just "use" it.
Piperika provides a single command that does all the complex work for you.
All you need to do is to commit and push your code, and launch Piperika. It will start the CI on your branch, follow the build process and show you all the relevant data including your progress.
- Validate that your local commit is on the remote git server (so the CI server could reach it)
- Sync Pipelines with your branch and latest commit SHA (if needed).
- Check if there is a CI pipe that is already running with your commit, if not, it will trigger it.
- Follow up your CI run, providing the current state and progress, information about your run steps (in progress, succeed and failed steps), and displays information about tests failure.
Installing the latest version:
$ jf plugin install piperika
Installing a specific version:
$ jf plugin install piperika@version
Uninstalling a plugin
$ jf plugin uninstall piperika
To build the Piperika binary
$ make buildTo build the Piperika binary for multiple operating systems and architectures (Mac, Linux and Windows)
$ make build-multi-osTo install the plugin to the JFrog CLI
$ make installJFrog Pipelines ONLY accepts Access Tokens for authentication and authorization.
If you set your JFrog CLI with Username/Password, you will need to create a new profile that uses an identity token:
- Create an identity token via Artifactory UI.
- Create a new JFrog CLI profile, and when asked for Access Token, use the generated identity token above.
You can also create a new JFrog CLI profile via command line:
$ jf c add pipr-profile --url='https://myarti.com' --interactive=false --access-token='your-identity-token'
$ jf c use pipr-profile$ jf piperika build # or just 'jf piperika b'It will:
- Validate that your git branch is ready to run.
- Trigger a run if needed.
- Attach to the Pipelines run and show you the progress.
Output example for a successful Pipelines run:
Output example for a Pipelines run that had a unit test failure:
$ jf piperika link # or just 'jf piperika l'Give you quick access to your Pipelines pipe.
It will provide you with a direct link to your specific Pipelines build.

$ jf piperika wait-sync # or just 'jf piperika ws'Wait for Pipelines pipe to sync. The command will end when the sync is done or fail.
Piperika uses a configuration file named .pipr.
The configuration file should be placed in the Git repository.
If the configuration file is not present, Piperika will look for the configuration then it will look for it in the parent directories until it will reach the root of the repository.
If the configuration file is still missing, Piperika will look for it in the $HOME directory.
For example:
My Pipelines configuration is placed under the repo root path - /home/user/sources/myProject/.pipr.
If I will run Piprika from the folder /home/user/sources/myProject/otherFolder, Piperika will take the configuration from /home/user/sources/myProject/.pipr.
If my repo doesn't include a .pipr at all, it will try to fetch it from my $HOME dir - /home/user/.pipr.
The configuration file contains a JSON, you can see an example for it in pipr_config.example. The fields in the configurations are:
- pipeline_name - The name of your Pipeline.
- default_step - The step to run on your Pipeline when triggering a run.
- pipelines_source_id - The Pipelines source Id of your repository (can be found via Pipelines API - Get Sources)
The release notes are available here.
When bumping the version, you must do the following:
- Update the RELEASE.md file with the new version and the release notes.
- Change the plugin version in the file 'main.go'.
- Commit and push your changes.
- Git tag the new version:
git tag -a v2.1.2 -m "v2.1.2"git push origin --tags
Hanoch Giner
Itai Raz
Omer Karjevsky


